Update windows 10 failure error. Errors when updating Windows - We fix the most frequent
On this moment current version Windows OS - 1703. It has the second name - “Creators Update” (Update for Designers). Before there was a version of the Jubilee - 1607.
The first update had a code name - 1511.
Accordingly, if you have Windows 10, then it should have already been updated three times.
In fact, the developers this time almost forcibly forced all users to regularly upgrade software. To disable auto-update, you have to dig a lot in all settings.
Why update?

Updates are needed to improve the performance of the operating system.
So, for example, in the last Creators Update added game Mode to optimize the performance of demanding programs.
In this case, priority is given to games, but Game Mode is also effective if you use many applications that run on a regular basis. background.
And, in fact, this is only one part of the update.
In addition, in this version, developers have implemented a new unified platform Unified Update Platform.
With its size boot files diminished. This is made possible by a mechanism that only downloads last changes, but not all entirely.
In addition, you can specify your Ethernet connection as limited.
That is, auto-renewal will not be carried out if your tariff plan to the Internet is limited to a certain number of gigabytes.
However, what to do if you don’t mind upgrading, but for some reason the computer doesn’t pull?
Update process
The latest Windows 10 Creators Update appeared just a few months ago.
Now it is available to almost everyone who uses the licensed OS.
Most often, the update process is automated, you do not need to do anything.
If your computer still does not want to download the update yourself, you can do it manually. To do this, run a special windows program 10 Update Assistant. If you do not have it, you can download it from the official resource.
Thanks to this, the software will first start downloading the necessary installation files. Be prepared that this may take some time.
Determines the download speed of your Internet connection and the operating system speed. However, be prepared that in the next hour you will have to do something else.
Sometimes the procedure reaches several hours. So you should not update if you need to work with a computer.
Cancel the update process will not work. By disconnecting the PC from the power system, you can seriously harm the operating system.
In addition, you can put Creators Update on your computer on a clean system. This is done with the help of special software Media Creation Tool. It just helps to update the OS from scratch.
By the way this program also help create a bootable disk / flash drive to install operating system on other computers.
Troubleshooting 0x800705b4
However, errors still occur during the installation of updates.
And it does not always depend on whether the operating system was updated correctly. Sometimes it is a matter of internal malfunctions. Quite often, users encounter an error 0x800705b4.
The reasons for its occurrence usually lie in the incorrect operation of the network or dNS server. Accordingly, the computer can not download the necessary files to the full.
In addition, the appearance may be due to the presence of outdated drivers in the system. They, in turn, cause failures.
You can solve the problem as follows:
- Go to the settings and find there Windows 10 Update Center.
- There will also be the inscription “Advanced Options”. Her and need to choose.
- You should see a new window with an expanded set of settings. Find the “When windows update provide updates for other Microsoft products. ” This step solves the problem with the driver conflict and the update itself.
- Then, step by step, reboot.
- Your next job will be to manually start the update. How to do this, we considered above. After downloading the files you need, you can return to the settings menu and again allow the system to update other utilities and software Windows
However, it will be more reliable if you update the drivers for graphic accelerators and other devices yourself. Usually this can be easily done by going to the official website.
Most often the conflict occurs with video cards. They need to be updated first.
This way Should come up if the problem was with drivers and other software solutions. If the error is of a slightly different kind - related to the Internet connection, then the actions will be different.
First of all, check the internet connection. And not only on its availability, but also performance.
That is, sometimes in the case of non-payment of the Internet connection, the provider does not allow you to go to the sites, respectively, to download the update is not fully possible. If everything is in order in this plan, let's move on to the DNS server.
First, try it in action. Check if there is access to public servers.
Most often, their role is 4.2.2.2 or 8.8.8.8. If something is wrong, you will have to tinker with the settings.
However, this will be necessary, since you not only will not be able to download Creators Update, but also generally use the network.
Thus, the error 0x800705b4 is not so terrible. To solve the problem, you only need to double-check the driver versions, and also to establish whether the Internet works correctly.
The only catch is all you need to do manually. So there is no such software that would implement it all for you.
The only exception is the special programs that update all the drivers on your computer.
0x80070643

However, 0x800705b4 is not the only problem that occurs when installing an update. In particular, because of the incompleteness of NET.Framework. error 0x80070643 may pop up.
This problem is solved by restoring the platform NET.Framework. For these purposes, there is a special software from Microsoft.
After downloading and installing it, your task will be to reinstall the platform. In addition, get rid of the side files arising from the violation of .NET.
The programs from the official site are best suited for this purpose. Additionally, you can use the software to clean incorrect files in the registry and other debris.
0xa0000400
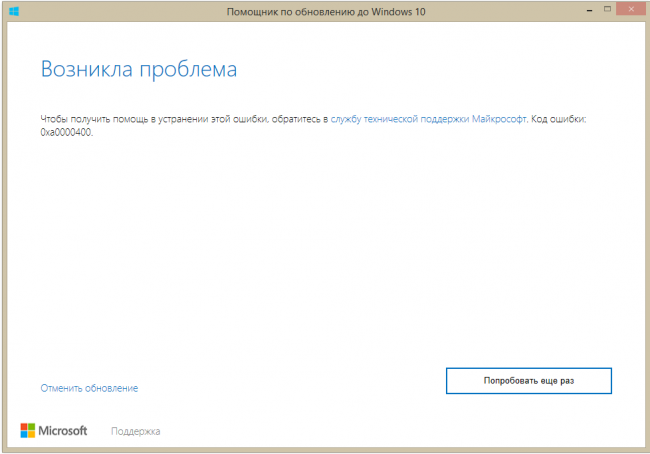
Why appears this error so completely incomprehensible, but methods for its elimination have already been created.
In particular, start by disabling additional gadgets from the computer. All you need is a mouse and keyboard. Next you have to remove the antivirus.
Check even if the time is right on the computer, if the date is the same as today.
Then proceed to update the drivers of all components. And for these purposes it is worth going to their official sites.
In addition, the problem may be that you do not have enough hard disk space. The minimum is 25 GB.
In addition, climb into the BIOS. See if everything is alright with the security settings.
Install with the need to turn off the Internet. Subject to all measures, everything should go smoothly.
80070002
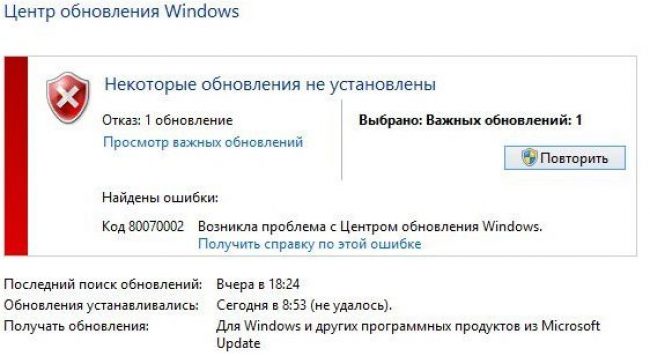
This error pops up when date and time settings are incorrect.
Besides, possible cause is crashing on boot. Accordingly, some folder is damaged and does not allow to carry out the update correctly.
To solve the problem, start with an elementary - go to the settings of the time and date.
Your task is simple - set the actual current time, check the date. Also pay attention to the time zone. After these steps, restart the computer.
An alternative solution to the problem is renaming the Software Distribution folder located in the C: \\ Windows directory. Then repeat the installation process again.
0x80248007
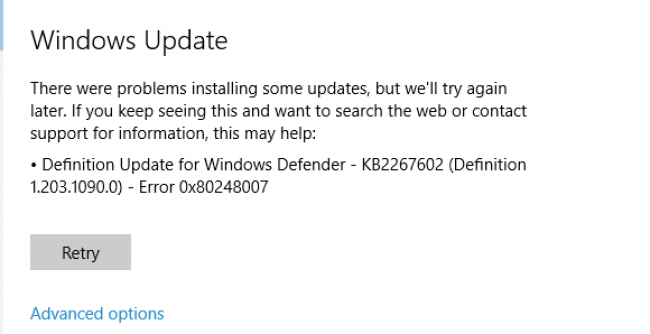
This error indicates damage to the boot files. So to fix it you just need to repeat the download.
You can, just in case, do it yourself using official utilities.
0x80070070
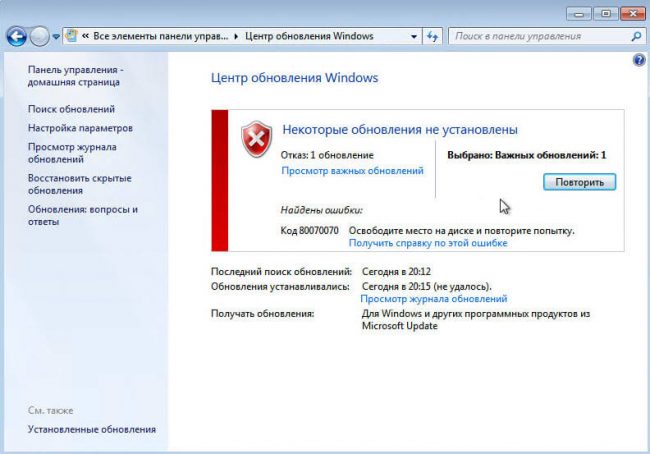
Error alert 0x80070070 says that the computer has too little free space. However, there is a more sad option - the OS is affected by virus software.
Do not exclude the option and with a large number of extra files in the register.
That is, you can solve the problem called 0x80070070 by sorting out each possible reason separately.
You need to free up space on the system disk. Try deleting temporary files and unused applications.
Be sure to do a full system scan for viruses.
Also use special programs for cleaning garbage in the registry.
0x8007045b
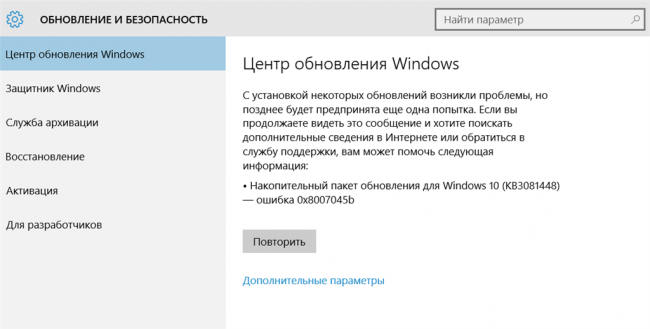
Typical OS problem with 64-bit architecture. During the upgrade, the architecture conflicts with the software environment.
This error is solved by the following commands:
- Open up command line under the rights run the administrator.
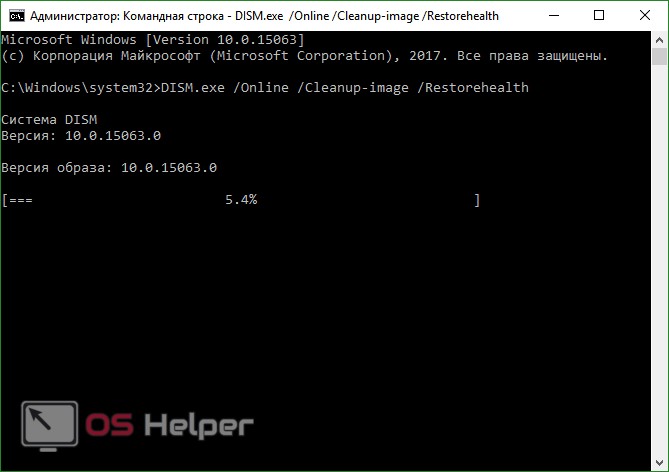
- Run the DISM command with the following keys:
DISM.exe / Online / Cleanup-image / Scanhealth
DISM.exe / Online / Cleanup-image / Restorehealth
Wait for the computer to process the tasks. Next, repeat the installation process.
0x80070057
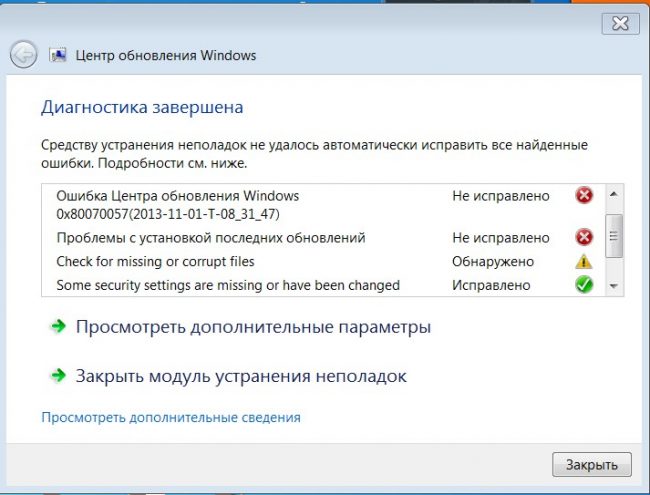
This error occurs due to failure reserve copy files through the backup program in Windows 10.
Most often, the problem lies in the incorrect setting of the parameters in the regional settings. The decimal separator value must be set to a point.
In the appropriate section “Region, language and clock” go to Advanced Options. In them, opposite the “Separator and full parts separator” put the “.” Sign. After that, reboot and re-install.
findings

Most of the problems popping up when installing Windows 10 updates are successfully solved. Sometimes it takes some time, but it's worth it.
For example, in latest version implemented quite interesting features, including the new game mode.
In addition, the speed and performance mechanisms are also constantly improving.
The only thing that you need to follow some measures to install successfully.
Often the conflict and failures occur due to incorrect operation of the drivers, virus activity of the system and registry errors. However, in some cases even the point in the settings plays a role.
The update can be downloaded as an auto update, but it is also an option available manually.
All utilities for this are on the official website. There are spelled out detailed instructions for the update.
Users, however, encounter a wide variety of errors. The most commonly encountered is 0x800705b4. It is closely connected with computer access to the Internet.
You need to check not only the connection, but also the DNS. In particular, the cause may be a driver conflict. Thus, it is better to update them until the system upgrade itself.
While working with the “Ten”, users sometimes discover that the store has stopped starting or disappeared altogether. Often, there is also a situation when an application gives an error after attempting to perform an action. Windows store is a very necessary and popular program, there is a huge set good applicationsthat complement the functionality new system. Below we just talk about why the Windows 10 store does not work and how to deal with it.
Before you begin to solve the problem and tell you how to “cure” the “Tens” store, we will see why it fails:
- records in the system registry, responsible for the operation of the store;
- wSService, which is part of the Windows Store, has failed;
- the problem occurred after an incorrect update;
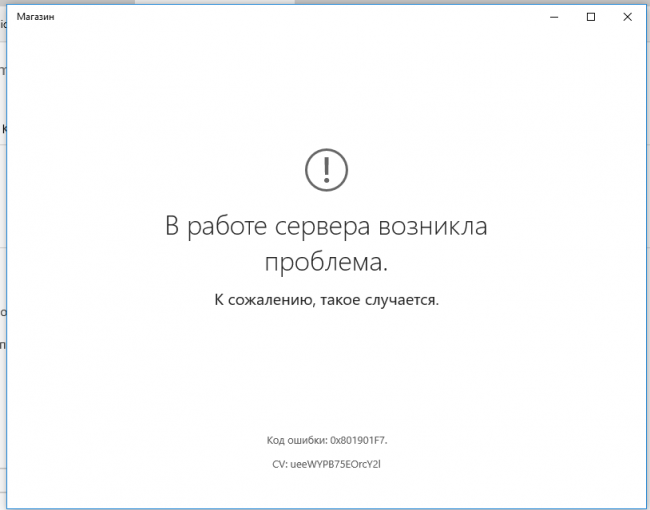
- when the store starts, the error code 0x80072efd appears, and the program starts to slow down.
The following errors may also occur: "0x80d0000a", "0x80072ee7", "0x80070005", "0x800706d9", "0x8024401c" or "0x803f8001"
It is clear that problems with the program may appear not only for these reasons, but still, they most often cause a failure. The main thing before we start to fix the problems in windows work Store, be aware: the program is an integral component of the system and it will not be possible to "cure" it separately. Correcting problems will have to rule the OS itself.
Solving the problem of a non-working Windows 10 store
In order to correct failures in the store in the main cases, use one of the following options.
Apply Troubleshooter
Developers from Microsoft have created their own tool that should automatically fix any problems that have occurred. In order to use the program, do the following:
- Initially download the application by. In the window that appears, just click the "Next" button.
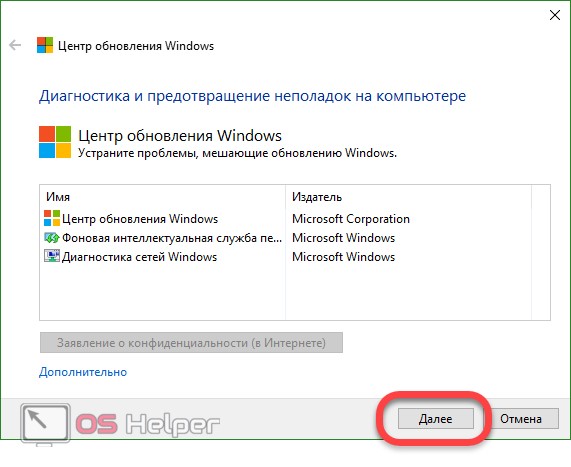
You need to run the utility only with administrator rights. In order to do this, right-click on the file and click on the startup entry as administrator.
- Troubleshoot problems that could lead to malfunctioning of the Windows Store

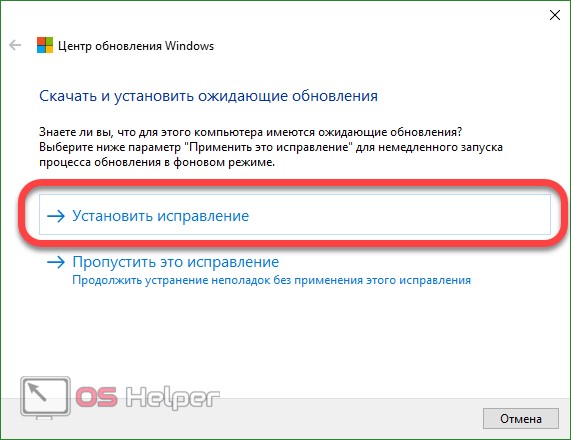
- The program will inform us that the situation can be corrected with the help of updates that need to be installed. To do this, click on the appropriate item.
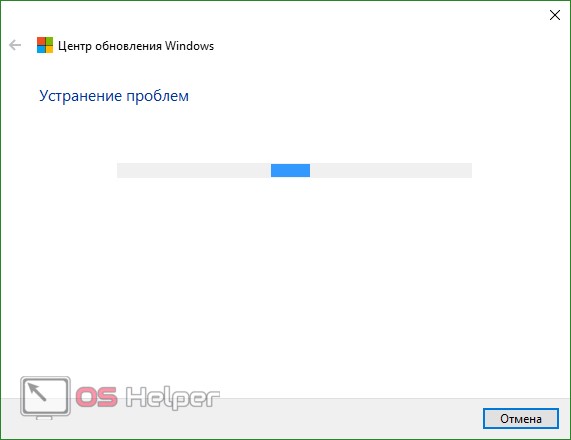
- There is a fix system, waiting for its completion.
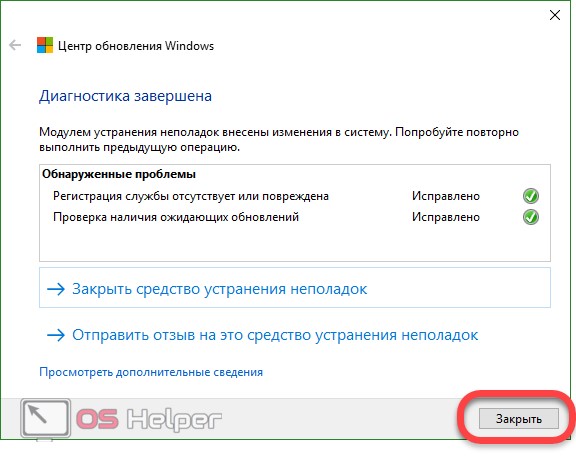
As a result, we see the following picture. Fixed the service (which was damaged or completely absent) were also applied updates that were available, but not installed. We can only press the button that says: "Close."
Use the Software Repair Tool
In the middle of the summer of 2016, Microsoft created and handed over to users a tool called Software Repair Tool - an integrated solution for solving problems with Windows 10 that can figure out why the store does not work in Windows 10. The application creates a restore control point before starting work.
Software Repair Tool features:
- restore standard network settings;
- reinstallation of programs using PowerShell (in particular, Windows Store);
- monitoring the integrity of the OS files through DISM;
- installation of system updates;
- reset to default power scheme;
- removal of unnecessary backup windows data and clearing free space this way.
Getting to work with the program:
- To get started, download the application for a direct link. Then run it on behalf of the administrator, accept the use license and click the Next button.

- Next, the process of troubleshooting and their correction will begin, we wait until the process comes to an end.

- 50% of the progress of the program will require restarting the computer. Close all applications, save the data and press the button that we circled in red.
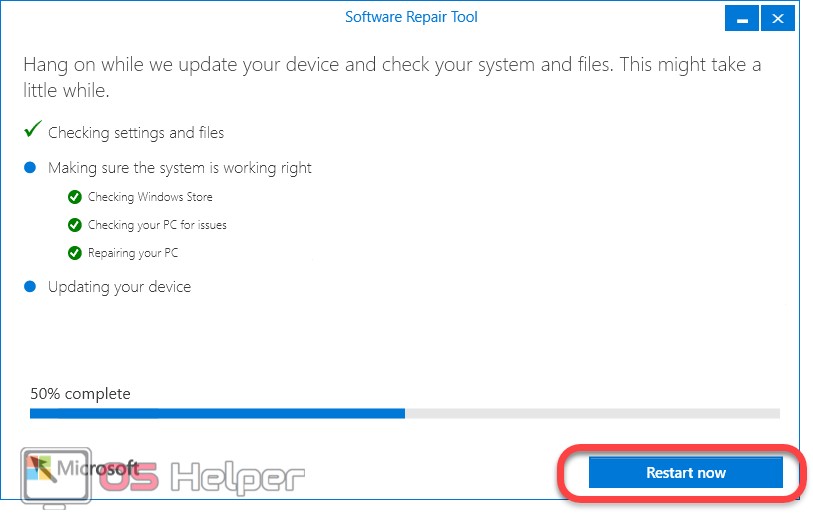
- After the PC is restarted, the process will last automatically.
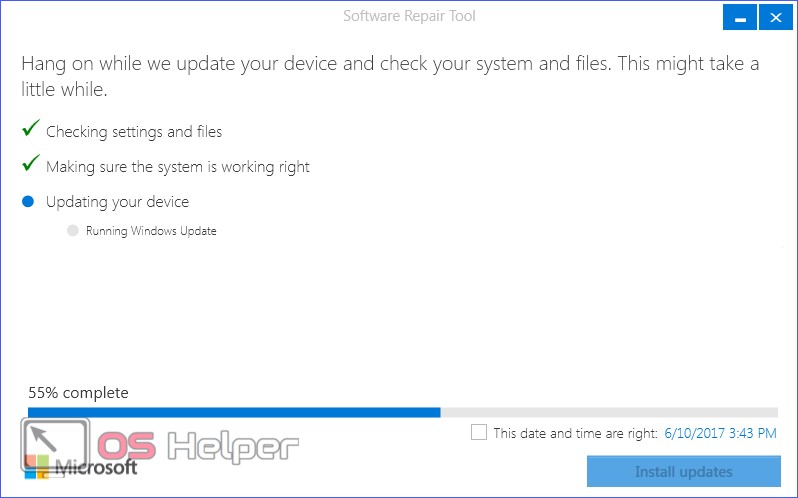
- If an update is found in the system, you will be prompted to apply it, in this case it is.
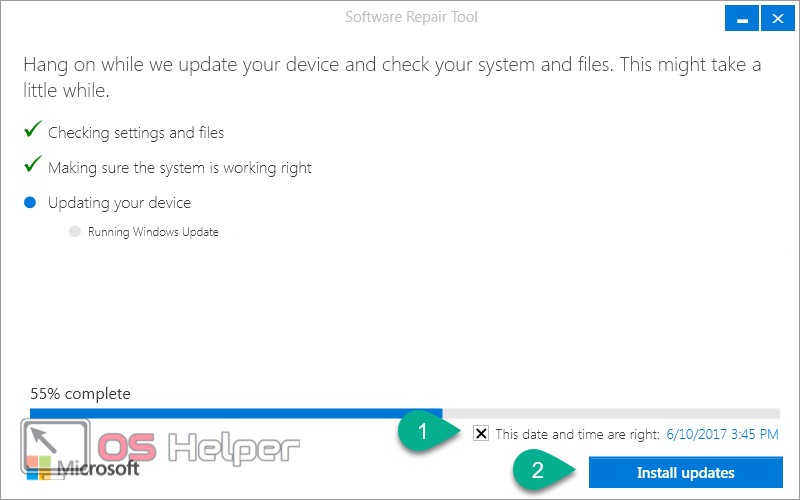
- As a result, the reset of all PC programs will be completed, we will only need to reboot the machine again.

Restoring system files
Windows Store, which does not open or has other problems, you can try to fix it by restoring its files. To do this, do the following:
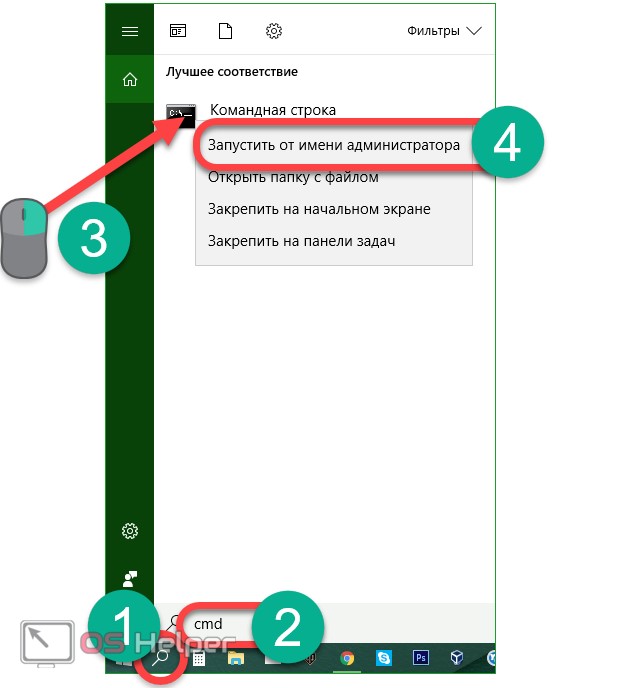
- Run the command prompt with superuser rights, for this we use OS search (magnifying glass icon in the left part of the taskbar) and enter the query “cmd”. Next, make a right click on the result indicated in the picture and click on the line that we have designated the fourth number.
- In the window that opens, enter the command: sfc / scannow and hit enter.

- When the scan is completed, restart the PC, again, call the command line with administrative rights, and enter the operator: DISM.exe / Online / Cleanup-image / Restorehealth, then press Enter.
In the process of scanning all the data, Windows 10 will check its integrity and, if necessary, replace the damaged ones.
Note: the second pass can take a very long time, sometimes it even seems that the utility is frozen, but we need to wait patiently for the operation to complete.
Reset cache
Sometimes, Windows Store crashes due to a hard-packed cache, often for the same reason, applications from the Windows 10 store are not installed. In this case, users see the message “The cache of the windows store may be damaged”, “An internal problem has occurred” or "0x80240438" errors. In order to clear temporary files do the following:
- Run the Run tool (for this we press together the two Win + R buttons) and enter the operator: wsreset into the window that appears, then click OK.

The process of clearing the cache will begin, if everything works out, the Store application will open upon completion of the operation. If this does not happen, go to the options described below.
Re-registering Windows Store via PowerShell
In order to re-register (reinstall) the Windows 10 store in PowerShell, do the following steps:
- Open the search tool "Tens" (magnifying glass icon in the left side of the taskbar) and enter the word PowerShell. When the result appears, make a right click on it and select the item indicated in the screenshot with the number "4".

- In the opened PowerShell we insert a set of commands like:
And click Enter.
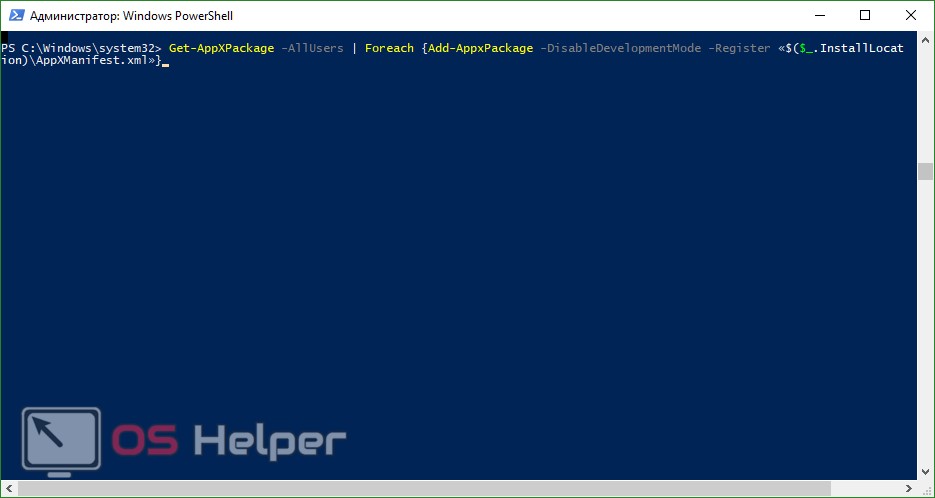
In the process, you will see a number of errors (red lines in the screenshot), but they will not affect the cleaning process, and you do not need to pay attention to them.

Once the process is complete, close all programs and restart the computer. After starting the system, check if the Windows 10 store has started working. If not, then reinstalling the program failed. Go ahead.
Add new account
Another option that can help repair a store that does not start is to add another account and launch the Windows Store from under it.
Consider how to do it as quickly as possible:
- We open our command prompt with administrator rights, how to accomplish this, we wrote a little higher (enter in windows search 10 word cmd and run the desired result as an administrator). When the window is open, enter the following statements in turn:

Instead of the line “username of which_we_create”, you need to enter the name of the new account.
If after new account it will be created to launch a store on its behalf, it turns out, just delete the old user and work with the new one. If this option did not help, we proceed to repairing the store with the help of system recovery.
System Restore
If none of the described methods helped to organize the work of the Windows 10 store, it remains to resort to the services of heavy artillery - the restoration of the system.
To do this, do the following steps:
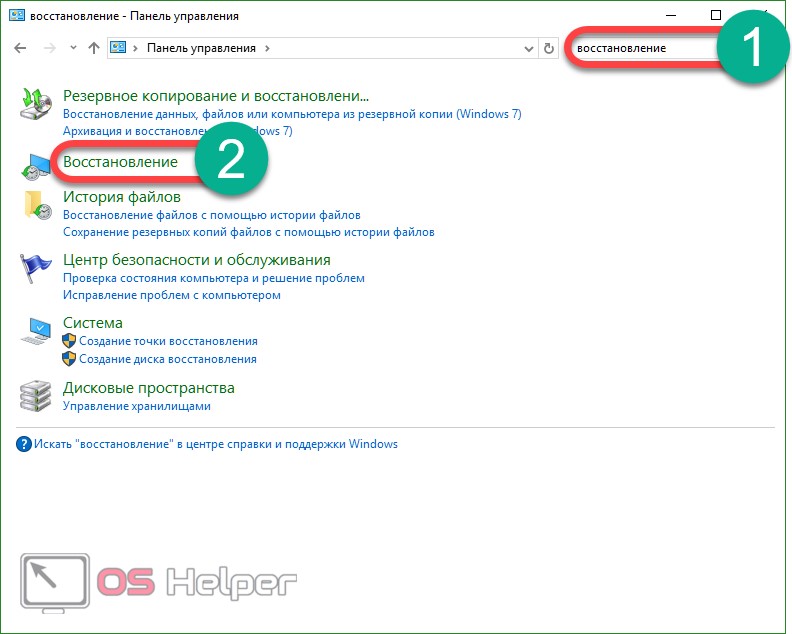
- Open the control panel by launching it through the Windows search. Click the magnifying glass icon in the left half of the taskbar and start writing the name of the application of interest, and when the desired result appears, click on it.

- When the control panel starts, enter the word “Recovery” into its search and click on the item indicated in the picture.
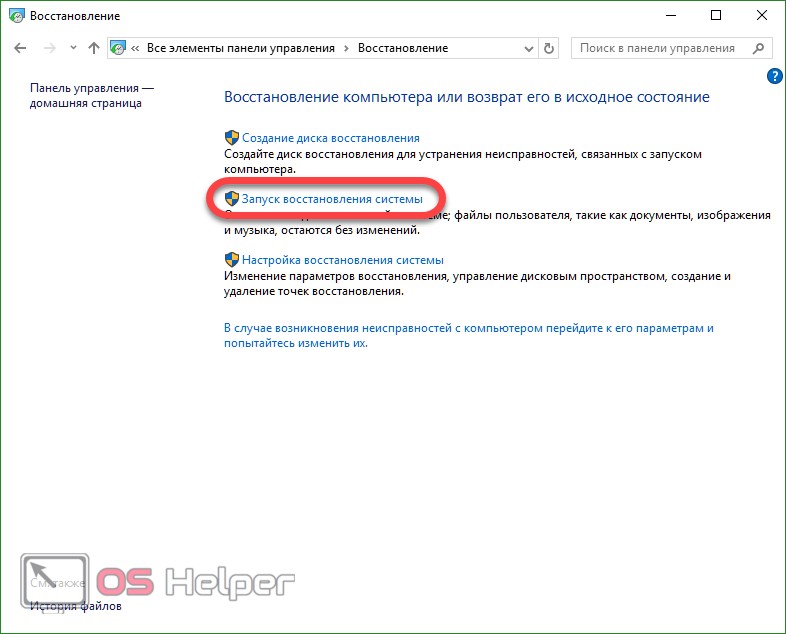
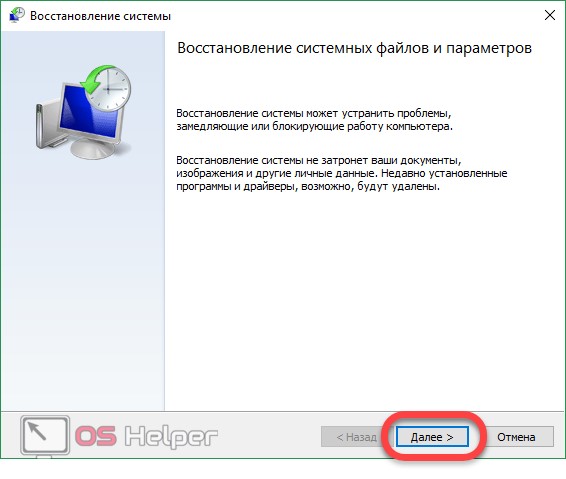
- In the opened System Restore Wizard, click on the “Next” button.
Important: in order for the recovery procedure to work, you must enable automatic recording of recovery points and create at least one of them.
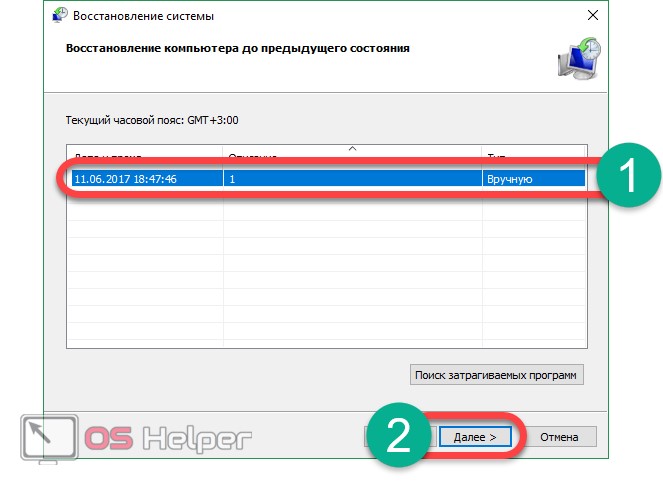
- Choose a control point windows recovery 10, to which the system will be rolled out and click "Next."
- In this preparation for the procedure is over, and we can close the master.

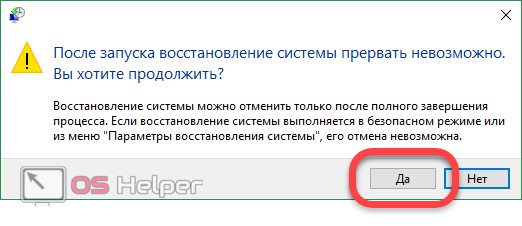
- We will be notified that if we start the restoration, it will no longer be possible to cancel it, if you agree, click "Yes."
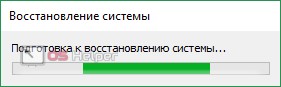
- Initialization of the system rollback has begun.
- The computer will restart, as the recovery procedure is conducted in PreOS-mode.

- The system is being restored, it may take time, for example, the process took about 15 - 20 minutes.
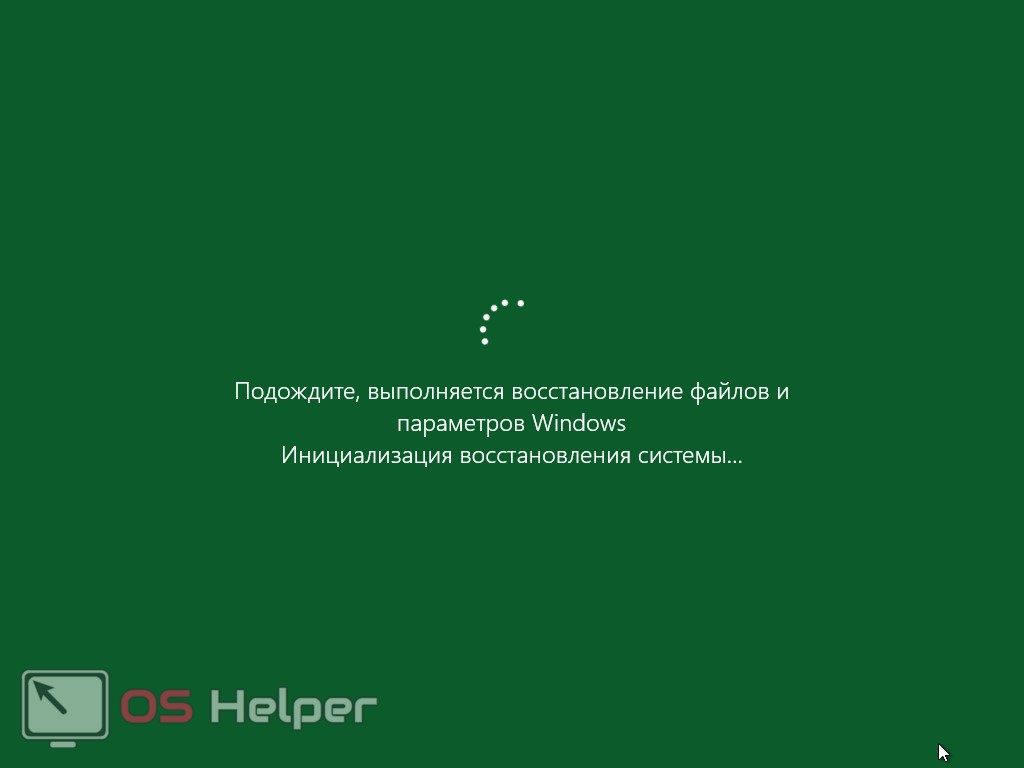
As a result, the system will be returned to the point that was created earlier.

Additional Information
Store in Windows 10 can be turned off if you do not need it and restore after disconnecting. In the article you will find the answer to the question - what to do if the Windows 10 store does not work. If you have any questions, write them to us in the comments, we will help you to get out of any situation.
How to fix problems with the store Windows 10: video instructions
Starting with Vista, the Windows installation process is simplified due to the presence of a graphical interface when choosing a system installation section. Having learned how to set the boot priority in the BIOS version of your computer and understand the specifics of hard disk partitioning, in fact, any more or less experienced user can independently carry out the Windows installation process. But provided that he does not face an emergency situation. And there may be a lot of these. Below are some of them.
So, what could be the reasons for the failure of the Windows installation process?
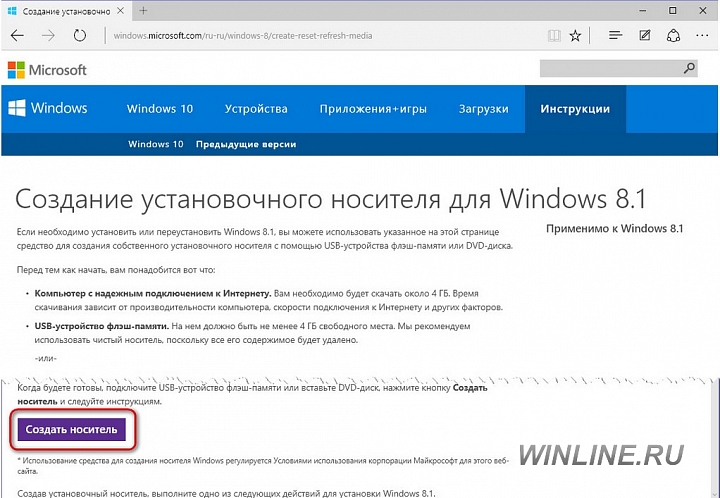
The article mentions the possibility of downloading distributions and creating installation media for Windows 8.1 and 10 using the Microsoft Media Creation Tool utility. Links to download this utility:
- for Windows 8.1 http://windows.microsoft.com/ru-ru/windows-8/create-reset-refresh-media
- for Windows 10 http://www.microsoft.com/ru-ru/software-download/windows10
1. Computer specifications
If the computer does not meet the minimum requirements for installing a particular version of Windows, at some stage of the installation of the system, the process may fail. Modern computers almost all meet the minimum requirements for installing the latest versions of Windows. On old computers with random access memory less than 1 GB, a processor frequency of less than 1 GHz and a hard disk not capable of providing 40-50 GB of space for the system disk, it is better not to try to install Windows 7, 8.1 and 10. Even if the installation process completes successfully, in the future these versions will work Windows will be terrifying. On old low-power PCs and laptops it is better to install Windows XP.
If we are talking about a modern, but low-power, low-power laptop, and installing one of the latest versions of Windows is of fundamental importance, it’s better to stay on the latest version 10. It is more productive, compared to versions 7 and 8.1, and contains in its distribution a larger number of device drivers that will save you from the red tape with their manual installation. Also, Windows 10 is better than other versions of the system adapted to work with small screens of netbooks due to the presence of tablet mode.

2. Pirated Windows builds
In some cases, an unsuccessful build of Windows, downloaded on the first torrent tracker, may cause the installation process to fail. Modified pirate builds are an attractive way to get Windows with an alternative look and feel free, but this is far from the best way get a stable operating system.
Pickers of illegal Windows distros rarely post original images intact. As a rule, even the slightest changes to the system, but made. Which system components have been removed from the Windows build to download, and which, on the contrary, have been added, whether the interface has been modified - all this is indicated in the distributions on torrent trackers or in descriptions on other sites. However, careful reading of information from collectors is not a guarantee for obtaining a stable assembly of Windows. It is better to install the original assemblies of the system that Microsoft offers on its web resources. In addition, you can use Windows 10 for free on a legal basis.
3. Problems with CD / DVD drives
CD / DVD drives are intricate devices. Many drive models refuse to read DVDs (both regular and installation), created with the participation of low-quality discs or if there is even the slightest scratch on the disc. If we are talking about computer devices that support booting from USB-carriers, and most of them, it is better to install Windows using a bootable USB flash drive. In addition to the fact that the software market today has a fairly large number of programs that can write bootable USB-drives, Microsoft itself has taken care of all the tools needed for installation Windows versions 8.1 and 10.
With the help of the Media Creation Tool utility from Microsoft, you can also download the operating system distribution kit and immediately write it to a bootable USB flash drive. Download this utility to create installation media with Windows 8.1 and 10 on the Microsoft website is completely free.

4. Problems with the hard disk
The Windows installation process may fail if there are problems with the hard disk of the computer. If the old operating system is still operational, it is necessary to log in and diagnose the hard disk using special programsFor example, CrystalDiskInfo, HD Tune Pro, Hard Drive Inspector, Hard Disk Sentinel, etc.
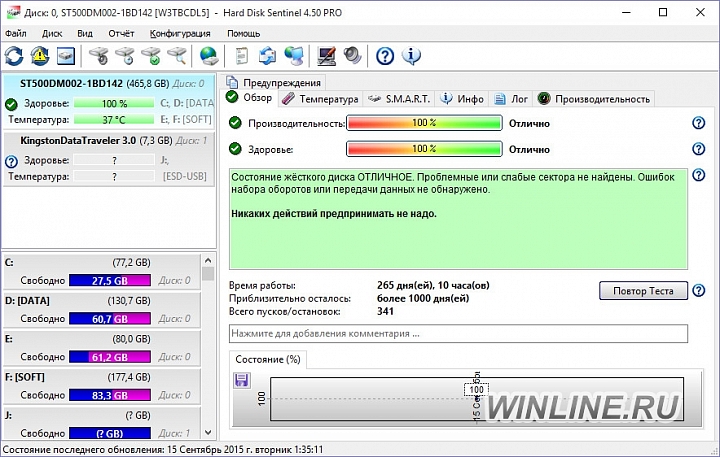
And if the system disk is already formatted, you can resort to using Live Disk - boot disksintended for resuscitation of the operating system. In their composition, as a rule, there is one or even several programs for diagnosing a hard disk. If the diagnosis reveals the bad state of the hard disk, it is better to wait a little while reinstalling the system and show the computer to a specialist.
5. Installing the system in a circle
When the stage of copying files is completed during the Windows installation process, the computer restarts, and the further installation process of the system components and drivers occurs on the system disk. If a bootable USB flash drive is used to install the system, after the files are copied, it must be removed before the computer boots from the hard disk. Naturally, initially when setting the priority boot from a flash drive in the BIOS hDD need to set second in priority boot devices.
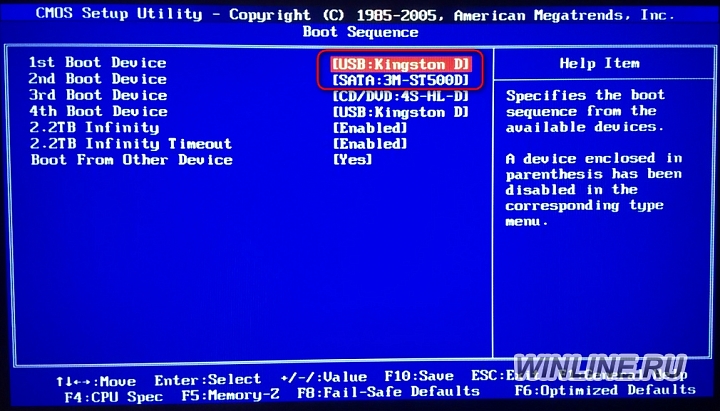
If the hard disk is not set second in priority, after the copy is completed windows files it needs to be purposefully set by the primary boot device of the computer, entering the BIOS. Otherwise, the download of the Windows installation files will be in a circle.
Avoiding the process of installing Windows in a circle is easier when using a bootable DVD. In this case, as a rule, confirmation of booting from removable media is required by pressing any key, when “Press any key to boot from CD” appears on the screen. After the installation files are copied and after the computer is restarted, you simply do not need to click anything to boot from the hard disk if it is second in the boot priority.

6. Connected digital TV
If the computer is connected via HDMI output digital television, while the main monitor is connected via the VGA or DVI outputs, instead of the installation process, the latter may display a blank screen. As a rule, the HDMI output has priority when determining the main screen: a digital TV is determined by screen No. 1, and it is by default that the image with the Windows installation process is displayed.
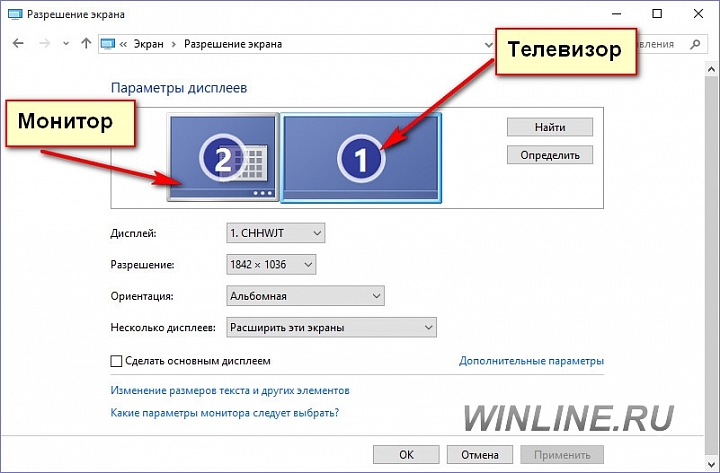
It is very easy to detect if the TV is on. But when the TV is off, the lack of an image on the monitor screen can be misleading, as if the installation process does not start. In this case, you can install Windows on the TV screen, then in installed system Assign the monitor to the main screen. You can also disconnect the TV's HDMI cable during Windows installation and connect it after installing the system.
7. BIOS issues with UEFI
BIOS UEFI is the basic input-output system of the new standard, which was originally intended to increase performance when working with new computer devices and to enhance security. In the process of reinstalling the operating system, it will be an obstacle if you try to install unlicensed Windows or a system version below 8. provides the Secure Boot Secure Boot Protocol as part of the UEFI BIOS, which provides for the verification of Microsoft-certified keys.
Windows versions starting from 7 and earlier, as well as Linux distributions for new PC assemblies and laptops, cannot be installed without disabling Secure Boot. The consequence of disabling Secure Boot will be the forced rejection of all the benefits of the UEFI BIOS. In particular, this is the impossibility of installing Windows on a hard disk partition from gpt style (GUID) - a partition table that provides work with a disk space of more than 2.2 TB and allows the creation of 128 primary partitions of a disk.
Refusal of the UEFI interface and the choice of the usual BIOS in the settings of the latter will give a green light to the installation of any operating system on the disk partition with the old MBR table.
8. UEFI boot flash drive
To install Windows 8.1 and 10 on laptops and PC assemblies with UEFI BIOS, you do not need a regular bootable flash drive, but a bootable UEFI flash drive. The ability to create such is not present in all programs for creating bootable USB-drives. Create bootable flash drives UEFI can, in particular, programs Rufus and WinSetupFromUSB. But the easiest way to install Windows 8.1 and 10 on a GPT partition without disabling the UEFI interface and Secure Boot is to use the Media Creation Tool utility mentioned above.
![]()
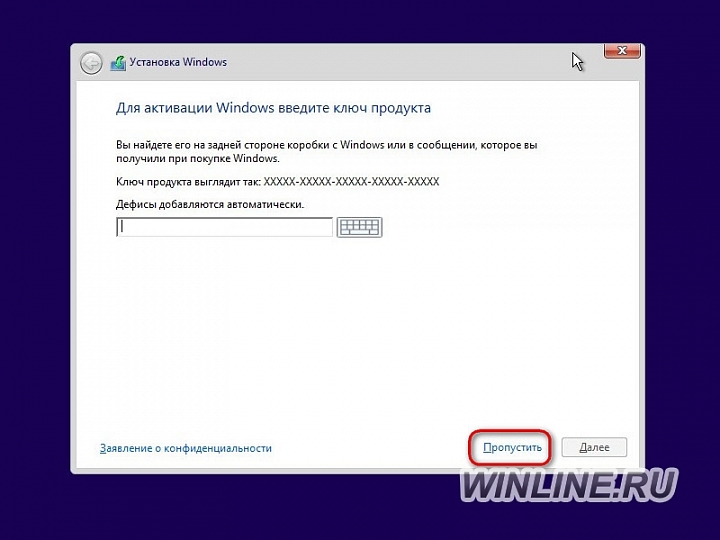
9. Skip entering the product key when installing Windows 10
While at the beginning of the installation of the licensed Windows 8.1, downloaded using the Media Creation Tool utility, you will need to enter the product key, Windows 10 has more benign conditions. Licensed Windows 10 can be installed without activation. However, this will require care in order to see options with inscriptions at certain stages during the system installation. small print “Skip” and “Do later”, which allow you to install the operating system without entering the product key.
![]()
Such an advance from Microsoft during the installation process, some may simply not be seen.
When upgrading to Windows 10, many users have an error C1900101. Developers with Microsoft are working on a solution to this complex problem, but until the release of the corresponding update will have to deal with the problem through the tips and recommendations given in this article.
What it is
Let us see what is the C1900101 error that appears when installing Windows 10. First of all, this is not a single error, but a whole complex. This code indicates only the commitment of the problem to a particular group. For example, a window with the message 0 × C1900101-0 × 40017 symbolizes a problem with uSB driver or outdated drivers, such as a video adapter.
The problem with the code designation 20017 may appear due to the activity of the antivirus during the installation of Windows 10, the incompatibility of the driver for hard drive SCSI or connected peripherals.
Based on the foregoing, it is easy to conclude: an error with the code C1900101 causes a huge number of factors and for each case the ways of solving them will be different. We will talk about them below, noting that this problem appears both during Windows upgrade to 10, and at the preparatory stage.
If a C1900101 problem occurs during the preparation phase of an update, the following recommendations should be followed.
- Be sure to check the hardware compliance with the minimum system requirements (note the amount of free disk space).
- Go to the Software \\ Distribution directory on the system partition and delete the contents of the “Download” folder that is in it.
- Then erase the folder “$ Windows. ~ BT ”located in the root of the system disk.
- Disable (better to uninstall at all) antivirus program at the time of the update Widnows 10.
- Remove all flash drives (except for Windows distribution media), if the Windows update comes from a flash drive, and temporarily disable all unnecessary external peripherals.
- We update the drivers of all hardware components by downloading them from the manufacturer’s official website or the support page.
- To simplify the task, you can use a program, for example, Snappy Driver Driver Package or Driver Booster, which will find new drivers on the Internet and install them in the system.
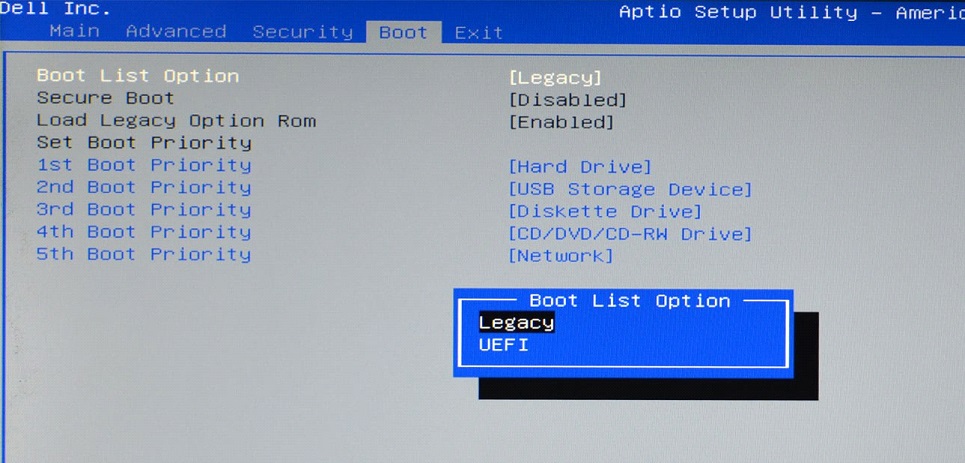
- Select the BIOS boot in UEFI mode (if motherboard supports it).
- Restart the system and go to UEFI by pressing Del or F2 after initialization. Go to the "Boot" and using the keyboard set the value of the parameter "Boot List Option" as in the screenshot.
Pay attention to the overclocking of the processor - if its operating frequency or voltage was increased - be sure to set the nominal value of these parameters during the manual update or reset the settings responsible for overclocking (it does not matter if it was done through the BIOS or third-party applicationoperating in Windows prior to the upgrade).
After completing all the above recommendations, you can begin the update process. In this case, the developers of Windows 10 recommend installing from a removable drive when the connection with the global networkEspecially it concerns the use of Wi-Fi.
Private solutions to the problem
A closer look at solving the problem when an error with the number 40017 occurs. This error can comprehend the user both during the Windows 10 update and at the preparatory stage. Based on data from Microsoft, it arises from the drivers. Some of the installed software for controlling the operation of the hardware does not have digital signature, that is downloaded from a third-party resource. This happens when using unofficial drivers, for example, installed through applications such as SDI, DPS.
In most of the cases above, the driver does not contain a digital signature and is not perceived. windows Installer 10 during the update. To fix the problem with error 40017, you need to enable the driver's digital signature verification tool.
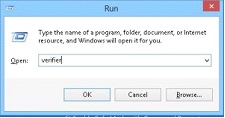
- Enter “verifier” into search string or the text form "Run" and click "Enter".
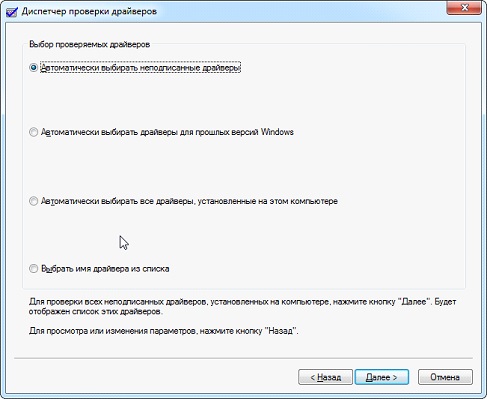
- In the opened window “Driver Verification Manager” we select the first option and click “Next”.

- In the second window, click "Next", without changing anything, and wait until the application scans the system for the presence of unsigned drivers in it.
- We look, the control programs of which hardware components do not have a digital signature, download them and install them from the official developer page.
In many cases, after removal windows drivers automatically installs it or prompts the user to perform this procedure. By performing such actions, error 40017 is basically eliminated.
If all else fails, then the developers recommend contacting the support center with detailed information about the system, hardware, and related information to determine the cause of the 40017 issue. The last option is windows installation 10 again with formatting the system volume, instead of updating.
The second most frequent occurrence is error code 20017. There are many factors causing it and for each case I have my own methods for solving the problem. In addition to the above-mentioned disabling of the antivirus, unused devices, driver updates, there are several other reasons for the problem with the code 0 × C1900101-0 × 20017:
- Dash or hyphen in the name of the computer - should remove this symbol from the name of the PC.
- When using a SCSI hard disk, you will have to install a driver for it manually before updating Windows or switching to HDD with SATA interface.
(Visited 3 219 times, 3 visits today)
For many users with the Windows 10 update, something went wrong. Whether it was a bad omen, or Microsoft screwed up not as big as when Windows 8 was released, we will find out later. Now we will try to solve this problem in the old manner, with the help of a pair of crutches.
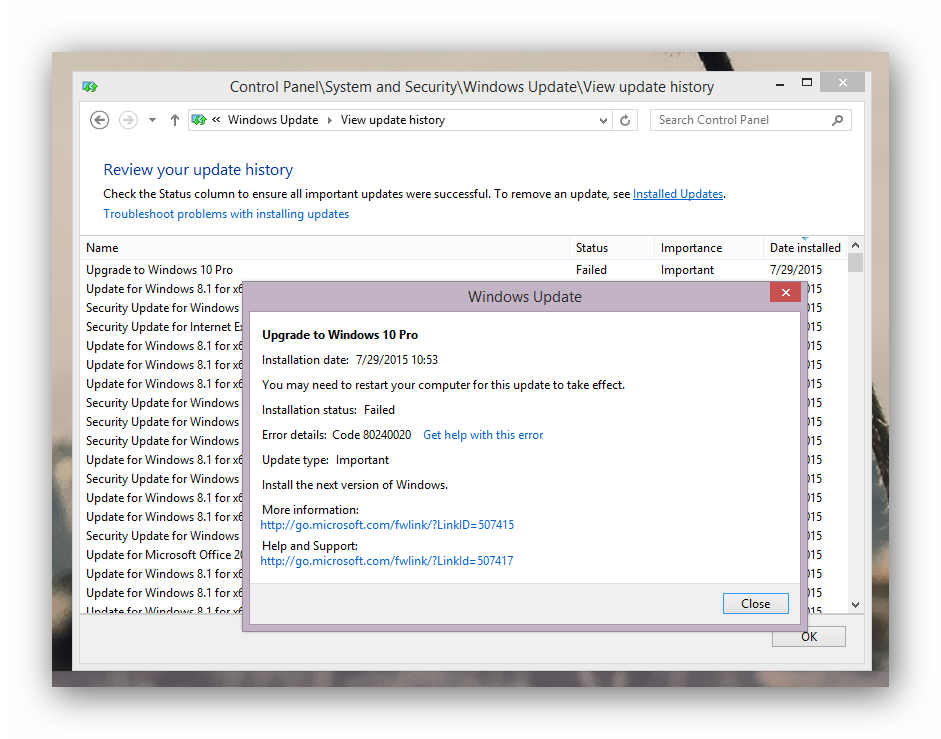
 If the 29th is coming to an end, or has long passed, and your reserved update has not yet arrived, then there may be two reasons for this: First, your hardware does not match system requirement. This is easy to check in the same window where you backed up your update. The second reason is that the update tried to load, but for unknown reasons, the download ended in failure and error 80240020.
Open the update center log and check if there was a download attempt. In my case there were two of them. Be sure to install all latest updates on your operating system, including “optional” patches. In my case there were nine of them.  Reboot your PC and check for updates again. If the system writes that they are not, or gives an error, then you need to do the following:
Open the folder at C: \\ Windows \\ SoftwareDistribution \\ Download and delete all its contents. Leave the folder in place.
 After that, run the command prompt as administrator. Next, enter the following command: “wuauclt.exe / updatenow” (without quotes), then open the update center again. If the error is again in the window, then repeat the procedure, since the solution does not work for everyone the first time.
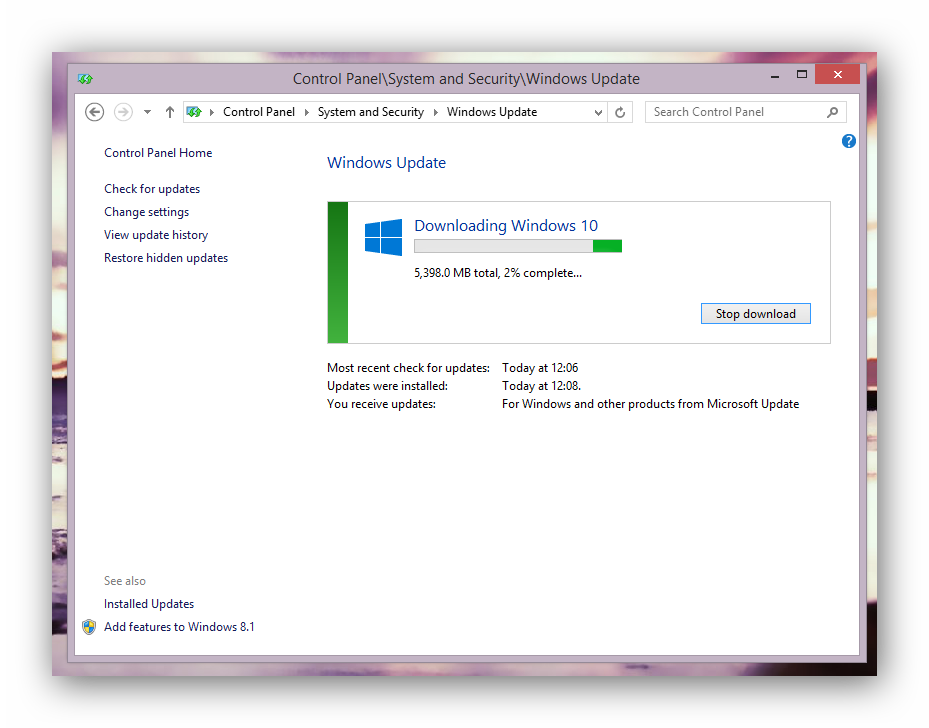
Anyway, a message should appear in the update center. booting windows 10 (just over five gigabytes in the case of Windows 10 Pro x64). After the download is complete, the process of preparing the update for the installation will begin. Depending on the speed of the computer, the process can take quite a long time. After that you will see a window with a proposal to proceed with the installation.

 If the window with the proposal to install Windows 10 did not appear, you can download the installer from the Microsoft website and upgrade through it.
 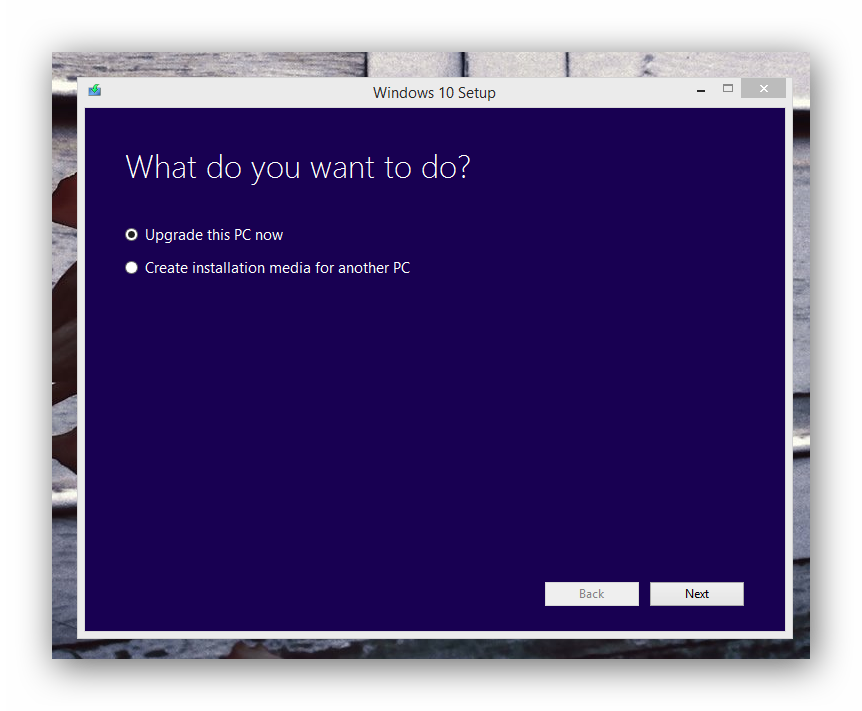 Select the bit you want and download the installer. Then run the installer. Here are two types of installation. The first involves direct download and update, the second type allows you to download an image (download ISO for writing to disk, or burn an image to a flash drive) and upgrade from the media. If you prefer the second method and the subsequent "clean" installation (not an update, but formatting a disk and installing the OS on a blank disk), then you will need a product key. When upgrading from Windows 7, 8, 8.1 (the first type of installation), the key is not needed.