How to open a blank sheet for printing
Instruction manual
First, make sure that Microsoft Word is installed on your computer. To do this, look for a shortcut with the same name on the desktop or look at the Start menu, the Programs section. Launch the found application by double-clicking on its shortcut. The application that opens is the Microsoft Word text editor.
Pay attention to the central white sheet. This is the main workspace in which you will print text. In the right part of the window you will see the so-called scroll bar. It will be needed when the size of your text will no longer fit on one screen. To start typing, click on the sheet. Word will display the active flashing cursor and place it at the very beginning of the document.
Now check which language is currently active on your computer. The text editor will print the text in this language. If English is active, left-click on its icon and select Russian in the menu that appears.
Type a few lines of text using the keyboard. If you don’t know what to type, open any book or magazine and reprint a few paragraphs from there. To move to another line, use the Enter key. You will see the blinking cursor move to the next line. If you make a mistake, delete the wrong text using the Backspace key and retype the word.
And what to do if you accidentally deleted the desired text or did some other unnecessary action. To do this, Word provides the undo function of the last action. To use the function, click the arrow button in the upper left corner of the window.
So the text is printed. It remains only to save it. To do this, click in the upper left corner the button of the main menu and select "Save". In the window that opens, enter the name of the saved document and select the folder to save. Click the "Save" button. You have just created a text file in Microsoft Word.
note
In the previous lesson, we talked about the fact that there is a special multifunctional program Microsoft Word for printing text on a computer. Try typing small text. If it is difficult for you to invent it yourself, open any book and print a small piece of text from it. Looking ahead, I’ll say that to go to another line (to print the text below), you need to press the Enter button on the keyboard.
Helpful advice
Now try typing something using the keyboard. But first, look what alphabet is installed on the computer. The bottom right shows the alphabet that is selected on the computer. To change the alphabet, left-click on these two letters and select the desired language from the list. Try typing small text. If it is difficult for you to invent it yourself, open any book and print a small piece of text from it.
Sources:
- how to save typed text
About printing documents in Microsoft Office Word 2007, 2010
Word document view mode.
The layout of the page provides the display of the document almost as it will be printed. Therefore, as a rule, no special preparation of the document for printing is required.
However, when working in other display modes, you may need to preview the document before printing.
In addition, it may be necessary to print not the entire document, but its individual fragments, printing a document in several copies, etc. In this case, you need to configure print settings.
To print and prepare the document for printing, use the command Print button menu Office and sub menu commands (Fig. 1).
Fig. 1. Print and print settings for Word documents
Document Preview
Preview is used to view a document before printing it. This mode is especially useful when printing documents that are used in display modes. Usual, Web doc or Structure.
To switch to preview mode in the command sub menu Print (see fig. 1) select the command Preview.
When previewing the document is displayed in a special preview window (Fig. 2).
Fig. 2. Display a document in preview mode
In this mode, there is only one tab - Preview.
You can use the scroll bar or buttons to paginate the document. Next page and Previous page groups View.
The document display scale is set using the elements of the group. Scale. You can set the display of several pages of a document at once.
- Press button Scale groups Scale (see fig. 2).
- In the window Scale press the button several pages and in the panel that appears, select the required number of displayed pages (Fig. 3).
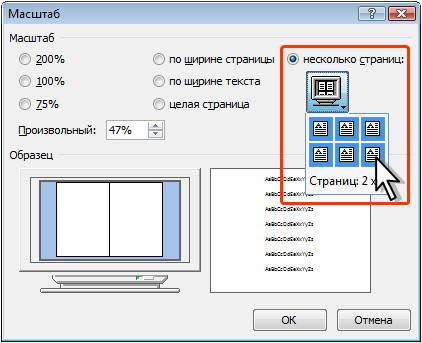
Fig. 3. Setting the number of pages displayed
Button Cut to page groups View can be used to reduce the number of pages in a document by reducing the font size and spacing.
Using group elements Page settings You can configure the parameters of the pages of the document: margins, orientations, paper size, etc.
To exit preview mode, click Close Preview Window or key Esc.
Printing a document
Print the entire document in one copy
To print the entire document in one copy, just the button menu Office choose team Printand then the command Fast print in the sub menu (see Fig. 1).
Adjust print settings
To configure document printing options in the button menu Office should choose a team Printand then the command Print in the sub menu (see Fig. 1).
The setting is made in the window Print (fig. 4)
Fig. 4. Setting print options for the document
In section Printer drop down list Name if you have several printers connected to a computer or local network, you can select the printer on which the document will be printed.
In section Pages You can set the printing of one page on which the cursor is currently located (switch current), or several pages by entering the numbers of printed pages from the keyboard (switch and field numbers) You can print only the selected fragment of the document (switch selected fragment).
In section Copies in the counter number of copies You can specify the number of copies to print. Check the box collateso that each copy is printed in the order of the pages of the created document.
In section Scale drop down list number of pages per sheet you can select the number of pages of the document (for example, enter 1-4, 5, 9 will print page 1 to 4, page 5 and page 9.) to be printed on each sheet of paper. Naturally, several pages per sheet will be printed at a reduced scale.
Drop down list Type You can select one of the options:
- Document - printing a document.
- Document Properties - prints information about the file name, the date the document was created, and when it was last saved.
- Corrections Document - printing of documents from any revision of this brand.
- Markup list - prints a list of edits, inserts and other allowances or changes made to the document.
- Styles - prints style information.
- Main tasks - Prints a list of keyboard shortcuts defined by the user.
Drop down list Enable You can select one of the options to print all pages, even or odd pages:
- All range pages - prints all pages, or all pages in a document or in a range you specify.
- Odd Pages - print all the odd pages in the document or in the range that you specify.
- Even Pages - prints all even pages in a document or in the range that you specify.
Enter the number of copies you want to print the document in Number of copies.
Click Fit to Page down arrow and select the paper size for which your document should be expanded. For example, you can select A4 when printing documents on A4 paper.
When you have selected all the necessary options and are ready to print the document, click OK.
Printing in Microsoft Office Word 2003
To print the active document (the document you are currently working with), click Print on the toolbar (a line with buttons and other controls used to execute commands. To call the toolbar, press ALTand then the keys SHIFT + F10.)
Below are some additional ways to view and print a document.
Note. If the document does not print, the printer with which you are trying to print the document may not be installed.Display each page as it appears when printed
Document Preview
On the toolbar, click Preview. To exit the mode preview (Preview. The display mode of the document as it will be printed.) And return to the previous mode, press the button Close.
Printing all or part of a single document
Page Range Printing
On the menu File select team Print. In field Pages indicate the part of the document you want to print. When selecting Rooms You must also specify the page numbers and ranges that you want to print.
Note. In addition, you can print the selected fragment of the document. On the menu File select team Printand then the parameter Selected Fragment.
Print only even or odd pages
On the menu File select team Print. In the list Print select value Odd Pages or Even Pages.
Print preset pages and sections
It is possible to print specified pages, one or more sections (Section. Part of the document that has the specified page formatting options. A new section is created if you need to change parameters such as line numbering, number of columns or footers.), As well as a range of pages from one or more sections.
On the menu File select team Print. In Group Pages select option Rooms. In field Rooms Enter additional instructions to print one of the following options. Multiple pages broken down
Enter page numbers, separated by commas. If you want to enter a range of pages, hyphen the numbers of the first and last pages of the range.
Example: to print pages 2, 4, 5, 6, and 8, enter 2.4-6.8
Range of pages within one section
Enter p page number s section number.
Example: to print pages 5 to 7 from section 3, enter p5s3-p7s3
Whole section
Enter s section number.
Example: enter s3
Multiple sections broken down
Enter the section numbers, separated by commas.
Example: enter s3, s5
Range of pages in several sections in a row
Enter a page range along with section numbers by hyphenating the first and last pages of the range.
Example: enter p2s2-p3s5
Print a document in a different format
Draft stamp
In draft mode, formatting and most of the graphic objects that slow down the print speed are not printed. Some printers do not support this feature.
On the menu Service select team Optionsand then the tab Print. In Group Mode check the box Draft.
Printing document pages in reverse order
The pages of a document can be printed in reverse order, i.e. the last page will be printed first. Do not use this mode when printing envelopes.
On the menu Service select team Optionsand then the tab Print. In Group Mode check the box In reverse order.
Print multiple pages on one sheet of paper
To see how multiple pages of a multi-page document will fit, you can print the entire document on one sheet of paper. For this, the pages are reduced to the appropriate size and are grouped on one sheet.
On the menu File select team Print. In Group Scale select the desired option in the list The number of pages per sheet. For example, to print a four-page document on one sheet, select the 4-page option.
Print to file
Printing a document to a file makes it possible to print a document on any printer.
For example, if you want to print a document using professional printing equipment, you can print the document in a file, and then print on a printer that provides high resolution.
Note. When printing to a file, you must first select a printer, such as PostScript, on which, ultimately, the file will be printed.
On the menu File select team Print. In the list Name specify the printer on which you intend to print the document. Check the box Print to file and press the button Ok. In the dialog box Print to file in field File name enter a file name. When printing to a file, line breaks, page breaks are saved (Page break. The place where one page ends and another begins. Microsoft Word parses automatically (inserts “soft” page breaks), but you can break the text into pages yourself by arranging “forced” (hard) page breaks.) and data about the fonts used.
Print multiple copies or multiple documents
Printing multiple copies
On the menu File select team Print. In field Number of copies enter the desired number of copies.
Note. To start printing the first page of the next copy after printing the first copy of the document, select the Collate. If you prefer to print all copies of the first page first, and then all copies of each of the subsequent pages, clear this check box.
Print multiple documents at once
On toolbars press the button Open. Open the folder containing the documents you want to print. Highlight the documents you want to print. Press button Service and select team Print.
How to print text on a computer - I think you will ask this question almost immediately after acquiring a new electronic friend - a laptop (or computer). Typing is really one of the most sought after features for both beginners and advanced users. But you can’t just lift the lid of the laptop, turn it on and start typing. Where is the text typed? Certainly not on the desktop. The developers took care of this in the first place and created, one might say, a program unique in its versatility, which by default (you do not need to search and download it) is already offered for free, which is called bundled with your Windows operating system.
So, please love and favor - Microsoft Office Word.
This is really a very powerful program in terms of functionality, allowing you to not only print text by selecting the font, its color, size and location of paragraphs, but also even insert an edited picture, photo, draw a frame, put page numbers, etc. The program includes the ability to execute 1964 commands. Of course, all the teams are likely to know only the creators of this unique editor. We will consider the main functions that may be useful to us more often than others.
So,
We will start from the very beginning, i.e. since starting Word.
For more information about launching programs, see the article How to run programs.
We go in Start menu those. press the button on the keyboard with the icon Windows or click on the button Start on . (You can see the appearance of these buttons in the article).
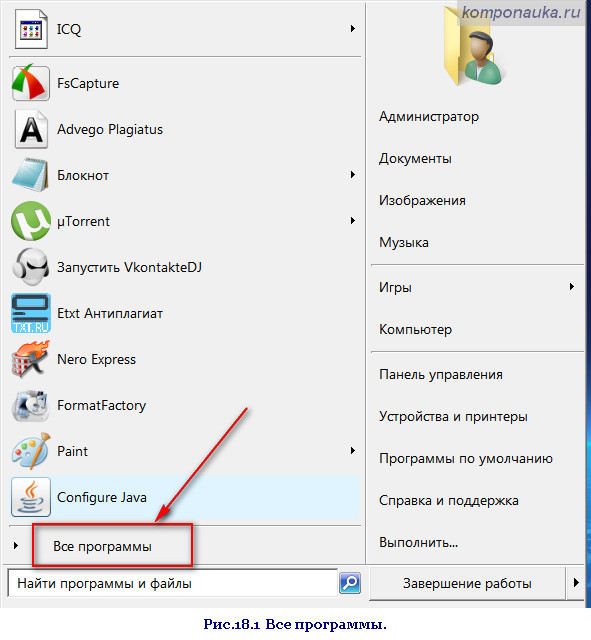
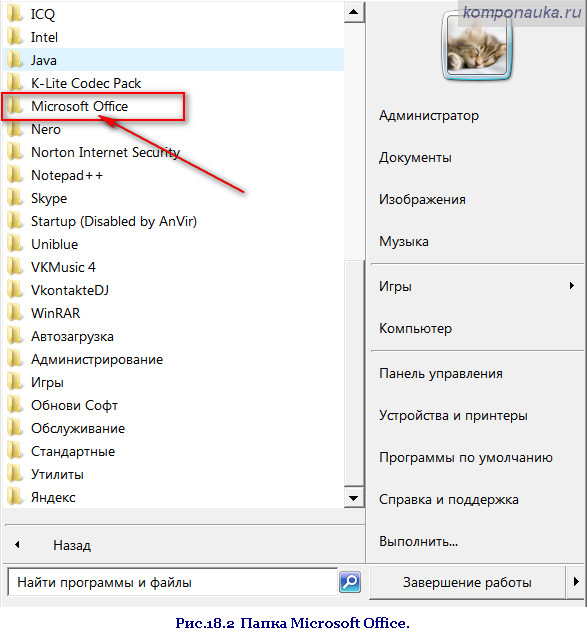
A list of programs that are included in the Microsoft Office suite opens. We choose the one that interests us
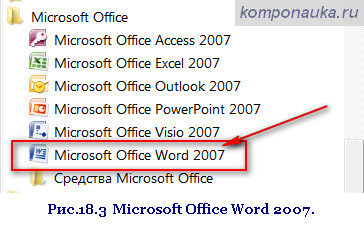
Some systems have a version of Starter installed, which is a simplified version. It has almost all the basic functions. We will consider Microsoft Office Word version 2007. I consider it as convenient as possible, but you should choose it.
I propose immediately transfer the program shortcut to the desktop (this will subsequently be much faster).
To do this, move the mouse cursor over the found line and, pressing the right mouse button, drag the cursor to the free field of the desktop. A window appears.
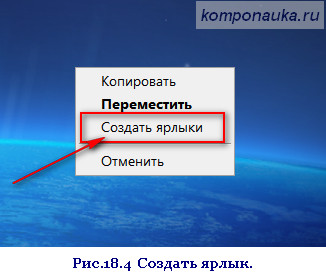
Click on Create shortcuts . That's it, now on the desktop there will always be a shortcut to quickly enter a text editor.
So, with a double click, we start Word. The program window opens. Consider the window elements of this program.
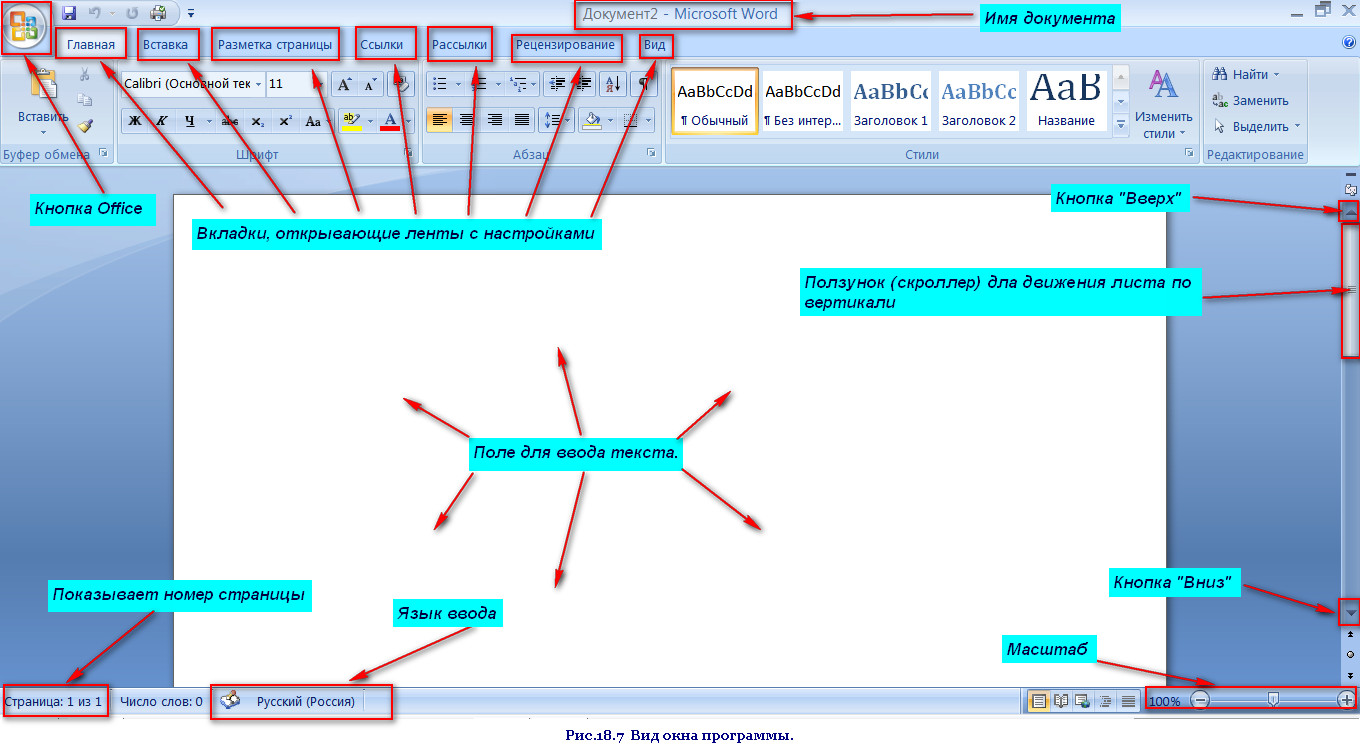
The program window is very similar to an ordinary A4 paper sheet. A blinking cursor indicates where the text you are typing appears. If you need to start from some other place, you just need to click on this section, and the cursor will change the location to the desired one.
Due to the lack of space on the screen, we can only see a certain section of our sheet. To move the sheet, you can use the scroller by controlling it with the left mouse button, or by clicking on the “up” or “down” buttons. After printing starts, the program will automatically shift the sheet for a better overview and will independently move to the next one if the lack of space requires it.
And that's all for today.
We figured out how to print text on a computer using a text editor, and in the next article , we have to go directly to typing, choose the size and style of letters, learn how to select text and change the language of typing.
Waiting for your comments.
Instruction manual
The Windows operating system, which is ubiquitous, by default offers users two main programs for printing text: WordPad and Notepad. Both of them allow you to type text on a computer and print it on a printer, differing only in their functionality. To find these programs, open the main menu on the desktop: “Start” -\u003e “All Programs” -\u003e “Accessories” -\u003e WordPad or “Notepad”.
Opening the program, you will see a window with an empty white field. This is your electronic sheet on which you will print the text. The menu buttons located at the top of the program window allow you to correct and edit it: erase unnecessary letters, cut out fragments, select individual phrases, etc.
To configure for manual printing, you need to click the "File" menu - select "Print".
After each operation, you must click the "OK" button.
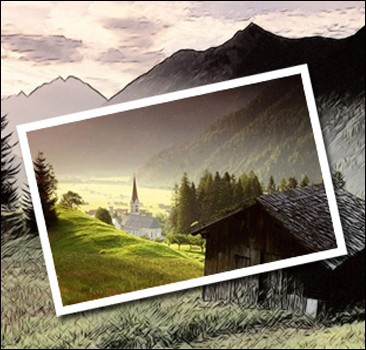
In our information age on the Internet, it would seem, you can find any information, get an answer to any question and download instructions for anything. But the simple question of printing photos without frames is completely unresolved. Many of us, wanting to print a 10X15 photo, used various programs that came bundled with the printer or downloaded third-party programs, but always faced the same problem - the problem of choice (or print a full, cropped photo, but with a frame, the indentation is approximately 5 mm from the edge of the paper, or the entire width, but the photo is cropped). There is a solution.
Instruction manual
Select a photo, right-click on it and click "Print".
Select the printer that prints your photos, and then click the "Printing Preferences" button. Select paper size A6 or 10X15, or 4X6 (depending on printer drivers). Manually adjust the paper size 2mm smaller on each edge. That is, the paper size you should get 98X148mm.
Next, close the window by clicking the "OK" button. In a previously opened window, click Next. In the new window, select “Photo Print Full Page” - “Next”. And here they are beautiful, full-size photos without frames!
note
Foreign printer manufacturers calculate the paper size as 4X6 (in inches). And, as you know, the English inch is 2.54 cm. Accordingly, it turns out that the size is 4X6 (in inches) \u003d 10.16X15.24 cm or, if rounded, 10.2X 15.2 cm. To the expanses of the former USSR, the metric standard has been and still is today, and all photo paper is produced in 10X15 format, which clearly corresponds to 100X150mm. That is why borderless photos are slightly cropped.
Sources:
- borderless printing
One of the interesting and attractive features of many printers is the ability to print texts and images on the surface of discs. The most popular printers that support printing on discs are the models of the manufacturer Epson (for example, Stylus Photo T50, R220 or R320) and Canon (PIXMA iP4200, PIXMA iP5000). A kit with such printers is supplied with a disk with a special program that helps to develop disk design and print the image.