Printing on transparencies or labels. Printer features
Print. How to run on the HP LaserJet 3050/3052/3055/3390/3392?
Change print settings, such as volume or print quality, in HP ToolboxFX
To change the default print settings in HP ToolboxFX, follow these steps:
Changes made to the print settings using the HP ToolboxFX software will be applied to all subsequent print jobs.
1. Open the HP ToolboxFX and click the Device Settings button.
2. Click on the System Settings tab.
3. On the System Settings tab, you can change the settings that appear on the following pages. For more information, help is provided on each page.
Device Information
Paper processing
Print quality. To achieve the maximum, we recommend using new original cartridges for the HP LaserJet 3050/3052/3055 and cartridges or for the HP LaserJet 3390/3392.
Print density
Print modes
System Setup
Date Time
Service
If there are similar parameters in the printer driver, they take precedence over the parameters specified in the HP ToolboxFX program.
Print on both sides (Windows)
In the printer driver, Print on Both Sides (Manual)
only available if automatic duplex printing is not available or is not supported by the media type you are using.
Do not use paper with a density greater than 105 g / m2 (28 lb.). This may cause paper jams in the device.
2. Open the printer driver (see Gaining access to printer drivers).
3. In Windows, on the Finishing tab, select the Print on both sides option.
4. Click on the OK button. The product is now ready for printing on both sides of a sheet of paper.
The printer driver provides instructions and drawings to help you perform manual duplex printing.
On the Finishing tab, select Print on Both Sides.
If the Print on both sides option is not available, open the properties (printer driver). On the Device Settings or Setup tab, select Enable manual duplex printing, and then click OK. Repeat steps 1 and 2.
3. Print a document.
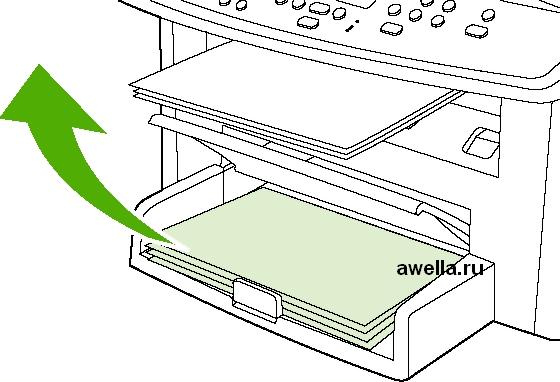

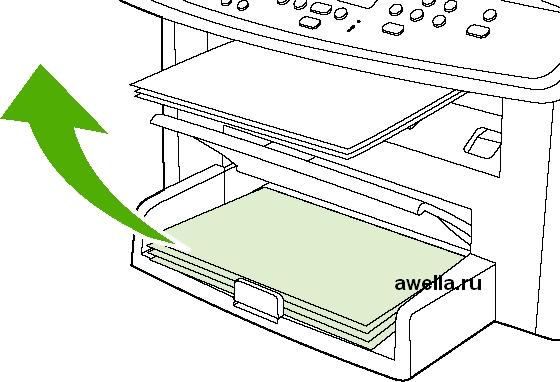
6. Put the stack back in the input tray. Print side down with the top edge toward the All-In-One.
To print on both sides of the paper manually
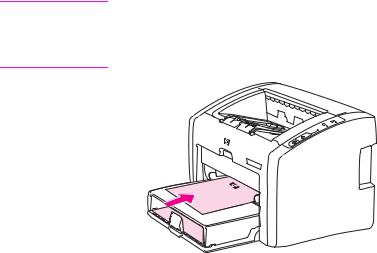
1. Place a stack of paper of the required size in one of the trays. If you need to load special paper such as letterhead, do one of the following:
When using Tray 1, load letterhead paper with the print side up, the bottom edge toward the printer.
When using all other trays, load letterhead paper with the print side down, and the top edge toward the back of the tray.
2. Open the printer driver.
4. Click on the OK button.
5. Submit the print job.
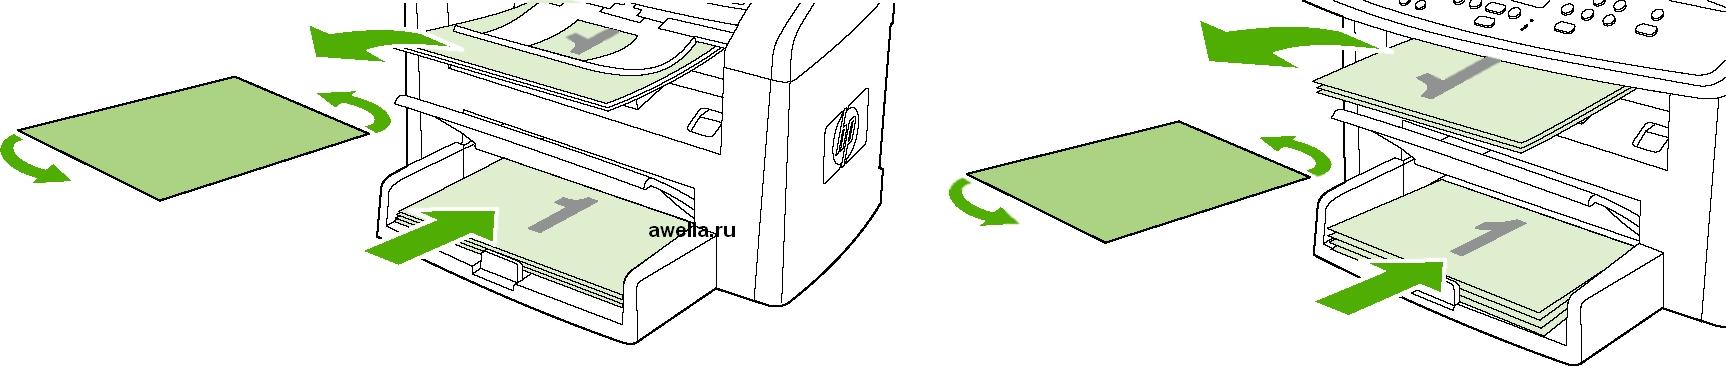
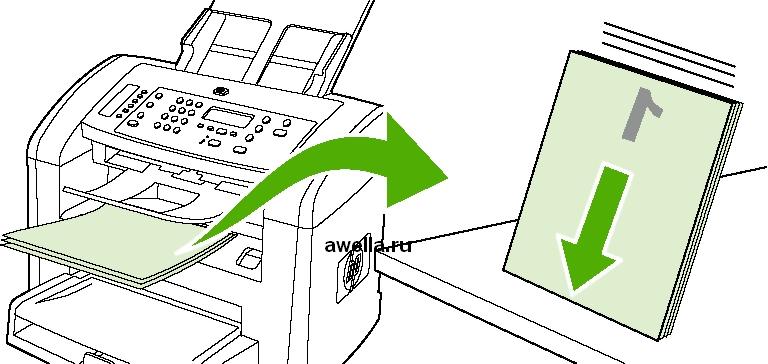
6. Go to the device. Remove any blank paper in the tray 1 from the device. Place a stack of printed sheets in the tray indicated on the control panel. Set the printed side up with the bottom edge toward the machine. To complete the second part of the print job, follow the instructions in the pop-up window that appears before re-feeding the stack.
Print on both sides (Macintosh)
Automatic 2-sided printing can be done using the automatic 2-sided printing module. Manual duplex is available. To perform manual duplex printing, you need to feed the page twice.
To print on both sides of the paper automatically
1. Place a stack of paper of the required size in one of the trays. If you need to load special paper such as letterhead, do one of the following:
When using Tray 1, load letterhead paper with the print side up, the bottom edge toward the All-In-One.
When using all other trays, load letterhead paper with the print side down, and the top edge toward the back of the tray.
Do not load paper with a weight exceeding 105 g / m2 (28 pounds of fine paper). This may cause a jam in the printer.
2. Open the printer driver.
3. Open the Layout pop-up menu.
4. Next to Two Sided Printing, select either Long-Edge Binding or Short-Edge Binding.
5. Click on Print.
To print on both sides of the paper manually
1. In the software, open the properties (printer driver).
2. On the Finishing tab, select Manually print on 2nd side.
3. Print a document.
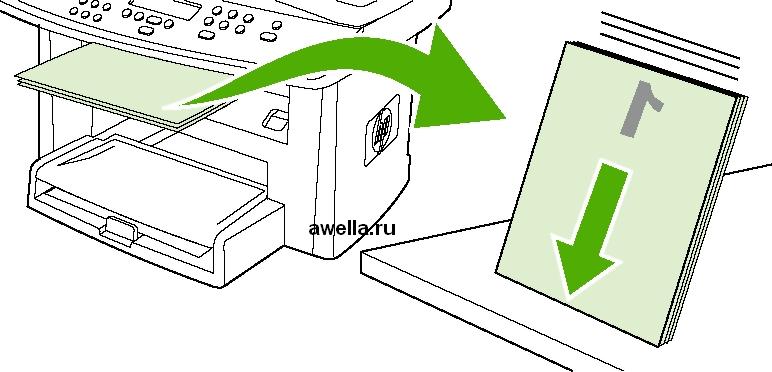
4. After you finish printing the first side, remove the remaining paper from the input tray and set it aside until the manual duplex job ends.
5. Assemble the printed sheets, turn them upside down, and align the stack of paper.
6. Put the stack back in the input tray. Place the paper with the printed side down, top edge toward the machine.

7. On the computer screen, click the OK button and wait for printing on the second side to complete.
To print on both sides of the paper manually (Macintosh)
1. Place a stack of paper of the required size in one of the trays. If you need to load special paper such as letterhead, do one of the following:
When using Tray 1, load letterhead paper with the print side up, the bottom edge toward the printer.
When using all other trays, load letterhead paper with the print side down, and the top edge toward the back of the tray.
Do not load paper with a weight exceeding 105 g / m2 (28 pounds of fine paper). This may cause a jam in the printer.
2. Open the printer driver.
3. On the Finishing tab, select the Print on both sides (manually) option.
4. Click on the OK button.
5. Submit the print job.
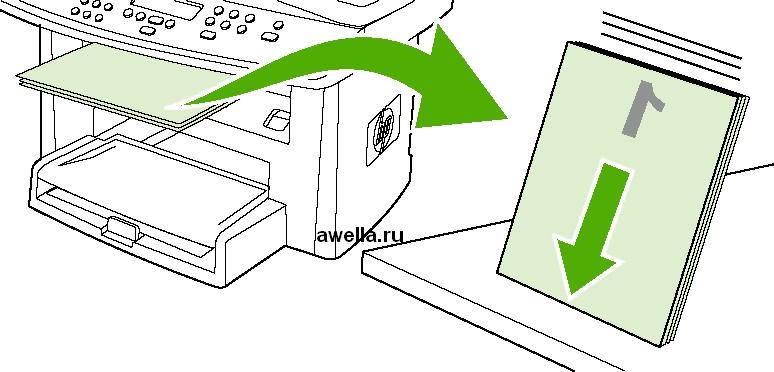
6. Go to the multifunction device. Remove any blank paper in the tray 1 from the device. Place a stack of printed sheets in the tray indicated on the control panel. Set the printed side up with the bottom edge toward the All-In-One. To complete the second part of the print job, follow the instructions in the pop-up window that appears before re-feeding the stack.
7. On the product control panel screen, you may be asked to press a certain key to continue printing.
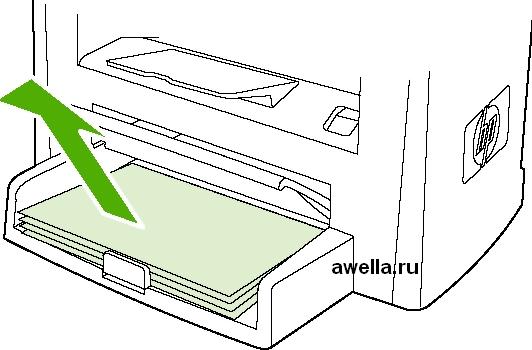
Using the input tray for priority sheet feed (tray 1)
You can feed one sheet with a density of 163 g / m2 or one envelope, transparent film or card into the input tray for priority sheet feed. Load media with the short edge forward and the print side up. To prevent jams and skews, always adjust the guides before feeding media.
When media is fed into the input tray for priority sheet feed, it partially loads the media and pauses its operation. Wait for a stop before serving the next sheet. Only one sheet can be fed at a time.
Printing on special media
When printing on special types of media, use these guidelines.
Not all printer drivers or operating systems are available.
Printing on special media
1. Open the input tray and remove all media.
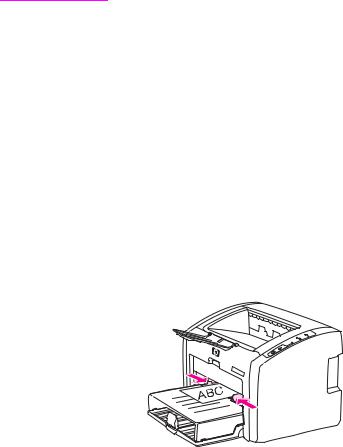
2. Load media. Load media with the top edge toward the device, print side up.
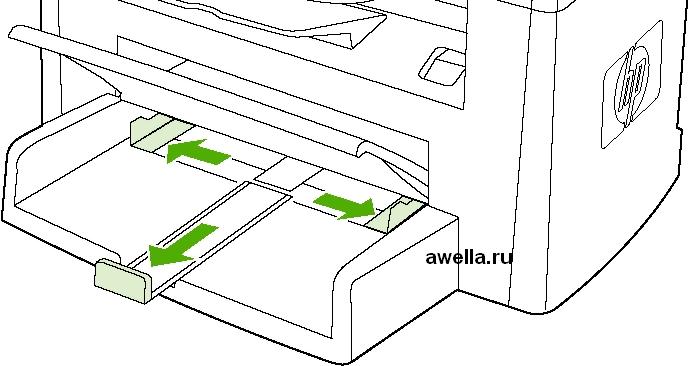
3. Adjust the guides to the width and length of the media.
4. If you are using Windows printer drivers, on the Paper or Paper / Quality tab, select a media type from the Type drop-down list.
When using Macintosh printer drivers, select the media type on the Paper / Quality tab or the Paper (Paper Type / Quality tab for some Macintosh drivers).
Linux Printing
Printing from applications
There are many Linux applications from which you can print using the CUPS printing system (Common Unix Printing System). The device supports printing from any application of this kind.
Print files
The device allows you to print files of various types in the standard way for the CUPS system - directly from the command line. You can do this using the standard CUPS lpr utility, but the driver package replaces the standard LPR tool with a much more convenient LPR GUI program.
To print a document, follow these steps:
At the Linux command prompt, type lpr<имя_файла> and press the Enter key. The LPR GUI dialog box opens.
If you enter only lpr and press Enter, the Select file (s) to print window will open first. Just select the files you want to print and click the Open button.
In the LPR GUI window, select your device from the list and change the properties of the print job.
To start printing, click OK.
Setting Printer Properties
In the Printer Properties window, accessible from the Printers configuration window, you can change various parameters of the device used as a printer.
General:select a name and location for the printer. The name specified on this tab appears in the list of printers in the Printers configuration window.
Connection:view or select another port. When switching from a USB port to a parallel port and vice versa, you must change the device port on this tab.
Driver:view or select a different printer driver. The Options button is used to set default device parameters.
Jobs:listing of print jobs. To cancel the selected job, click the Cancel job button. To view previous jobs from the list, click the Show completed jobs button.
Classes:displays the class to which this device belongs. The Add to Class button allows you to add a device to a particular class, the Remove from Class button - remove the device from the selected class.
Open the Unified Driver Configurator window.
If necessary, go to the Printers configuration.
Select the desired device in the list and click the Properties button.
The Printer Properties window opens.
The window contains five tabs.
Click OK to apply the changes and close the Printer Properties window.
A WARNING
A WARNING
For printing, use only transparencies and labels designed for laser printers, such as the HP transparency and HP LaserJet labels. For more information, see Select print media.
Make sure that the appropriate media type is selected in the printer options window, as described above. The printer adjusts the temperature of the fuser according to the selected media setting. When printing on special media, such as transparencies or labels, this setting helps prevent damage to the media as it passes through the printer.
Before loading, make sure that there are no wrinkles or bends on the media, as well as torn edges or missing labels.
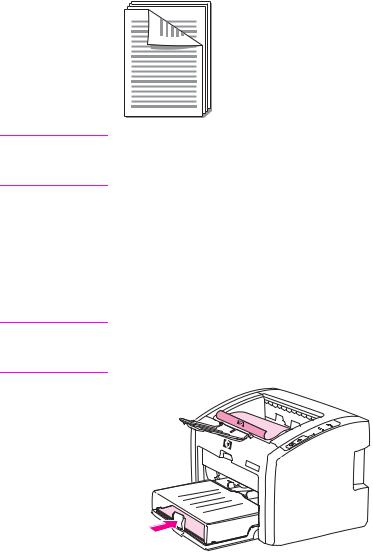
1. One sheet should be loaded in the priority feed slot, and several sheets in the main input tray. The substrate should be fed into the printer with the top edge first and the print side (with a rougher surface) up.
2. Adjust the media guides.
3. Printer Properties (Driver).
4. On the Paper / Quality tab (Paper Type / Quality tab on some Macintosh drivers), select the correct media type.
5. Print the document.
Printing on letterhead and preprinted forms
HP LaserJet 1022, 1022n, and 1022nw printers can print on letterhead or letterhead paper that can withstand temperatures of 200 ° C.
1. Paper should be fed with the top edge first and the print side up. Align the guides with the width of the paper.
2. Open the printer properties (or print preferences in Windows 2000 and XP). For instructions, seePrinter Properties (Driver).
3. On the Paper / Quality tab (Paper Type / Quality tab on some Macintosh drivers), select the correct media type.
4. Print the document.
Note To print the cover page of a multi-page document on letterhead, load the letterhead side up in the priority input slot and print plain paper in the main input tray. The printer will automatically start printing first from the priority feed slot.
Printing on custom-sized media and cards
HP LaserJet 1022, 1022n, and 1022nw printers can print on custom-sized media or cards from 76 by 127 mm to 216 by 356 mm.
To load multiple sheets into the printer, use the main input tray. For supported media formats, see Main input tray.
WARNING | When loading media in the printer, make sure that the sheets do not stick together. |
|
between themselves. |
||
Feed paper with the narrow edge forward and the print side up. |
||
Adjust the side and front guides to fit the media. |
||
Open the printer properties (or print preferences in Windows 2000 and XP). For |
||
for instructions seePrinter Properties (Driver). |
||
On the Paper / Quality tab (Paper Type / Quality tab in some drivers |
||
for Macintosh) select a custom format option. Specify sizes |
||
non-standard media. |
||
Not all printer features are available for all drivers or operating systems. |
||
Note |
||
Information on the availability of functions for a specific driver can be found in |
||
online help for printer properties (in the driver). |
||
Print the document. |
||
For information on manual feed, see Manual feed. |
||
When printing on both sides of a sheet (manual 2-sided printing), sheets must be passed through the printer twice.
Note
Note
Manual two-sided printing can cause the printer to become dirty and reduce print quality. For instructions on contaminating the printer, see Printer Cleaning.
1. Open the printer properties (or print preferences in Windows 2000 and XP). For instructions, seePrinter Properties (Driver).
2. On the Finishing tab, select Print on both sides.
(manually) (on some Macintosh drivers you must select Manual Duplex). Select the desired binding option and press the OK button.
3. Print the document.
Not all printer features are available for all drivers or operating systems. Information on the availability of functions for a specific driver can be found in the online help for printer properties (in the driver).
Printing on both sides of the paper (manual 2-sided printing) |
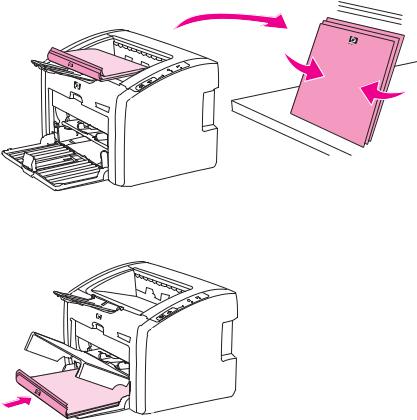
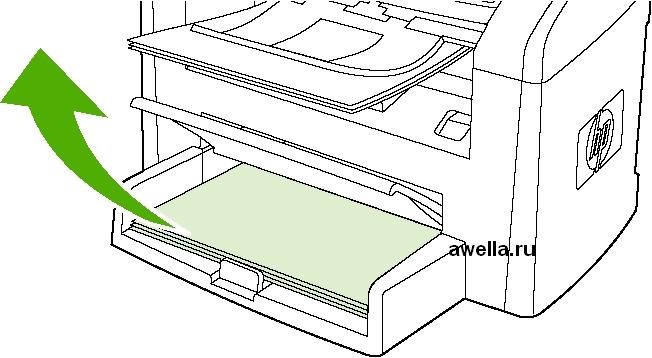
4. After printing the first side, collect the printed sheets. Turn the stack upside down and align it.
5. Reload the stack in the feed tray. The first printed side should be down, with the bottom edge toward the printer. Close the input tray cover.
6. To print on the second side of the control panel, pressSTART.