Samsung tv account
This process is not so complicated as it may seem to novice users who do not know the basics of video capture. In fact, not even any specialized software is required. In principle, for this, you can even use the built-in video editor, which is included in the set of operating systems of the Windows family, called Movie Maker. Although, to get a better result, you can use more advanced utilities like Adobe Premiere or iMovie for Apple-systems. The process of device recognition and video capture is practically no different. Only a slight change in the commands themselves used in a given program is possible.
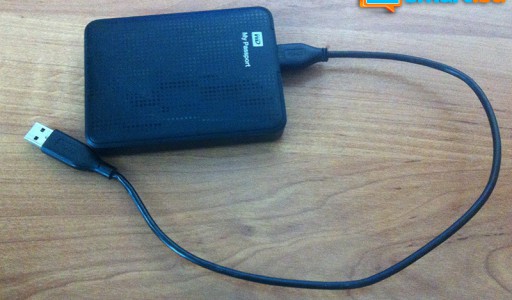
How to record video from a TV to a computer
So, to record video, whether it be a movie or a television program, you must use the AV cable, and if you have, then the S-Video cable. Using the second option gives the best quality. However, the first option is good, especially since almost all TV models have such a cord as standard. The cable is connected to the audio and video connectors on the TV or optional set-top box (if used) in accordance with the colors of the plugs and connectors on the cable and TV (set-top box). It goes without saying that they must match.
The USB tip of the cord must be connected to the appropriate port on the computer or laptop (usually these are USB 2.0 / 3.0 interface jacks). There is no fundamental difference when using the newer interface. Anyway, the recording will be made in real time, that is, the process will continue while the program, program or movie is being broadcast.
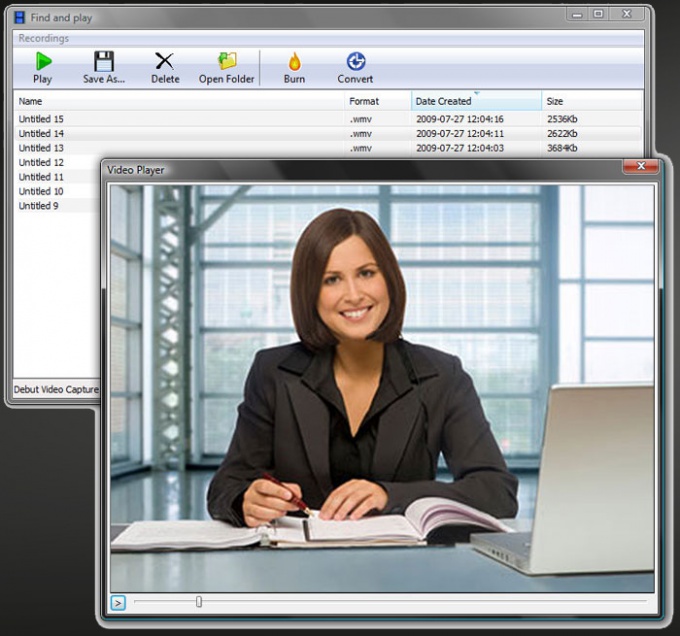
Next, you need to run the selected application for video capture and in the main menu "File" (File with the English interface, which is more common) select the option Capture or Capture Function. In the proposed video capture options, you need to use the Capture From Digital Video Camera function, which allows you to record with recognition of the video system (digital camera). In this case, a new device is recognized. After that, it remains only to indicate the name of the downloaded file (when the program requires it) and select the path to save the result by specifying the necessary folder on the hard drive. By and large, this almost coincides with the question,. Only here is a hard drive used as a storage place.
To start recording, press the Start Capture or Start Import button to the program you are using at the moment when the program starts broadcasting or playing video from the player. At the end of the recording, we simply stop the process with the corresponding Stop Capture button. The final video file will be saved under the name and in the place that were specified in the process of preparing for recording.
It goes without saying that after all this, the resulting file can be edited at will, using professional and semi-professional software products that have ample opportunity to improve the quality of the received video material. But this is a separate issue.
Instruction manual
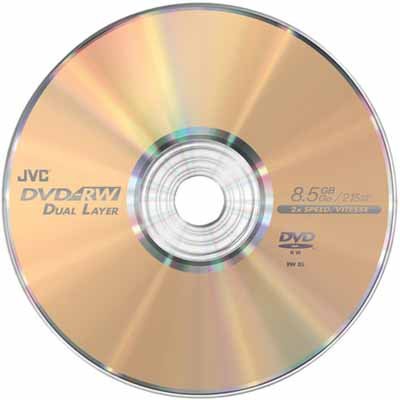
Read the instructions for your DVD burner. Find out the types of discs that can be recorded with this unit. Usually these are DVD + R or DVD-R formats. There are universal models that can burn DVD-RW drives.
Connect the DVD burner to your TV. To make this connection, use the connectors that are required to transmit the signal from tVand not to him. You can find out the name and purpose of the ports by studying the user manual for the recorder.
The functionality of most recorders allows you to use the delayed start method. Open the recorder settings menu and check the accuracy of the set time. Set the timer to a specific interval in which recording will be performed. In this case, it is better not to save disk space. Set the timer so that the recording starts a little earlier than the scheduled time, and ends later.
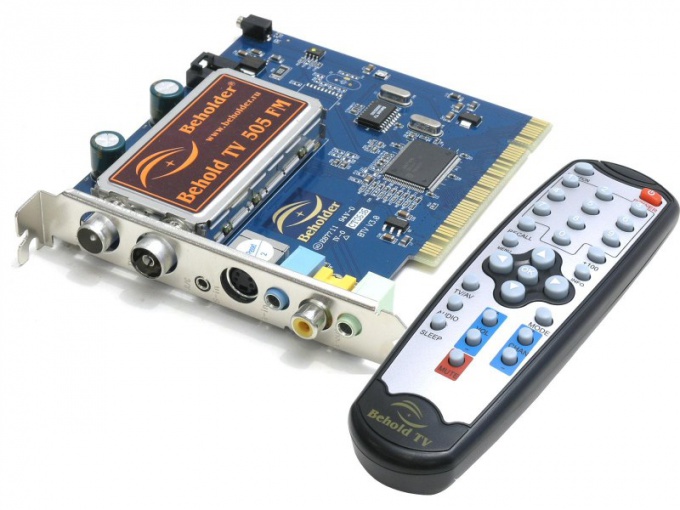
If you do not have a DVD recorder, then use a personal computer to record video. You will need a video card in which there is a port for receiving a signal. Connect a TV to it using special cables and adapters.
Install a program that allows you to view the image transmitted on the channel you are using. Install the Fraps utility and configure its settings. At the right time, run both utilities and enable recording of the image transmitted to the computer monitor. Burn the resulting video file to a DVD.
In the variety of television programs of modern television, occasionally really worthwhile programs come across, doubly valuable precisely because of their rarity. It is possible that you will find them so valuable that you even want to record them for re-viewing in the future.
Instruction manual
Now that everything is ready, all you have to do is press the record button in the tuner control program interface and, when the transfer is over, stop recording with the stop button.
Now in the place you specified on the hard drive there is a video file with your favorite show.
Record photos on disk can be performed in various ways, however, the most correct way to record photo using special recording programs diskov. One of the most popular programs of this kind is Nero. Burn Photos to DVD disk using Nero is a simple task.
Instruction manual
Open the Nero program. This program, in fact, is a set of utilities for various manipulations related to recording and erasing compact disks, as well as for preparing content for recording on this type of media. To record photos, select Nero Burning Rom. Then insert the DVD disk to the drive, and at the top of the program window, select the type diska, on which data will be recorded. In our case, a DVD. Then click the "Add Files" button. A window opens that resembles the standard Windows file manager - Explorer.
In the right part of the add files window, find the folder with photos that you want to record on disk. Take either the whole folder or separate photofor recording and drag them with the mouse to the left side of the window. Watch out for DVD full indicator disklocated at the bottom of the program window. On DVD disk 4.7 gigabytes of information are placed, that is, more than a thousand photos with a resolution of 8 megapixels can be recorded on it. After you dragged into the record field all the necessary photo, Make sure that disk not completely filled out, otherwise the recording may not take place.
To start physical recording of photos on disk Click the Burn button. Monitor the status of this process and do not remove the compact disk until it is completed. Otherwise, the storage medium may be damaged (if it is not rewritable disk) After burning, the drive will open automatically. Insert disk back and check the file recording quality.
Helpful advice
If you want to be able to add photos or other files to an incomplete disk later, cancel its finalization before burning.
Sources:
- burn disc with photos
The many online video viewing services on the Internet that do not allow you to record and save these videos to your computer’s hard drive. For many users, this is associated with certain inconveniences.
Instruction manual
To save video from one of the online services, such as YouTube, RuTube, Vimeo, etc., use the browser cache. To do this, download the desired video on the site to the end, and then use the explorer to open the folder with the browser cache. To do this, go to C: \\ Documents and Settings \\ [username] \\ Local Settings \\ Application Data, where you can find the folder with a name that matches the name of your browser. Locate the cache folder, in which the downloaded video file will be located. Copy it. There is a more convenient way to search for files in the cache in Opera’s Internet browser: for this, type opera: cache in the address bar and check the box for the desired file type.
To save video from various online services, there are websites with the proper functionality. Examples are SaveFromNet, Save2Go, etc. In the appropriate field on this site, insert the address of the web page with the video you want to save. After processing the request, links will appear for downloading the file in various formats and resolutions.
For popular web browsers, there are specialized extensions (add-ons, plug-ins) that allow you to record online video on your computer’s hard drive. After installing this extension, links to save the file will appear next to the video on the Internet pages.
An alternative to these methods can be the use of one of the programs designed to record video from the monitor screen. This method will be more effective if you want to record an online broadcast. Among such applications, you can highlight Fraps, Total Screen Recorder, Camtasia Studio, etc. Select one of the programs, install and run it. Click on the record button in the application interface. After that, enable video viewing and expand it to full screen. Wait for the end, then click the "Stop" button in the application.
Related videos
Previously, the problem of recording television broadcasts was solved with the help of a video player, but, you must admit, they are a little outdated, and not everyone now uses them. Now there are many new and convenient ways to record TV shows on removable media. If you have some simple devices and knowledge, you can easily do this.
Instruction manual
Use the Windows Media Center program. It records live shows and movies on your computer. Recording can be scheduled in advance and automatically record any TV shows. To work with Media Center, you will need a TV tuner and any source of TV signal (antenna or cable). Recorded programs will be saved to the hard drive in WTV format.
Connect the TV tuner to your computer and install the automatic software. After installing the driver, go to the TV signal settings and select the desired channel. Then go to the Windows Media Center program and click Record. Please note that TV recording should be done while the computer is turned on.
Get a DVD player with a hard drive. This is the closest modern option to the recording method through the good old VCR. The principle of operation is almost the same. Only the recording of the TV show is not on the tape, but on the disk. Also on such DVD-players you can set a timer for the time at which the recording of the desired program will begin. It is very convenient if you are absent.
Write down the program you need using the console. It usually comes with digital television. Using the remote control, select the desired gear, set the recording time, and it's done. It is also very convenient that with the help of such a set-top box, you can pause a telecast in real time. This function is very convenient and greatly simplifies life, if you need to go away for a while, but you don’t want to miss the most interesting.
But if all these newfangled gadgets aren’t for you, get a used VCR, a few blank tapes (probably for sale somewhere else) and record programs in an old proven way. True, the recording quality will not be the same as digital. In addition, there is not much that can be recorded on a cassette, unlike disks or hard drives.
Related videos
Sometimes you need to burn mp3 to a DVD disc to take it with you on the go, or listen to it on the appropriate player. If the disc was not recorded correctly, the music device will not be able to play it or display all the recorded items. Therefore, it is advisable to use programs to burn such DVDs.
You will need
- - Nero, or any other program for burning optical discs
Instruction manual
In order to burn mp3 files to DVD, install the specialized program Nero.
Launch the Nero Express app. To do this, go to the "Start" menu, select "All Programs" - "Nero" - "Nero Express".
After opening the program, select "Data", select the sub-item "DVD with data." The “Disk Content” window appears.
Add your MP3 files to the project. To do this, click the "Add" button on the right side of the program. A window opens displaying the file system of the hard drive. Select the necessary folders and files and press the similar Add button in the lower right corner of the application. The previous menu opens, which displays the selected files. As the disk fills with content, the sensor at the bottom of the screen will change, which shows the remaining disk space.
Press the "Next" key. The disc burning settings window opens. Under Current Recorder, select the drive you are using. In the "Disk Name" field, enter a name for the future disk. Highlight the option “Allow adding files” if you want to write something at the end of burning. After completing the settings, click the "Record" button.
Creating an Audio DVD differs from creating an ordinary MP3 disc in that in the Nero Express selection window on the left side of the window, select “Music”, and on the right side select the desired format (most often “Jukebox Audio DVD”). This disc can be played on any DVD player that supports MP3.
note
To burn a disc using standard Windows tools, insert it into the drive, select the necessary MP3 files and move it to the disc. Right-click on the drive icon and select "Write data to disk." It will also allow you to create a DVD that plays successfully on most music players.
Helpful advice
There are many other programs that similarly allow you to record MP3s. For example, to burn a DVD in the CDBurnerXP program, you need to create a data disc and copy the desired songs onto it.
Sources:
- burn dvd disc for player
Despite the proliferation of various USB drives, a certain category of users prefer to store information on DVD drives. To write files to these media, you must use special programs or standard utilities of operating systems.
You will need
- Iso File Burning.
Instruction manual
If you do not want to use additional utilities, write down information using standard operating system tools. Create a folder with an arbitrary name on the hard disk. Copy into it all the data that you want to write to the DVD-drive. Remember that the size of the folder should not exceed the amount of free space on the selected drive.
Wait until the menu for preparing recording parameters opens. Fill in the “Disk Name” field. Choose an option for future use. If you plan to start the disc using video players or music centers, then select "With CD / DVD player." If you are working with a DVD-RW disc and want to further overwrite the data on it, then select "Like a USB flash drive."
To create specialized disks, you must use other utilities. If you want the DVD to start before loading the OS, then use the Iso File Burning program. It is designed to write files stored in ISO-images of disks. Run this program and select the desired DVD drive.
Specify the image file whose contents you want to burn to disk. Click the ISO Record button. Wait for the process to complete. Restart your computer and open the BIOS menu. Go to the Boot Options menu and find the First Boot Device field. Press Enter and select Internal DVD-ROM. Save the changes, restart the computer and wait for the program to start from disk.
My favorite movie, cartoon, interesting program I don’t want to erase from the computer’s memory. But they take up a lot of space. There is a dilemma: leave everything as it is, spend Internet traffic or record video on disk and watch not only through a computer, but also through any player.
You will need
- - DVD-R;
- - movie in .avi format;
- - computer;
- - a program for burning discs.
Instruction manual
Prepare a DVD-R format disc. They are played by players at times better than DVD-RW (which is more suitable for saving documentation and photos).
Remember the address of the folder in which the file prepared for recording is located. This must be done in order to quickly find it among the other documents on the computer. Make sure the file is in .avi format again.
The most common recording program is Nero Burning ROM. If it is already installed on the computer, open it.
Insert a blank disc into the drive. In the window that opens, click on the inscription “Create data disc”\u003e “Video CD / DVD”. In order for the tracks to be well read by the player, they must be burned to a high quality. To do this, select the minimum burn speed. Click “Start Burn”, wait until the recording is complete.
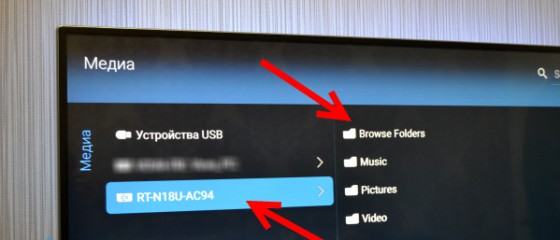
If you like to watch television programs, but don’t have enough time to fully devote yourself to your favorite activity, you can use one interesting function of smart TVs - record on the USB flash drive of the program that you want to watch in the future. Previously, this was impossible, but with the advent of Smart TV, the boundaries of the possible have expanded significantly.
The option of capturing video and its further transfer to external devices has become something commonplace. A flash drive can act as this storage. But it is important that it be formatted, otherwise the TV simply will not see the medium and will not be able to transfer video to it. Of course, then you can watch your favorite program online or download from the Internet, but intercepting a digital or satellite signal is much more interesting.
SocialMart WidgetHow to choose a USB drive
When learning how to transfer a program from a TV to a USB flash drive, you first need to find out if this feature is available on your device. Not all televisions are capable of copying a signal and storing it in memory, or writing it to a drive, therefore, even if you have a smart TV, it is advisable to clarify this nuance in the instructions.
If everything is clear with the TV, and the signal can really be intercepted and recorded, then now we need to find out how things are with the carrier itself. For the purpose of recording, you can use not just any device, but only some, and it is desirable that there is a large amount of memory and a format suitable for a TV set. As a rule, a new flash drive has the standard NTFS format, but you can use a special program to fix it.
Media preparation is important. If you do not format the USB flash drive:
- LG TV “will not see” the USB flash drive;
- Recording will happen, but the video will not work;
- If the recording is played, there will be no sound, the picture will be “blurry”, noise will appear, etc.
 To avoid these troubles, it is advisable to take a USB flash drive no less, but no more than 4 GB. And be sure to format the device by choosing the FAT32 format. It supports most LG TVs with Smart TV, so you will not lose. Although there are televisions that do not even see such flash drives, because for them you can take a different format.
The file system can be changed both from a Samsung TV and on a computer - to whom it is more convenient. But in any case, it is important to delete all the information that was already on the device. It already disappears after formatting, but if there is something important there, it is advisable to copy the data to another medium.
How to record video from an LG TV to a USB flash drive
As already mentioned, recording is possible only if the TV supports this function and correctly selected, formatted means for storing information. The principle by which one can make one on an LG TV, although depending on the features of the model, some of the nuances can differ significantly from the standard. Therefore, before engaging in such a procedure, it is advisable to find out which method is suitable for your technique.
The differences relate to the names of menu items, their functions, etc., but the essence remains the same, because users can easily customize the recording process with their own hands. In some LG models, we record TV shows through the “Schedule Manager”. Indicated:
- The channel from which it will conduct television recording;
- The date when the recording process begins;
- The time and duration of the process;
- The period during which the recording will be kept.
 In addition, if the user is interested in periodic recording, this can also be done by specifying all the parameters mentioned, but adding to them the “recording frequency”.
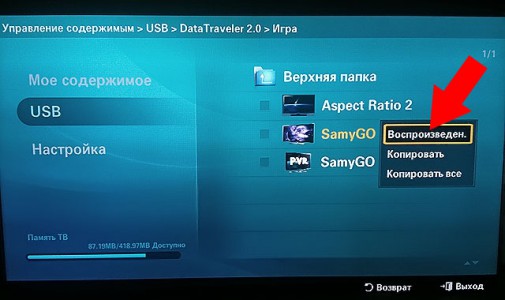
If you record movies on Samsung Smart TVs, you need to capture video through the "Multimedia" menu. Another way - “Photos, videos, music”:
- We need to find "Recorded TV-pr";
- Insert a flash drive, after which it will be formatted if the user has not done this procedure previously on the computer;
- As soon as they start showing the program, it will be recorded on the device.
Just keep in mind that the recorded content can only be viewed on the same device on which it was recorded, that is, on the TV, and not on the computer. In addition, it is important to consider that the broadcast will be successful only if you record digital and satellite signals, and you can not copy analog television.
 Here is the most common instruction:
- Insert the USB flash drive into the connector;
- Using the Magic remote, press the button with the wheel drawn;
- Select "Record";
- “Stop recording” when it is no longer needed.
Following these instructions, you can confidently answer the question "can I record a movie on the drive directly from the TV." The answer is yes.