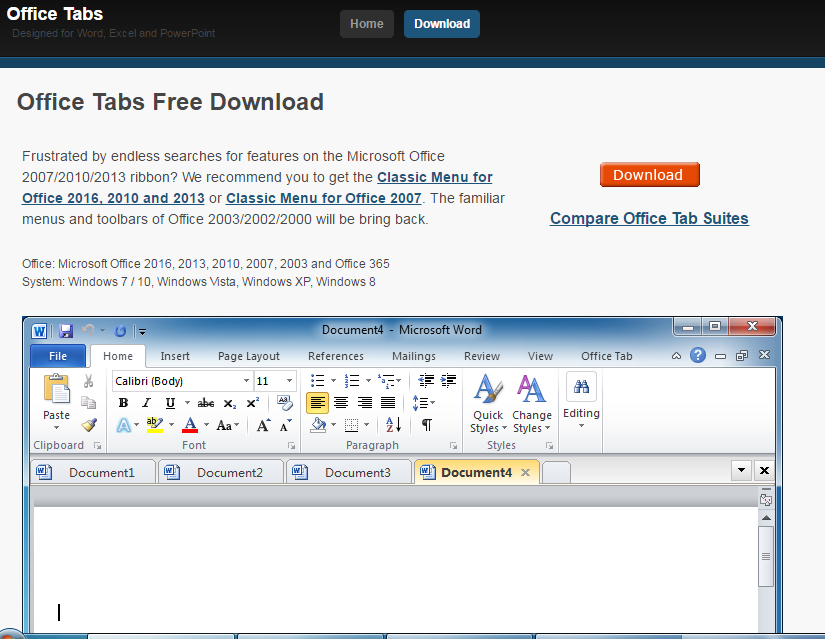
What is the office tab. Add tabs to the Microsoft Office interface.
Everyone knows how it became convenient to work in a single browser window with the advent of tabs that allow you to switch from one window to another. open pages. Utility creators Office tab embodied this idea for Microsoft Office programs.
The free version of the Office Tab utility allows for the three most popular Office applications (Word, Excel and / or PowerPoint) to open files in separate tabs of one window. At the same time restrictions free version completely irrelevant.
Paid versions cost: Office Tab - $ 25, Office Tab Enterprise - $ 35 (www.extendoffice.com)
Supports work: Microsoft Office 2003/2007/2010
Supported operating Systems
: Windows 7, Windows Vista, Windows XP, Windows 8
Homepage free version: www.office-tabs.com
Consider the main points that arise when working with this program.
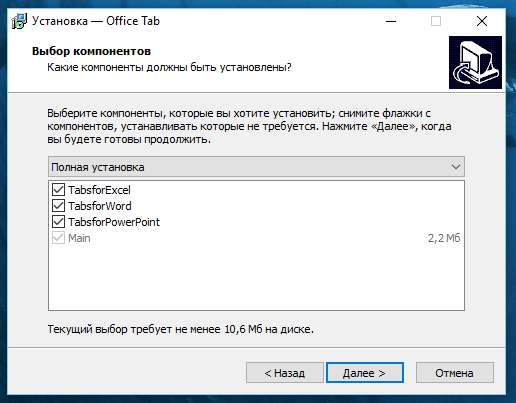
Installing Office Tab is no different. In the wizard, among other things, the user is prompted to choose which MS Office applications will work with. this program: Word, Excel or PowerPoint, or in all at once (see Figure 1).
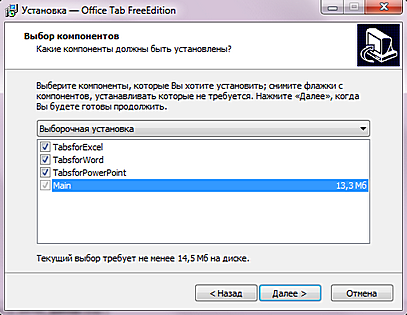
Fig.1. Install Office Tab
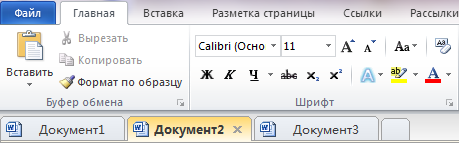
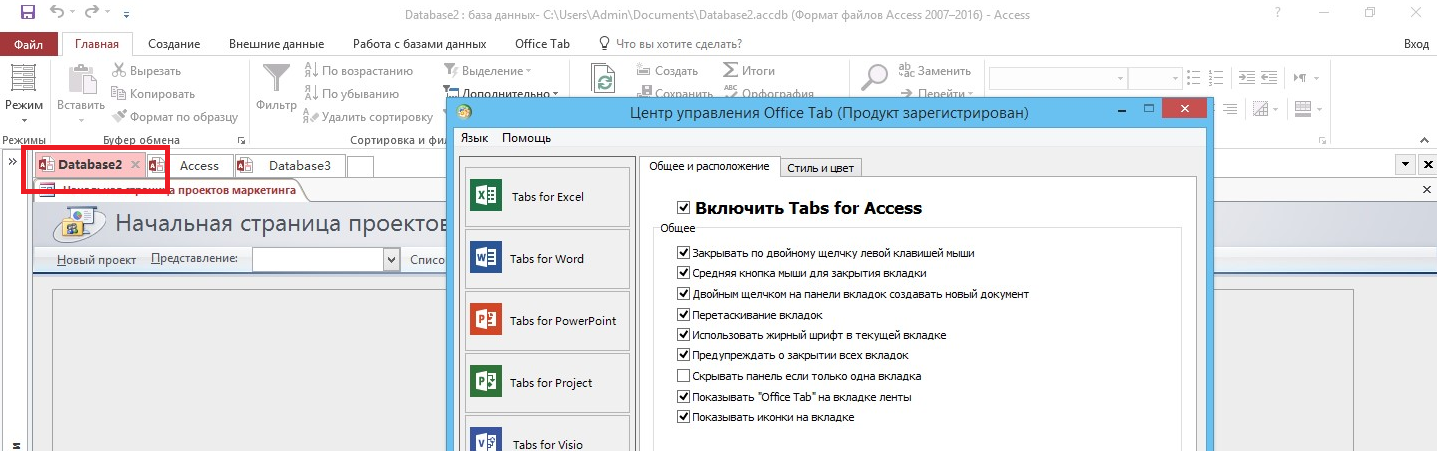
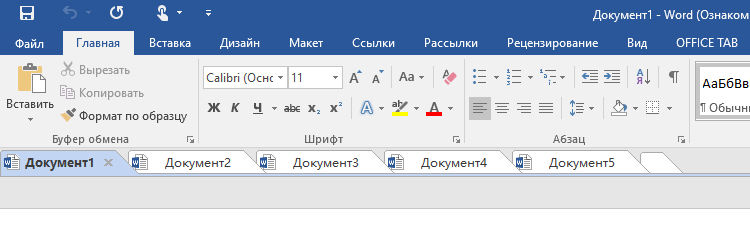
After installation, an additional panel will appear in the selected Office applications on which tabs will be available. open files (see figure 2).
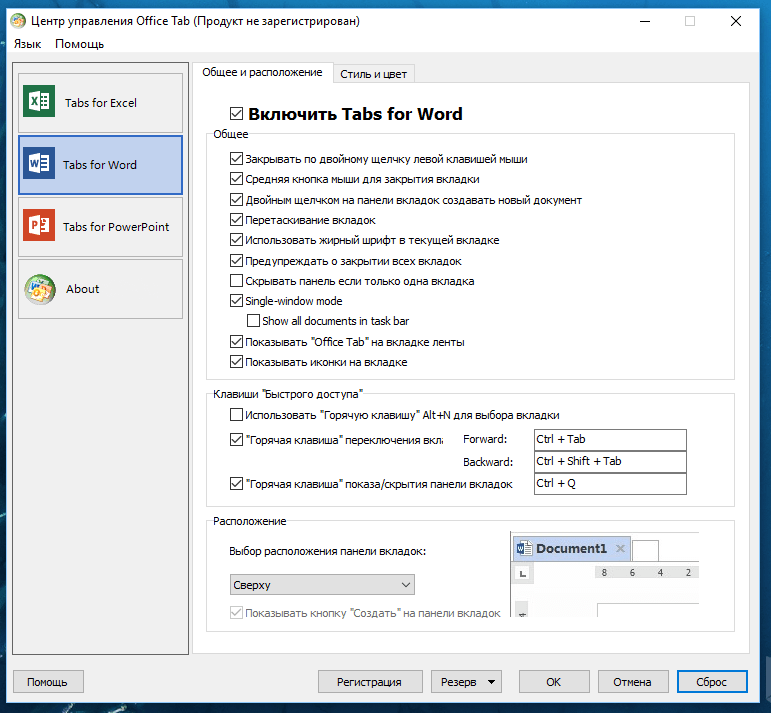
Office Tab has a rather large selection of options for customization. The user can enable or disable such parameters (see Figure 3):
- close the tab by double-clicking the left mouse button or the wheel;
- double click on the toolbar opens a new document;
- ask again when closing all tabs;
- setting shortcuts.
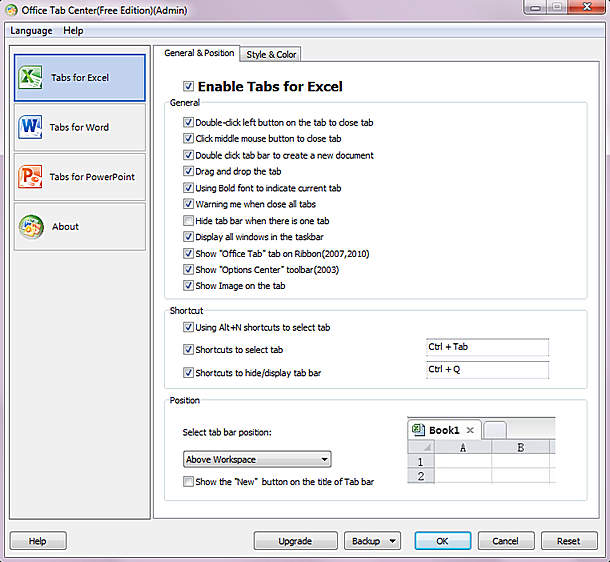
Fig.3. Office Tab Options
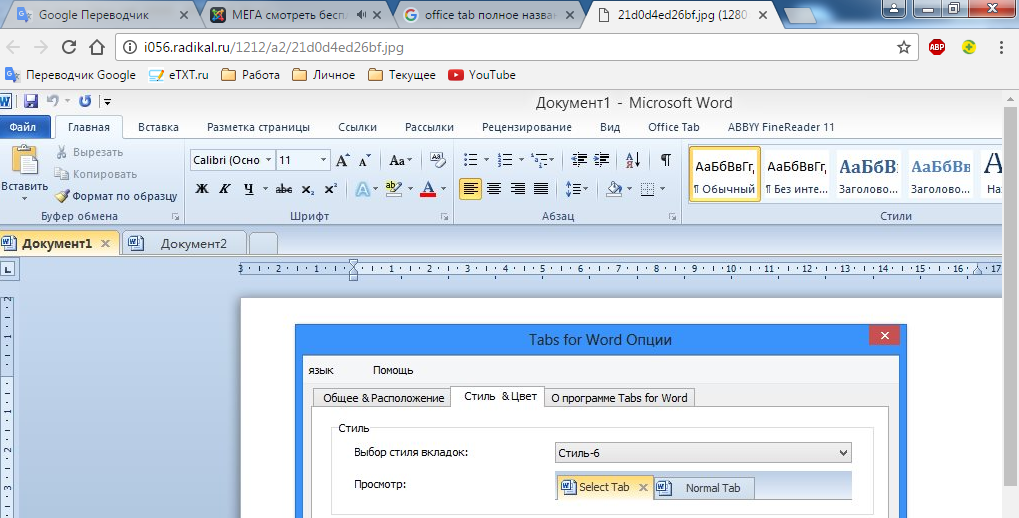
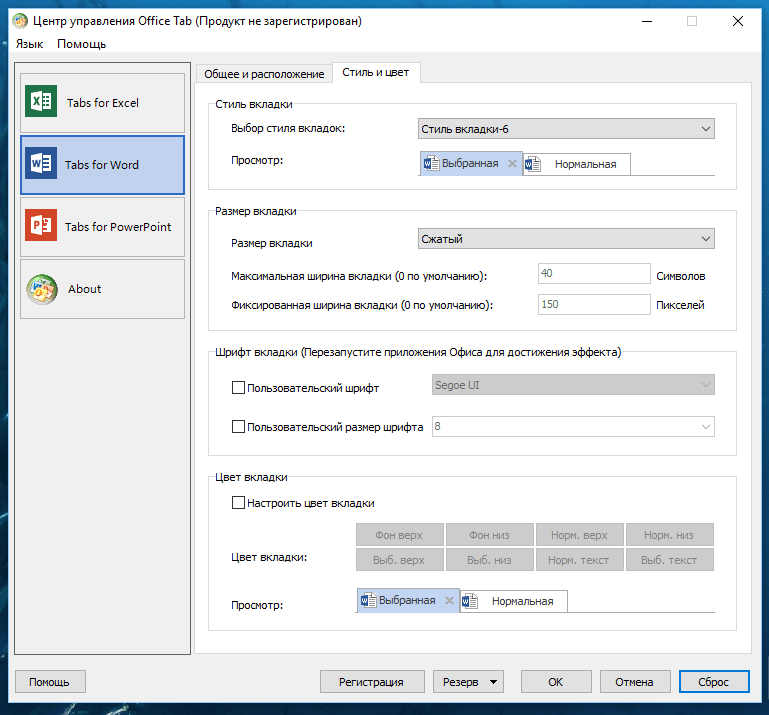
On the additional tab (see figure) of the settings window you can:
- select tab style;
- specify their layout parameters;
- set the font parameters for displaying the file name on the tab (see figure 4);
- customize the color scheme for the tab bar, inactive tabs and the active tab separately.
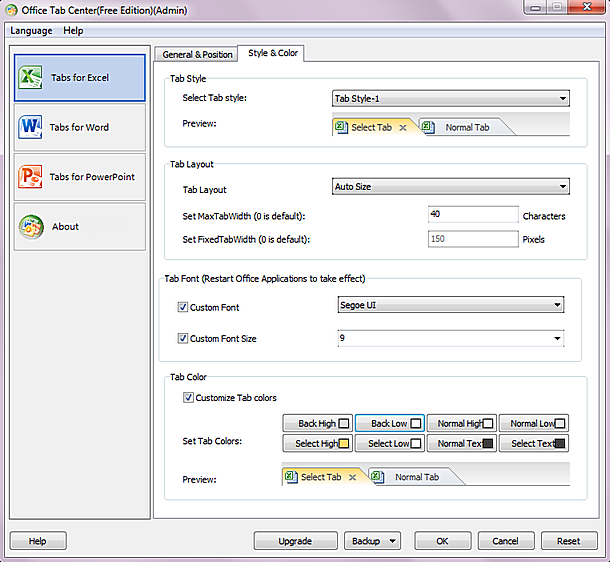
Fig.4. Advanced Office Tab Options
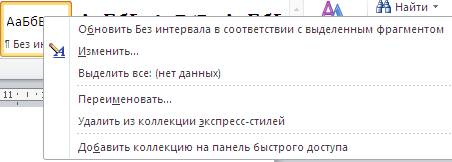
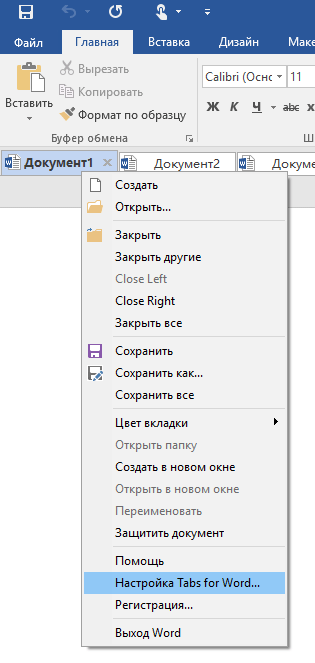
Clicking the right mouse button on the tab brings up a context menu with a fairly extensive list of commands (see figure 5).
From it you can perform the following actions:
- opening and saving a document;
- rename open document. Which, in my opinion, is very convenient;
- tab lock;
- opening tab settings window.
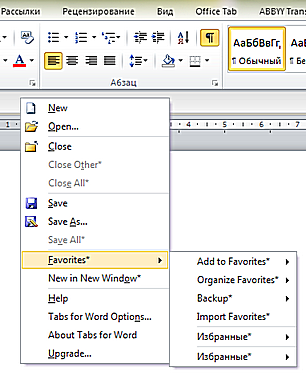
Fig.5. Office Tab Context Menu
It should be noted such an interesting feature of Office Tab, as maintaining a database of selected documents, by analogy with Internet browsers (see fig.). To add a document to Favorites for its tab, open the context menu in which to turn to the item Favorites (Favorites). In addition to the usual actions to add documents to Favorites and managing them, you can also create backup copy and import Favorites.
A brief description of the modes tab Home
Home tab contains five panels:Clipboard, Font, Paragraph, Stylesand Editing . In order to find out which mode the button represents, you need to move the mouse cursor to the button and wait a bit. A window will appear below that will display help information about it.
Consider the modes in more detail.
PanelClipboard. The modes of this panel are associated with the clipboard. What it is? This area of memory where fragments with the text and drawings are located. About how to copy to the clipboard and copy to the text of the document we have already considered.
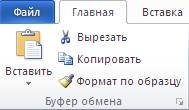
The panel contains the following modes:
Allows you to paste text from the clipboard. Below the button is an arrow (), if you click on it, a drop-down menu with modes will appear:

Allows you to paste text with pictures from the clipboard with formatting elements.
Allows you to paste text with images from the clipboard without formatting.
Allows you to insert only text without pictures from the clipboard without formatting.
Special insertallows you to insert text in a different format. Used rarely.
Paste by default- brings up a window with program parameters, the Advanced tab. Used rarely.
Allows the selected fragment to be placed on the clipboard. In this case, the selected fragment will disappear. Used to move a fragment;
Allows you to copy the selected text or graphics to the clipboard. At the same time, this fragment will remain in place. Used to copy, that is, duplicate text;
![]() -
allows you to format one piece of text as well as it is done elsewhere. In order to do this, place the cursor on a place in the test that serves as a template for formatting. Then click on this button, find the text that should have the same formatting, select it. After the left mouse button is released after the selection, the fragment will be formatted, as in the original location. Pretty useful feature.
-
allows you to format one piece of text as well as it is done elsewhere. In order to do this, place the cursor on a place in the test that serves as a template for formatting. Then click on this button, find the text that should have the same formatting, select it. After the left mouse button is released after the selection, the fragment will be formatted, as in the original location. Pretty useful feature.
Now we note that some modes may not be involved, that is, not to work. If the buttonCut out it looks like this, the mode can be used. If the button looks different -(that is, to have faded colors), then the mode cannot be used. This is because if a piece of text is selected, the mode is enabled and it can be used, if there is no selection, then nothing can be placed on the clipboard and the mode does not work.
At the bottom right of the panel there is a button with a cross (). If you click on it, then a clipboard window will appear on the left side of the window, as shown in fig. below.
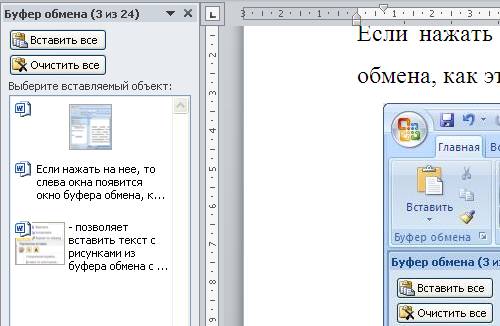
If you copy the selected fragment, it will be placed on this panel. Then select the fragment again and copy it to the clipboard. He will appear there again. And so on. And so you can put 24 fragments. Now you can insert any piece in the text. To do this, move the mouse cursor to the place where you want to insert it, click the left mouse button and then click on that fragment in the clipboard panel that you want to insert. To remove the panel, click on the button with a cross, which is located on the upper right of the panel ().
PanelFontallows you to change the font characteristics (see figure below).
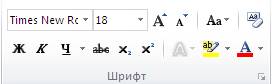
The panel contains the following buttons:
Set font type. If you click on the check mark to the right of the field (), then a list of types of fonts will appear, as shown in Fig. below.
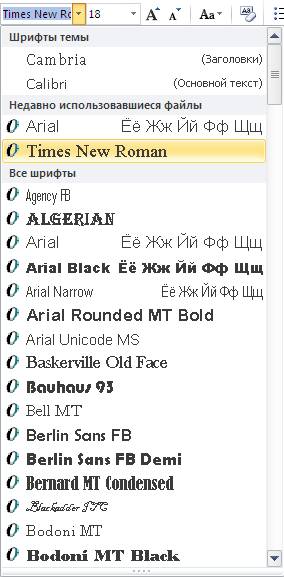
In this drop-down menu, you can select the desired font type. If the desired type is not in the list, then you can view other views using the scroll button (on the right in the panel), as is done to scroll the text of the document. When the desired view is found, move the mouse cursor to this name and click and release the left mouse button. It calls to click on the type name.
If a selection with a text has been selected, the type will be changed. If the fragment was not selected, then if you enter new characters from the keyboard, they will have a new type.
Allows you to set the font size. If you click on the check mark to the right of the field (), then a list of sizes will appear, as shown below.
This panel has size values. If they do not fit, the scroll bar will be enabled, which is located on the right side of the panel. In this example, all values are displayed, so the scroll bar is empty, that is, does not contain a slider and has a faded appearance.
Note that it is possible to install not only the specified sizes. Suppose we need to set the size13,5 . To do this, click on the top field, without calling the panel and enter this value from the keyboard, then press the keyEnter. If a piece of text has been selected, it will change its size. If not selected, the following characters entered from the keyboard will have a new size.
Increase the size of the selected font by 2 units.
Reduces the size of the selected font by 2 units.
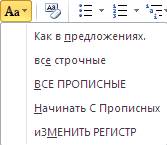
Convert text to all CAPITAL or lowercase. If you click on the triangle icon (), then a panel will appear with the modes, the names themselves make it possible to understand how the mode works.
Remove formatting from the selected fragment.
Use of symbolsin bold(example).
Use of symbolsin italic (example).
Use of symbolswith underscore ( example).
Allows you to cross out characters (example).
Allows the use of subscripts (example).
Allows the use of superscript characters (example).
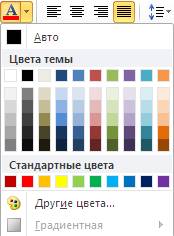
Allows you to change the background color of the text (example). If you press the button, the cursor will look like a pencil. If you select the text, the text will change its color. In order for the cursor to take its usual form, that is, to exit the mode, then again press the same button. In order to set a different color, click on the triangle to the right of the button (). At the same time, a panel with colors will appear, which allows you to set the current color.To do this, click on the desired color.

Allows you to set the color for text. It works approximately as the previous mode (example ). To set a different color, click on the triangle to the right of the button (). At the same time, a panel with flowers will appear. Next, click on the desired color.
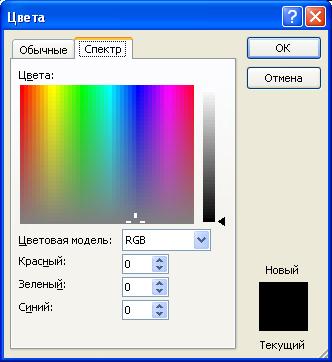
You can also adjust the color using the modeOther colors . The window shown below appears on the screen. TabOrdinary there are color swatches. Click on the desired color and it will appear in the box.New then by buttonOK .
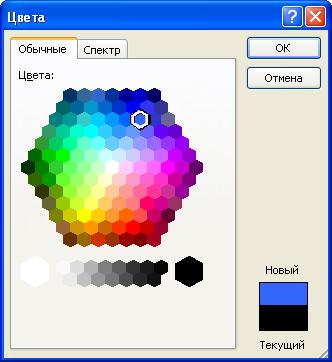
On the Spectrum tab there are more options for choosing colors. Color can be selected either in the main field by clicking the left mouse button, or set numerical values.
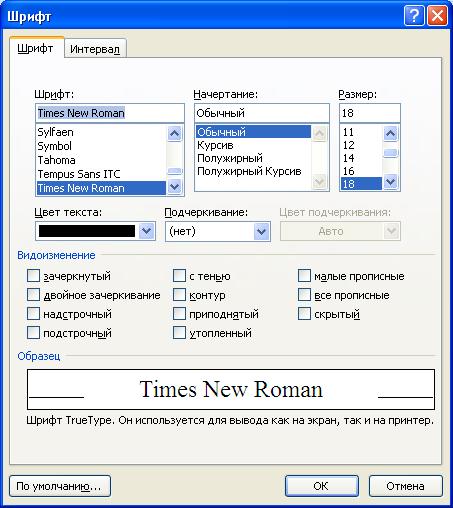
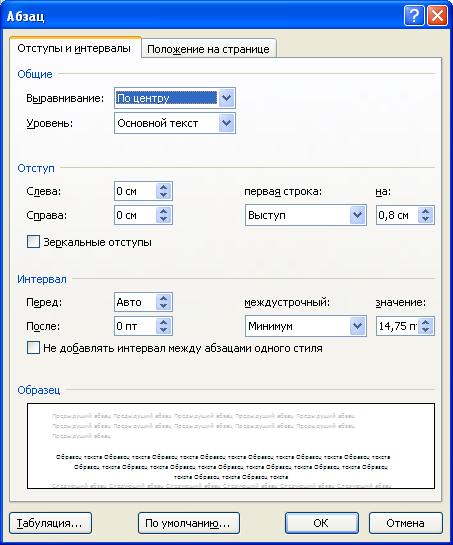
). It has two tabs. TabFont you can set the type, style, size, color, underline, etc. Note that color and underline have more features than described above. For example,can emphasize not only solid line but also by othersin ways as shown in this sentence. Accordingly, the tabInterval allows you to set the size of the spacing between characters.
TabParagraphhas a panel shown below.
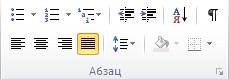
Contains the following modes:
Insert the paragraph numbers as an icon for the paragraph, as shown in Fig. below.
), a panel appears in which you can select a different kind of marker.
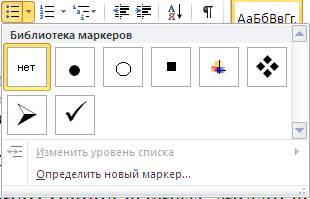
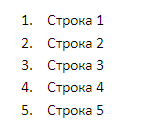
Allows you to replace paragraph paragraphs with numbers, as shown in Fig. below.
If you click on the triangle to the right of the mode (), a panel will appear in which you can select a different kind of character.
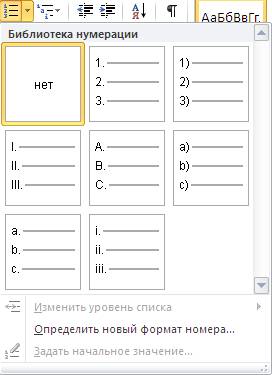
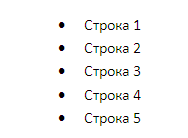
Allows you to create a multi-level list, as shown in Fig. below.
When you click on the mode button, a panel will appear with different options.
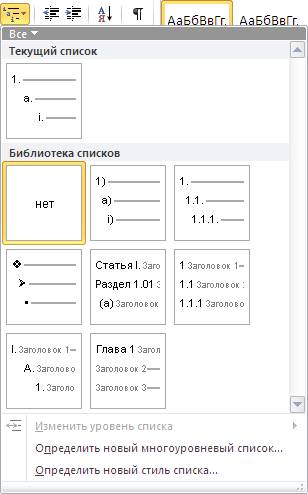
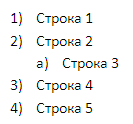
Select a mode, for example, which is highlighted in the figure, and numbers with brackets will appear to the left of the selected paragraphs. If then the third line is shifted to the right with next mode, then the symbol on the left will appear not a number, but a letter.
Allows you to indent to the left for the selected paragraph (paragraphs), as shown in Fig. below. On it, line 3 is shifted to the right using this mode. To do this, set the cursor on this line and click on the button.
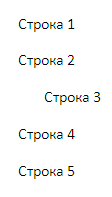
Note that the interval by which the paragraph is shifted is determined by the tab characters that you can set yourself. For example, moving the dots with the mouse on the ruler, which are at the bottom of the numbers.
Allows you to indent to the right for the selected paragraph (paragraphs). This operation is the reverse of the previous mode.
Allows you to sort paragraphs by initial. You can also apply sorting to text in tables.
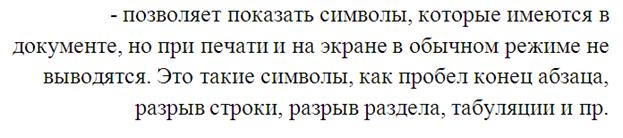
Allows you to show the characters that are in the document, but when printing and on the screen in normal mode are not displayed. These are characters such as a space, end of paragraph, line break, section break, tabulation, etc. The pictures below show the display before and after the mode starts.Note that the space is displayed as a dot.
Align text on the left border.

Alignment of text in the paragraph in the center.An example of the text is shown in the figure below.
![]()
Align text to the right border.An example of the text is shown in the figure below.
text alignment on both borders.An example of the text is shown in the figure below.
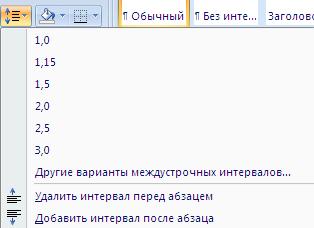
Allows you to set the distance between the lines. When you click on this button, a panel with modes will appear.
Allows you to set the background color, as in the mode -.
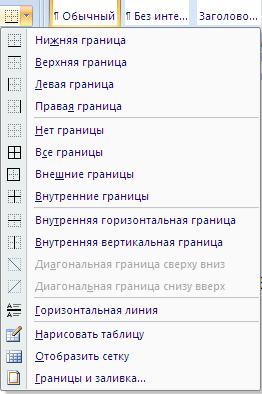
Set the frame around the text. When you click on the button, a panel will appear with modes for setting borders in different parts of the selected text. Left, right, upper and lower boundaries are set for paragraphs. If a word or several words are selected, they are surrounded by a frame on all sides.
In the right lower part of the panel there is a button with a cross, clicking on which will open a window with modes ().
PanelStylesallows you to set the style. Style is a set of rules for formatting text. Usually, for example, in a book, plain text is different from the text in the section title. The text of the section title is usually bold, has a large size and another type, for example,Arial. Plain text is oftenTimes New Roman. In the program style sheetWordthere are already established styles for plain text, section titles, etc.

To change the style, select the fragment with the text and click on the style button, for example, onusual. The style sheet is not all displayed on the monitor. To view all styles, you need to click on the button (), which is located to the right of the style sheet.
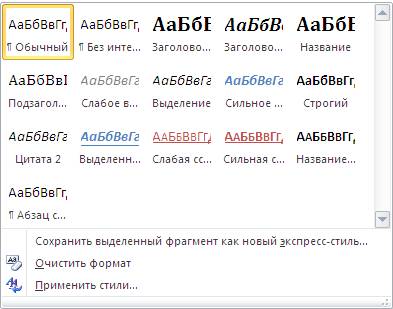
Select the desired style and click on the square with its name.
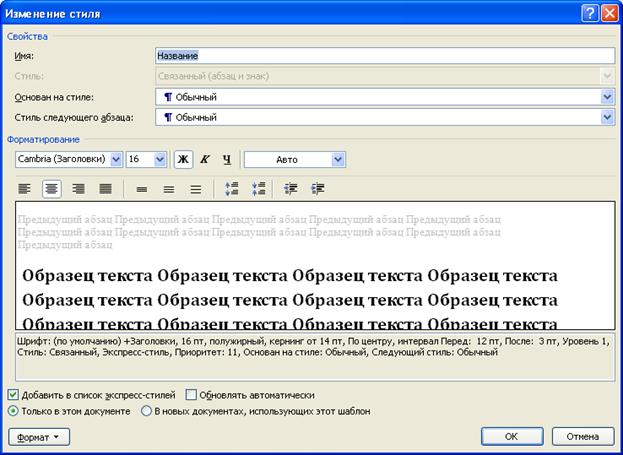
Style can be changed. To do this, click right click mouse on the desired square (which needs to be changed) and select modeChange ... A window will appear on the screen in which to change the formatting options.
Allows you to change the style of the selected text from the proposed companyMicrosoft. Virtually not used.
In the lower right part of the panel there is a button with a cross, clicking on which will open a window with a list of styles that are available in the style sheet discussed above ().
PanelEditingcontains three modes.
Allows you to find a chain of characters in the text. If the text is selected, the search will be conducted in the selection. If no text is selected, the search will be conducted throughout the document. When you click on this mode button, a mode panel will appear to the right of the document.
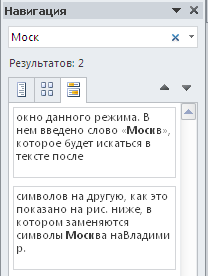
The figure above shows the window of this mode. It has the word “ Moscow"Which will be searched in the text after pressing the keyEnter . The right side will show the document that contains this text.
Go mode allows you to go to a specific page in a document, a note, a bookmark, etc. It is rarely used.
Allows you to select the entire document. Click on the button and in the appeared panel on the modeSelect all . The remaining modes of this panel are rarely used.
Hello, glad to see you on site! This article, as you already understood, is entirely devoted to mS Word 2007 settings. Settings, Word functions do not fit into 1 article, so I will divide them into tabs, respectively, 1 tab = 1 article, in order to describe the settings of Word and the built-in functions in more detail and more deeply.
Acquaintance with the settings will be in the form of descriptions, explanations and recommendations for the use of these. At first glance, there are not so many settings for Word 2007 - only 7 tabs: Home, Insert, Page Layout, Links, Mailing List, Reviewing, View. And there are no less than Word functions, than settings. But with a less attentive look at the tabs, it becomes clear that everything is not so simple! Running a little ahead, I will say - some of the settings may not even be needed at all in my life, but we will still look at them superficially, just in case.
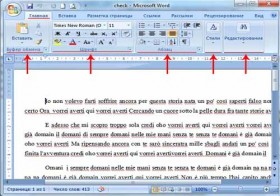
I suggest to start with the tab "The main", then we move in the order of their location, that is, the next article will reveal the insert settings in Word. I will write the names of the blocks, settings, functions - you can see their descriptions just by hovering the mouse over the names. I think it’s pointless to use pictures for each item - there are just too many of them, besides the page will load unpleasantly for a long time. Here, just in case, the working blocks of the Home tab
(click to enlarge)
We have touched upon some settings of this tab in Word before, so now we will pay attention mainly to the remaining ones. I remind you that many tabs have a button to open the advanced settings dialog box, use it always. I will describe only what is displayed directly on the tab panel.
Block "Clipboard" - this block will help you to carry out such manipulations on selected sections of the text, such as pasting, copying, cutting, formatting text following an example. The first functions are clear to all, I will explain the last a little. Sample formatting allows you to apply the formatting style of any part of the text to another text of the document. It works like this: You formatted 1 section of text, for example, you put a blue font with a size of 25 pixels in italics of the Impact family. After some time, we decided to do exactly the same in all the first paragraphs of each page. Now we need formatting according to the sample. Select the formatted text (its part), the style of which we want to apply to another text of the document, press the left mouse button on the " Sample format", move the cursor to the text. We should have an image of the brush in front of the cursor. Now we hold the left mouse over the text (select) to which we want to apply the copied formatting. formatting, I hope, clearly explained.
By clicking the arrow on the image (additional block parameters) you can manage the information copied to the clipboard (that is, insert it, delete it, select from several copies).
Block "Font" - Of course, various font manipulations. You can set the font family, its color, size, fill color, typeface, strikethrough, make the text subscript or superscript, and much more. Note the white button with the letters Aa and crayon located in the upper right corner of the block. Select the text, press this button - all text formatting will disappear, only the “bare” unformed text will remain. Let me remind you again - the image of the arrow opens additional settings specific block Word - now it is a font - be sure to read them!
Block "Paragraph" - provides control over alignment, lists, fill, borders, indents, sorting, and also displays a button for displaying non-printable characters (spaces, Enter "s, etc.)
Let's start with alignment - this text editing function does not require the selection of the entire text, just put the cursor in front of the desired paragraph sentence, press the desired alignment button (at the edges, in the center, in width) - you get the selected alignment. If you select 1 sentence from a paragraph to align it separately, you will not get anything, since the alignment is tied to the paragraph. You can't fool him by breaking the line (Shift + Enter).
Above the alignment is the setting bulleted, numbered, multilevel lists. All of them also operate on paragraphs. To make a paragraph with one paragraph from one paragraph, you will need to divide each future list item with the Enter key.
Change indent level from the left / right edge of the document. This setting allows you to move the text to the specified amount of indent (by default 1.25 cm). The indent value is set in the tab settings (Paragraph -\u003e Tab), but the indentation does not work in the same way as tabulation. An indent transfers the entire paragraph, regardless of the highlighted part of the paragraph and where the cursor is, and the tabulation transfers the portion of the text that is to the right of the cursor, without touching the rest of the text of the paragraph.
Sorting - rather strange, although occasionally useful function. Strange because sometimes her work defies logical description. Works with selected text, sorting it by paragraphs or by fields. You can customize the sorting of the contents of paragraphs as text, numbers or dates in descending / ascending order. It also has additional sorting options that allow you to select a language, a field separator, and also make the function take into account or ignore case.
Line spacing button I personally do not work, just giving an error, so I adjust the line spacing through the advanced settings of the paragraph (arrow with a corner). If it worked, then with its help it would be possible to change the distance (interval) between lines of text. For example, during my studies at the institute, any work had to take 1.5 line space between lines.
Fill - elementary fills the background under the selected text with the color you selected. The difference from the "text selection color" of the "Font" block - fills the entire text background, but does not fill in the text lines. It can work with selected text and with a paragraph, if somewhere in the paragraph sentence the cursor is set.
Setting boundaries - this parameter ... sets the paragraph limits. Selecting 1 paragraph sentence, again, will have no effect - the boundaries are tightly bound to paragraphs. That is, the border is still set "around" the whole paragraph. Clicking on the triangle next to the borders button will see a drop-down list. This list will help you set specific paragraph borders, or remove them, allow you to draw tables, show / hide a grid of tables, provide an opportunity to insert a horizontal line, and also allow you to use the "Borders and Fill" settings. Here is such an excellent list.
Display characters - this button shows / hides non-printable characters, such as space, Enter, tab - to see them sometimes is very important for understanding formatting problems or for determining the abilities of students who used 50 spaces instead of Tab
Office Tab - what is this program and how to use it - often ask MS Windows users to search engines.
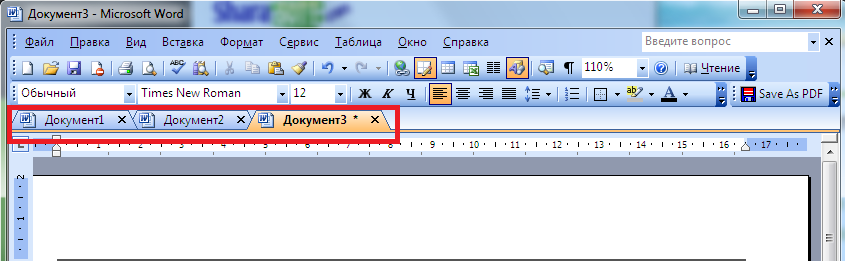
The Office Tab platform allows you to work with individual documents, presenting them as tabs.
This allows you not to search for the desired name on the panel or in the drop-down list, helping to save a few superfluous seconds.
It takes a little time to customize the display of documents in tabs.
The user is only required to find one of the latest versions of the platform, selecting the appropriate (paid or free) option and enjoy the benefits of Office Tab.
Office Tab versions and features
The idea of creating a utility to display microsoft documents Office tabs appeared in 2008 from the Chinese company Extend Office.
Thanks to platform developers, all popular applications included in the standard office suite (from Word to Visio) can open files in separate tabs, but in one window.
The home page of the free version of the program is located at: www.office-tabs.com.
Tip: It is best to download the official application from the developer’s resource, rather than trying to install hacked versions, possibly containing malicious code and carrying a threat to your computer.
There are three versions of Office Tab:
- a free, free edition that does not require a purchase and does not overly limit the user's capabilities
- paid, Office Tab worth $ 25;
- improved, Office Tab Enterprise Edition cost $ 35.
Limitations of the free version:
- the inability to simultaneously open, save and close all documents, quickly rename files without using the Save As command and locking them;
- inclusion of only three main applications in the list of Tab Center programs - Word, Excel and PowerPoint;
- possible problems with PowerPoint for 64-bit Windows.
Activation is needed only for the paid version of Office Tab, which will provide an opportunity to use all the functionality of the platform.
Enterprise Edition is distinguished by an expanded number of styles (11 in latest versions) and compatibility with any version of Office, even with MS Office 2016, which has not yet been released.
Some users believe that there is no special need to install paid versions of Office Tab, since most people work with Word and Excel, almost without using applications such as MS Vision.
If the screen prompts you to enter an activation key (mainly after the expiration of the 30-day trial version), usually it is simply ignored and the next version with restrictions is used.
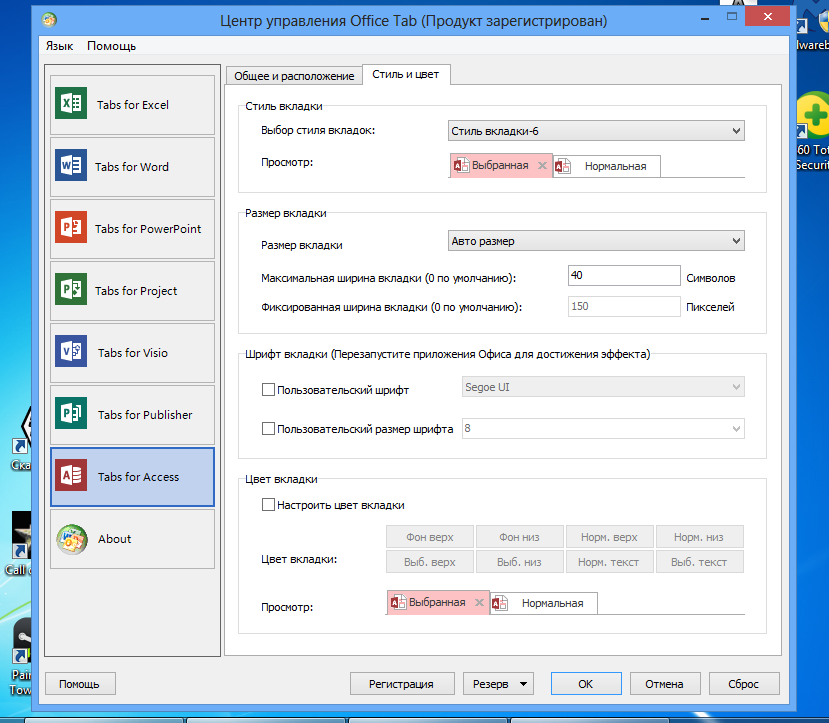
Reference: Office Tab Center is a common platform center that allows you to customize the style and color of tabs, enable hot keys and change the panel layout for each application from MS Office.
Features of using Office Tab
The program has many advantages, thanks to which it is popular among users.
- The first and most important of them is ease of use. Using the platform with one click in the same window opens the required number of documents;
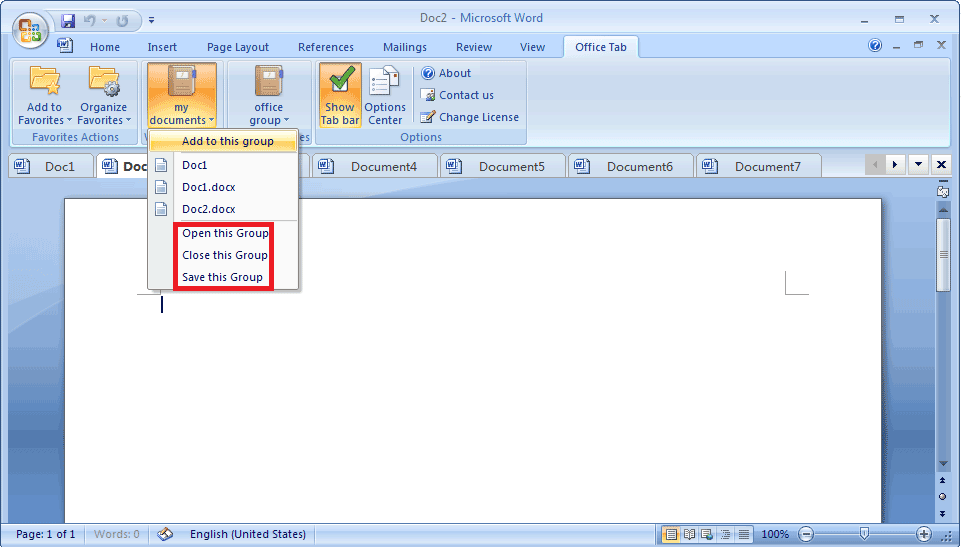
- High functionality of the context menu, which can be accessed by clicking the right mouse button on an open tab or tab bar. In addition, the menu duplicates part of the usual Office commands, allowing you to simplify access to some commands;
- The ability to save files with one click. Opening several documents at the same time and making changes to them, you can not waste time saving each. Just click on context menu Office Tab "Save All" button and all data will be saved. In the same way, you can close a group of files (the command "Close All"). No features in the free version;
- Convenience of managing a group of documents, including adding new files to it and opening the entire list in the corresponding Office application;
- The ability to see the full file name on the tab bar, not the part, which can help when working with several documents that differ only in the last characters in the name (for example, work_project1.doc, work_project2.doc and work_project3.doc);
- Simplified renaming of the document (for paid versions only). Instead of selecting “Save As”, the user can simply enter the context menu and select a new name for the file. The document is saved over the top. existing option. And if you need to create only a copy, leaving the original intact, you will still have to use the "Save As" command.
Other advantages include the low resource intensity of the program, which is not so noticeable for owners. powerful computers, but important for users of not too productive equipment.
This is achieved through the use of Office Tab of the same software package as Office, and the platform spends no more PC memory than the standard set of tools from Microsoft.
It is also important to be able to move the tabs using the drag and drop function and switch between them (using the mouse or the Alt + “tab number” key combination).
You can use the Office Tab and personalization tabs, customizing their colors or choose one of the styles of the application collection.
And another plus of the platform is support for a large number of languages, including Russian.
One of the few drawbacks of using Office Tab is the reduction of visible space on the screen due to tabs (by default, the panel is 40 pixels tall, although this value can be changed).
This feature may be important for owners of small monitors or laptops.
However, for the usual modern PC, this minus is not as significant as increasing the usability of documents.
Tabs in Windows and Office
Installing tabs in Microsoft Office using Office Tab is relatively easy. To do this, the user will need no more than a few minutes.
The sequence of actions to be able to use the platform is as follows:
- Download Office Tab from the official site. The average size installation file does not exceed 15–20 MB (Enterprise Edition is larger);
- Install the application by selecting in the process those programs where the ability to open several tabs at the same time will be added. Most users choose Word and Excel, less often - PowerPoint. To improve the entire package, select all applications (for paid versions only);
- Open the appropriate application and make sure the result of the installation of the platform;
- Customize colors, width and other panel and tab settings.
You can customize the display characteristics of the Office Tab elements either through the control center (an application that can be found in the Start menu or on the desktop), or separately in each open program MS Office.
The platform allows the user to:
- change the location of the panel, its size and color;
- configure the ability to close tabs by double clicking the scroll wheel or the left mouse button;
- set shortcuts for quick access to the functions of the platform;
- ensure that a new document is opened with a double click (the application does not provide a plus on the right side of the tab list, like in many browsers).
On the special tab "Style and color" is the setting of these parameters.
You can choose a style from the standard set or set your own font color values, panels, active and inactive tabs.
In the context menu, you can select actions such as:
- opening and saving a document;
- renaming the document (except the free version);
- lock open tab;
- call the settings menu.
The settings will be saved after closing all active MS Office applications. Opening them again, you can see the changes - a different color, width or position.
Add tabs not only to MS Office applications, but also to windows Explorer using the same platform is impossible.
To implement this, you will have to download another utility - QTTabBar, after which the work in the explorer starts to resemble actions in browsers.
Nowadays, using a tab-free web browser seems unthinkable. The days of viewing sites in separate windows are long behind, although one of the essential tools on each computer still maintains the “for each session” window.
Of course we are talking about Word, the most popular in the world. word processorwhich is a key part of the Microsoft Office suite. It still does not support tabbed browsing, but, as is the case with most other software giant products, you can expand its capabilities with the help of third-party tools; You can add tabs, for example, using the Office Tab and in this short article I will explain how to do this.
The developer says his software compatible with Microsoft Office 2010, 2007 and 2003, but when using Office Tab in conjunction with Office 2016 Public Preview, I did not notice any problems.
Installation
Download the program from the official site. The installation file weighs about 14.4 MB, so it should not take a lot of time.
Install Office Tabs. During installation, select the programs in Office that you want to add tabs to. Word is the obvious choice, but Office Tabs allows you to work with tabs back in Excel and PowerPoint.
That's all. Now open Word or another program to which you want to add tabs; along top bar tools you will see the installation result.
Settings
If at the end of the Office Tabs installation process you didn’t uncheck the Change Settings checkbox, then you will see a window that allows you to customize the style and behavior of the tabs.
If the window does not open, you can start it manually using the shortcut on the desktop.
From here you can change the appearance of the tabs, and separately for Excel, Word and PowerPoint.

Office Tabs offers rich personalization options: you can customize tab style, size, font, color, and even layout.
In order for the settings to be applied, the program requires you to close and reopen all the active Office windows. However, Office Tabs settings are available inside office applications by right-clicking on the tab where they take effect without restarting Word, Excel or PowerPoint.
Office Tabs is distributed as shareware. The trial full-featured period is limited to 30 days, after which it is necessary to pay $ 29 to use the program further.
Have a great day!