Development for Android: install the SDK. Versions android. Android SDK download
Android SDK Manager is an environment for developing applications for the Android operating system. This program allows you to create applications that use the capabilities of the camera, Wi-Fi, Bluetooth, GPS data, 3G. Also, Android SDK Manager supports browsers, various video and audio formats. The program gained popularity thanks to an integrated module that allows you to test the developed applications on different versions of Android.
How to install Android SDK Manager?
In order to start using the Android SDK Manager program, you need to initially install it. To do this, perform the following:
- Download the archive SDK Manager on your device.
- In parallel, we launch the installation of the latest version of Java Development Kid on your PC and follow the instructions.
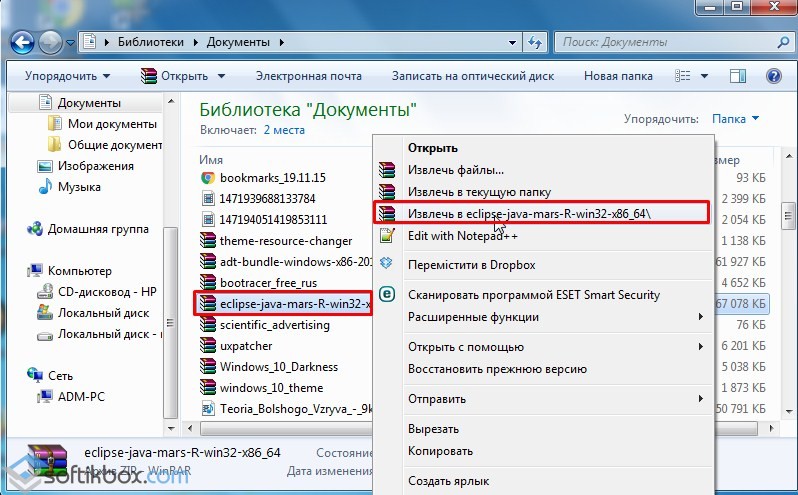
- From the archive we start unpacking the file “SDK Manager”.
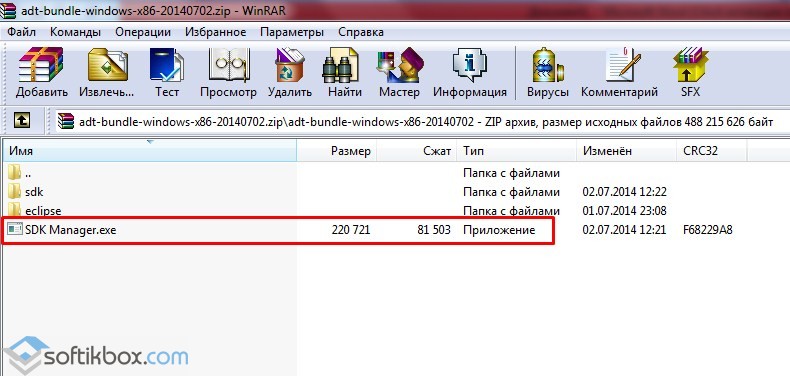
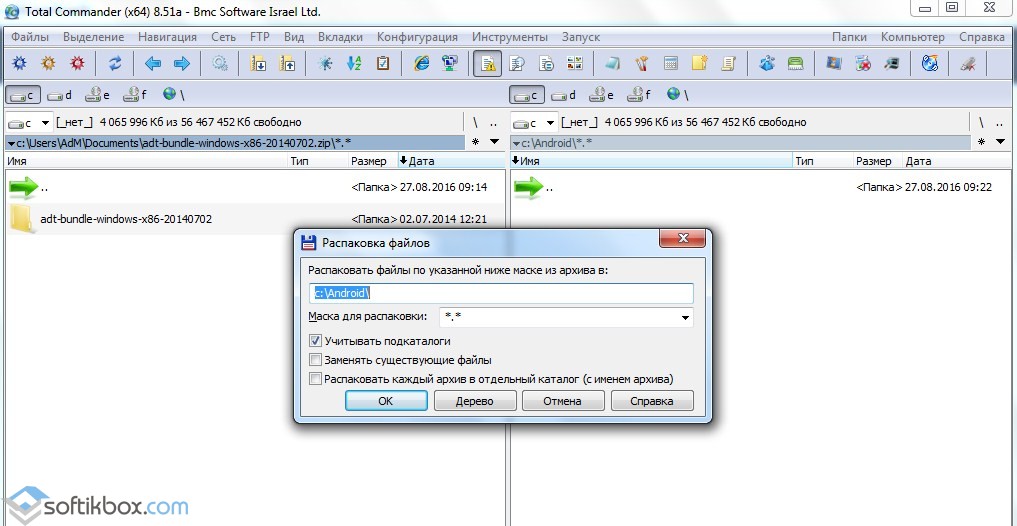
- If it was not possible to unpack, you should create the “Android” folder on drive C and unpack all files from the archive via Total Commander.
- Next, run the file "SDK Manager.exe". Within a few seconds, a working program will appear.
- However, it is still impossible to work with the program. Eclipse needs to be installed. It is in the archive.
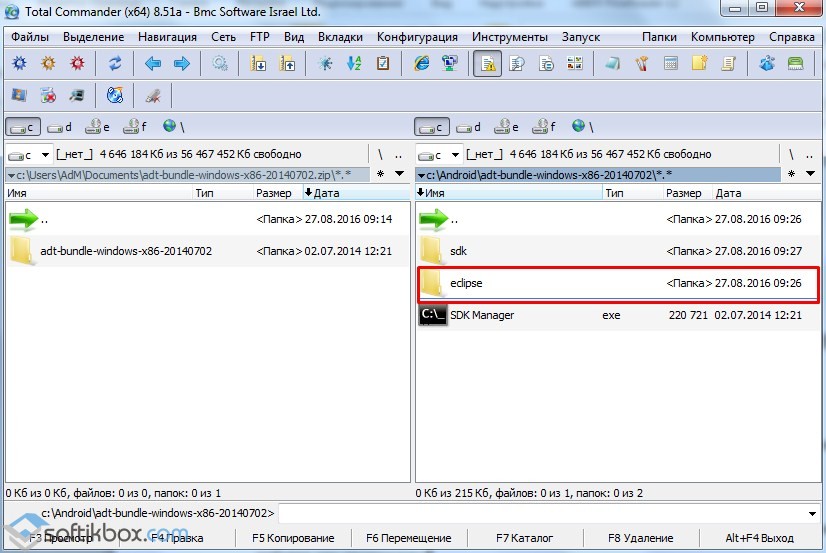

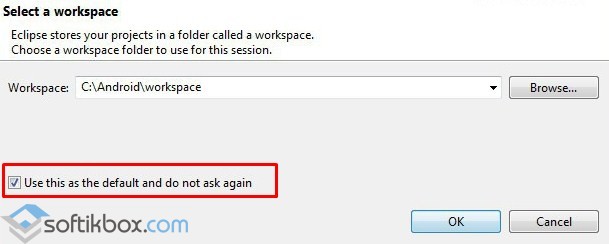
- From Total Commander to install this item will not work. It is necessary on drive C in the folder “Android” to create a new folder called “Workspace” and put all the contents of the folder.
- Next you need to update the program itself. To do this, click on the menu "Deselect All", so as not to install all versions of Android.
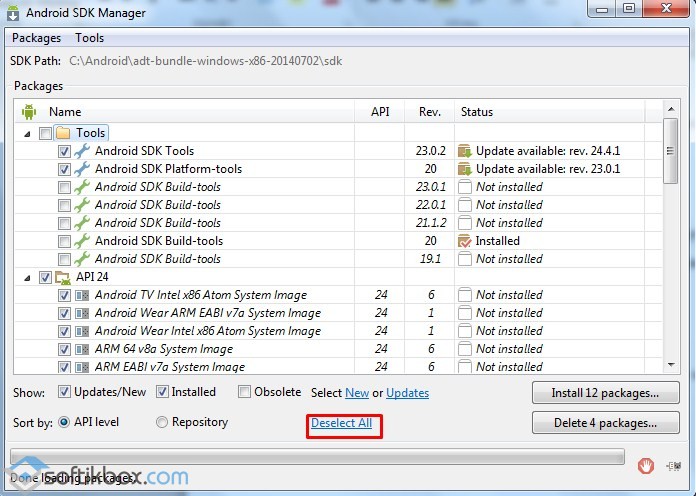
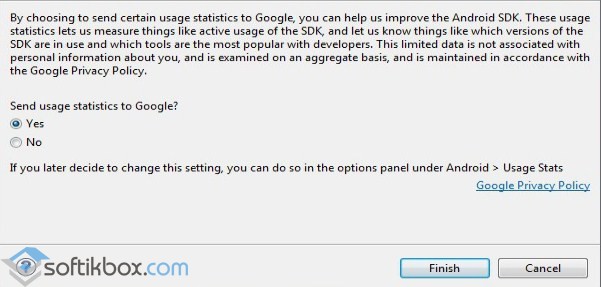
- Now the “Update” button will become active. Mark the version of its Android OS. And click "Install".

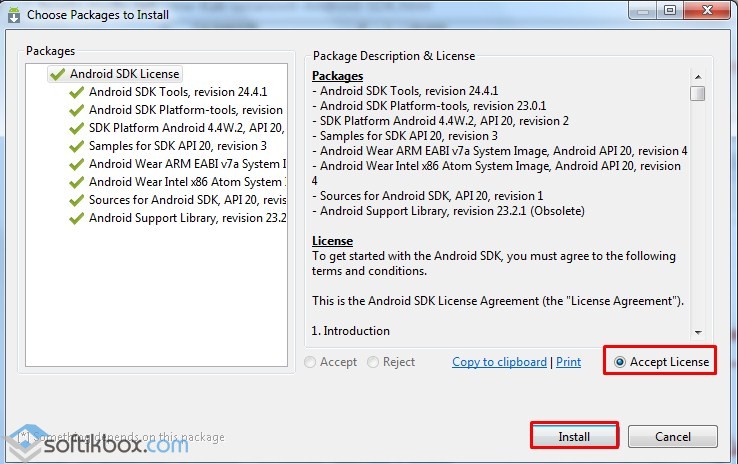
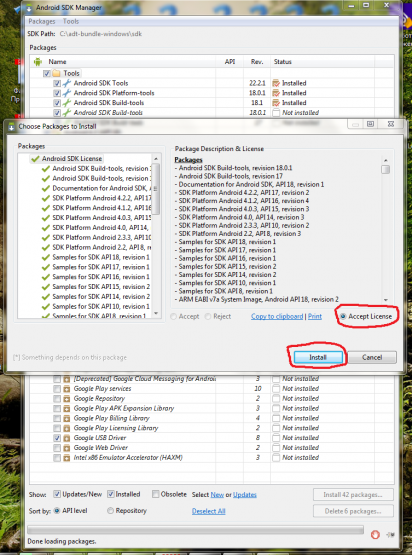
- In the new window, check the “Accept License” and click “Install”.
- We are waiting for the completion of the installation of the Android SDK Manager.
You can also learn how to install and configure the program from the video:
How to install Eclipse for SDK Manager and Android Studio correctly?
Often, users have problems installing the Eclipse component. Often it comes with android program SDK Manager. However, it can be downloaded separately from the developer’s website, after selecting the version and bit depth of Windows.
The setting for this item is as follows:
- Download and unpack the archive in windows folderthat on drive C.
Important! There is a known problem with unpacking the Eclipse archive. We recommend for this purpose to use the program or. Before starting the unpacking of the archive you need to install Java.
- If it was not possible to extract to the specified folder, some experienced users note the success of the execution of the action if the “Program File (x86)” folder is selected.
- Next, run the exe file.
However, this method does not always work and errors often occur.
Given the feedback from users of the program and their recommendations, we suggest that you familiarize yourself with 100% way to install Eclipse:
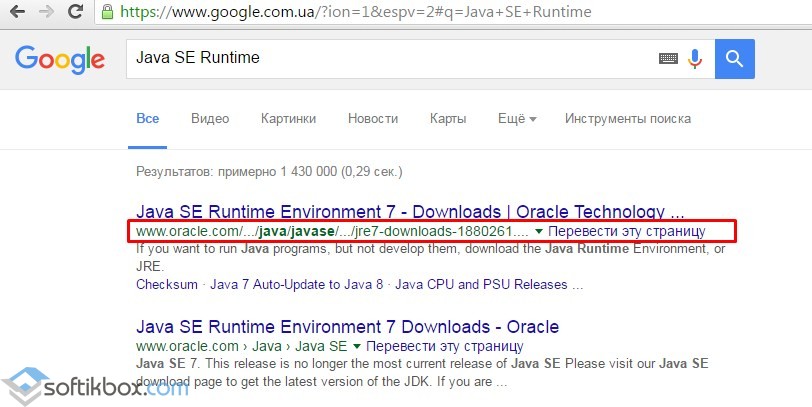
- Enter the query "Java SE Runtime" into Google. Open the first link.
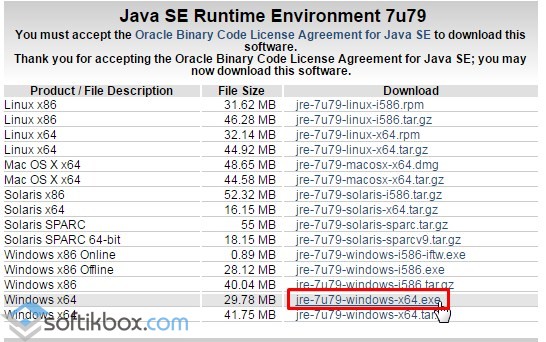
- Choose latest version programs in accordance with the capacity of the system.
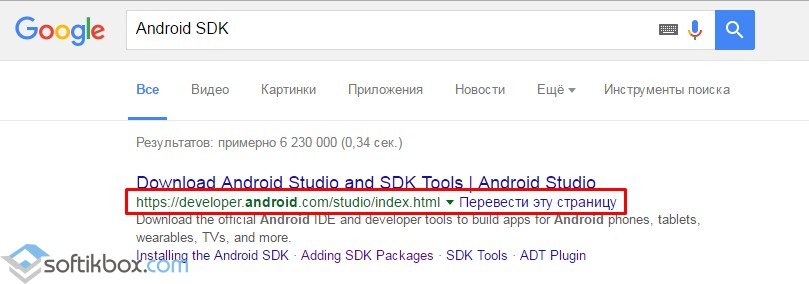
- Archive download will begin. Go back to the search engine and enter the "Android SDK". Again, select the first link.
- Open the page and go down to the section "SDK Tools". Here choose “Includes Android SDK”
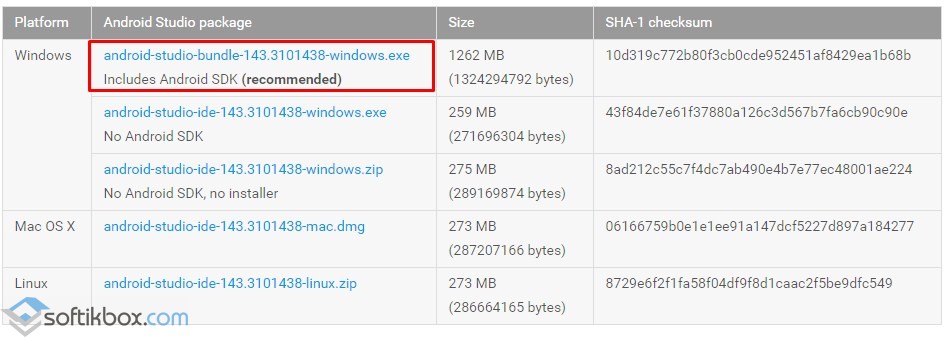
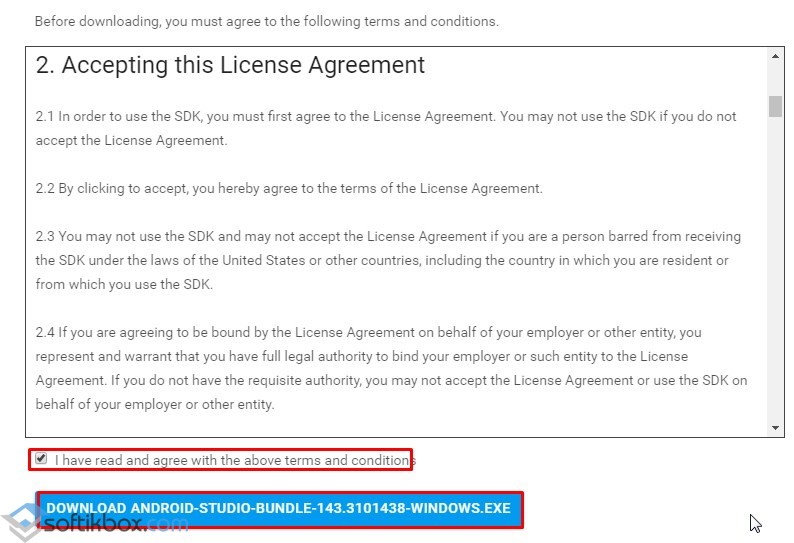
- We accept the terms of the license agreement and click "Download".
- The file will weigh more than 1.2 GB. Therefore, while the file will be downloaded, install Java.

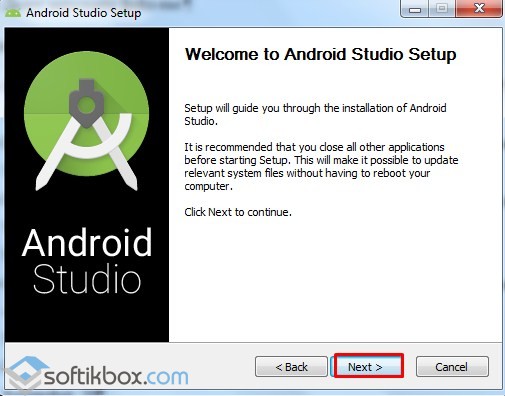
- Now install Android Studio. On disk C, you need up to 4.5 GB of free memory.
- We mark the necessary elements.
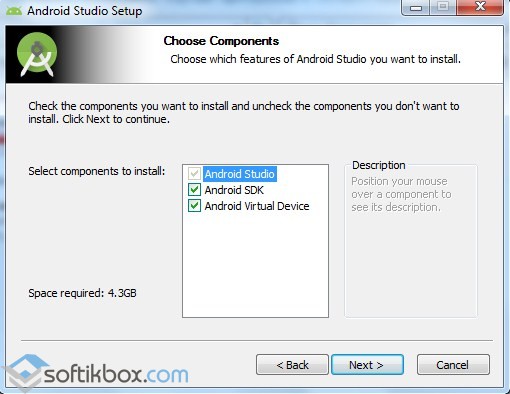
- We accept the terms of the license agreement and click "Install".
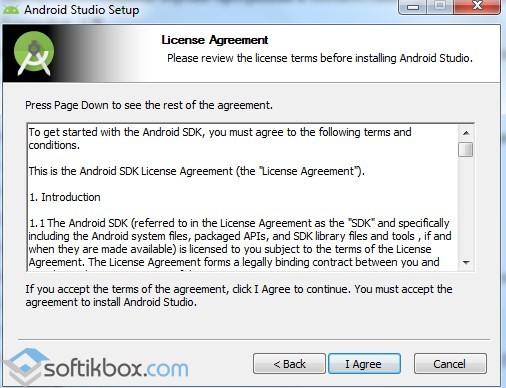
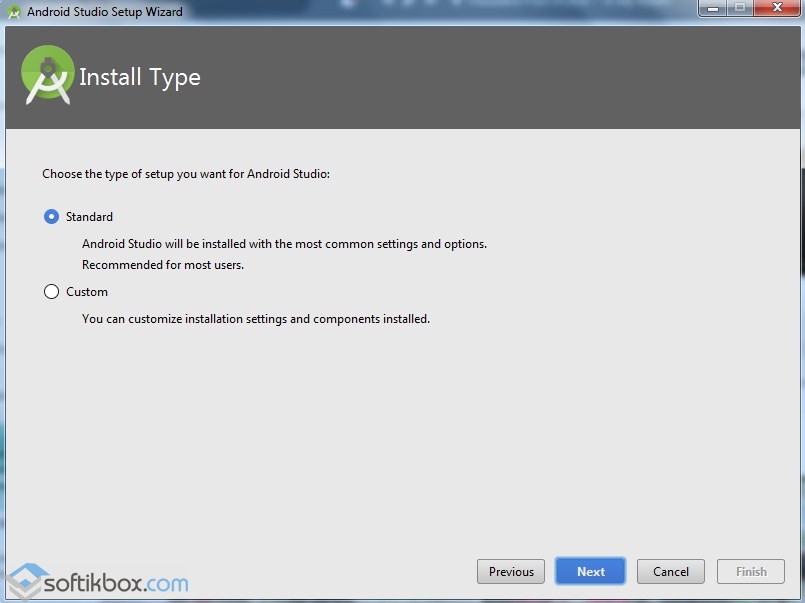
- You need to select the type of installation. Choose "Standard".
- Program installation is complete.
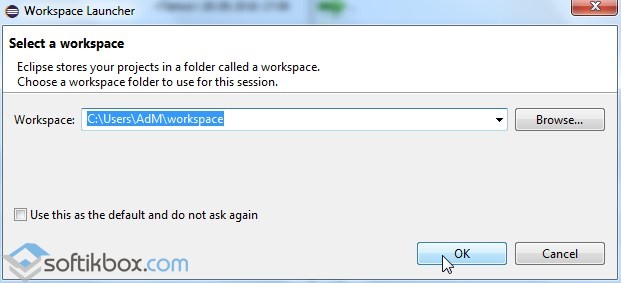
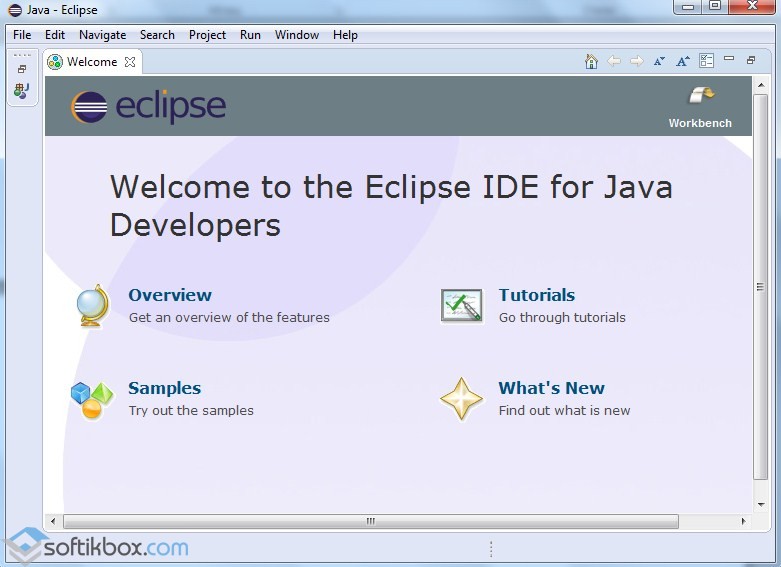
- Now you can install the Eclipse IDE for Java Development without any problems. Run the file.exe from the archive. The program itself will create desired folder. Just follow the instructions.

- The program has been successfully installed.
Important! Eclipse can be installed only if the above recommendations are followed. Otherwise, the error sdk tools directory is is missing.
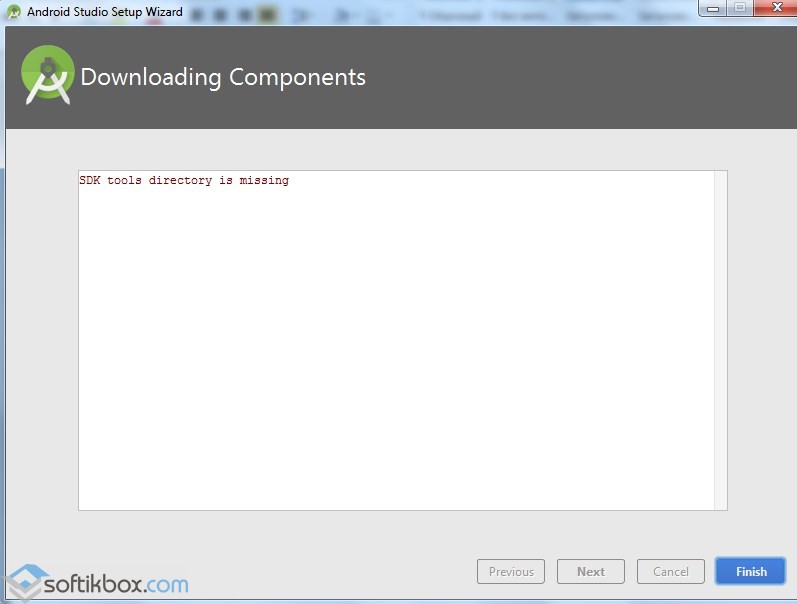
What should I do if the SDK tools directory is missing error?
The sdk tools directory is missing error was encountered while installing Android Studio. It originated from an uninstalled Eclipse component. Therefore, if you are trying to install a program before installing Java and Eclipce, be prepared to face this problem.
Also this problem may occur when saving a project. In this case, in the program menu, click “Configure”, “Project Defaults”, “Project Structure” and copy the correct address C: / Users / user / AppData / Local / android / SDK.
In the first case, when the error occurred during the installation of the program, this means that the Tools folder is missing. It is worth removing the program completely, freeing up to 5 GB of memory and re-installing the program according to the instructions for Eclipse.
Such a popular operating system like Android cannot do without powerful and simple development tools. And it is here that the Android SDK (Software Development Kit or Software Development Kit) shows itself with best side. Today we will install the SDK and see what it can do. This will be a series of articles on the development of applications and games for Android.
Preparing to install
Android SDK supports most modern operating systems under the architecture of x86 and x86_64, including Windows, many Linux distributions and Mac OS X. Also on the PC must be installed Java Development Kit (Java 7 or Java 8)which is surely required for many SDK features, because Android is inextricably linked with Java.It is worth noting that the built-in Android emulator requires good hardware on the PC, as, in principle, for other modern development tools.
Installing with Android Studio
For a long time, there is Android Studio - the official IDE (Integrated Development Enviroment) for Android development. There is already included everything you need and is installed in one click. All you need to do is install an IDE, and you can also use all the features of the SDK integrated within the development environment.
Download Android Studio from the official site. There you can find many useful guides for working with the Android SDK, but, unfortunately, they are available exclusively in English.
Installing a separate package
If you do not intend to use such a powerful tool as Android Studio or you already have Intellij IDEA installed, on the basis of which this development environment works, then you can install the Android SDK separately. However, this installation method will not give any other advantages and it is recommended to use the previous method.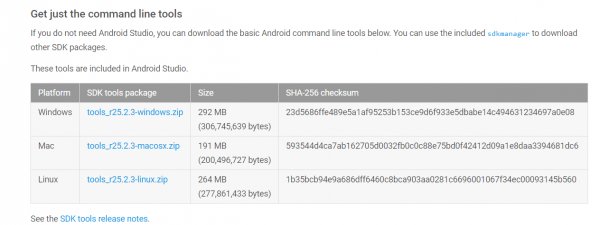
To download a separate package of development tools without an IDE, you must use android Developer site. Ignoring all possible references to Android Studio, go down to the bottom of the page and find the section “Get just command line tools” - you can also use the search on the page. After downloading the appropriate package for your operating system, just unpack it at any storage convenient for you - it is recommended to also specify the location of the SDK in Intellij IDEA (Project Structure\u003e SDK).
Launch and features
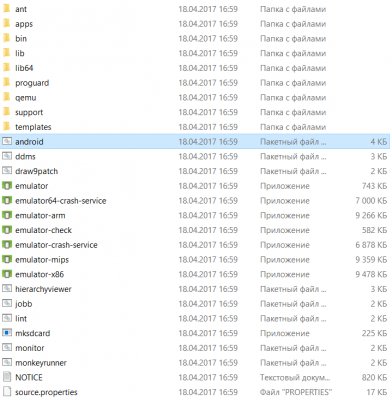
To gain access to all the functionality of the Android SDK, just run the batch android file, if you work under Windows, or in the terminal, execute the “android” command in the tools / folder of your SDK to run on Linux and MacOS X. You will be prompted to install tools for different versions of the API, the more tools installed, the better. Downloading packages can take a long time depending on your system and Internet connection speed.
Let us turn to the description of the main tools:
- Platform-tools includes basic Android interaction tools such as ADB, fastboot, and systrace. Android Debugging Bridge will help to track errors in the applications on your smartphone, as well as perform some actions to work with the APK; fastboot, familiar to all fans of its Android device firmware, works in tandem with ADB and helps to set up the device before the OS is loaded, and systrace is able to analyze the speed of processes in the operating system;
- Build-tools work together with Platform-tools, but can be updated separately. This includes utilities such as ProGuard to protect your APK files, JOBB to work with extensions in the * .obb format, and Zipalign, which is necessary to optimize your ready-made applications;
- In addition, the SDK provides an advanced Android OS emulator, in which you can test any applications and try out the features of fresh versions of Android. However, good hardware on a PC is necessary for high-quality emulation, and x86 emulation is recommended.
Why do I need the Android SDK?
Android SDK is a universal set of tools that will be useful to every user of a smartphone or tablet operating under android system. A normal user can access the necessary logs, restore the device from its inoperative state and gain access to a full-fledged emulator, whereas for the developer it is the necessary minimum to start creating games and programs for Android.Of course, you have already heard about this open operating system, which has revolutionized the telecommunications industry and of course, is using it. And if not, what planet do you live on?
This system is already used by millions or billions of people around the world, but most people probably don’t know about its functions and general information that everyone should know.
Android start
In principle, Android is the operating system that was developed by Linux, a free system with an open platform. It was created primarily for mobile devices with touch screen. But very quickly the android was reprogrammed, and also optimized for tablets, televisions and even electronic watches.
 What makes this operating system attractive is that it is completely free. Developers and manufacturers, decided to include this OS in all possible gadgets and run on the consumer market, which led them to billions in profits. By the way, this OS is easy to edit, programming errors can be solved in the shortest possible time, in addition, it can be adapted “for yourself” without disturbing the integrity and power of the system
Android was not known to anyone until 2005. Google saw a huge potential to revolutionize the market with its help and bought it. In 2007, the Handset Alliance Open and Google provided the first Android version with an SDK. The first HTC Dream phone with this OS was sold in 2008.
Android versions
Android, it must easily adapt to technological changes and user requirements, which is why it has had several versions since its inception. They are:
- Version 1.0 Apple Pie
- Version 1.1 Banana Bread
- Version 1.5 Cupcake
- Version 1.6 Donut
- Version 2.0 and 2.1 Eclair
- Version 2.2 Froyo
- Version 2.3 Gingerbread
- Version 3.0 and 3.2 HoneyComb
- Version 4.0 Ice Cream Sandwich
- Version 4.1 4.2 and 4.3 Jelly Bean
- Version 5.0 Lollipop
- Version 5.1 Android M
- Version 6.0 Android Marshmallow
- Version 7.0 of Android N (perhaps - Android 7.0 Nutz, 7.0 Nutella, 7.0 Nestle) or your version, write in the comments!
Reasons to choose Android as the operating system for your gadget
The first reason is that, unlike other operating systems, this version is easy to use, so everyone can learn to handle it without much knowledge and training. Plus, it is a completely free, editable system that is easy to “tailor” to your needs.
Moreover, you can add any applications for messaging, music, photos, videos, increase device performance, play powerful games - all this makes this system very attractive and useful.
Android multitasking system that allows you to run applications in backgroundthat was not possible before, so that we can listen to music while surfing the Internet. Accessibility to many applications is simple and free, but some unique and functional ones can be bought cheaply.
So this operating system is easily accessible and has a number of advantages for its users, plus their versions and applications are constantly updated, respectively, the daily development in technology and society.
Android SDK on windows or how to download android on windows?
If you want to download and run yourself on a computer with OS windows operating room android system then enough download android sdk - it is an environment that allows you not only to develop and test various applications and games on android, but also to run them on a computer with windows! The android sdk environment will launch and test programs on different versions Android, which need to analyze different sensors: compass, gps, edge, bluetooch, position sensor, smartphone camera, which will enable not
While reading our blog, you felt that the honorary title “Maker” is no longer about you and now you can try on the rank of “advanced user”, then the Android SDK is the very tool that will make it possible to feel yourself even as a developer.
Users who want to significantly increase the performance of their android devices understand that without root access and unlocking the bootloader (bootloader) is not enough:
And further, it is possible the desire to test any custom firmware. That's when Android SDK and ADB are needed. And this means that you will have to work not only with the command window, but also with the codes that open access to the Android operating system.
SDK (English abbreviation of software development kit) is, by and large, a set of various development tools that allow software professionals to create applications for special software packages, game consoles, basic development software, operating systems and computer systems, game consoles, and etc.
This tool is used for:
- Obtaining the rights of "superuser".
- In order to provide access to the system part of the firmware and its changes
And ADB will allow:
- See the connected devices that can work with ADB
- View the log of the Android system
- Make copies of files from both the Android device and on it
- Delete (or clear), and also flash (or overwrite) the section " data»
- Create different scripts android controls-device
- Manage some of the gadget's network settings
- And much more.
Android SDK Manager - how to use
The Android SDK includes ADB drivers and other tools that, if you precisely follow this instruction, any user will be able to install without any problems.
First you need to do some preparatory steps:
- Checking the requirements of the Android SDK.
- We download to your computer Jdk, and Java Development Kit
- You will also need to download the Eclipse IDE and the ADT plugin.
- Now we need to install Eclipse on the PC and run the program. The route looks like this: Windows\u003e Android SDK\u003e AVD Manager.
Users who do not plan to develop and test applications may skip the last two steps.
*Note: Eclipse - the language in which the codes are written.
How to install on Windows Android SDK / ADB
- Download and save the installation file on your desktop
- Unpack and move it to the “C” drive as root (C: \\ android-sdk-windows).
- Go to this folder on the drive "C" and then open the SDK-manager.
- Click to install Android SDK Platform-tools, revision 6
- Further we move along this path: Available Packagesthen Third party add-ons, Now Google Inc. add-ons, Further check Google USB Driver package, revision 4(the last file requires installation).
- Close the manager.
- Go to the control panel and open the properties of the system ( System properties).
- Click "Advanced System Settings", "Environment Variables".
- They need to be configured: scroll down the list until the “Path” (or Path) appears. We press.
- In the field "Value" at the end of the line you need to enter C: \\ android-sdk-windows \\ platform-tools; C: \\ android-sdk-windows \\ tools. Click "OK", then "Exit".
- We activate on the device Android debugging via USB and connect it to the computer.
- Install the necessary drivers for the smartphone (or other device) and open the command window on the PC, enter adb devices
- Now our device should appear in the list, and if this is so, then everything went well.
If something does not work out, then you need to manually perform the driver update procedure. To do this, you will need to perform the following steps:
- Open " device Manager»And find a yellow exclamation mark near a group of unidentified devices.
- Now we need to click right click mouse on adb. Path to update: Update Driver Softwarethen Browseand Let me pick Now Have disk and browse.
- Next you need to go here - C: \\ android-sdk-windows \\ extras \\ google \\ usb_driver and choose android_winusb.inf. and choose Android ADB Interface.
- A pop-up warning (if it appears) must be ignored.
After the installation is complete, we need to open the command window and re-enter adb devices. Let's hope that now everything will work.
This article will help all newcomers, owners of Android devices to get acquainted with Sdk. You will learn how to install android sdk. What is it for: firstly for hacking, secondly for accessing the system part of the firmware and its subsequent modification, thirdly for getting root rights.
SDK has a tool ADB (Android Debug Bridge) debug Bridge for Android or another interface for debug Androidusing it you can:
- View the log of the Android system.
- View which Android devices are connected and can work with ADB.
- Install programs on Android devices.
- Remove programs on Android devices.
- Copy files from Android device.
- Copy files to Android device.
- Delete the data section on your Android device.
- Clear the data section on your Android device.
- Flash the data section on your Android device.
- Overwrite the data section on your Android device.
- Perform different scripts to control your Android device.
- Manage some network parameters of the Android device.
- And much more.
SDK (software development kit) - a set of development tools that allows software specialists to create applications for a specific software package, software basic development tools, computer system, game consoles, hardware platform, operating systems and other platforms.
Install Software Development kit (SDK)
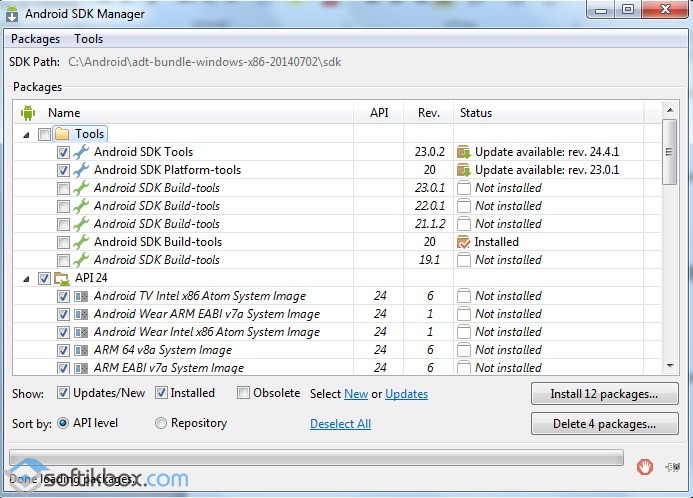
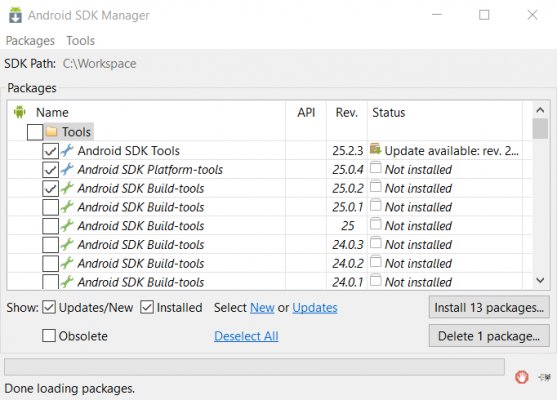
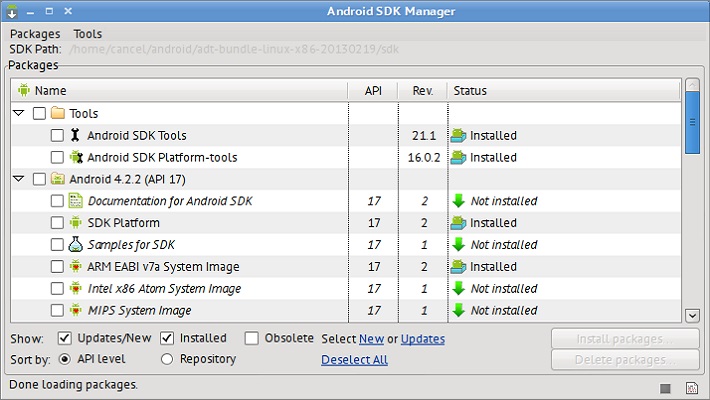
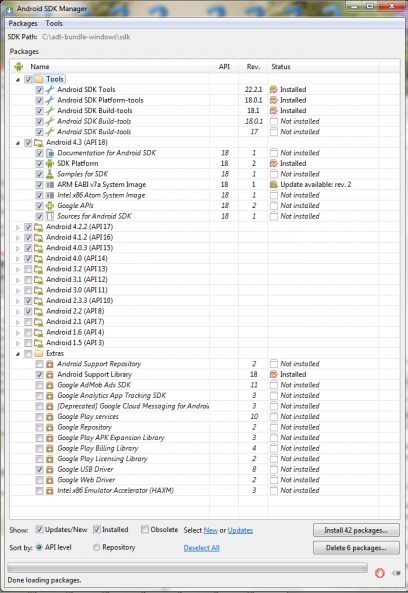
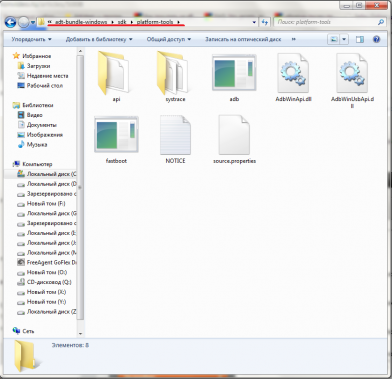
Go to the folder adt-bundle-windowsthen to folder sdk and run SDK Manager.exe. In the window that appears, you are invited to select components for download via the Internet. The right side for each component indicates whether it is already installed or not. We select the necessary packages for work. Desirable as in the picture. If you have other versions of Android, then choose the right ones. When all the necessary packages are selected - click the button. Install X packages bottom right. In the new window we confirm that all this is agreed to download - Accept All. And here you can see the size of the package and abandon something. Press Install - the indicator ran and the log opened - the download started. After a while (depending on the number of selected packages):. Installation completed. Close the log and SDK Manager.

Then we go to the folder this address needs to be copied (in this folder there should be files adb.exe other)
Folder with the program
For Windows XP: go to the control panel, system properties, in addition, environment variables
For Windows Vista / 7: go to the control panel, system, advanced system parameters
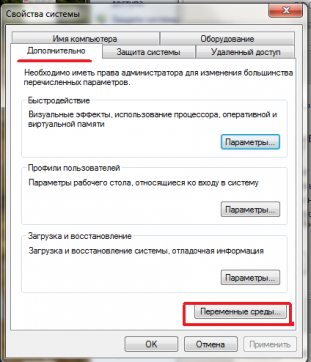
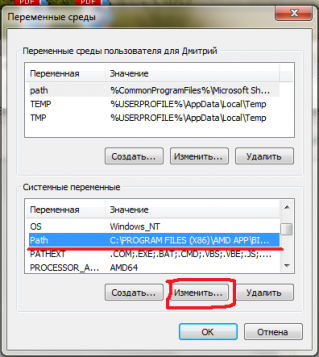
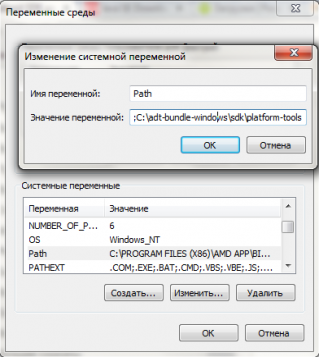
Find the item variable environments and find the item Path, we click to change and without deleting anything through a semicolon we add our path C: \\ adt-bundle-windows \\ platform-tools (see the picture). Click OK.
Now we check if everything works: go to the start, run the command line (preferably as administrator for Windows Vista / 7) and enter adb command and we get the following.
Result
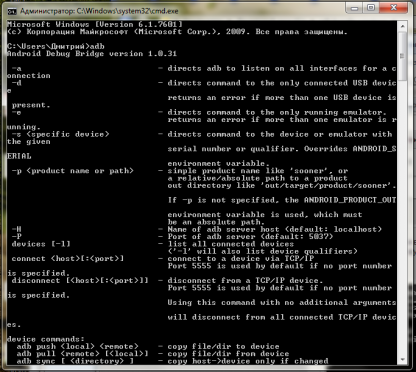
If received, then everything works fine.
ADB commands
Here is a list of useful commands:
adb devices - View a list of devices that are already connected to the computer.
adb wait-for-device - Wait for device connections
adb get serialno - Preview serial number devices
adb logcat - See what's going on inside the device
adb logcat\u003e c: \\ logcat.txt - The command will save all changes to a file.
filters for logcat
V - Verbose (verbose) (lowest priority, default mode)
D - Debug (debugging)
I - Info (information)
W - Warning
E - Error (error)
F - Fatal (critical error)
S - Silent (silence) (highest priority, silent mode, nothing is displayed)
Example adb logcat *: W - Only system error messages are displayed.
adb logcat [-b] - Displays system buffers information
radio - View the buffer containing the radio / telephony module messages.
events - View the buffer containing messages related events.
main - View the main log buffer (default)
Adb logcat example -b radio
adb reboot - Reboot the device.
adb reboot recovery - Reboot the device into recovery mode.
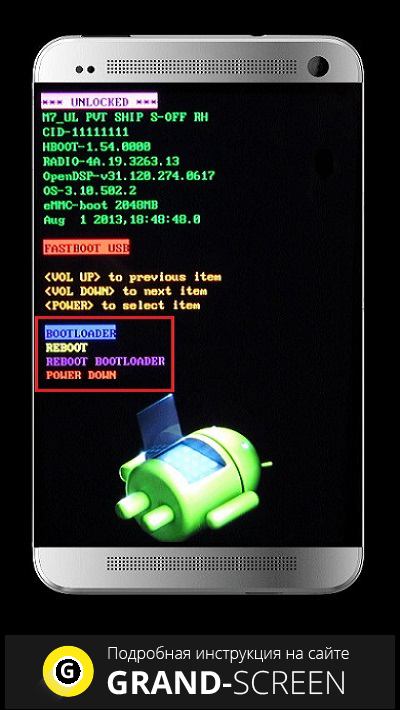
adb reboot bootloader - Reboot to bootloader mode.
adb shell cat / proc / mtd - View information about the "sections" of the device memory.
adb shell df - View information about partitions and free resources.
adb push - Copy file to device.
adb pull - Copy file to computer.
adb install [-l] [-r] [-s] - install the application
Example adb install with: /adb/app/autostarts.apk Install the autostarts.apk file located in the / adb / app / folder on the disk with:
filters
-l lock application.
-r Reinstall the application, saving the data.
-s Install the application on the memory card.
adb uninstall - Uninstall application.
Adb uninstall example autostarts.apk