The adb program displays a list of attachments connected at once to the computer
Mayzhe leather vlasnik Android I’ll build it, somehow improve your love with a way to replace the firmware of the kernel of the operating system, stick with the program adb.
For more newcomers in itself, the program becomes a non-searchable transition and we will tell you today, how to install it at the beginning of the work with this wonderful add-on, which will help you, for example, take root rights to your device, flash the new version Android or navit vіdnoviti phone or tablet to the cob I will become after a sudden vtruchannya in the system.
So what is it adb, which fell in love with all modders and hackers, why take it, and what more wine do we need?
What is ADB.
Abbreviation adb decrypted like Android Debug Bridge(Nalagojuvalniy place Android). ADB є warehouse part, which can be purchased stars .
OSKILKI OPERATING SYSTEM Androidє variety linux for її nalashtuvannya often blamed the need to work through the command line. Obviously, using programs - terminal emulators, which allow you to type commands directly on the extension, but, first, on a small screen, the phone does not work manually, but in a different way, sometimes you need access to the extension through a computer, and in this bagatioh other types of program adb just irreplaceable. Program adb install a link between the add-on and the computer and allow you to perform various manipulations from the system directly on the computer Android.
How to install ADB.
Nasampered, we recommend that you take advantage of yourself the rest version, at the time of writing of this manual, a version is available r11, on the її butt the whole further description was prompted, and in more early versions, place of rotashuvannya necessary programs after installation SDK You can take a look at what is described here.
1. Zavantazhuemo, yoga can be known for the help, appointed earlier. Є kіlka rіznovidіv SDK, For Microsoft Windows, MacOSі linux.
We will need a variety for Microsoft Windows. And here there are two options - get the installer chi zip archives Android SDK. We don't need an installer, we won't be able to install more wines SDK V Windows 7, and to that zipped archives.
The archive contains a folder android-sdk-windows, what and revenge myself SDK. Unpacked її on the computer. At our butt, we spread the folder in the root of the C drive. SDK we will have this: C:\android-sdk-windows
For older versions SDK in the middle of the folder in the folder tools we needed a program adb, ale pіznіshe won bula moved by the retailers to the folder platform-tools.
However, if you go to this folder, you will not know the program adb so let's move on to the next stage of installation.
2.
Installable SDK Platform Tools.
Reconcile that our computer connects to the Internet and starts the current, which is in the papacy android-sdk-windows, program SDK Manager. When the program is launched, the following window will appear:
We need to secure and install Android SDK Platform-toolsі Android SDK Tools.
For the help of a dependent click on the item, or I will press on " accept» ta « Reject» Signify two points in the list and signify the sign of the other points, as shown in the above screenshot. Let's press on " Install» And check while downloading and installing the components we need.
Now we may have installed adb on my computer, but for working with our phone or tablet, you will need to install the driver and for further success with the program, it would be bad to prescribe the path to it and other components in Windows.
3. If we go to the folder C: android-sdk-windows platform-tools , then now we can display the program there adb.
Therefore, we need to edit the system PATH change, so that when you start the program and enter commands, do not type the path to the program, as it looks like this:
C:\android-sdk-windows\platform-tools\adb
If you didn’t edit the system changes, create a point of inspiration for the system, so that later you could turn it into the cob mill.
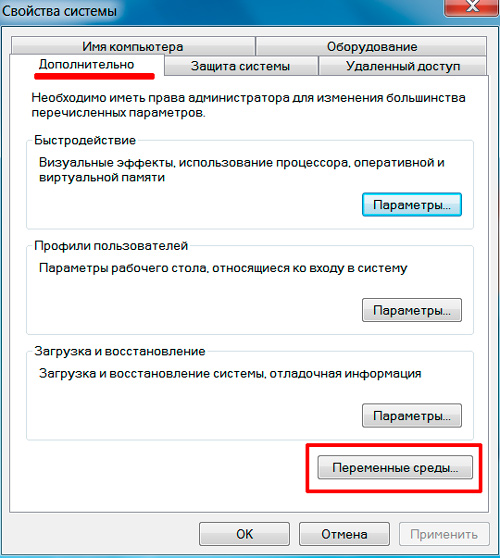
What do you have installed Windows 7, click with the right mouse button on the shortcut " Computer”, choose “ authority» and vіkni vіbirаєmo « Additional parameters systems».
What do you have Windows XP, click right button click on " My computer» and potim po « power»
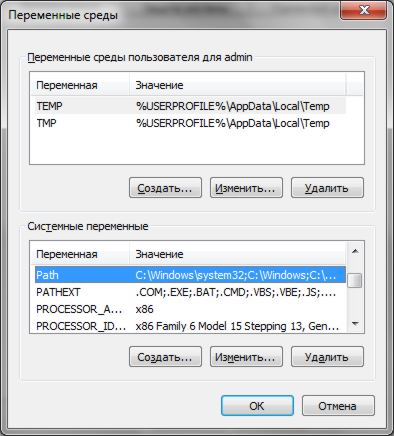
At the coming vіknі on the deposit " Dodatkovo» click on the button « Change of middle". In the list" System changes» choose change « path» and press the button « Change…»
Vіdkryєtsya vіkno redaguvannya zminnoy, the one at the point "h miner's start"at the end of the row, after the specks with whom we add the path to the folder tools that daddy platform-tools:
;c:\android-sdk-windows\tools;c:\android-sdk-windows\platform-tools;
(like in the end of the row there was no speck with a coma, add її - the leather way in this row is guilty of water-creaming in another speck with a coma)
If you installed it in your folder, write in the end of the row your path to the tool folders platform-tools.
I will install drivers.
Deyakі outbuildings, for example, telephones and tablets of the company Samsung to wash in the air software security for synchronization with the computer, and as it is already installed on the computer, the driver is already installed on your system.
Ale for such outbuildings, yak Nexus One, as delivered without any additional programs and drivers, for robots Android SDK, the drivers need to be installed.
For whom we go to the folder, they installed me in yaku SDK and start SDK Manager.
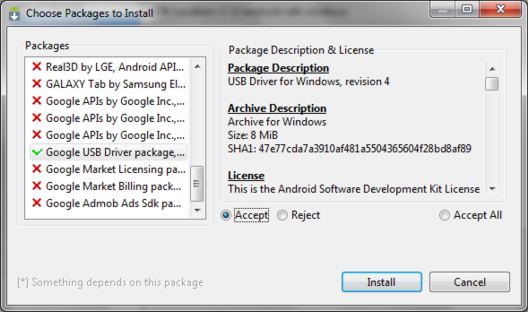
Just like that, we were installed Android SDK Platform-toolsі Android SDK Tools, we know that is selected from the list " Google Usb Driver package". It's pushing " Install» That check while the program is downloading the drivers. Drivers for 32 and 64 bit Windows will be taken to the next folder:
C:\1\android-sdk-windows\extras\google\usb_driver
Now you can install the drivers for your add-on. For which, in the menu, set up the phone or tablet, select the item “ Programs» (Applications), and in the new include « USB setup »(USB debugging).
We connect our attachment to the computer. The computer will show a new possession and will prompt you to install the drivers. We install the drivers from the folder, where the stench was taken earlier.
After the drivers are installed, a new attachment will appear at the extension dispatcher. adb interface and we can switch to tsoma, breaking yoga, pressing the mouse with the right key at the end. Computer» -> « power» -> « Attachment manager»
In addition, you can try to install the universal ADB driver on your computer.
How to run adb
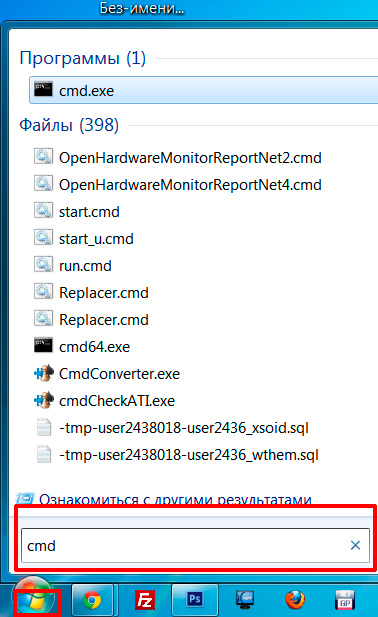
Work out from the program adb best through the command line Windows. For viklik command line on computer Windows XP, pressing " Start» and in the field of introduction « Vikonati» dialing cmd and press "Enter".
On the computer Windows 7, pressing " Start»and in the input field «Know program and files» you can type cmd and press "Enter".
Vіdkryєtsya vіkno command row, and in order, for example, to marvel at the fact that we have a connection to the computer, we type in a new command
adb devices.
Program adb display a list of attachments connected at once to the computer.
How do you have a smartphone with an operating Android system And you often experiment with it, you can either fix it or ask again, better for everything, and you already know the ADB tool or (Android Debug Bridge). This is a program for swiping with a smartphone via a computer via USB, to avenge the nameless commands.
You can look through the logs, install and see the programs, revise the add-ons and see the impersonal other blue commands. For the sake of statistics, you know how ADB is corrupted in Linux, we can look at the colorful ADB commands for koristuvachіv Android and reportly analyze this utility. Let's take a look at how to install the tool itself on the computer.
Installing ADB on Linux
The ADB program comes before the standard set of Android SDK utilities. You can install the middleware and remove the required utility. Ale, don’t ever want to gravitate to the computer in the middle of the vikonannya. Sometimes only one program is needed. Її You can simply insert Okremo. For Ubuntu, for which you can use the command:
sudo apt install android-tools-adb
For red hat, CentOS Trochi Command
sudo yum install android-tools-adb
If you need to install ADB on Windows, then you can get the SDK Platform Tools package from the official site.
Smartphone preparation
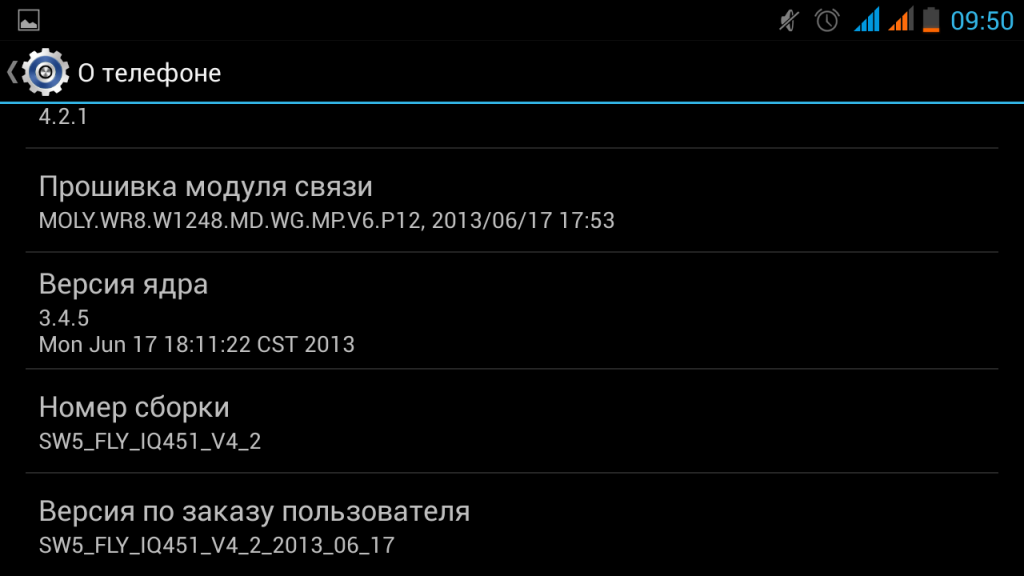
In order for you to be able to hack adb at once with your smartphone, you need to enable USB charging mode. Tsya mozhlivistnost chained to all Android versions starting from 4.2. To become a retailer, go to "Nalashtuvannya" -> "About the phone" that same time press on the points "Stock Room":
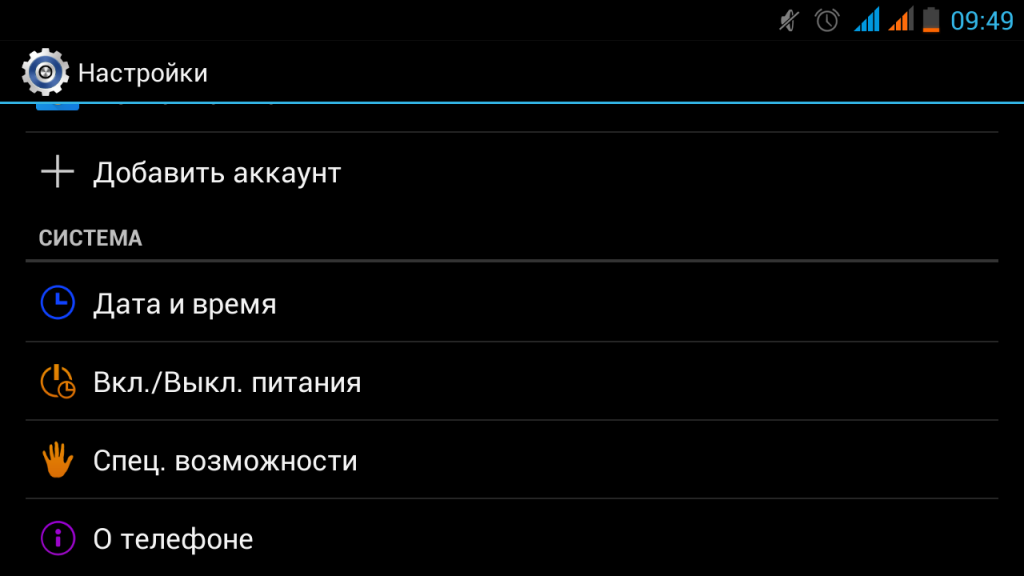
Let's add an item to the main menu "For retailers":
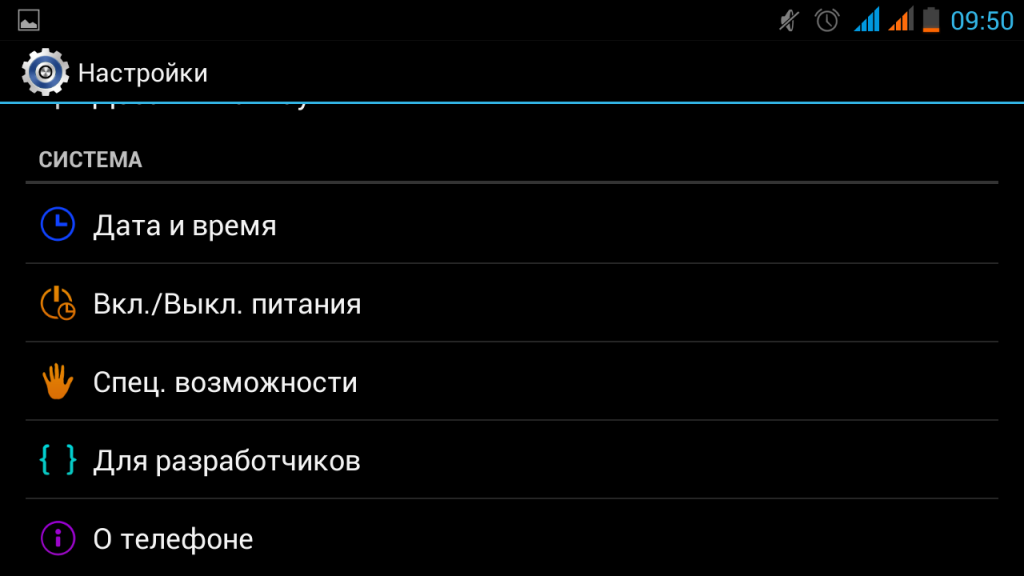
Here it is necessary to put a tick next to the division "Enable USB download":


Now your phone is ready for adb. Connect yoga USB to your computer and get it right.
Colored ADB commands
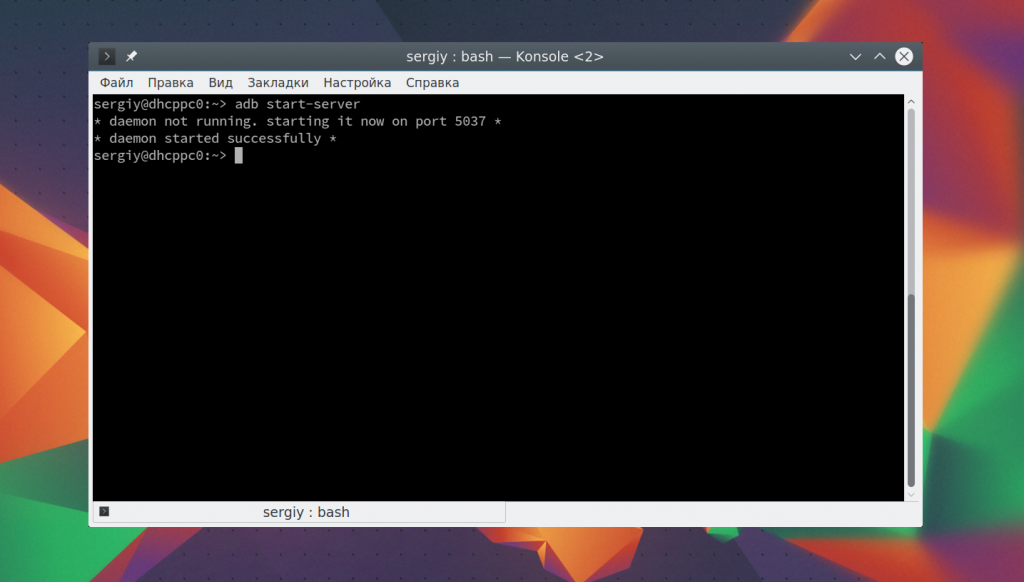
Before that, as we can cherubate the building, it is necessary to work more. The adb command needs a special service to communicate with Android, you need to run it. For which one, type the following command:
adb start-server
After the completion of the work, you can turn on the service, so that it does not save the resources:
Now you can run the adb command for android.
List of outbuildings
Nasampered, marveling at the list of connected devices to our computer. For which hack is the devices command:

If a small number of smartphones are connected to the system, then the smart phones will be blocked until the first. Ale, you can ask the need for it, I'll add it for additional options -s. For example:
adb -s 0123456789ABCDEF logcat
I’ll also add it to you, until it’s necessary to stop the commands of the adb program, you can use the additional ANDROID_SERIAL replacement:
export ANDROID_SERIAL=0123456789ABCDEF
Then all adb commands will zastosovuvatisya before the attachment, designated in this change.
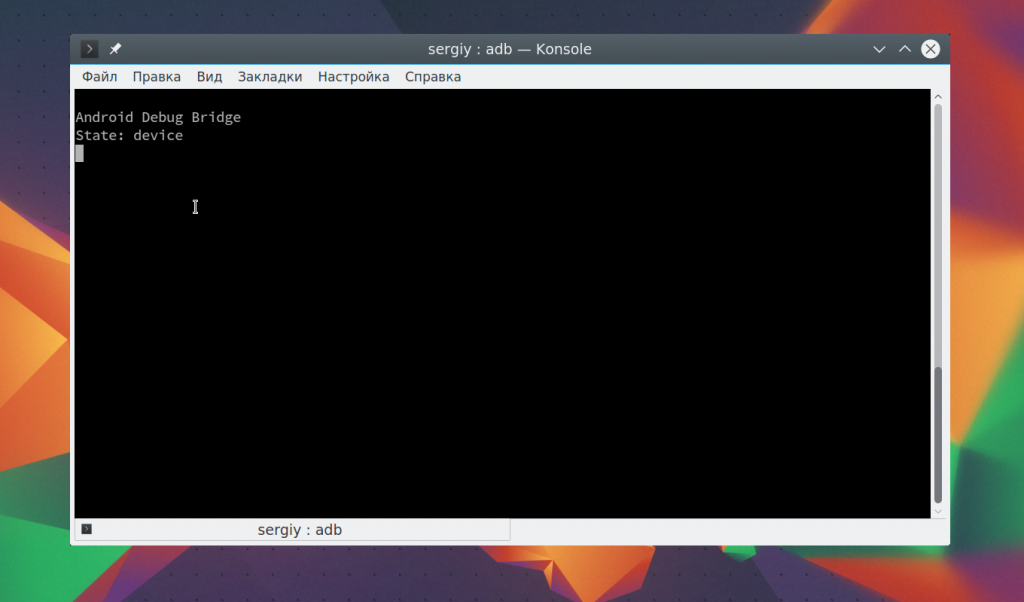
I will build a camp
For the help of the get-state command, you can find out about the camp:
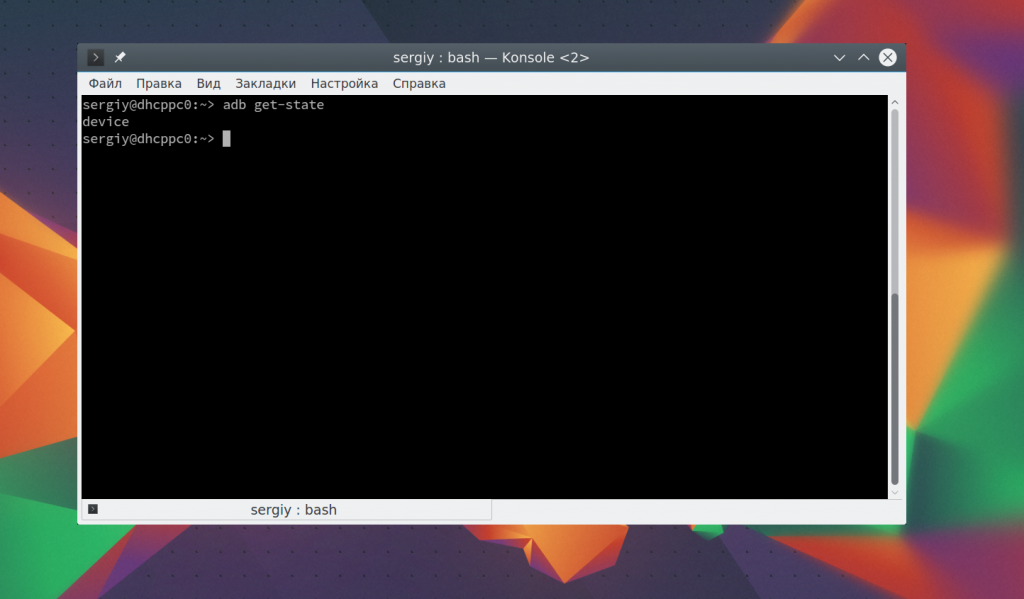
The command will turn one of the values: device - work, bootloader - take over, offline - disabled. For the help of the status-window command, you can permanently change the state:
adb status-window
Review of magazines
Same often, like to be robiti to retailers and testers mobile supplements at the request of pardons - a review of the journals of the system and programs. For which the logcat command is stopped:
The utility displays the Android logs in a real hour, so you can immediately get all the information about pardons. You can also write everything to a file:
adb logcat -d > ~/android.log
With the help of the -c option, you can clear all the logs on the extension:
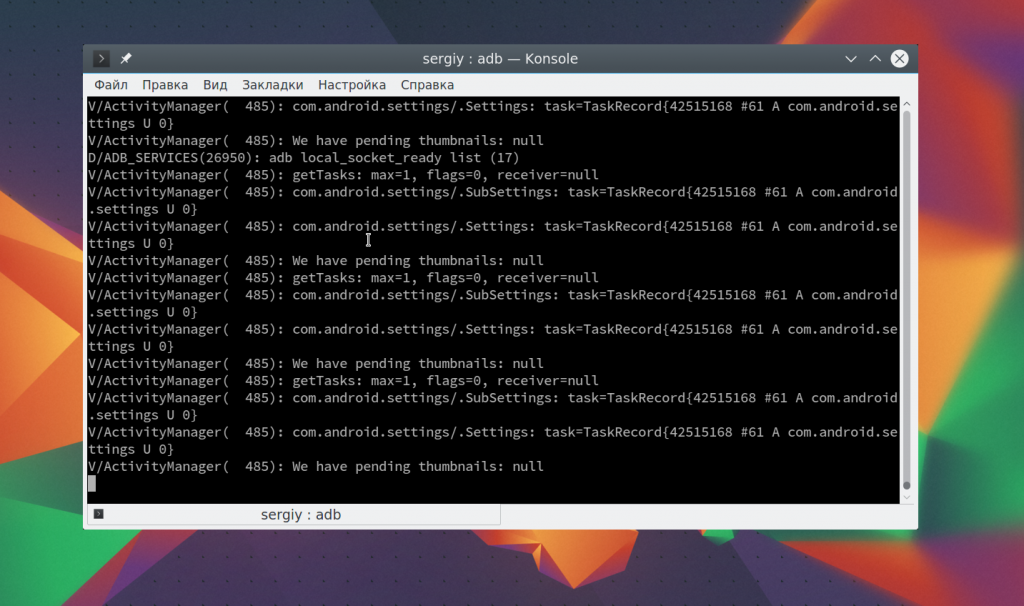
Do not start to look at the latest system log, sometimes it’s enough just to remind required programs.. For which one, just enter the package name:
adb logcat com android.settings
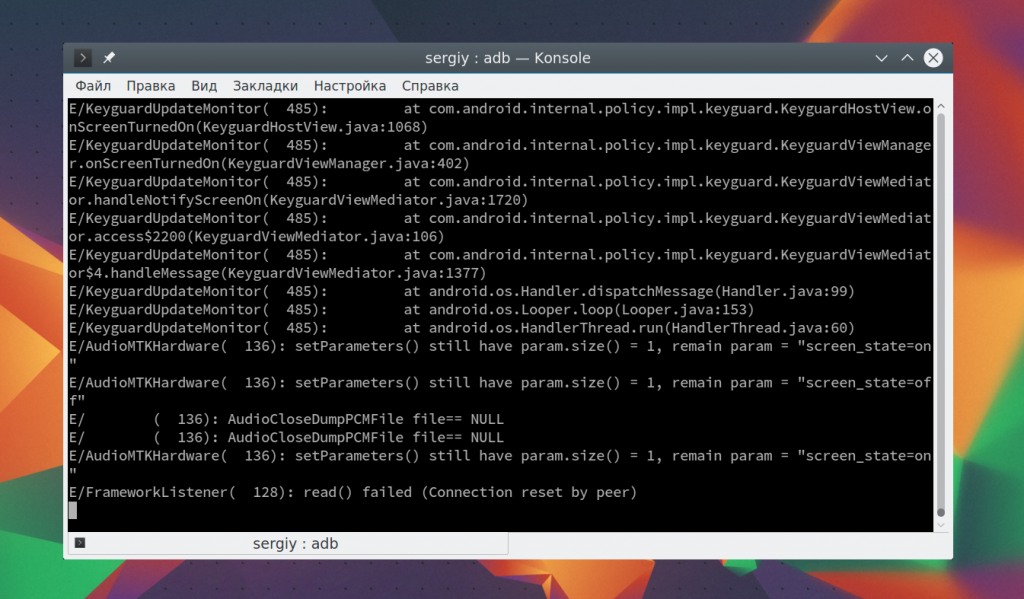
For the help of the -log-level option, you can set the number of details, the following options are available: V, D, I, W, E, F, S.
adb logcat com android.settings:E
Otherwise, we will see only a pardon for the whole system:
Transfer files to attachment
If you need to move the file to an attachment, you can edit the push command. Axis її syntax:
$ adb push /address/local/file/address/in remote/file
For example, let's take a file from the home folder to the attachment:
adb push ~/file /sdcard/file
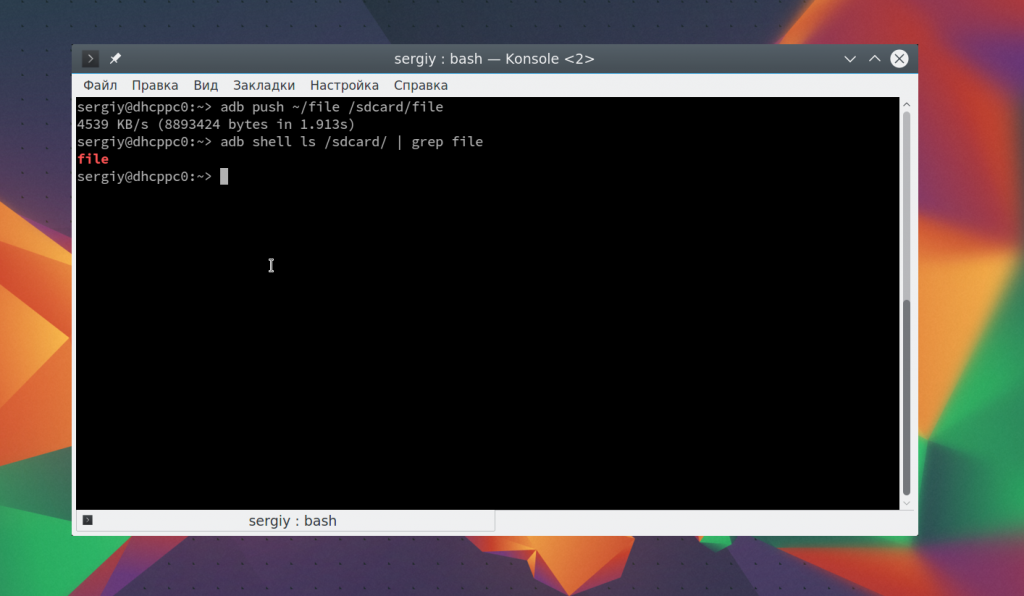
The file will be transferred to the attachment and you can transfer it to the other one. Optionally, you can change the -p option to display progress, as well as the -a option to keep the original timestamp.
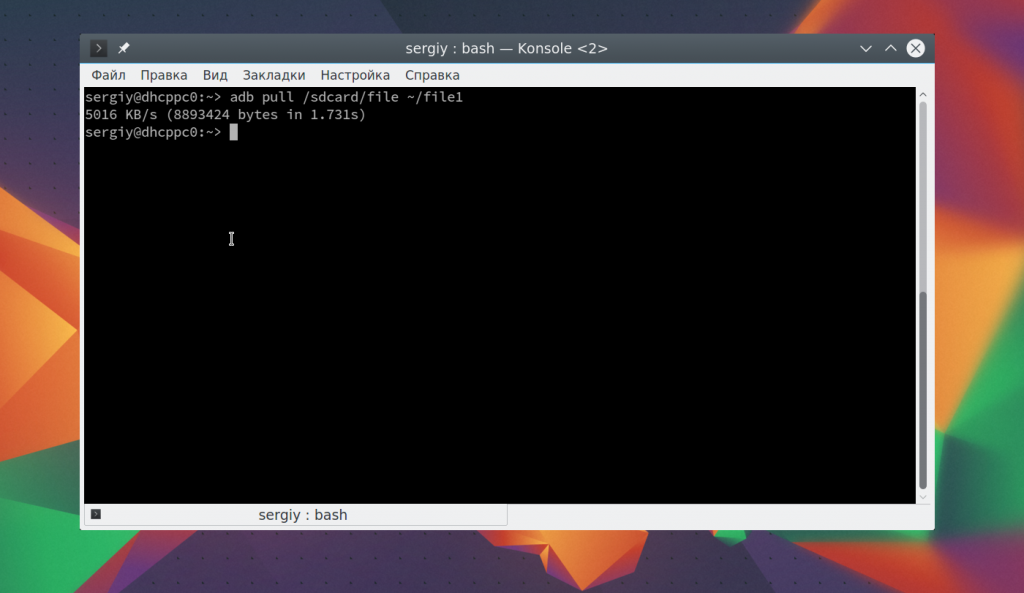
In the same rank, you can zavantazhiti file іz attach. Pull command syntax:
$ adb push /address/in remote/file/address/local/file
For example, copy the attached file back:
adb pull /sdcard/file ~/file1
Installed add-ons
For the help of adb, you can install programs without intermediary. Tsya mozhlivost may be more convenient for retailers. The install command needs to be passed only to the address of the apk file:
adb install ~/Momentum_apkpure.com.apk
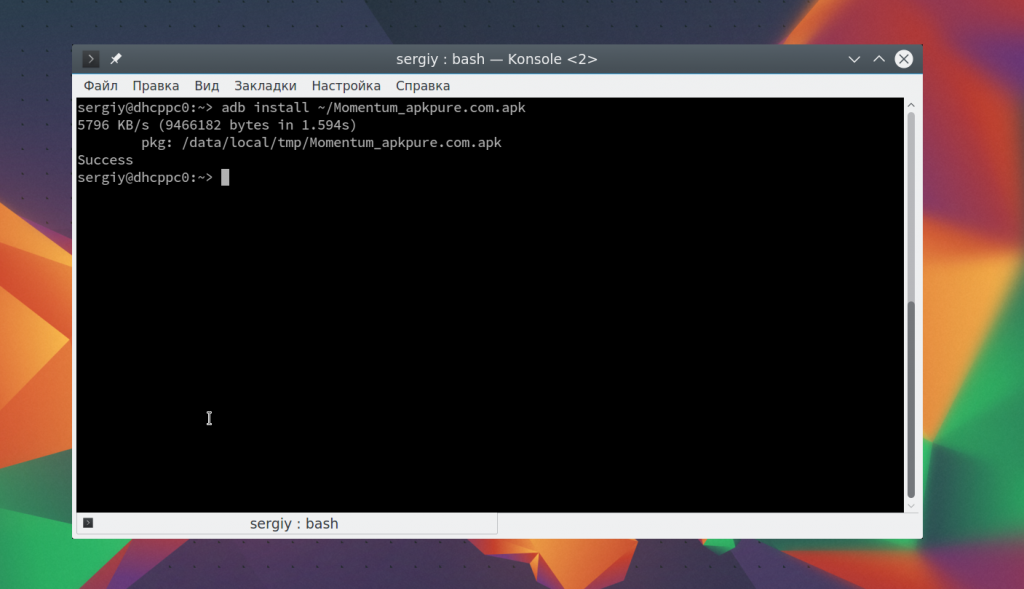
Once the program is installed and ready to work on your device. If you need to upgrade the program to more new version Then tag the -r option. Tse is important. Otherwise take a pardon:
adb -r install~/Momentum_apkpure.com.apk
More options available -s for installation on a flash drive and -d for a downgraded version of the program.
Viewing programs
Viewing the program is even easier. For whom it is sufficient to pass the package name to the uninstall command. For example, let's see the Firefox browser:
adb uninstall org.mozilla.firefox
Backup
You can create a backup copy of your firmware and all system files Android in order to її sweat even just that swvidko vodnoviti. For whom the backup command is used. Let's take a look at the syntax:
$ adb backup options packages
The options indicate how the data needs to be copied. The skin option may include the prefix no, which means that it is not necessary to copy data. Let's look at the main options:
- -apk- save apk files for programs, as for locking it is included;
- -obb- Save extensions extension installed apk files in obb format. For zamovchuvannyam vymkneno;
- -shared- save program data from SD card or phone memory, disabled;
- -all- Save all installed add-ons;
- -system- Save system programs, cі programs already enter to the list all.
The remaining parameter allows you to specify how the program should save. If the all option is specified, then, obviously, this parameter is not needed. In this manner, the command for backup systemview the axis like this:
adb backup -apk -obb -shared -all -f backup.ab
 For the help of the -f option, we will assign it to the archive file, you will save money from the current dad. If you don't ask anything, I'll be backup.ab for the lock. You will need to confirm the copy made by phone, you can enter a password for encryption:

For inspiration backup copy Tick the restore command. Їy enough to pass the address of the file:
adb restore android.ab
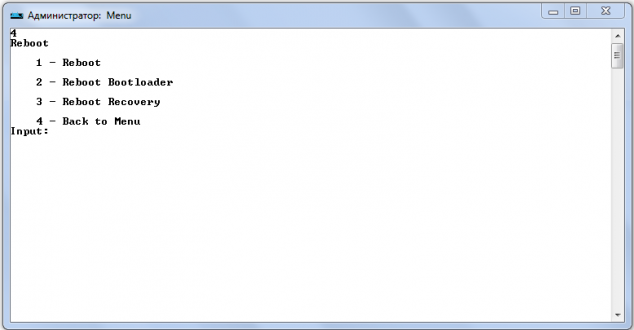
adb utilities - run commands to reattach the addon. You can simply reboot your smartphone with the help of the reboot command:
You can take advantage of the recovery mode:
adb reboot recovery
Abo in the mode of setting the zavantazhuvacha:
adb reboot bootloader
Android Console
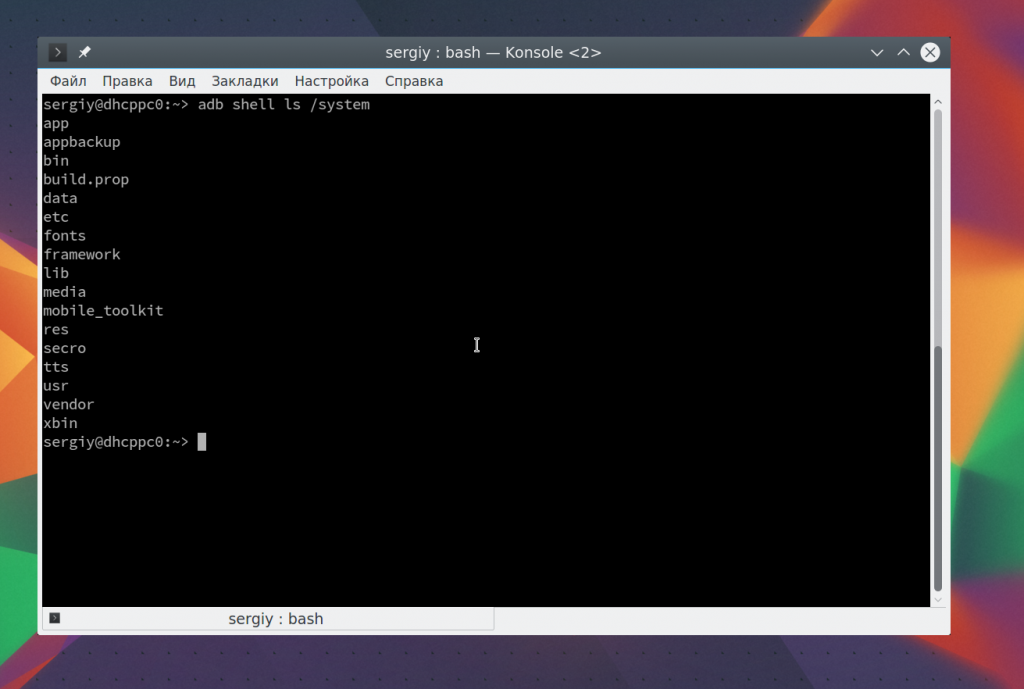
For help with the shell command, you can go to the Android console and see the necessary information there. More information about us is available here linux commands. We reportedly reviewed all the available commands in the article. Let's talk about the shell command itself and let's talk about some applications. To get to the console, dial:

adb shell ls /system
For example, for the help of such a command, you can generate a screen capture:
adb shell screencap -p /sdcard/screenshot.png
And so you can take the smartphone screen on the video:
adb shell screenrecord /sdcard/video.mp4
Visnovki
At this article, we looked at how to use the adb utility for android management smartphone, as well as the main commands of the adb program, so you can stop. adb shell commands Android terminals to that there is no sensation їх razbirati sche times. I agree, the information from these statutes was helpful to you.
A lot of people know about adb, a lot of people know adb and know the whole world of the console. The time has come to ask for that interaction with this functionality for the help of the Adb Run program. You can report back to whom you look around.
The author of the program comrade Shipilov Vitaliy.
The essence of the Adb Run program lies in the fact that it is richly corystuvachiv, like adb corystations, victorious type commands and so on, and it automates them and simplifies the coristuvacha’s execution in the console.
How can the program be console-like and folded on Narazi from 14 points, the procedure for the program is as follows: go from menu to menu for additional numbers, confirm the choice with the Enter button
Instructions-Overview of the ADB RUN program
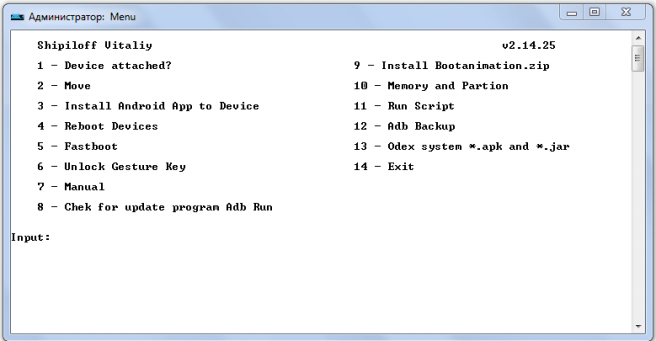
All the menu items in the Adb Run program are briefly shown at once
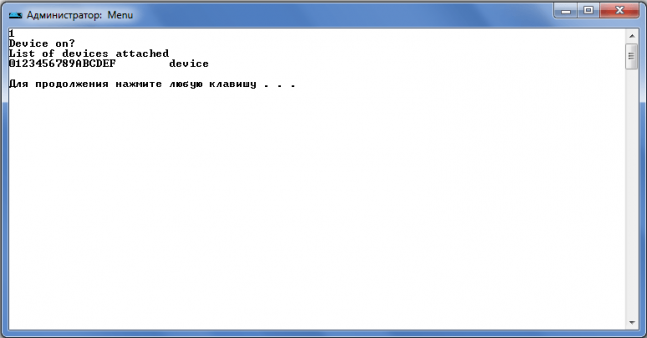
1. Item Device attached? - check the number of smartphone connections to the PC (don't forget to turn on the USB port on the Android device)
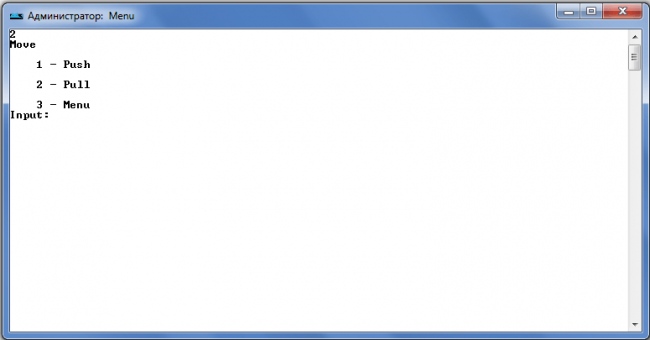
2. Item Move - move files from Android to PC and PC to Android. At these points, mortgages have “typical” options, and manual control is possible.
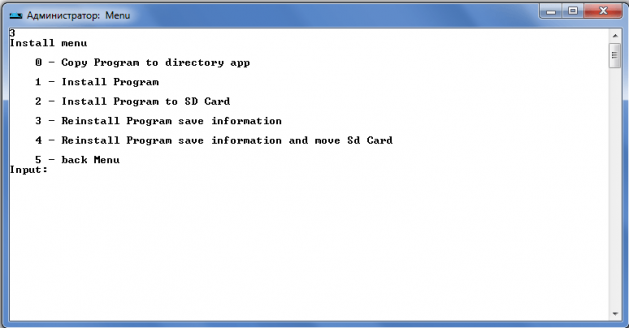
3. Install item android app to Device - installation of programs on Android, options for saving data, moving to a memory card.
4. Item
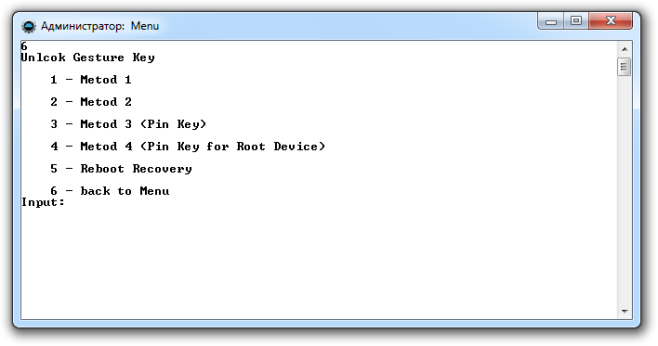
7. The Manual item is self-explanatory, here you can enter the commands manually, є the item that allows you not to enter adb permanently, but write the command in a row,
Universal ADB Driver (UAD) is a GUI based application that allows you to quickly install the Google ADB Driver on your computer in a few clicks.
Here, we may categorize, to throw off the remaining version of the Universal ADB Driver with the previous models. How do you joke for Drivers for your Android device then this is a treat for you.
Features of Universal ADB Driver
Quick Installer
Let me allow you to flash the Google ADB Driver in a few seconds. Tweak your computer and check Universal ADB Driver Setup and click on additional tools.
Supports every device
Tse supports every Android Device, whether it is from Major brands like Samsung, HTC, Sony or from Minor brands. It automatically recognizes the chipset of your device and install driver accordingly.
Detects Manufacturer & Model
This is automatically assigned to the Manufacturer name and Model Number of your device and shows it in the Manufacturer and Description List.
Refresh Button
To allow you to speed up the quick edits, I will add a list that we can connect to the computer. This feature is available in version 2.0 and is not available in version 1.0.
Supports Windows x86 and x64 Bit
It automatically recognizes the BITs of your computer and allows you to install ADB Driver on Windows XP, Vista, Windows 7, Windows 8, Windows 8.1 and Windows 10 easily.
Download Universal ADB Driver
Readme Once :
[*] Compatibility Note: Use Windows Computer only, including Windows XP, Windows Vista, Windows 7, Windows 8, Windows 8.1 and Windows 10.
[*] Support Nokia and Amazon: It supports Nokia devices including Nokia X, Nokia XL Series. It also supports all the Amazon Devices.
[*] How to Install: If you want to learn How to install the setup the head over to the Page.
[*] Best Alternative: The Universal ADB Driver is the best in the whole world, but the great alternative is available, called . Bezposeredno nalashtovoyuchi zavantazhuvach driver, tse also nalashtovy shvidki files on your computer.
[*] Credits: Universal ADB Driver is created and distributed by universaladbdriver.com. So, full credits goes to them for sharing the Driver for free.
Download Android Firmware
Choose your device Adcom Alcatel Ambrane Amoi Arise Bassoon Bedove Blu Bluoo BQ Bsnl Byond Celkon Champion Cheers Colors Coolpad Croma Cubot Zavantageti Karbonn K-Touch Koobee Lava Leagoo Lemon Lenovo Lyf M-Tech Magicon Maximus Maxx Micromax (Page 1) Micromax (Page 2) Mycell Nexus Obi Okapia Panasonic Q Sony Xperia Spice SunUp Swipe Symphony Thl Tianhe Timmy Tooky Ubtel Ulefone Verykool Videocon Vivo Vodafone Walton Wellphone Wiko Winmax Winstar Wynncom Xiaomi Xolo Xplay Xtreamer Yu Zears Zen ZD Real Zolo Zopo Zync
Download Android Driver
Choose your device Acer Adcom Alcatel Allview Amazon Ambrane Amoi Archos Arise Asus Bassoon Bedove Blu Bluboo BQ Bsnl Byond Celkon Champion Cheers Colors Coolpad Croma Cubot Dell Digiflip Elephone Fly Gfive LG Lyf Maximus Maxwest Micromax Meizu Mobistel Motorola Mycell Nexus NIU OnePlus Oppo Orange Qmobile Panasonic Pantech Philips Plum Posh Prestigio Samsung
The Adb program is recognized for robots with the Android operating system. ADB often wins when changing files in the operating system, restarting the work will become after some time.
ADB (Android Debug Bridge) - what in translation means a legal place for Android, the translation of this term itself already gives you the ability to understand that adb is a good luck between an android attachment and a computer, allowing you to work with android OS files directly from the computer era. The adb program is part of another program called the Android SDK.
How to install the ADB program
1 First of all, you need to get the Android SDK program. For robots in operating system Windows 7 radiomo install the program in zip archives, to get rid of problems from the offensive installation.
2 Unpacking archives from the program C:\
3 Now install the program SDK Platform Tools
4
Daddy's got it installed Android program SDK open folder android-sdk-windows it is necessary to launch an addendum in it SDK Manager, (When you have a language, you can be actively connected with the Internet). After the launch, it may appear later. 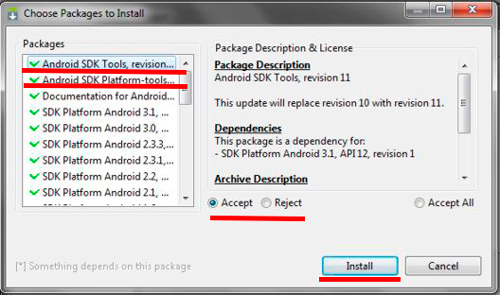
5 In the left part of the window, it is necessary to tick off two points Android SDK Platform-tools і Android SDK Tools, all other checkboxes are removed. Let's wait for the minds of vikoristannya that tisnemo accept, and then Install. If so, two designated programs will be installed on the computer. On whom the program is installed adb finished and you can start working with android devices. For skin attachment, do not forget to install drivers.
If you don’t want to write the path to the folder with the program, you need to edit the file path. At the moment, the path to the program looks like this: C:\android-sdk-windows\platform-tools\adb .
To change the path parameters, do the following:
On the label " My computer
» embossed with the right button of the bear, select the parameter « power", at the vіknі, we go to the rozdіl" Additional system parameters
". Let's press the button " Parameters of the middle
» that at the vіknі z signed « System changes
» known parameter « path» and press the button « Change
«. 
At the vіknі, scho vіdkrilosya, marveling at the row " Significance of the change
”, For example, we put a speck with a coma (like її not) and write step by step: ;c:\android-sdk-windows\tools;c:\android-sdk-windows\platform-tools;
» Enter the command « adb device s". After that, a change of connected outbuildings will be shown.