How to fix the remote printer. How to build a printer, we measure it. Abo podoristuvavsya himself, now give it to others
Hello, new readers! For days, you’ve been nareshti, having completed one long-drawn-out right, and the very conversion of your old printer into a mesh. In this article, I will describe everything in order - how everything started and how everything ended.
The need for converting the printer into a mesh appeared in my connection with the replacement of the computer. She wanted to work in such a way that it would be possible to make friends over Wi-Fi with any kind of attachment that supports such a function.
Printer dosit old, ale zrobleny on conscience. New has already been mentioned.
The printer could just be plugged in to a new one. stationary computer through the usb port for the help of an lpt-usb adapter, but we don’t need easy ways.
Yak zrobiti printer merezhim
First croque for folding tether printer was the purchase of a special piece under the name lpt print server Tp-Link TL-PS110P.
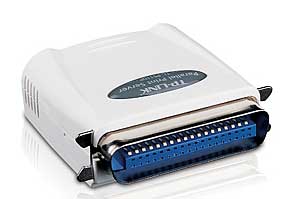
The Danish print server allows you to robit any printer with an lpt port by following the "printer - print server - router" scheme. May from one side of the sockets for connecting to the printer, from the other RJ-45 socket for connecting to the router.
Having bought a print server, but in my mind, not everything was so simple. On the right, because my HP LaserJet 1100 printer has a non-standard lpt-pin (microcentronics-36), in order to connect the print server to the printer, I need a centronics-36 - microcentronics-36 adapter. It was too late to get into the chum behind the cordon, so I bought the components in radio spare parts and tried yoga myself.
Scheme for making contacts bra. Dyakuyu author!
After that, as I found myself with great difficulties, having completed the adapter, I immediately ran to put the whole system together and test.
Later, after the folding of the system was left behind on the right - install the print server distribution kit (as it appeared, not obov'yazkovo) and add a new printer.
I will show an example on Windows 7.
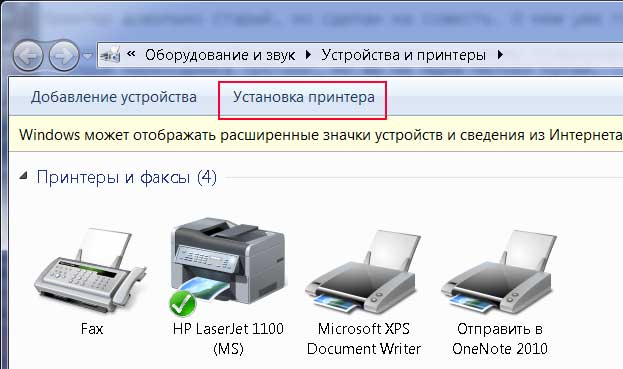
Click Start-Add-Ins and Printers-Install Printer
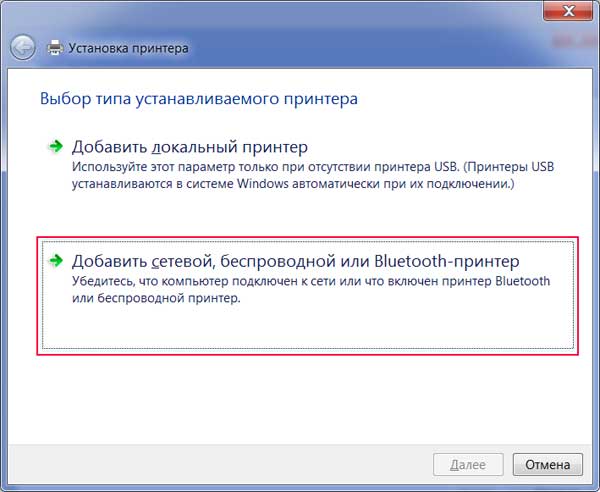
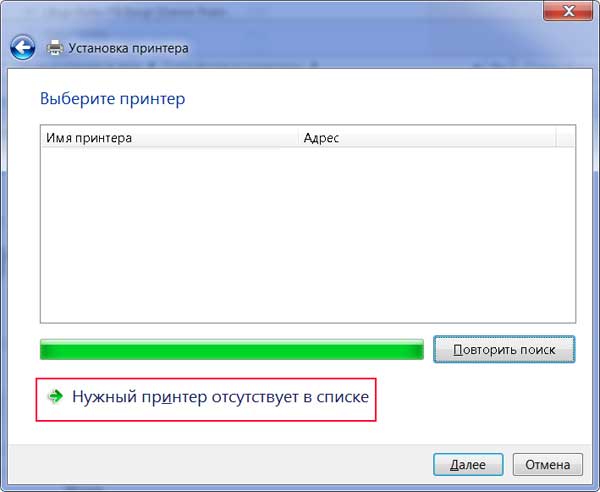
We select "Add a printer, drotoless, or a Bluetooth printer"
The printers will be searched for, and then we need to click on the button “Required printer available on the list”.
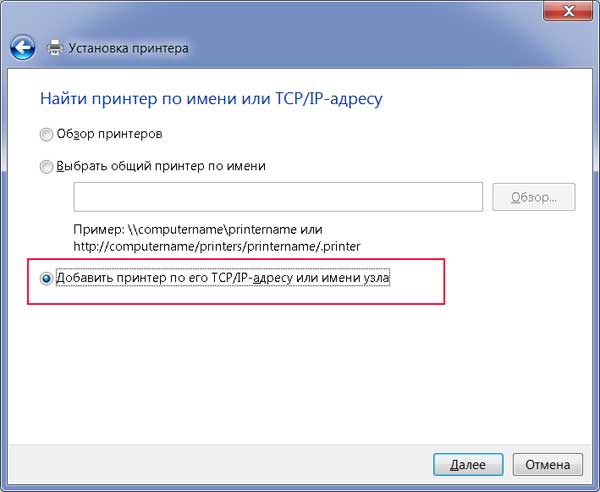
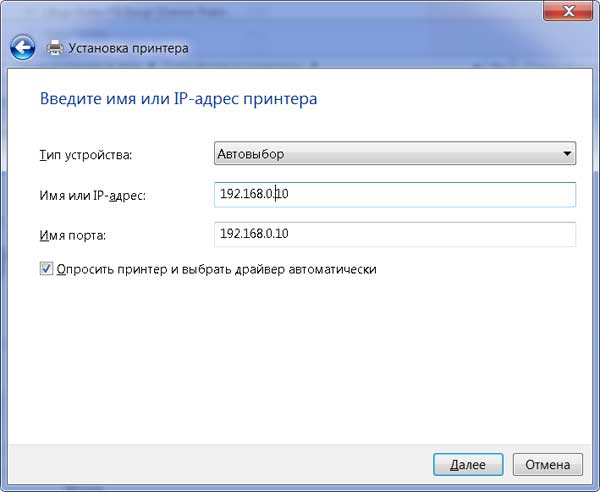
Enter the IP address of the printer, tobto the print server (for locking tse 192.168.0.10).
We select the appropriate parameters for the supplementary capacities. I have an HP LaserJet printer with a parallel port.
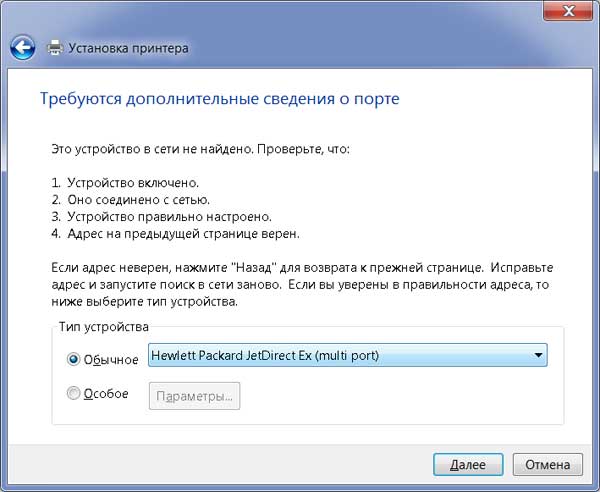
The port will be built without changes - Parallel 1.

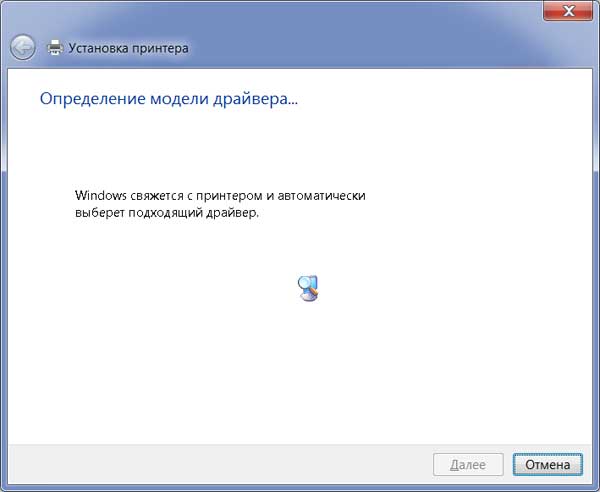
The driver model is displayed.
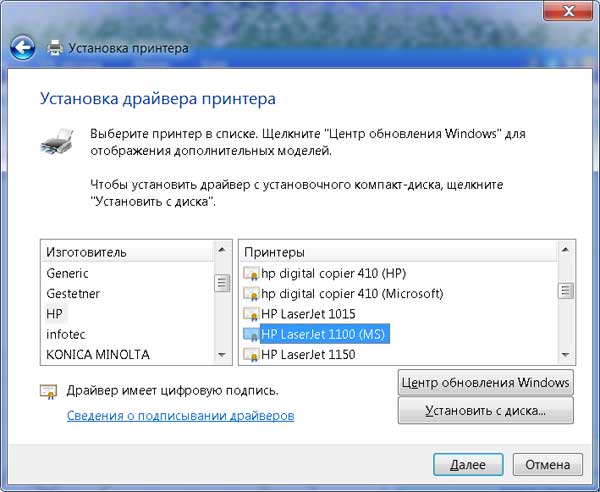
After that, a list of all printers appears, among which you need to choose your own.
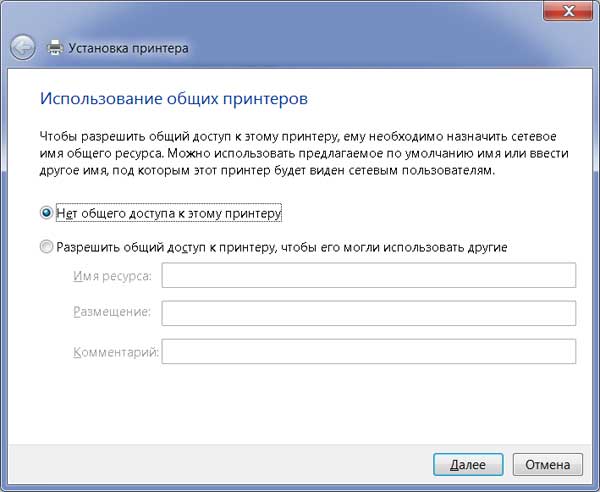
Protected / allowed access to the printer.
I, nareshti, s'appear at a meeting about the successful installation of a new printer.
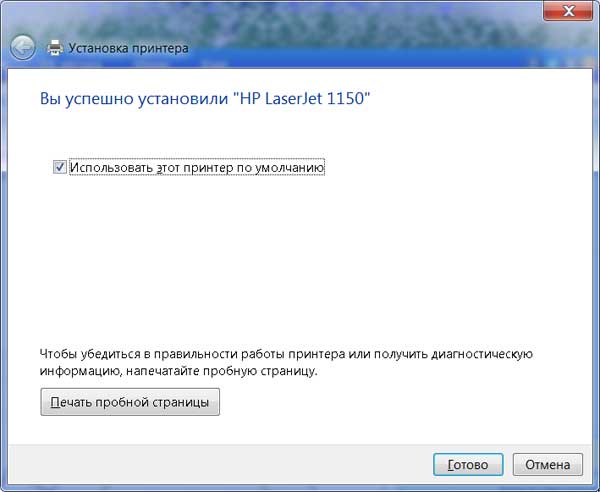
If you don’t leave the installation master, in order to change it into correctness, you can change the test side.
When the printer is all right, everything is rozdrukuvav, it means that everything was set up correctly.
In exactly the same way, we add a printer on other attachments under Windows controls.
In the next lesson, I will write about those, how to connect to the printer Android-appliances and others. DO NOT miss!
Also watch the video with a friend from Android via Wi-Fi through an add-on Printer Share Premium:
Aje stinks are zatsіkavlenі in that, shchob koristuvach for organization home measure vicoristovuvav vypuskaєtsya their possession. Such a concept is fundamentally wrong for the 21st century. In this look we will look at everything possible options connecting the printer to the home network. Allow me to optimize the robot of the koristuvach. Ale persh for everything, it is necessary to discuss, about what the language was about.
To make it easier to navigate in the settings, it is necessary to sort through the printer interfaces: what stinks can be and why stinks are needed.
USB port
1.
Vikoristovuyuchi vysokoshvidkіsnu bus, koristuvach can easily connect the printer directly to the annex, for example, to a laptop or router. Denmark's interface is unique in its own way: on one side, the port for connecting to a printer has a trapezoidal shape, and on the other side, there is a rectangular rose for connecting to a computer. As a rule, it is the most important thing for the owners of attachments with USB-interface to check the power settings of the tethered printer. In this rank, you will be able to connect not only from a computer, but also from other outbuildings connected by dartless mesh.
2. An Ethernet port is present only on expensive outbuildings and is used to connect a printer to a media hub. Zastosovuyuchi tsyu technology, you can satisfy the consumption of all coristuvachiv, connected to the merezhі.
3. Wi-Fi technology. Many modern printers are equipped with a Wi-Fi module. However, the practice I will build this you can not worry. For each other, it is necessary to win only a few firm software security, which is far from being practiced on tablets and smartphones.
Connecting to a router
Now it is necessary to sort out how to build a USB printer. Without the built-in Print Server module, try to rob the printer and we will not bring results. For this reason, it is better to read the instructions, as they are supplied in sets with the least installations. Reconsider that for the router model you have chosen, the possibility of connecting a printer has been effectively transferred. Since such a possibility has been transferred, follow the next steps:
- connect the printer and router to the electricity grid;
- connect the printer to the USB port of the router and switch over, what is wrong with the device. For whom, open the web interface merezhego outbuilding at the end of the internet browser. You can find the password, login and addresses of the router in the instructions. If the patching of the wireless mesh was set up by the provider, then the power supply connected with the connections of the other building, it is necessary to check without intermediary with the master, who was engaged in the patching of the router. After successful authorization, the printer's name may appear in the Print Server distribution.
Setting up a USB connection with a router
On the computer, you need to go to the "Control Panel" and select the "Add Printers" tab. Follow this algorithm: “Add local printer- "Create a new Standard TCP / IP port". Then press the "Dal" button and enter the IP address of your router (for locking ce 192.168.1.1). Obov'yazkovo znіmіt tick the box for the item "Select the driver automatically". Once the printer knows, select the type of Generic Network Card to attach and click on the “Next” button.
You can install the driver manually for the help of the disk, using a single menu item. Re-enter the "Add printers" item and select the "Printer power" item. Move the cursor over only the attachments and click on the alternative mouse button. Go to the "Porty" tab. Here, install the LPR protocol and set the name. after the wedding report inventory In addition, as you connect the printer to the router, you can easily change all the necessary settings on your own. We will not hesitate to get familiar with the instructions on how to get to the router. Dosit often typing pronounce koristuvachevі vlasny printer connection algorithm.
Troubleshooting Wi-Fi
During the rest of the hour, office equipment is equipped with a Wi-Fi module. In such a rank, the koristuvach takes the opportunity easily and quickly builds his printer. AT operating systems Windows 8 and 10 as well as other versions Android don't worry about getting the printer working correctly over Wi-Fi. Folding blame through insanity software and operating system. A lot of koristuvachіv on the territory of the post-tradyansk expanse vzagali can not think of the possibility of completely vikoristovuvat Wi-Fi module of the other building.
In this case, there are two ways to solve the problem. First, the printer can be connected to the router via USB, the instructions are described above. In another way, the printer can be connected via dartless z'ednannyu WPS. The router in this way is obviously to blame for the mother Print Server, which supports your printer model.
Wikoristannya wire mesh
yakscho nalashtuvati wireless connection the printer didn’t come to the edge, don’t get confused. Use one more simple way to create a wonderful printer. For whom you can win a wired interface. To connect the coristuvachev, you need to add the Print Server attachment. Today you can practically know yoga in any computer equipment store. I will build this warehouse for a total of 200-300 rubles.
Certification of the server to another in most vipadkіv May factory settings. The virobnik shows them on the stickers, as they sound like they are placed on the hull of the annex. Everything that needs to be done, just connect the printer to a friend's server via USB. The one in his line is connected to the router hub for an additional Ethernet cable. In order to recognize the address of the printer, it is necessary to go to the router settings or to display the PC for additional special software. After that, it is necessary to viconate the installation of an auxiliary building according to the described above instructions
solution road
A lot of koristuvachiv, such as the power supply settings of a twill printer, the price of the power supply of the antrohi is not correct. Therefore, it’s better not to let a friend’s server out of the field. Obviously, the price of such an addon will be to save someone for good, even if it’s more, lower for more people Wi-Fi routers, What to give chimali opportunities. For such a miracle-priest koristuvachev, you will get generous for 4000-8000 rubles.
Setting up Print Server
The installation of a non-rotor add-on will practically not interfere with a wired server to another. All information about fine tuning I will add you can know in the instructions to fencing. The main feature, as a result of koristuvachiv, is the possibility of supporting the mobile technology of the Apple company. rich virobnikov jetless printers And routers are forgetting about this brand. Three reasons for the owners of iPad, MacBook and iPhone adding a wireless server to a friend can be the only solution to the problem associated with the organization of work on printers.
The simplest way to create a printer is by using it to access the local PC. The algorithm for carrying out this operation is under the force of schoolchildren. Log in to the printer installed in the system, select the "Access" tab. Here, set the ensigns opposite the paragraphs “Promalovuvannya zavdan” and “Zalniy access”.
Go to the power of the system and go to the bookmark "Im'ya computer" perekonayetsya in what for all computers that are folded into local lines, The same “Robocha group” is registered. In operating rooms Windows systems 7, 8 and 10 for organization tether access before the printer you need a viconati dodatkovі nalashtuvannya twill adapter. It is necessary to go to the item "Measurement Management Center" and change the parameters of the main access. For whom to set the right to the next watering, as the words "Turn on" begin. It is recommended to choose 128-bit encryption and enable password protection.
Remote connection to the printer
After that, as you know the first steps, connected with the organization of the work of the tethered printer, you can proceed to connecting the globally accessible extension to other PCs in the local tether. There are two ways. The first option has already been described above. Golovne know the IP address of the printer. Another way to help these coristuvachas, so that everyone can know the easy way.
Go to " Merezhevy connection»I choose an item« merezhe otochennya". You can also run the shortcut "Merezheve otochennya" on the desktop. Here computers are shown, as if to enter working group. After that, as you know the PC you need, click on it. The transfer of available resources will show the printer. Just click on the power button and wait with your mind, the printer will connect.
visnovok
As a matter of fact, it is necessary to organize access to the printer as soon as possible, it is possible to implement dekilcom in ways. Variants are impersonal, I will give my mother a sum of pennies for their implementation.
Hello everyone! In these articles, we will talk about those how we build a printer. Tse bude good prodovzhennyam earlier rozpochatoy on blozі those about zagalnі. So let's take a look.
So I’ll immediately say what I won’t describe here detailed installation printer like this. Aje tse is easy to finish. It would be better to connect yoga to the computer for help usb cable, and then install the software.
Well, let's get started. Further improvements will be shown on Windows 10 applications. If you want on Win 7 and 8, everything will be the same. So, in the first place, let's go to the "Control Panel":
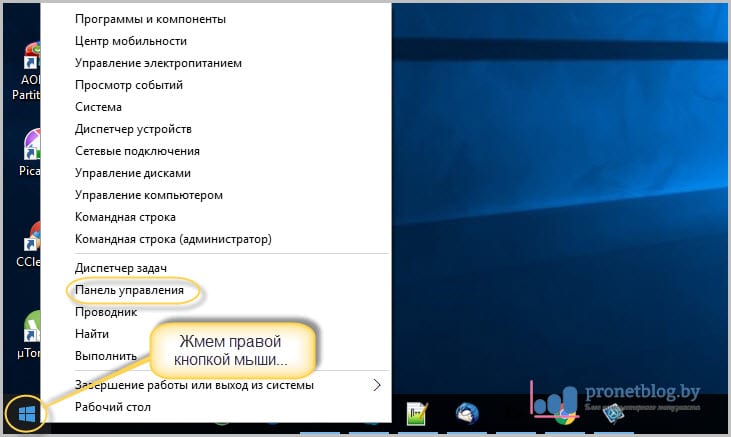
І shukaєmo there the tab "Additions and printers":
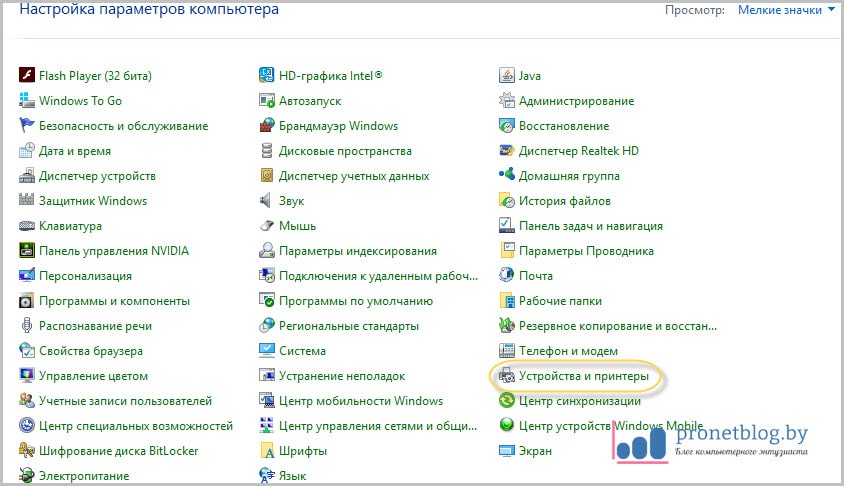
Let's later know our latest printer, embossed on the badge right button click and select "Printer power":
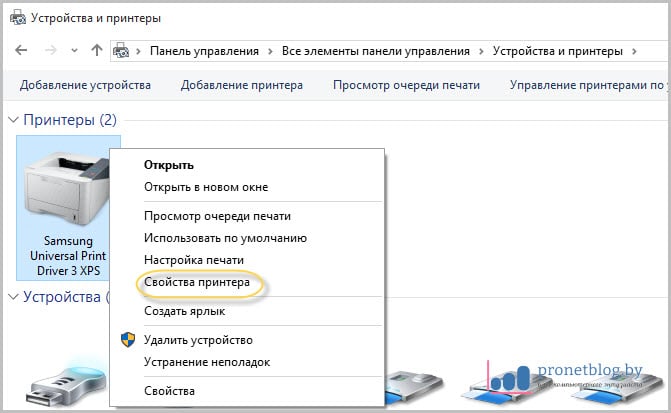
On the next button, select "Access" and activate the checkbox "Access to this printer":
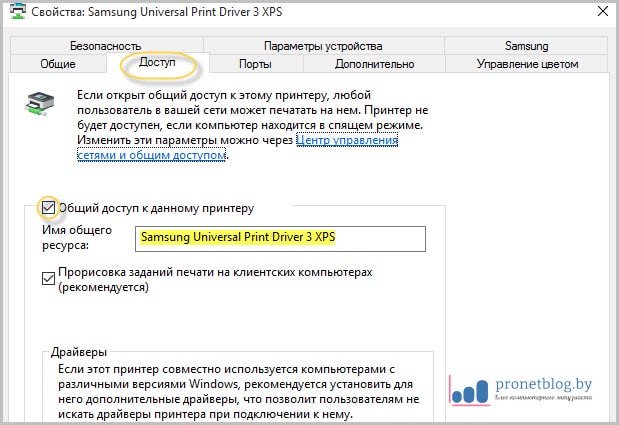
And about all sorts of things, you can go to the "Safety" tab and switch to the fact that for the "All" group of shortlisted people, there is a checkbox next to the "Druk" item:
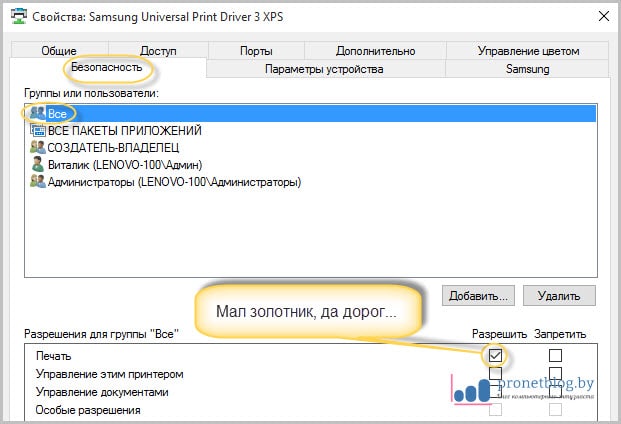
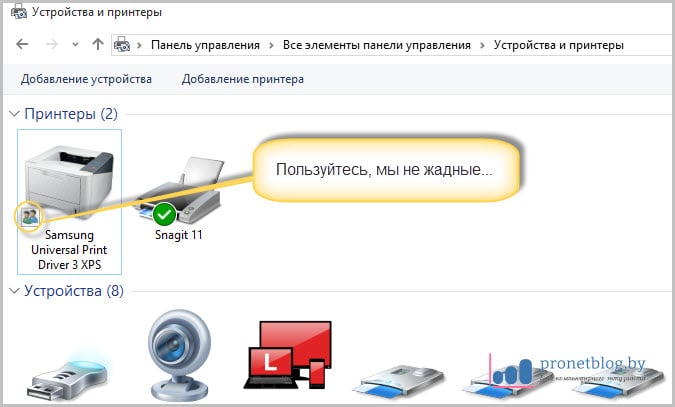
Obviously, do not forget to press the "OK" button everywhere in order for the changes to be accepted. Now, if you turn to the primary section "Appendices and printers", then by the printer icon you can add an icon to two people: