How to connect a network printer win 7. How to share a printer
Network printer installation is quite useful feature in Windows 7, because if you have multiple computers connected via a local network and one printer, you can significantly increase the efficiency of using this equipment. With this option, users will be able to print documents without departing from the workplace, and there will no longer be the need to transfer files from computer to computer.
It should be borne in mind that not the printer itself should be connected to the network, but the computer on which it is installed, in addition, it may be necessary during installation, you can download them on the official websites of the hardware manufacturer, or install them from the disk supplied with the printer. There are two ways to find a printer on the network: first, simple, fully automatic. The second is more difficult, you will need minimal knowledge and participation. Usually, the second is resorted to when the first does not work.
Method 1. Automatic
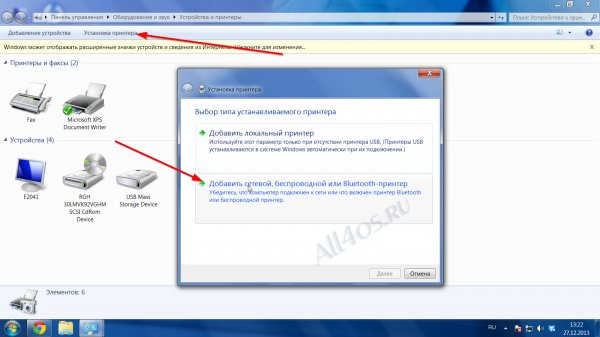
1. Go to Control Panel -\u003e Equipment and Sound -\u003e Devices and Printers. Here, in fact, will take place all the action.
2. Click on " Printer setup". An installation window will appear. A local printer is a device that you connect directly via USB. But we are interested in the second option - "Network Printer" - a printer, access to which is usually shared between several computers at home or in the office.
3. The automatic search for devices on the network will begin. At best, you will see several devices and choose the right one. All you need to know is the exact name of the printer, for example, CanonLBP6000.
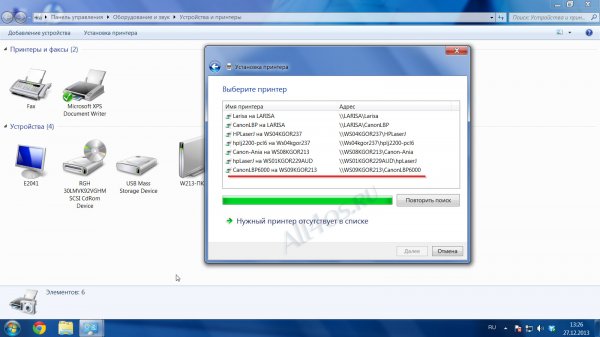
In the example in the column “Printer Name” you can see the name of the type “CanonLBP on LARISA”. The first is the network name of the device, the second is the network name of the computer to which the printer is connected directly.
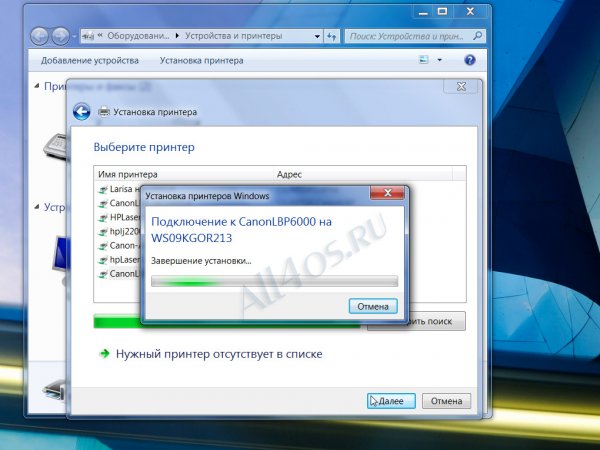
5. If everything is good, at the end you will see "You have successfully set [Printer Name]".

6. A new device will appear in the “Devices and Printers” window. It remains to put it default printer. When you click on it right click, see the desired item.
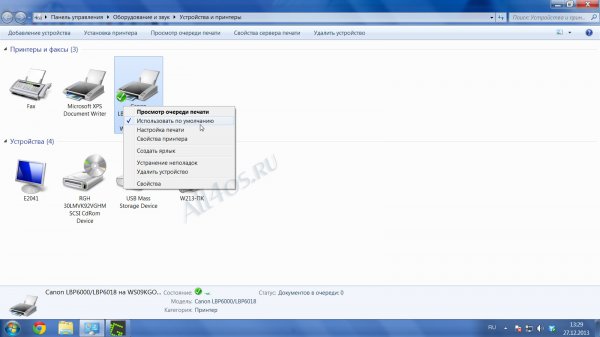
Now, when printing, all documents will be automatically sent to the newly installed network printer.
Method 2. Find the printer by network name
Suppose method 1 did not help find the device. Step number 3 was interrupted, a notification appeared that no printers were detected. This usually happens when the system is just installed.
1. Step 3 was interrupted; the line “The required printer is not listed” appears in the window below. Click on it or “Next”.
2. See the window where you have to enter the printer name manually, for example “\\\\ network_computer_name \\ network_printer_name”.
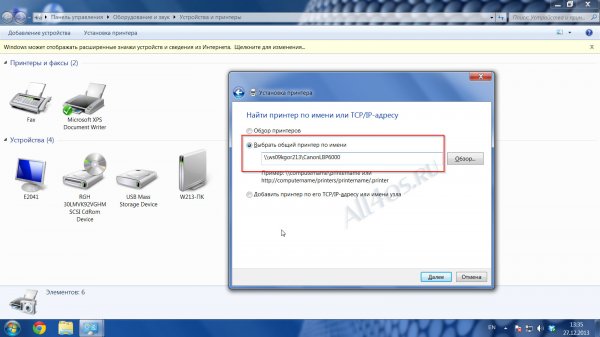
Both the first and second is on the “main” computer to which the printer is directly connected. In the properties of "My Computer" look for the string "Network Name". In the printer properties in “Devices and Printers” - the network name of the printer.
In Windows open general access can not only to folders or drives. Very convenient to open network sharing for the printerconnected to one of the computers on the local network. As a result, you can use one printer to print documents from several different computers. This will not only save significant funds, but also save staff from running around with flash drives or disks when the office staff will need to print something.
To share the printer, sit at the computer to which the printer is connected and do the following:
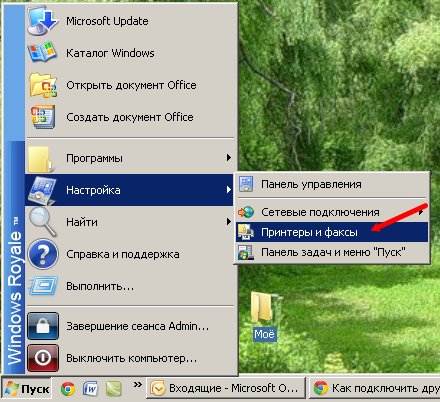
1) Go to “Start” - “Control Panel” - “Printers and Faxes”.
2) Right-click on the name of the printer to which you want to share network users - select “Properties” - go to the “Access” tab:  3) Place a marker in front of the “Share this printer” item.
4) In the “Network Name” field, enter the name or description of the printer that will be visible to network users. It is undesirable to use spaces in the printer name:  5) Click “Apply” - “OK”. After that, the printer will be shared and a hand symbol will appear on it:
In order for the user of any computer on the local network to print on this network printer, it is necessary to install this printer on his computer via the network. If all computers on the network need to be allowed to print on this printer, then on each of these computers doing the following steps:
1) Sit down at the computer of the user who needs a network printer. Go to “Start” - “Control Panel” - “Printers and Faxes”.
2) In the menu bar, click “File” - “Install Printer”. The “Add Printer Wizard” starts. Click “Next”:  3) In the next window, set the marker to the “Network printer or printer connected to another computer” and click “Next”:
  4) Then set the marker to the “Browse for printers” position and click the “Next” button:
  5) In the next window you will see a list with the names of computers and printers connected to them. Double-click on the computer and then the printer to which you want to connect. The name of the selected printer appears in the “Printer” field. Click “Next”:
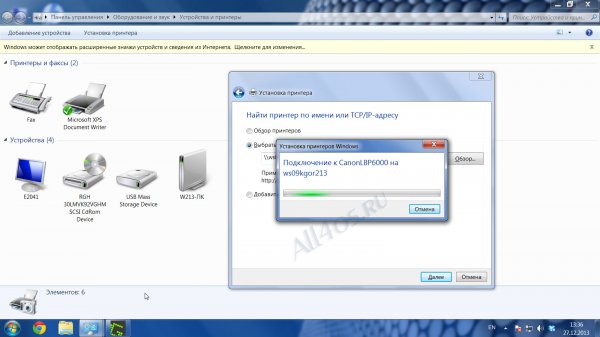
  6) You will see a warning that printer drivers from the network will be installed on the computer. Click “Yes”:
  7) In the next window, you will be prompted to use the default printer to be installed. If you agree with this, leave the marker in the “Yes” position and click “Next”:
  This completes the installation of the network printer. After you click the “Done” button, the icon for this printer should appear in the “Printers and Faxes” folder.
Printing on a network printer is no different from printing on local printer. It will also show net paper alerts and other messages to network users. You can also cancel or pause print jobs.
Do not forget that to use the printer by other computers on the network, it is necessary that the computer to which the printer is physically connected must be turned on, not hung up, and connected to the local network. If errors occur when printing to a network printer, check these conditions.
Sharing a printer in windows 7. Many have a new operating system. windows system 7 Difficulties in sharing a printer. How to create a shared printer on Windows XP, we have already considered. You can read about it in my article.
Now we have a more difficult task. You must create a shared printer in Windows 7.
Just want to draw your attention to this. If you have an old printer (it is 4-5 years old or more), then it will most likely be installed on Windows 7. And it will print, but if you connect it over the network, especially through Windows XP, problems may arise. I’ll need a driver for Windows 7. That’s what happened to me when I created the video I posted at the end of this article.
If the printer is not very "ancient", then you can download drivers for it on the Internet.
First we need to set up printer sharing in Windows 7.
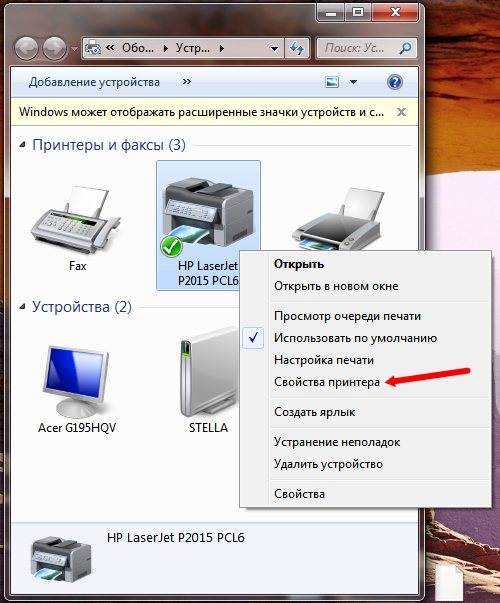
To do this, go to the menu Start - Devices and printers.
Right-click on the printer you want to share and select from the drop-down menu Printer properties .
Click the tab Access and check the box next to the entries Sharing this printer and Drawing print jobs on client computers (recommended) .
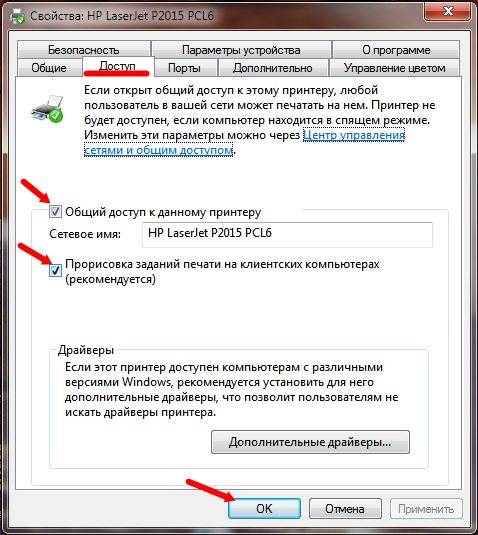
Push buttons To apply and OK .
Now check which group your computers belong to. The group name must be the same on all computers on your network. Otherwise they will not see each other, and you will not be able to connect the printer.
Check group name inWindows 7
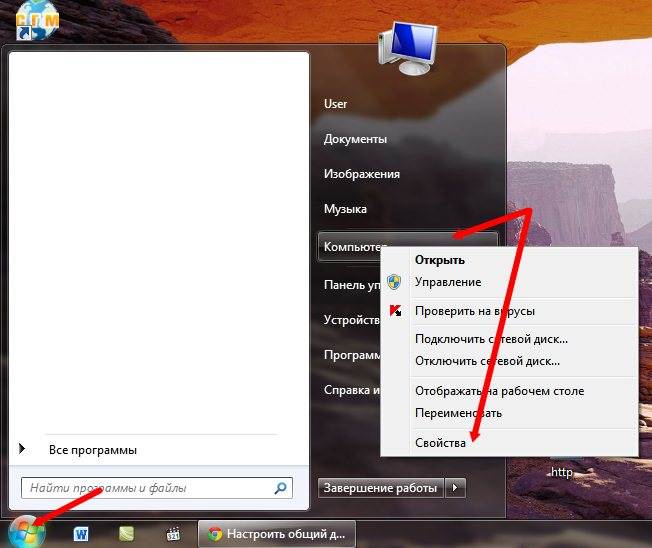
To do this, go to the menu Start and right click on the tab Computer and in the drop-down list select Properties .
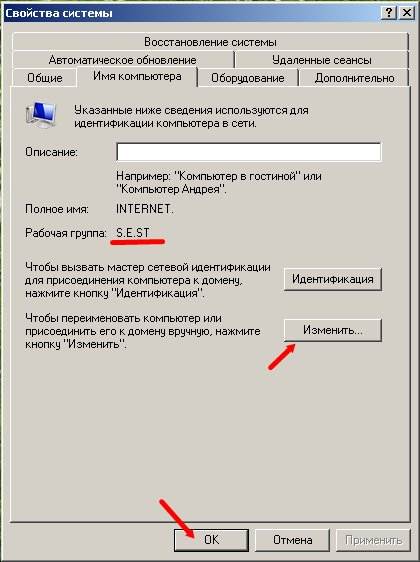
In a new window System click on the link Change parameters .

Click the tab Computer name and look at the record Working group .
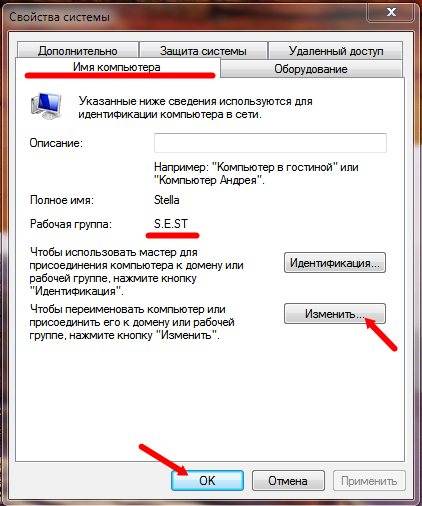
If you need to change it, then click Change . Change the name and click OK .

Again, go to the menu Start – Control Panel . In the upper right corner of the Search window write the word " network ". You will see this list.
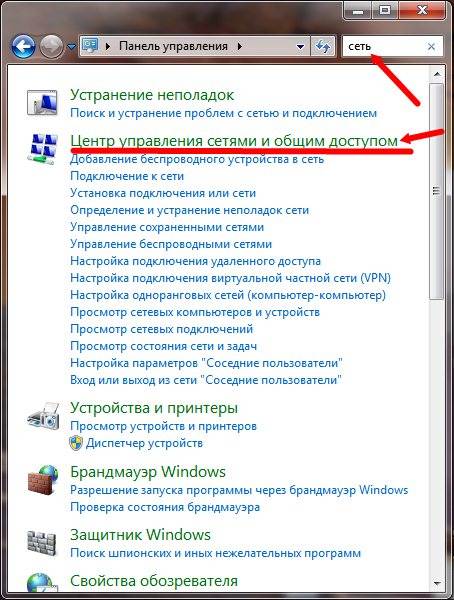
Click on the record Network and Sharing Center . In the next window, go to the left side and click on the record Change advanced sharing options .

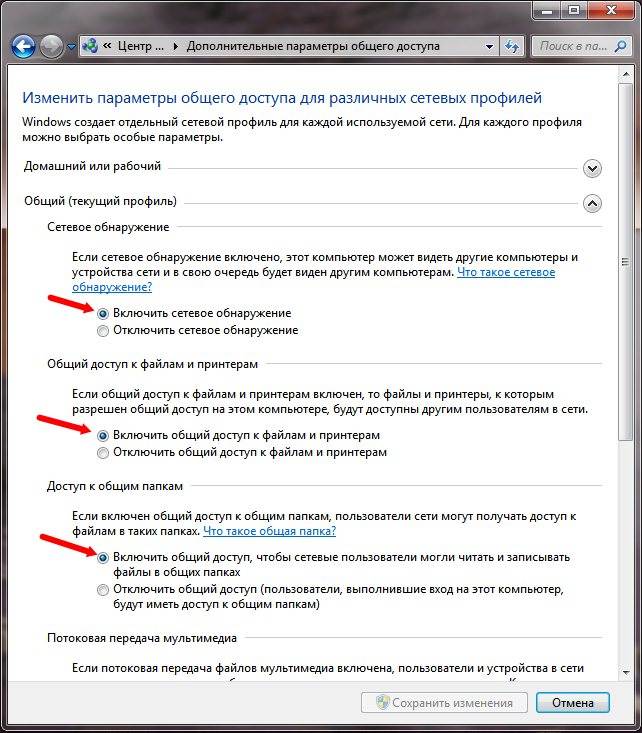
In the next window, set the switches to
- Enable network discovery.
- Enable file and printer sharing.
- Enable sharing so that network users can read and write files in shared folders.
- Use 128-bit encryption to protect shared access (recommended).
- Disable sharing with password protection. (If you do not do this, then when accessing the printer you will need to constantly enter the password.

Now go to the computer with operating system WindowsXp .
First we check the network group.
Right-click on the icon. My computer and in the drop-down list select Properties . The eponymous window will open. Properties .
Note
The same window can be opened differently. Start - Settings - Control Panel - System .
Click the tab Computer name , and if necessary, change the name Working group .
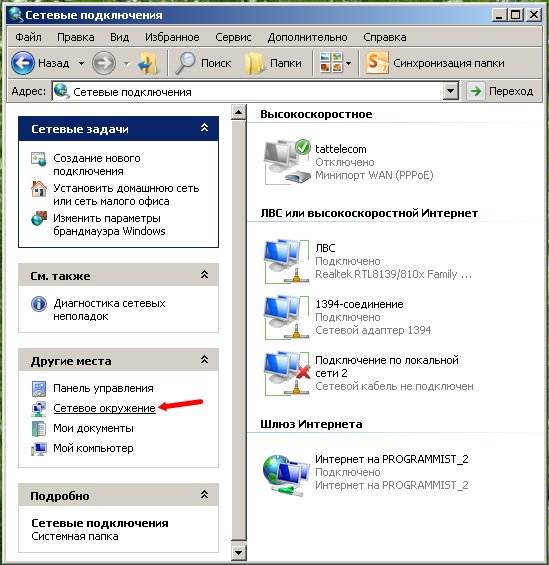
Now open the window Network connections .
To do this, go to the menu Start - Settings - Panel management - Network Connections .
Go to the left half of the window and click on the link. network .
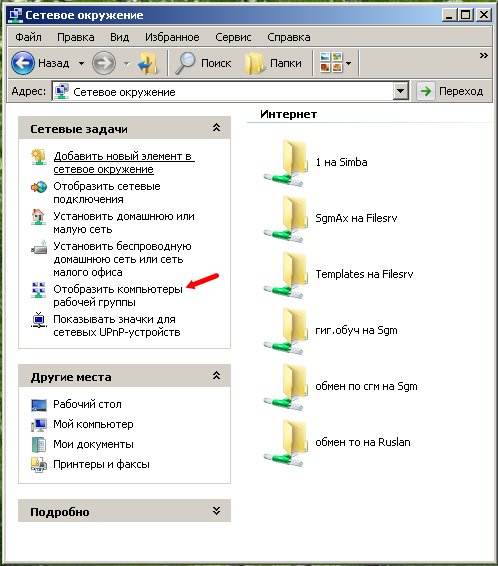
Now, on the right, we have displayed all the computers of our network, included in this moment. We find the computer on which we have installed Windows 7 and the printer.

If you have a home network, you will not have to search for a long time. Click on the computer icon, with the printer installed.
In the same place on the right we should display our printer.
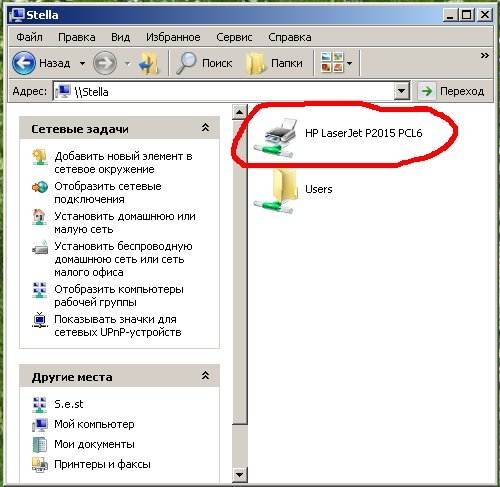
Double click on it. A window will appear asking.
You are trying to connect to the printer, the corresponding drivers will be automatically installed on this computer. Printer drivers may contain viruses or scripts that can damage your computer. You need to make sure that the computer sharing the printer can be trusted. Continue?

Feel free to click Yes . The following query will appear.
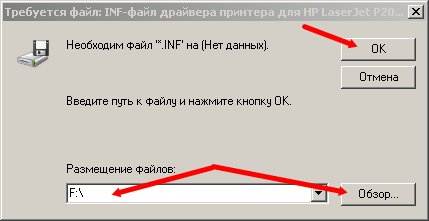
The server for the printer does not have the desired installed driver the printer. To find the correct driver, click the " OK ". Otherwise, click Cancel, and contact the network administrator or hardware manufacturer with the required driver.
Again, press the button Yes .

We insert the driver disk of the printer installed on Windows 7 into the drive. Usually, the file is found automatically, but you can also specify its location by yourself.
To do this, in the next window, specify the drive letter and locate the file via the button Overview .
So the problems begin.
With this new printer you will not have this. Since the new printers and drivers are new for Windows 7.
I don’t have drivers for Windows 7 on the disk, so I’ll need to first find them on the Internet.
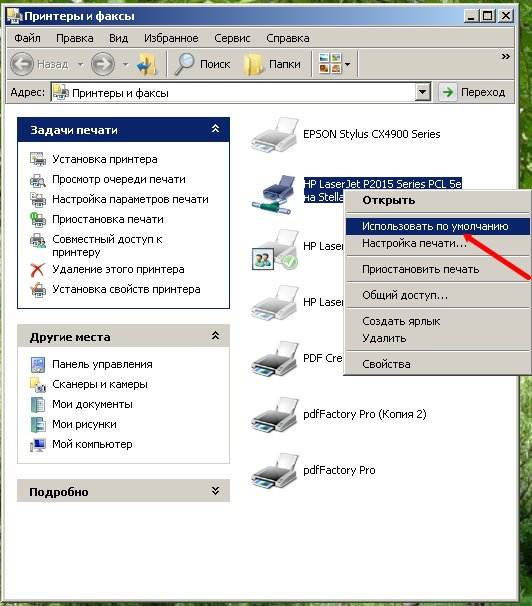
In the window that opens Printers and faxes find our new printer. Click on it with the right mouse button and select in the drop-down list Use default .
A white tick in a green circle should appear near the printer.
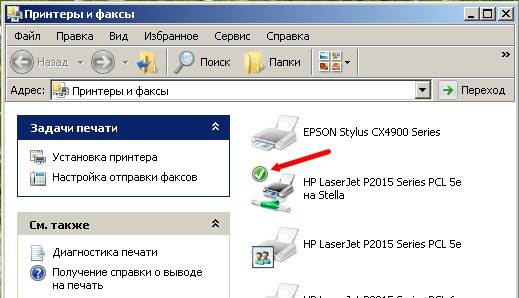
Now you can print your documents.
All that concerns local networks You can read in articles from the heading.