Installing themes on windows 7 initial. Change the elements of the conductor. Preparing the system to support third-party themes
Insanely easy to install themes in Windows 7 / Vista / XP!
Thanks to this patch, it will be possible to easily install themes from third parties, i.e. not created by Microsoft themselves and not licensed by them.
Such themes are most often in the format .msstyles (it happens and .theme, but less often) and they need to be copied into the folder with the themes of Windows OS (C: \\ Windows \\ Resources \\ Themes). After that, you just have to click on such a file twice with the mouse - and the design theme has changed. Simply. Without any additional programs.
After installation, you must restart Windows. Patched files can be restored by re-launching the patch and pressing the appropriate buttons.
suitable for both 32-bit architectures and 64-bit for the following windows versions: 7, Server 2008, Vista SP1 / SP2, Server 2003, XP SP2 / SP3.
There is nothing difficult in working with the program. But let's still consider it more.
You downloaded the program and extracted it from the archive. Launched (UniversalThemePatcher-x86.exe for 32-bit OS versions and UniversalThemePatcher-x64.exe for 64 users) ( necessarily with administrator rights) and see the language selection window:
Choose the great and mighty and click on OK.

A window opens with information about installed system and information about the files we need:
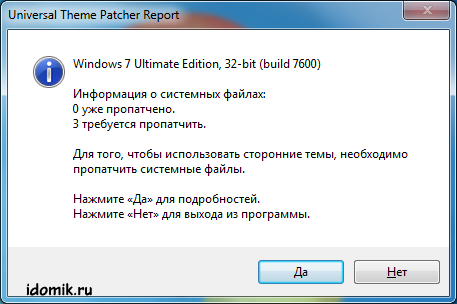
Click "Yes" to continue and see the window where it will be shown which files we need to patch. In each system, they are different, but be sure, Universal Theme Patcher will choose for you exactly the ones that need to be patched.

Click on the "Patch" button next to each file in turn and get a success message:

When we patch all the necessary files - Universal Theme Patcher ask us to reboot, which we will do.

That's all! Now you can safely install third-party themes, whether you have Windows 7, Windows Vista or Windows XP!
You can check the result by running the program again.
Many PC users want to give operating system Windows more interesting and attractive appearance with the help of its personalization.
Therefore, the question of how to install the theme on Windows 7, is relevant.
Consider the whole process of installing themes for different versions of this popular operating system.
The easiest way to install a theme on Windows 7
For novice users, the easiest and most accessible method of changing the look and feel of the Windows 7 operating system will be installing one of the certified themes downloaded from the official Microsoft website on a personal computer.
In this case, you need to perform a number of simple steps:
- in the free space of the desktop click right click mouse to call context menu;
- in the menu select the item “Personalization”;
The choice of the item "personalization"
- to select one of the themes pre-installed on the computer, simply click on the version you liked with the left mouse button.
Tip! If nothing of the existing options suits you, you can install another theme by downloading it to your personal computer. This is done very simply and quickly.
- When you click the left button on the link "Other topics on the Internet" opens the page of the official website of Microsoft, which presents a wide selection of various topics.
- Having chosen the most attractive option for you, click on the "Download" button, located directly below the corresponding image.
Download selected topic
- Next, you should run the downloaded file to install the theme - after that it will immediately be displayed in the “Personalization” panel.
- If you want to change the image - you need to select the "Desktop background" item on the "Personalization" panel and select the desired pattern option.
- In order to install several images on the desktop at once, you should select them and configure the slide show mode.
- After all the settings are made, do not forget to save the result.
Installing a Theme on Windows 7 Home Basic and Windows 7 Starter
Many people use on their computers such versions of this popular operating system as Windows 7 Home Basic and Windows 7 Starter. In these cases, there are some nuances and features of installation topics.
Consider where and how to install the theme, if the personalization feature is disabled by default here.
Before you start installing themes on the Initial or Home Basic version of Windows 7, you need to enable personalization. You can do this by installing a special patch on your computer called the Aero Patch.
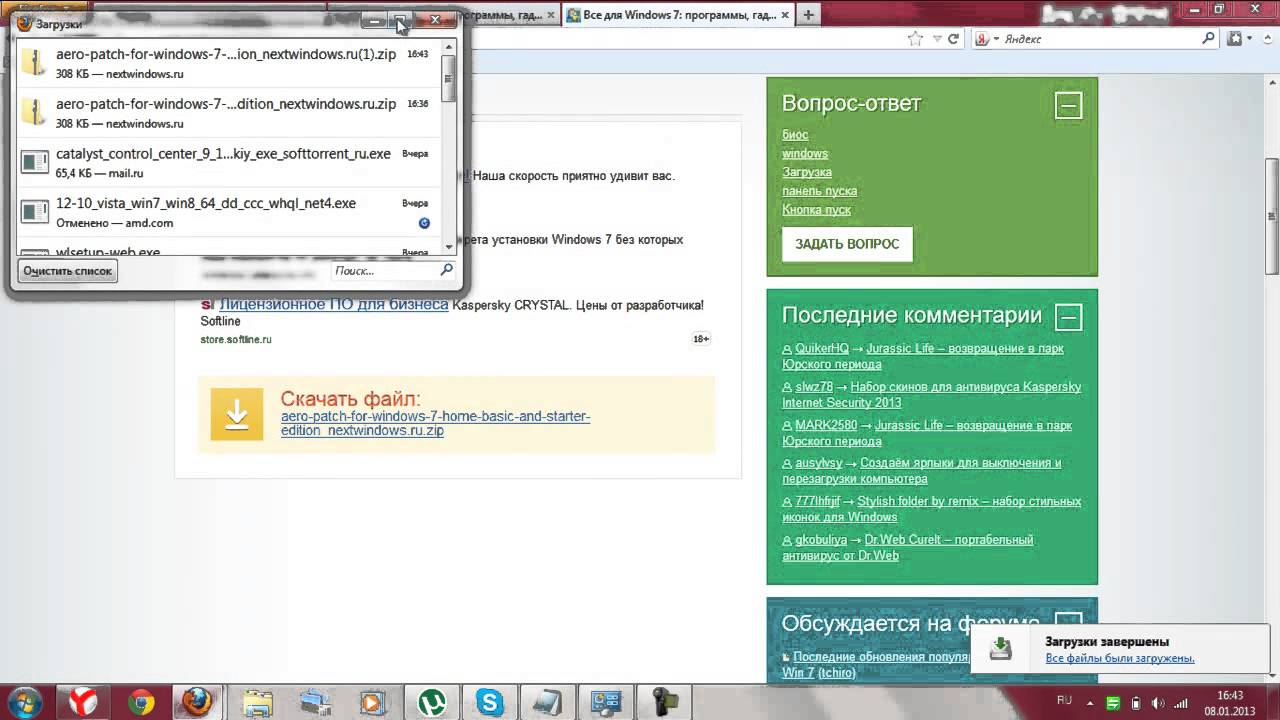
Download patch
You can download it at winaero.com in the section Unsupported software. Next, the downloaded file is required to unpack and run as administrator of the computer.
Run as administrator
After this procedure, you must reboot. As a result, the operating system personalization feature will be activated. This method equally well suited for both Windows 7 Starter and Windows 7 Home Basic.
Installing a non-certified topic
Quite often, users of personal computers will need to install non-certified topics on Windows 7. Therefore, it would be advisable to consider how third-party themes are installed without any threats to the operating system.
This process is not particularly complex, so on average it will take no more than ten minutes. The main thing is to carry out preliminary preparation of the operating system, strictly following the instructions and rules.
To make the installation process as successful as possible, you must first download and install two patches - Theme resource changer and Universal Theme Patcher, and then each of them alternately run as administrator.
After both required patches are installed, you need to restart the computer. Thus, the operating system will be fully prepared to install third-party themes of your choice on it.
This process consists of several successive steps:
- open the site, which presents a wide range of interesting topics for Windows 7;
- choose the version you like and download it to your computer;
- as a rule, such topics are offered in the archive format, therefore the contents of the archive must be extracted;
- the extracted folder should be moved to the C: / Windows / Resources / Themes directory.
- after the topic is displayed in the Personalization panel, you can apply it and see the result.
Change the start button and navigation buttons
After the new theme for Windows 7 is installed on your personal computer, you need to give the corresponding updated look to such important components as the “Start” button, as well as the navigation buttons that are present in the “Explorer”.
We start by replacing the Start button. To do this, follow these steps:
- pre-prepare the system for further changes - get access to the file explorer.exe using special programfor example, such as Takeownershipex;

Many users of personal computers want to give the operating system Windows more interesting and attractive appearance with the help of its personalization.
Therefore, the question of how to install the theme on Windows 7, is relevant.
Consider the whole process of installing themes for different versions of this popular operating system.
The easiest way to install a theme on Windows 7
For novice users, the easiest and most accessible method of changing the look and feel of the Windows 7 operating system will be installing one of the certified themes downloaded from the official Microsoft website on a personal computer.
In this case, you need to perform a number of simple steps:
- in the empty space of the desktop, right-click to open the context menu;
- in the menu select the item “Personalization”;
- to select one of the themes pre-installed on the computer, simply click on the version you liked with the left mouse button.

- When you click the left button on the link "Other topics on the Internet" opens the page of the official website of Microsoft, which presents a wide selection of various topics.

- Having chosen the most attractive option for you, click on the "Download" button, located directly below the corresponding image.

Download selected topic
- Next, you should run the downloaded file to install the theme - after that it will immediately be displayed in the “Personalization” panel.
- If you want to change the image - you need to select the "Desktop background" item on the "Personalization" panel and select the desired pattern option.

- In order to install several images on the desktop at once, you should select them and configure the slide show mode.
- After all the settings are made, do not forget to save the result.

Installing a Theme on Windows 7 Home Basic and Windows 7 Starter
Many people use on their computers such versions of this popular operating system as Windows 7 Home Basic and Windows 7 Starter. In these cases, there are some nuances and features of installation topics.
Consider where and how to install the theme, if the personalization feature is disabled by default here.
Before you start installing themes on the Initial or Home Basic version of Windows 7, you need to enable personalization. You can do this by installing a special patch on your computer called the Aero Patch.
Download patch
You can download it at winaero.com in the section Unsupported software. Next, the downloaded file is required to unpack and run as administrator of the computer.

Run as administrator
After this procedure, you must reboot. As a result, the operating system personalization feature will be activated. This method is equally well suited for both Windows 7 Starter and Windows 7 Home Basic.
Installing a non-certified topic
Quite often, users of personal computers will need to install non-certified topics on Windows 7. Therefore, it would be advisable to consider how third-party themes are installed without any threats to the operating system.
This process is not particularly complex, so on average it will take no more than ten minutes. The main thing is to carry out preliminary preparation of the operating system, strictly following the instructions and rules.
To make the installation process as successful as possible, you must first download and install two patches - Theme resource changer and Universal Theme Patcher, and then each of them alternately run as administrator.

After both required patches are installed, you need to restart the computer. Thus, the operating system will be fully prepared to install third-party themes of your choice on it.
This process consists of several successive steps:
- open the site, which presents a wide range of interesting topics for Windows 7;
- choose the version you like and download it to your computer;
- as a rule, such topics are offered in the archive format, therefore the contents of the archive must be extracted;

- the extracted folder should be moved to the C: / Windows / Resources / Themes directory.

- after the topic is displayed in the Personalization panel, you can apply it and see the result.
In order for you to install another theme in Windows 7, you will need an application like Universal theme patcher. This program will allow you to use extraneous themes for Windows 7. The program impresses with its simplicity - start, three clicks, reboot and ready. I tried this program on my PC and everything works fine.
What is the Windows theme
This is a set of images, color and sound designs that can change the design in Windows. The theme sounds are played when certain actions are performed (for example, error messages, menus, or folder openings). The image is used on the background of your desktop.
In Windows 7, a few themes are installed. They are divided into categories such as simplified, basic and Aero. For weaker PCs, the basic theme is intended, and for more powerful PCs, you can also install Aero.
how to establish topics for Windows 7
Download the application Universal theme patcher (0.15 MB), then unpack and install. After that, launch the application, then select the language and click on OK.

In this window, everything is simple, you must click Yes.

Then you will need to make a patch for all three files, do it as shown in the screenshot.

After this process, you will be prompted to restart the PC, respectively, agree.

Now you can install the selected theme, for this you will need to download the theme from the beginning, unpack and then go to the unpacked theme folder. Next, you will need to transfer two files to C: / Windows / Resources / Themes, as in this screenshot. But you need to do it right, make no mistake, only then you will succeed.

Well, everything is simple here, right-click the bears on your desktop. In the menu, find the item "Personalization" and click on this item. Then choose your uploaded theme and everything is ready.


Sometimes it happens that there are some files in the theme, for example, like ExplorerFrame.dll, such files are usually found here (WindowsSystem32). This is for the topic to be full functionality, but this is not necessary, sometimes it is enough to simply transfer the files to C: / Windows / Resources / Themes. Now you know "how to install themes for windows 7"
Ps. Subscribe to update the article and you will find out when there will be a competition with cash prizes, as well as a lot of cool chips and useful tips to your e-mail.
In the Windows 7 operating system, you can change the appearance of the desktop. To do this, just change the topic to a more appropriate one. You can download these topics online from official Microsoft sources as well as from third-party resources. How to do this, read on.
Where are the standard themes in Windows 7?
The standard Windows 7 themes are:
- Click “Start”, “Control Panel”, set the “Small icons” view mode and select the “Personalization” section.
- Look what themes are available for installation.

- If the standard design you do not like, you can download other themes.
How to install a theme in Windows 7 from official sources?
In the "Personalization" are the themes for the design of Windows 7. Install any of them easy. Just double click on the topic.

If the standard themes do not like, click on the link "Other topics on the Internet."

A new tab will open in the browser, or rather Microsoft Store. Choose the theme you like and click Download.


After saving, double-click the theme file. It will automatically be added and the “Personalization” window will open.

Now double click on the topic. It is installed.
How to install a new theme from third-party developers?
Operating theater windows system 7 does not support themes from third-party developers. Therefore, to change the design of the desktop, it is necessary to make a number of changes to the system. Only after that it will be possible to install the left topic.
Theme resource changer free download:
Size: 1 MB | Uploaded: 16 times | File Type: rar | Version: 12/29/2016
- We make a system restore point, as you will do all subsequent manipulations at your own peril and risk, and therefore you should be safe.
- Download theme-resource-changer. Unpack the archive through Total Commander. Run installation file that digit capacity which your system and we follow instructions.


Universal Theme Patcher download for free:
Size: 74 KB | Downloaded: 10 times | File type: rar | Version: 12/29/2016
- The program will ask to restart the system, we agree.
- After downloading the second file Universal Theme Patcher. We launch it on behalf of the Administrator or through the Total Commander. A window will open. You must click on the 3 buttons "Patch".

- Restart the system again.
- Downloading a theme from a third-party network. We retrieve from the archive file * the name of the theme.theme and a folder with the same name as the file.
- This file (.theme) and folder must be placed at the address “C: / Windows / Resources / Themes”. We recommend to copy through Total Commander.

- Now double click on the theme file. It will be added automatically and again, as in the official method, the “Personalization” section will open.
- The topic is set. However, it should be noted that now you need to replace the icons "Start" and all the rest. To do this, perform the following steps.
Takeownershipex free download:
Size: 169 KB | Uploaded: 6 times | File Type: zip | Version: 12/29/2016
- With the help of the Takeownershipex utility, you need to get access rights to the file “ExplorerFrame.dll”, which is located at the address “C: / Windows / System32”.

- The original file is renamed to “ExplorerFrame.dlloriginal”.
- We put in his place new file "ExplorerFrame.dll" that comes with the theme.
Reboot the PC. Check the result.
How to install a theme from a third-party developer in Windows 7, see in the video: