Print large photos with A4 sheets. How to print high-quality photos on the printer
If you have already tried your hand at printing your own photos and were disappointed with the results, you probably made small mistakes that are easy to fix. Most inkjet printers are able to print high quality photos with little or no effort on your part.
In this case, the 80/20 principle works perfectly: with 20% of the efforts that are contained in the tips presented below, you are guaranteed to get 80% of the result that satisfies you completely.
Printer selection
Before you get acquainted with these tips, it is worth once again to evaluate the capabilities of your printing device. First of all, you should not use laser printers for printing photos. Of course, in recent years, they have significantly improved their performance, but there are very few models that can come close in print quality to photo inkjet. Yes, and to them from particularly demanding users may have questions.
The technologies that are currently in the lead are inkjet and thermo-sublimation printing. Inkjet printers for home use have long been known. Every year they are becoming more accessible and functional, and compared to laser devices, they are significantly superior in quality of full-color printing.
The advantages of this technology are the ability to print photos of different formats and on various media. Among other things, many inkjet printers can be upgraded by installing a continuous ink supply system (CISS). This option allows you to reduce the cost of the print.
Thermosublimation photo printers appeared not so long ago, but have already established themselves as the most promising devices. Their main difference is that instead of ink, special cartridges are used with a film containing a solid dye. Under the influence of temperature, the dye layers evaporate and transfer onto the paper. As a result, such equipment is capable of extremely accurately reproducing color gamut, for which it is valued by professional photographers and those who place high demands on the printing of images. However, you should be prepared for the fact that sublimation printers are more expensive and the cost of printing will be slightly higher than that of inkjet “brothers”. In addition, while there are restrictions on the format of photos - usually it is 10 × 15 and 15 × 20 cm.
Of course, for the most qualitative results, time should be spent on a detailed study of all the characteristics of both printing and imaging devices - cameras. The mastering of software - graphic editors and image processing tools will also be useful.
However, there are a number of simpler solutions that can be tried without a strong "immersion in the material." Experiment with your printer now and maybe you will quickly find the best way to use it to print high-quality photos.
# Choose between different direct print modes
If your printer can have direct print modes from a camera (smartphone) and from various media (memory cards, USB drives) - do not forget to experiment with both. The same image can sometimes be printed with noticeable differences in color or brightness.
# Automatic fix function
Most modern printers, photo-oriented, have the function of automatic correction, which analyzes the image and can adjust several parameters simultaneously. Among the most common parameters are contrast, brightness, color, and the option to remove red eye.
# Preview photo
The latest series of printers from many manufacturers are supplied with color displays. With their help, you can not only manage print jobs, but also see in advance how the printed image will look like. This is especially useful if you do not have the opportunity to evaluate a photo on any other device (for example, when you type directly from a memory card or USB drive).
# What if not edited?
You should always keep in mind that the colors and shadows that you see on the screen will not be the same as on the finished print. Therefore, if you have such an opportunity, try printing a photo without any processing at all. Maybe this option will suit you perfectly, or it will give you a clear understanding of what exactly should be improved in the picture.
# Use suitable paper
The best quality paper gives the best quality prints and here you can conduct a large number of experiments. It should take into account where your picture will be stored - in a closed album or in a general review in a frame? Experiment with different types of paper - glossy and matte, from different manufacturers. Make sure that the paper you choose is compatible with the printer and that it has the appropriate settings.
# Print from the editing program
Many professional photographers print images directly from graphic editors, because in this case they have much more control over basic functions cropping, resizing and color management. Even not too complex and functional programs (for example, those that come with the printer) can significantly improve a photograph or solve the most common problems. Changing the settings and experimenting with color, you will have the opportunity to visually get acquainted with the result of your manipulations.
Convenient and powerful photo editor, opening up tremendous opportunities for your creativity.
Purchase full version produced through the most reliable online stores. Delivery is also possible.
on CD throughout Russia.
Need to urgently print photos of a certain size for documents or a photo album, but there is absolutely no time to run to the photo studio? Your faithful printer and Home Photo Studio editor will help you out! From the article you will learn how to print a photo of the desired size on the printer using these two tools.
Step 1. Install the program
First of all, download the program "Home Photo Studio" on your computer and install it. You can find the distribution kit on one of the pages of our site. All that remains to be done after this is to launch the installer, select the folder in which you want to place the application, create a shortcut on the desktop and wait for the installation process to finish. When everything is ready, launch the editor. Click " View photo»And specify the path to the image you want to print.
Start menu of the program "Home Photo Studio": upload photos for work
Step 2. Customize the print.
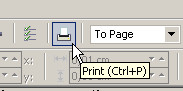
So, the main screen will appear work menu programs. Immediately press on the control panel on the button with the image of the printer or go to the same menu through " File»>« Print».

Click "Print"
Select a printer from the drop-down list and enter the number of copies required for printing. Specify paper size: A4, A5, A6, sheet 10x15, etc. Do not forget to indicate the orientation of the page: it can be both horizontal and vertical. And, of course, do not forget about the fields. In the columns of the same name, specify the requirements for them by entering all the values manually or by defining them using special switches.
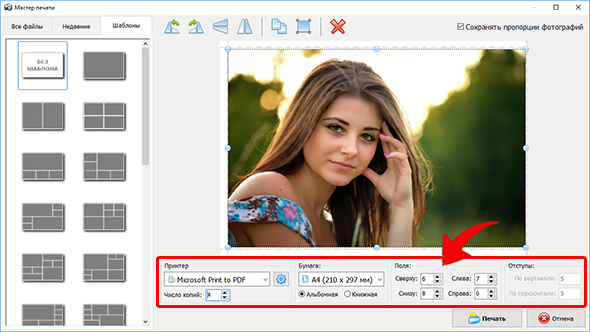
Customize the printing process: specify the paper size, orientation and other parameters
Step 3. Photo printing
Now it’s time to learn how to print a photo of the right size on the printer. On each side of the image there are three “circles”. By grabbing any of them, you can change the size of the image: to do this, simply pull the photo in the direction you want.

Resize the photo to the one you need.
Note: by default, the program frames the image, starting from the boundaries you set. If necessary, disable this feature: just tick the box “ Keep aspect ratio photos", Then the photo will not be cropped when changing. All is ready? Start printing by clicking the button of the same name.
Step 4. Photo enhancement
“Home Photo Studio” is not only a program for quick photo printing, but also a convenient editor that will improve the quality of any image.
In the tab " Picture»You will find a large number of tools to improve the photos. This includes adjusting brightness, contrast, saturation, and correcting light and hue, and eliminating defects — red eyes, too-exposed or darkened images, and many other useful options.

In the "Image" tab you will find tools for improving the photo.
After the basic photo enhancement, you can continue processing the image in the menu “ Effects". Here are hundreds of different effects that will be a worthy addition to any image, emphasize his mood and add a “zest”.

In the "Effects" tab there are over 100 effects for your photos.
In the tab " Registration»You can choose an original frame for a photo, process the edges with a mask, decorate a photo with a clipart, turn it into a postcard or even a calendar.
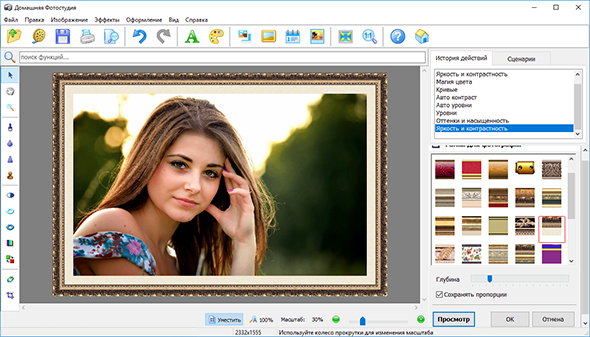
Any photo can be decorated with a spectacular frame.
Conclusion
Fine! Now you can print photos of the right size at home without the hassle and bustle. Also, the processed image can be saved on the computer: the program presents all popular ones, any of which you can choose to commit all the changes made.
Download Home Photo Studio editor now!
The program supports Windows 7.8, Windows XP, Vista and Windows 10
Many novice modelers have a question: "How to print a drawing at the desired scale with an A4 printer?". At the same time, the drawing of your favorite airplane often comes across in image format ( * .jpg, * .png, * .bmp). I will show you how to do this on the example of 2 programs: and Microsoft Office Publisher 2010.
To begin with, we need a drawing in image format, many such drawings can be found on the website AirWar.ru (Great Aviation Encyclopedia).
Further, if necessary, you can clean the drawing from unnecessary parts and elements using any graphic editor (for example Adobe PhotoshopPaint). I have already prepared such a drawing with a Mitsubishi A6M Reisen aircraft.
Let's start with Microsoft Office Publisher 2010.
The Publisher application is included in the office suite, starting with Microsoft Office Professional 2007. Therefore, many will not have trouble finding this program, as can be the case with Corel Draw.
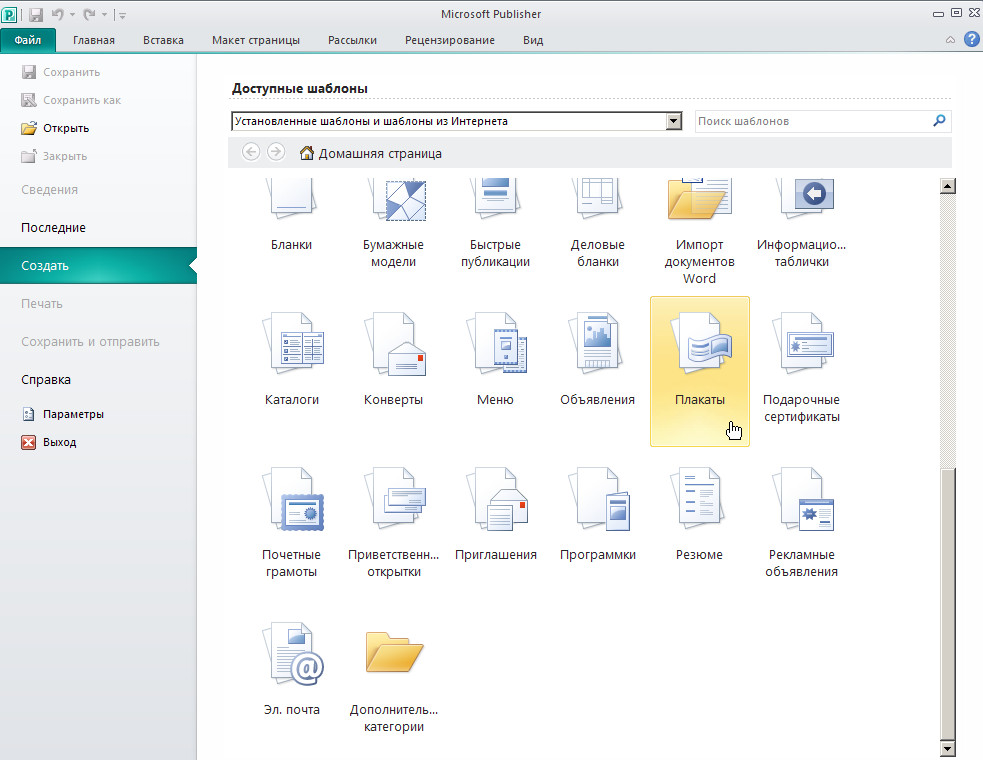
1. Run Publisher. In the window that opens, to create a document, you must select a document template, select Posters. Then from the list that appears, you need to find the format of the poster that fits to our drawing. I chose 118.9 x 84.1 cm.

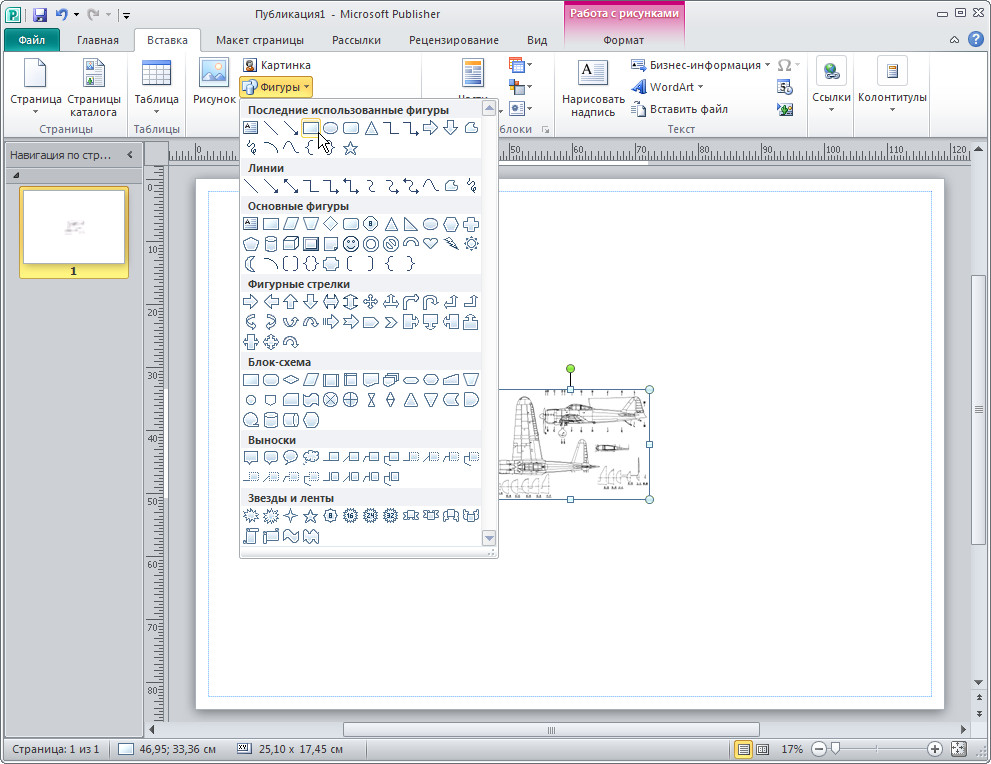
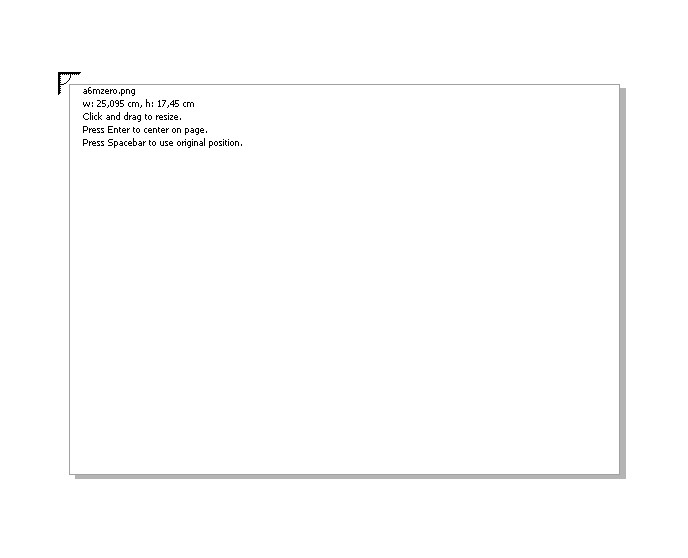
2. Next you need to import the drawing drawing. Go to the tab Insert - button Picture. A dialog box will open. Insert picturethen select our drawing file. 

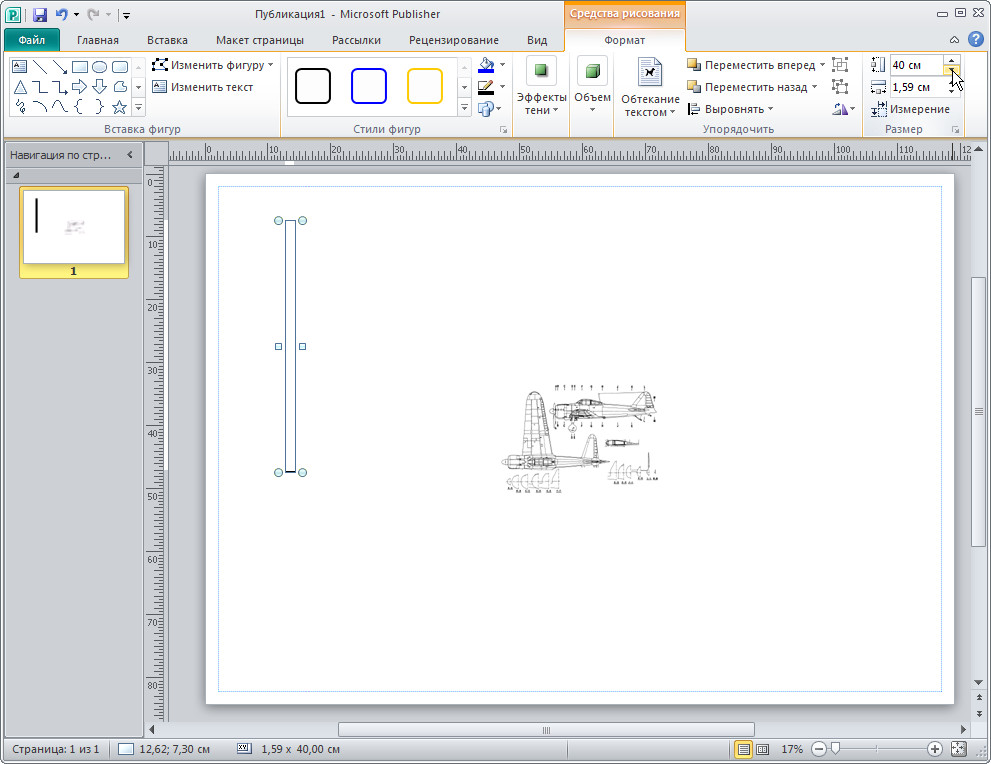
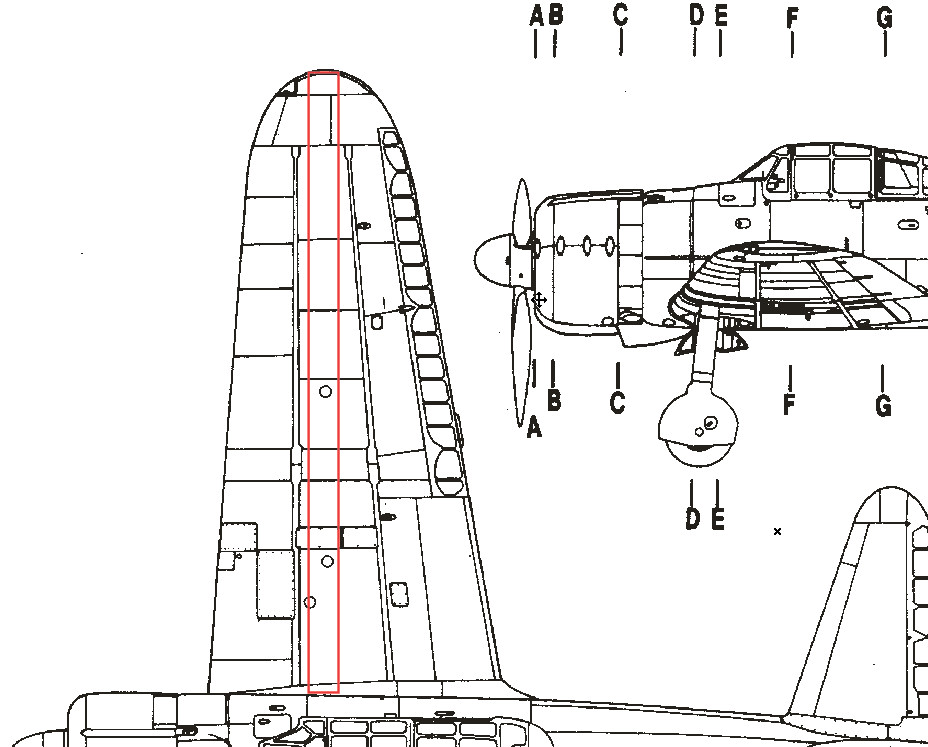
3. After our drawing is inserted, we need to draw a rectangle that will measure the wingspan. The span of one half of the wing was decided to make 40 cm to the size of the ceiling tile. Go to the tab Insert – Figures - button Rectangle.
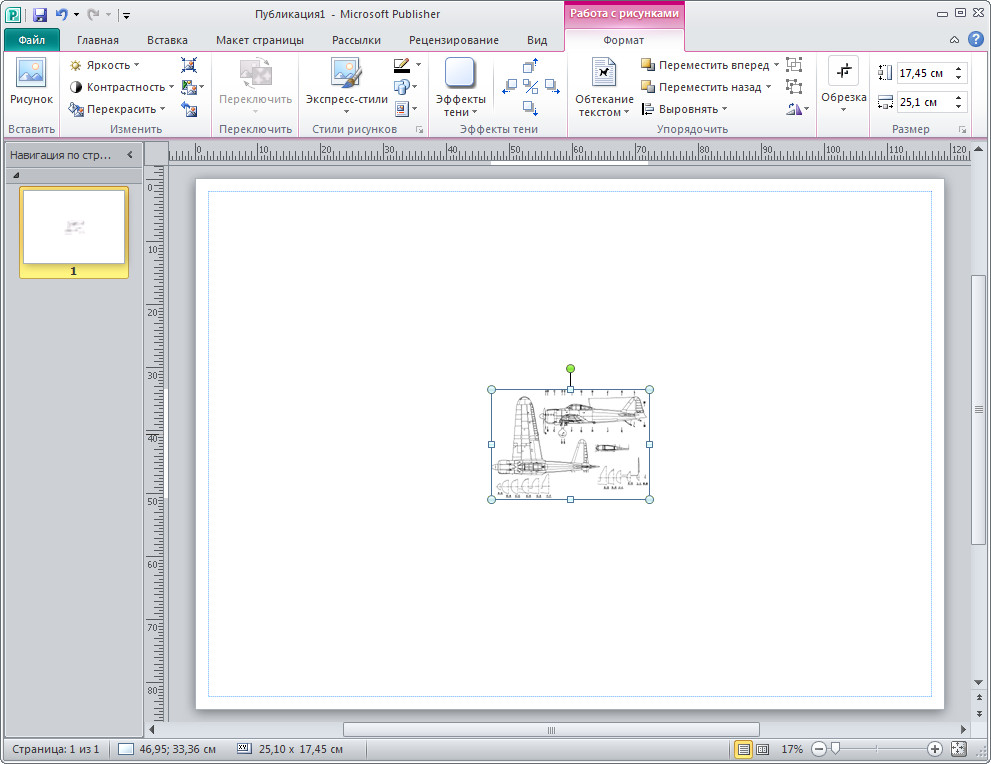
After inserting a rectangle, we change its size to a height of 40 cm. When a rectangle is selected on the toolbar Drawing tools – Format – The size – Height.
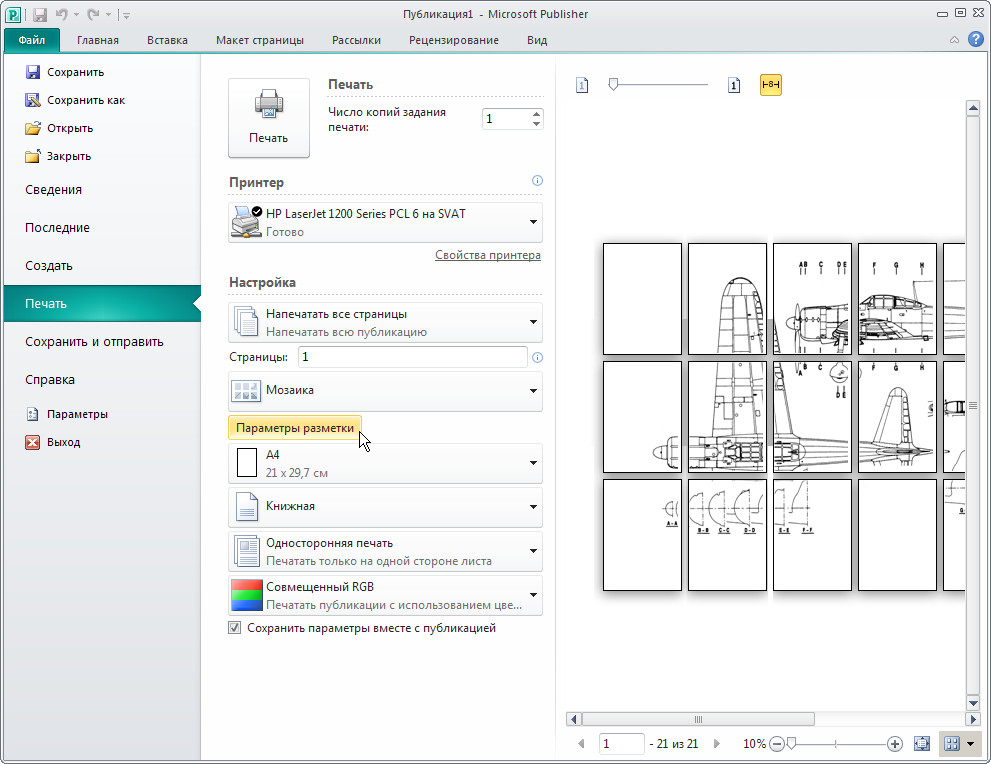
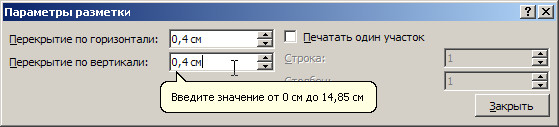
Next, find the button Markup options and push it. A dialog box opens in which you need to set the overlap of the pages that will serve to glue the drawing. You can set this 0.4-0.6cm enough. You can also change other printing settings, such as sheet layout: Landscape or Portrait.
6. After all the settings are set, click on the button.
How to do this in Corel Draw.
1. Run Corel Draw.
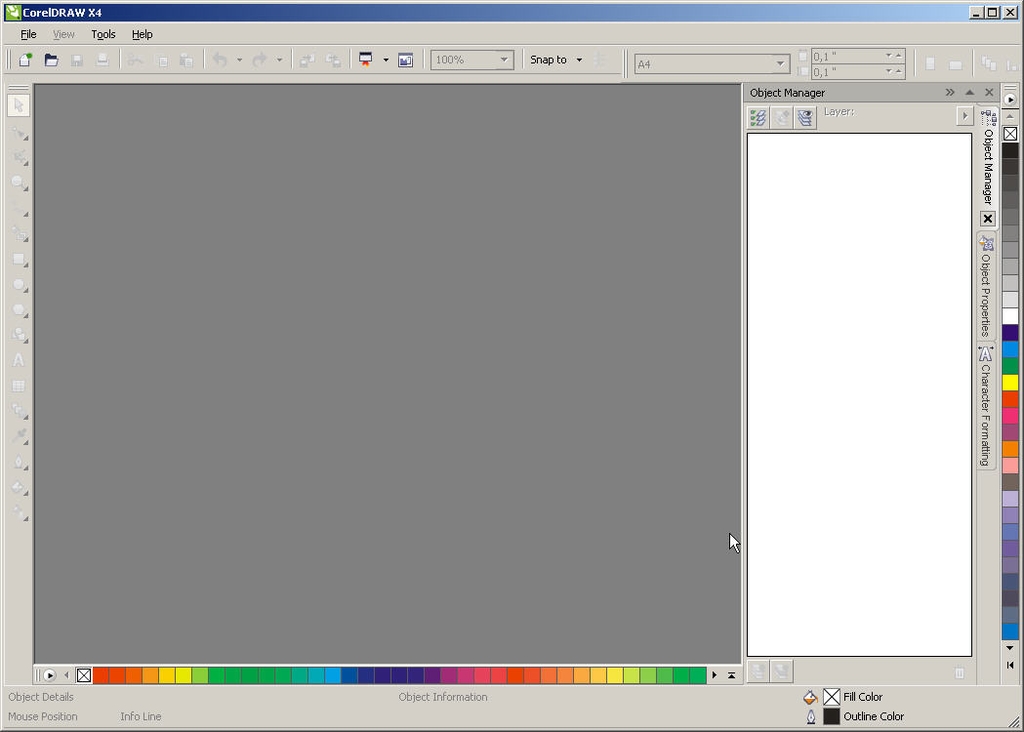
2. Push the button New (Create New Document) or menu File - New (New) .


3. Then we need to import the drawing image file. To do this, go to the menu File (File) -Import ... (Import).

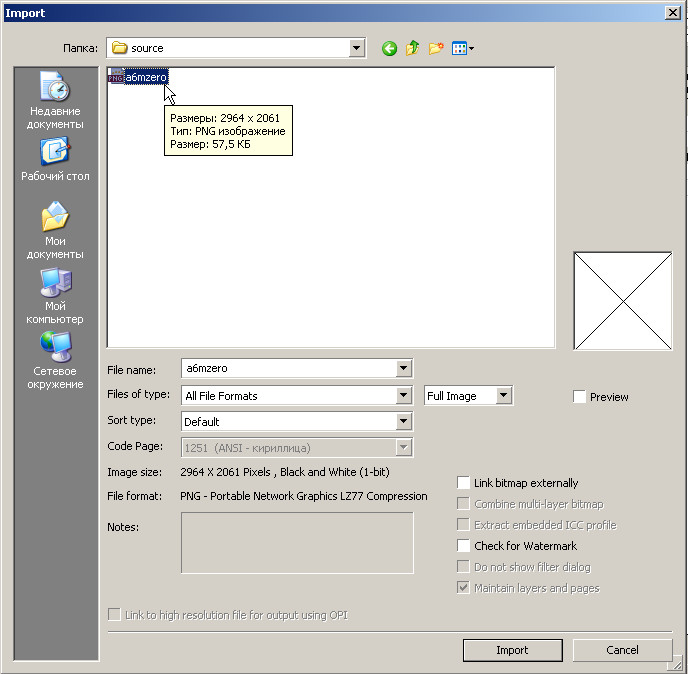
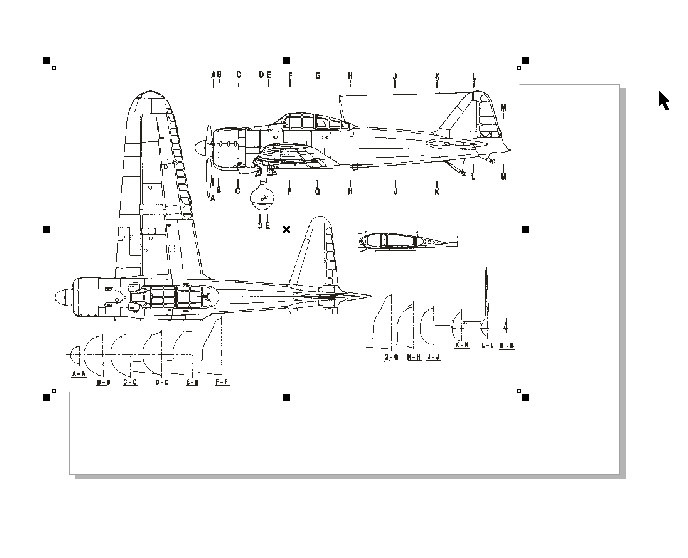
After selecting the file, the cursor changes to a triangle, which you need to click on the document field to place our drawing.

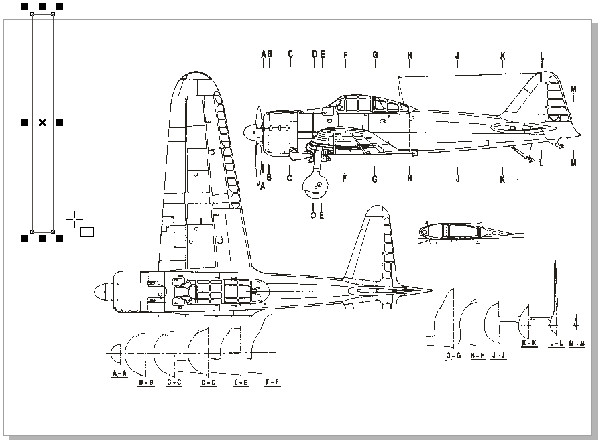
To fit the drawing to the desired scale, you need to select the created rectangle and on the toolbar as in the screen shot set 40 cm in height.
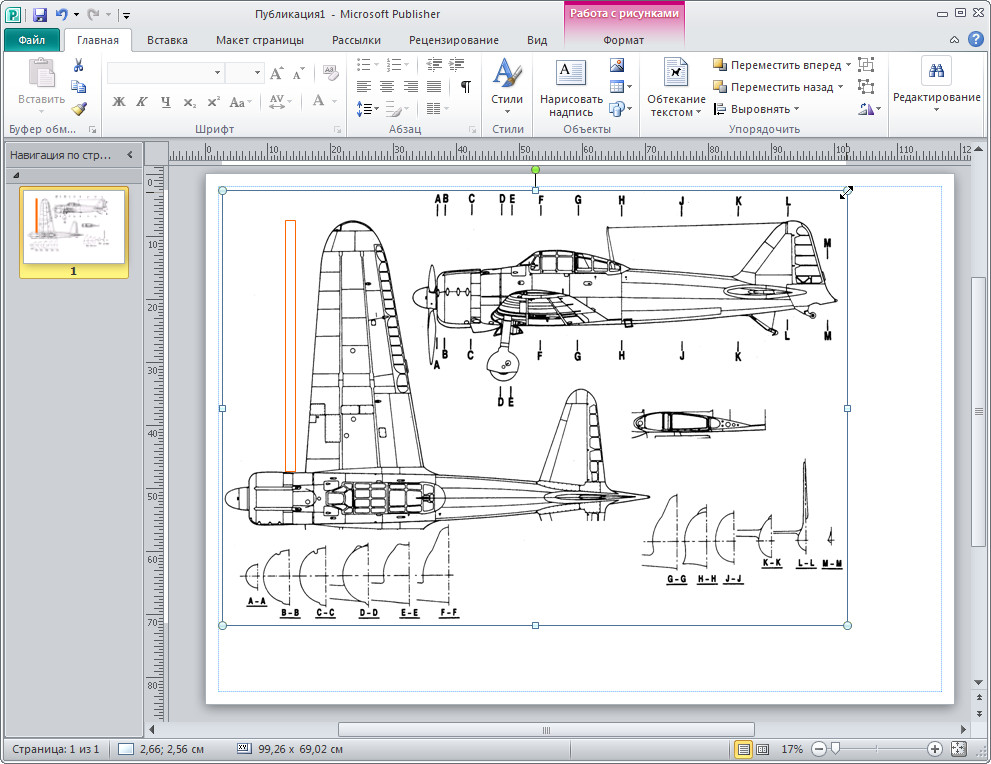
As a result, we get a long rectangle. Then click the cursor on the image of the drawing to select and drag it by the edges with squares to resize the image by adjusting until the length of the rectangle is equal to the length of the wing. Once we have adjusted the scale, the rectangle can be deleted.

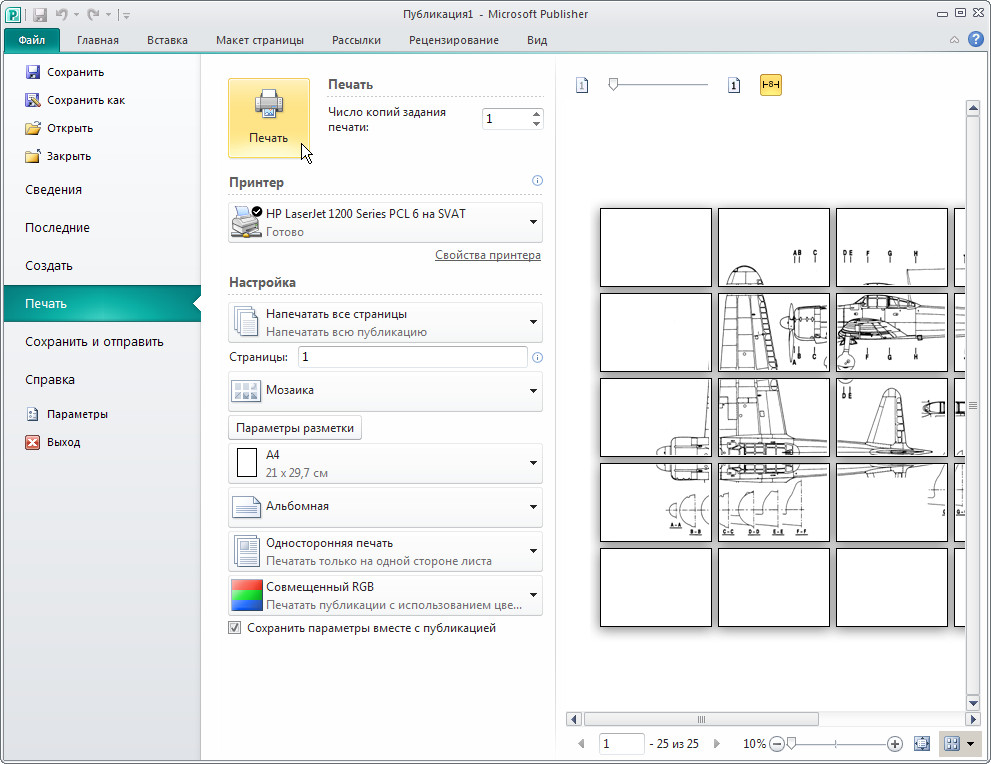
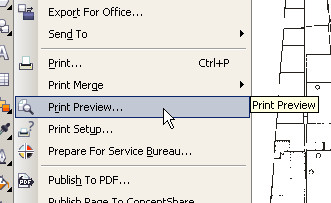
5. Next, open the preview by clicking the menu. File (File) -PrintPreview (Preview). A preview window will open, but only a part of the drawing that fits into the A4 page will be visible on the screen.
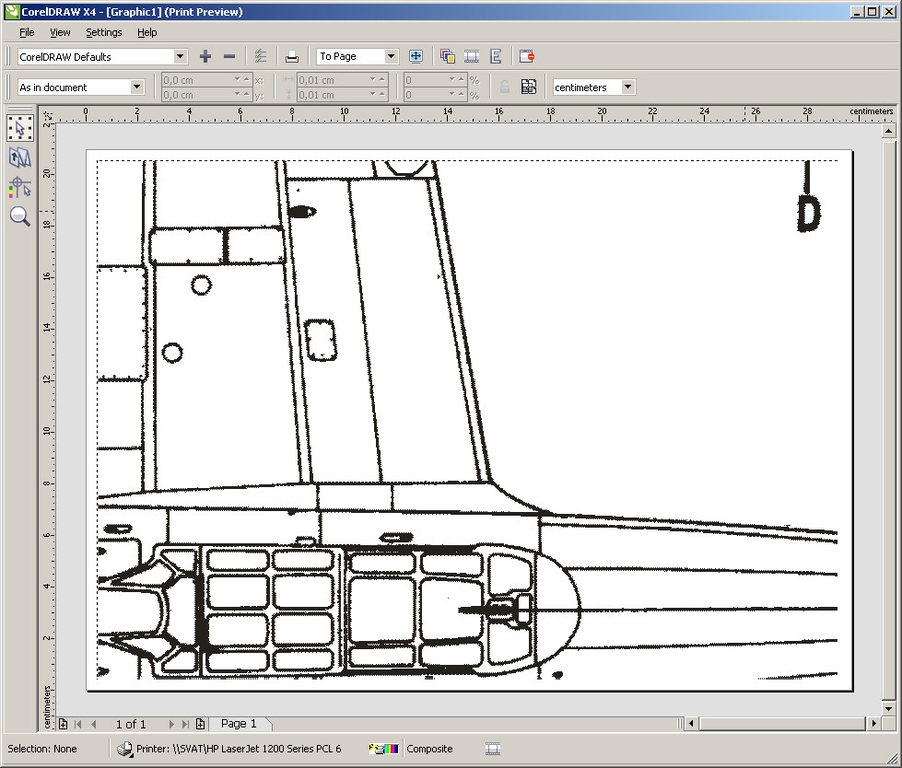
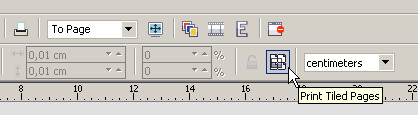
6. In order for the drawing to be broken into sheets, you must click the Print Tiled Pages button, which is located on the toolbar. After clicking on this button, we will see the drawing completely and with a pagination grid.

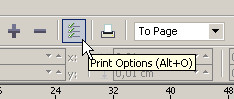
7. Next, go to the print settings by clicking on the button. PrintOptions (Print Setting) on the toolbar and in the window that opens, go to the tab Prepress. On this tab, we find the option Printregistrationmarks and put a tick. This option is responsible for marking the borders of the print for further more convenient cutting and gluing the drawing. Push OK.

8. That's all ready. Now it remains only to press the print button.
Conclusion
As can be seen from the above instructions, nothing complicated. It remains only to glue the drawing. Also these methods can be used in other cases. For example: when in some CAD programs there is no possibility of printing on an A4 printer, but it can be saved in an image format.
Often the causes of frustration experienced by amateurs when trying to print their own photos are mistakes that are easy to correct. The quality of photos printed on most modern inkjet printers and ...
Often the causes of frustration experienced by amateurs when trying to print their own photos are mistakes that are easy to correct. The quality of photos printed on most modern inkjet printers and thermal transfer dye printers is no worse and even better than those printed in the workshop. At the same time, little or no effort is required from the user. However, it is sometimes useful to follow the rule of 80-20 (in this case, even 90-10): to get 90% of the highest quality photos, it is enough to spend 10% of the effort needed to achieve a perfect result. The following is a list of important conditions to keep in mind in order to reach the 90% level.
A few words about printers. When starting to print, find out what to expect from your printer; This knowledge will come in handy when you buy the next printer. The main characteristic is the technology underlying the printer. There are only two modern printing technologies that provide real photo quality: inkjet and dye thermal transfer (or sublimation, although the use of this term is incorrect).
Laser photo printing technology is improving, but for now it is clearly inferior to inkjet, and only a few color prints laser printers approaching real photo quality. The relatively new ZINK technology is improving rapidly. Soon it may become acceptable for printing high-quality photos along with inkjet and sublimation technology.
Most generic inkjet printers, regardless of whether the manufacturer is positioning them as photo printers or not, provide about the same level of quality as a typical workshop in a store or the Internet. If the quality of the photos you print is approximately the same, it means that the capabilities of the printer are mostly exhausted.
Quality that exceeds the typical level for a photo workshop is usually possible to obtain from two types of inkjet printers: specialized and professional photo printers. Specialized photo printers (models with thermal transfer dye also belong to this category) are suitable for printing photos no larger than 10 x 15 cm, although on some devices it is possible to print panoramic photos or pictures up to 13 x 18 cm in size. Typically, printers in this category The emphasis is on ease of use and quality of photos. On most models, you can get pictures of a more attractive look than in a typical workshop, and if the quality is lower, then, most likely, some mistakes are made.
Professional photo printers are designed for serious photographers, both amateurs and professionals, and are among the most expensive inkjet models. They are considered “almost specialized” (near-dedicated), as they are usually designed for paper sizes up to 33 x 48 cm, i.e., suitable for business documents of “letter” format (216 x 279 mm) and “standard” (216 x 355 mm). However, using them for tasks other than printing photos is wasting their capabilities (and dye).
For printers in this category, there is almost always a wide choice of photo paper (including art for professional photo printing) and not one or two options, as for most inkjet models. If the printer of this class can not get extremely high quality, then you probably do something wrong. Here are some of our recommendations.
1. Select direct print mode. If you have a printer and a camera that can print directly from both the camera and memory (in this case, from cards and USB drives), then experiment with both methods. The quality of output for the same file can vary greatly, with noticeable differences in colors and details on the light and dark areas. It is useful to spend a little time to find out how big the differences are and what pictures you like more.
2. Examine the auto-correction function in the printer. In most modern specialized photo printers and in some universal inkjet models, there are automatic correction functions that can be used to analyze the image and change several parameters simultaneously - from contrast, brightness and gamma (the contrast changes differently at different brightness levels) to automatic elimination. red eyes.
In most photos, automatic correction leads to an improvement in the final result, but sometimes it does more harm than good, and sometimes even the effect that the photographer has sought for is lost. If the printer has an automatic correction function, it is useful to spend a little time and effort on printing various images with the correction turned on and off to study its capabilities and determine situations when it is better to refuse it.
3. Preview your photos before direct printing.If the printer can print directly from memory cards, then the preview of photographs can be limited to printing a summary sheet or displaying images on the embedded screen. But if the device has both options, keep in mind that each has its own advantages and each of them can be used at any convenient time.
Using the screen is faster, because you do not need to print twice (once the summary sheet, and then the final picture), and cheaper, because you do not need to pay for the dye and paper to print the summary sheet.
But if, for example, several similar photos are taken with slight differences in settings (a method often used by professional photographers to increase the chances of getting a good shot with optimal settings), it is preferable to use the summary sheet to select the option for full-size printing. Using miniature printed images, it is easier to estimate the colors of the final print and to see the details on the relatively small differences in shadows than on the screen.
4. Examine the editing features in the printer. On printers with preview screens, you can often change photos before printing. Editing functions can be limited to several elementary features, such as cropping images and red-eye removal, or adjusting brightness and contrast, adding graphic elements and frames stored in the printer's memory, etc. The process is similar to working with a photo kiosk, which is in the workshops, and is almost always simple and simple. Be sure to familiarize yourself with the editing features available in the printer.
5. Do not correct photos without appreciating the look of the original. Remember that the colors and shades on the screen (both the computer and the printer) almost never completely coincide with the printed photo (often you cannot get even a distant resemblance). The reasons for this are many, and their consideration is beyond the scope of this article. Photos for which you want to achieve the best quality with minimal labor costs, as a rule, should be first cut, then printed, and then make the necessary changes manually, in accordance with the appearance of the printed version. If there is an automatic correction mode in the printer or the program from which you are printing, you can try to print both the original and the corrected image before making changes manually.
6. Use suitable paper. The quality of prints on good paper is higher, as well as their cost. If you are going to frame the photo and hang it on the wall, be sure to use the highest quality paper produced for this printer. But if you want to put a photo on an office bulletin board or under a magnet on the door of a refrigerator, then plain paper, inkjet paper or inexpensive photo paper is fine.
7. Experiment with different types of paper. The glossy varieties used in most photo workshops are so widespread that consumers often don’t even think about other options. Some printer manufacturers do not offer other types of paper, but it is helpful to find out the range of supplies for your printer. Many professional photographers prefer to print photos on matte paper. Try it and you.
Another option is paper from other manufacturers, but be warned: the quality of output (and especially color accuracy) varies widely. It’s pretty easy to verify this by printing a photo on both regular and photo paper, on almost any inkjet printer. Before you spend money on buying a large supply of photo paper from another manufacturer in an attempt to save money, put the experience by printing the same photos on this paper and on the paper of the printer manufacturer, and compare the results.
8. Make sure the printer is set to the paper being used. One of the parameters of the printer deserves special attention. Make sure the printer (for direct printing) or the printer driver (when printing from a computer) is set to paper of the type that is loaded into the device. I have repeatedly heard from suppliers that, judging from appeals to technical support, the most common mistake is that users forget to change printer settings according to the type of paper.
Some manufacturers try to circumvent this problem with sensors that automatically detect paper type, but the results are not always reliable. If there are no characters on the back of the page that can be read as a bar code by the printer, do not rely on the reliability of the automatic paper type setting. Get used to manually set the paper type.
9. Print from the editing program.To get top-quality photos, transfer files to a computer and print from a photo-editing program. In professional photo printers, as a rule, there is no direct printing function, since professionals and serious amateurs know that the photo editor is much more convenient to perform basic operations such as cropping, resizing and color management, and much more powerful editing functions are available. In some printers, using a photo editor, you can print pictures with a higher resolution than when outputting directly from the camera or memory card.
Easy-to-use editing software that deserves close attention is often included with printers, cameras and scanners. You can also download Picasa for free from Google.
Even in programs entry level There are often surprisingly powerful and easy-to-use features to eliminate typical flaws, such as red-eye and yellow eyes (similar to red-eye on animals), loss of detail when shooting against light (for example, if the sun shines in the window behind the person’s back, his face looks like a contour in the picture), etc. If the printer or scanner is aimed at relatively demanding users, then a medium or high-end photo editor may be included in the package.
Perhaps you do not have the time and desire to master even a moderately complex photo editor, but if there is free program, it is useful to get to know her. Even using only a part of its functions, sometimes it is possible to dramatically improve the appearance of photos with very little effort.
10. Edit copies, not originals. Before editing a photo (which may consist in correcting minor flaws, applying special effects, or cropping the original to use only part of the image), first make a copy of it. This will allow further, if necessary, to return to the original. It is not recommended to edit and then save the file with a different name. It is safer to make a copy before opening the file, so as not to overwrite it by accident. Then freely experiment with a working copy.
11. Avoid losses due to compression. In most cameras, images are saved by default in compressed JPG format (in some cases this is the only option). It is always useful to turn off compression (if possible) if you want to get the highest quality. But more importantly, never edit a compressed photo on a computer or save it in a compressed format. The JPG format is characterized by losses, and every time the file is saved and compressed again, some of the information is lost. If edited compressed file, save it in its own editor format or in a format such as TIF, without compression, to avoid further deterioration of image quality.
12. Examine the printer driver. Almost every printer driver has settings that affect image quality. Options may be limited to good, improved, and best quality, but it may be possible to change the brightness, contrast, red, green, and blue levels, as well as other parameters. To get the best quality, take the time to research the capabilities of the driver. At the very least, experiment with each of the quality parameters and decide whether the time required to print is justified in the best quality mode.
There are other ways to improve the quality of photo printing, but the ones listed above are the most important. The more you experiment with them, the better your printed photos will be and the deeper your knowledge of the various methods applicable in a given situation.