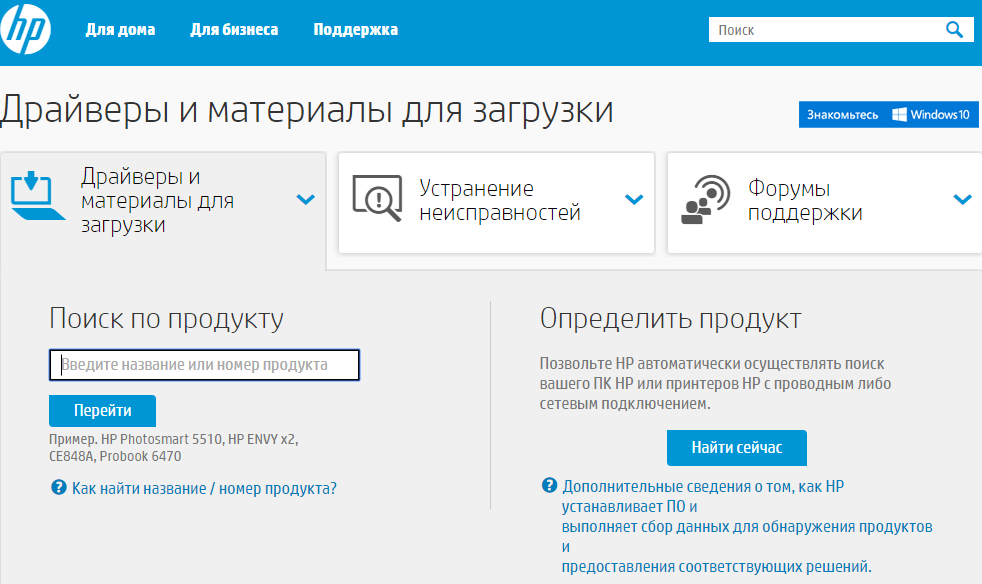
Connect the printer to your PC and describe the connection method. How to properly connect a printer to a computer: methods, instructions
Early and late at night, at your desk, are you asking questions about how to connect a printer to your computer? There could be a lot of reasons, for example, a new device was added, the operating system was reinstalled and the device stopped showing up or the driver crashed.
Since our device is in good working order, there will be no problems with connections. Let's check the hardware information first. To do this, simply turn on the device at the outlet, after which the device begins to connect to work. At this moment you feel the work of its mechanisms. Please pay attention to the correct installation of the cartridge(s) and the tightness of the lids. After the self-tuning procedure is completed and the printer is locked, we need to create a test device.
Skin types won't be shy in different ways- either press the song key (combination of keys) for a few seconds, or in the menu (in the main MFP) find “Call”, then “Test side”. For your type, follow the instructions on the Internet. If the side is over-armed, the device works.
On the right hand side – connect the device to the computer. To connect, we need 4 cables: a life cable, an information cable, the printer itself, a computer (laptop). It is necessary to plug in the power cable to the socket and the data cable to the output port. There are two connection options:
- Via LPT port;
- Via USB port.
Everything depends on what kind of cable we have. We connect the printer to the computer with an information cord.
What's included in the set? Installation disk Then everything was simple. We inserted it into the DVD, downloaded it, spent some time with all the minds of the video player, and installed the drivers for the device. The technology for manufacturing printers, which is widely accepted, is “plug and play”, such printers. operating system This means that it automatically connects the necessary driver.
Let's look at the option if our device is not automatically recognized by the system and the installation disk is also valid
On the Internet you can find free programs to check the system for uninstalled or outdated drivers (Device doctor, Driver Pack Solution, Driver Reviver) with current installations required programs. You can quickly access one of them or download the printer driver on the Internet yourself. It is recommended to download the drivers on the software sites to avoid the hijacking of useless software and the parallel downloading of unnecessary utilities. There is no difference in connecting a printer, either Windows XP or Windows 7.
To begin with, it is necessary to find out what kind of system we have installed. It's not difficult. Clickmo right button Move to my computer icon on the desktop. The window is embossed with “Vlastivosti” and immediately after: 32 or 64 discharge system we have it installed. It is necessary to know that most often there will be two stupid drivers.

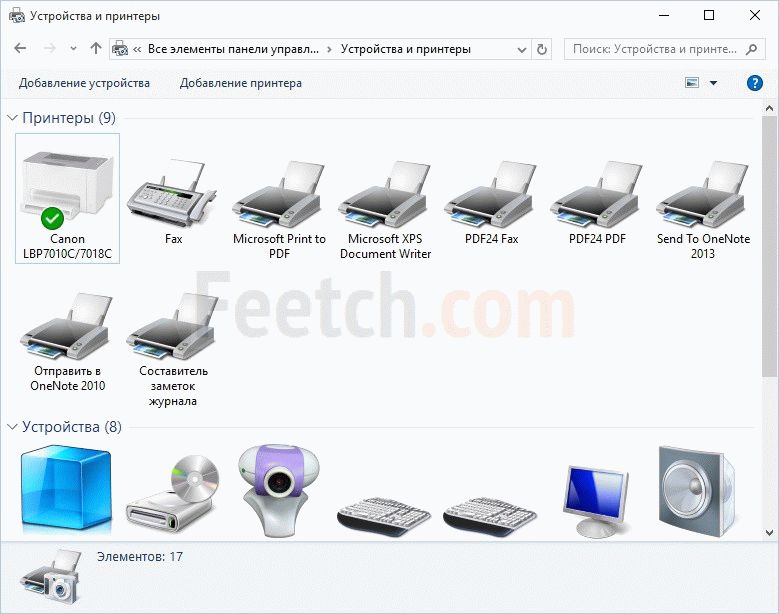
The downloaded driver is necessarily transferred to the archive (rar or zip), after unzipping the files, you must find the “setup” file. Or the driver will arrive and look ready installation file"exe" format. Then follow the prompts to install the driver on the device. Be prepared to connect the printer to your computer before installation or connection. This is the type of vibrator. If everything went smoothly, your printer will appear as a confirmation icon in the “Add Printers” subgroup.
Click on the "Start" menu, go to "Control Panel", then select "Windows and Sound" and find the one we need "Adds and Printers" or "Printers and Fax". After this, it is recommended to restart the computer and check the printer for synchronization with the PC by sending any document to the other. There is another option - through the use of Windows utility Update.
How to connect a printer to a computer via Windows Update
Windows maintains a large archive of drivers for almost all peripheral devices. We need to go to the “Start” menu, go to “Windows and Sound” and go to “Add-ons and Printers”. We know the computer icon and stamp it with the right key.
After which we select Windows Update. In the window that has opened, click on “Check for updates” or “Check for updates”. If they are found in the database, the system itself will install them or ask you to confirm the request.
- a practically irreplaceable device, which, however, is often used both at home and in the office. Hello, the printers have one unacceptable feature. In addition to other peripheral devices, stench may not occur without correct connection and installing drivers.
That's why Windows reinstallation When purchasing a new printer, homeowners often struggle with the problem of connecting the printer to the computer. This article aims to solve this problem and look at the process of connecting the printer to the computer in as much detail as possible.
The process to get to the computer can be divided into three main stages:
- Connecting the printer to power supply;
- Connecting the printer to the computer;
- І installation of drivers.
Let's look at all these stages, one by one.
We connect the printer to power supply
The first thing you need to do is install the printer in the place where you will be standing and connect it to the power supply. It’s not your fault to call out the old folding goods. We connect the power cable to the printer and then plug it into the nearest outlet.
Please note that the printer cannot be connected to the printer uninterrupted life(DBZh or), just straight into the socket. The printer requires too much electrical energy, so it still cannot operate as a DBZ.
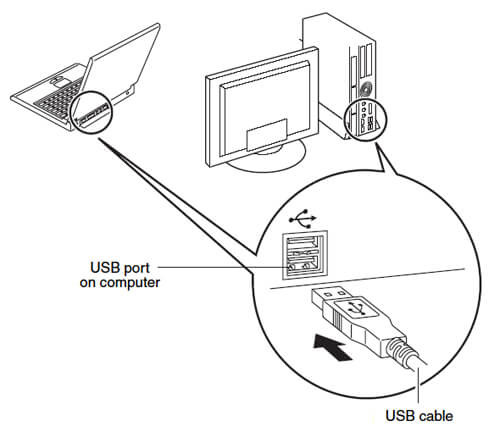
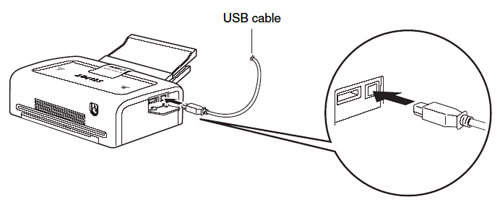
We connect the printer to the computer using an additional USB cable
The next stage is connecting the printer to the computer or connecting the computer and the printer using an additional cable. Most often, a USB cable is included with the printer. If there is no cable, or if it gets lost, you can buy it at your nearest computer hardware store.
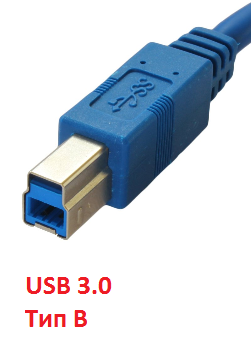
To connect the printer to your computer you will need Primary USB cable. Please note, on one side of the USB cable there is a double connector - this is called a Type A connector, and on the other side there is a square connector - it is called Type B. Connect to the computer with a Type A connector, and to the printer Type B

If the printer is connected via an additional USB 3.0 cable, the Type B connector (which is connected to the printer) is slightly cut off. Blue color and slightly larger in size.
We complete connecting the printer to the computer by installing drivers
From printer connections to power supply and connections to computer please help usb cable, you can start installing it. Make sure the drivers are supplied on disk with the printer. If you send a bunch of disks to the printer, read the writing on them. We need the drive that says "Driver" on it.

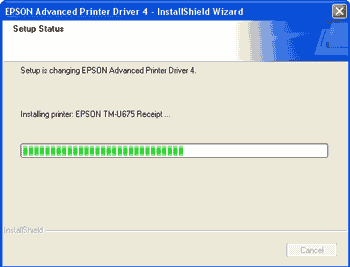
Insert the driver disk into your computer. After this, the printer driver installer will start. The process of installing drivers is very simple and differs little from installing the default program. It is possible that during the installation process you will have to turn off and reconnect the printer. If this is not necessary, then the installer will tell you about it.
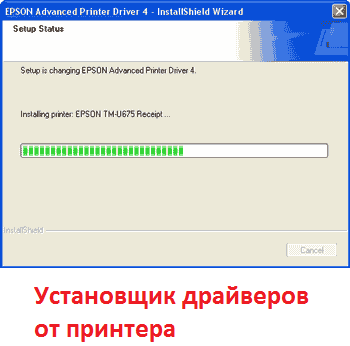
After completing the installation process, you can restart your computer. If there is such a need for the winery, then the installer should be informed about it.
If you do not have a disk with drivers or the installation from the disk does not start, you can. You can easily download the driver from the official website of the printer manufacturer. From whom you can get the best idea new version drivers and thus do not risk getting a virus.
Regardless of the fact that installing a printer on a computer does not affect the foldability, many computer users often cannot get it in the first time. Let's think about it different types connections and actions related to the functions of the other device. Most modern devices are connected directly via USB, but it is often necessary to connect the printer via the serial port or wireless connections.
on current laptops For connection, only the USB port is used, so connecting the printer to the laptop may be easiest. To do this, you need to connect the printer and laptop with a USB cable, and then turn off the printer itself. If the laptop is connected to the Internet, you can determine the type of connected device and select the required components from the list. This is all about plug and play technology. This is how you can connect the printer to your computer, but it is important to select the port itself, and not the hub, as the devices connected to the hub may not generate enough energy for normal operation.
If the printer comes with a disk, you must first install it and install all the supplied components. This rule applies to any type of connection, as it ensures that everything is installed necessary drivers robot printer.
If you don’t know how to connect the printer to your computer via a parallel or serial interface, here are some instructions to help you:
- Through "Start" go to "Appliances and Printers";
- Click "Install printer";
- Select “Add local printer”;
- Select the port by clicking "Select printer port";
- Quit until the values of the selected ports are restored;
- On the printer driver page, select the model and install the drivers in a separate folder.
If you are installing power or installing a printer without a disk, it is important to download the drivers for your model from the Internet or use direct connections for automatic recognition.
Installed dartless printer It vibrates just like any other device of this type. Follow these lines:
- Through "Start" and "Control Panel" select "Control and Sound";
- Switch to the printer that is accessible for search and the new button is pressed;
- Select “Add devices”;
- Inodes for correct work It is necessary to switch the device to WPS recognition mode.
In this way, you can connect any printers to each other, and you can check the success of the connection by opening the test page.
The printer has long become such a constant companion to the computer, like the mouse, keyboard and speakers. That's why It is important to know how to connect the printer to your computer: If you still don’t have a good place for your friend, then the time has long come to make amends.
I’ll add connections
Mentally, the process of connecting a printer can be divided into three stages:
- Connection until the end of life.
- Connected to the system unit (laptop).
- Installation of software (not required).
Place the device for hand on the table. Connect the printer to the nearest outlet behind the auxiliary power cable. The installation cannot be connected to the uninterruptible life unit: the printer uses a lot of energy but still cannot operate. It’s better to immediately realize your desire for a power supply and connect the device to the main socket or filter.
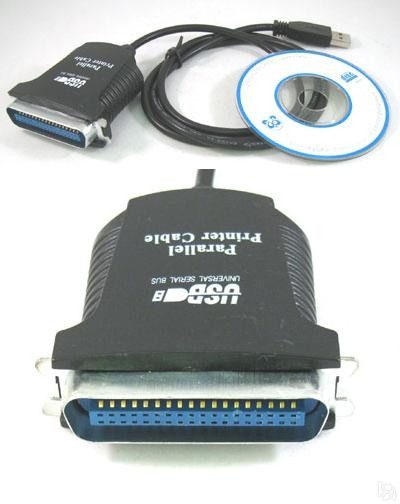
It is then necessary to accept the friend's possession before system unit or a laptop. Previously, the LPT port was used for this purpose, but recently all printer manufacturers switched to the USB interface.

If you have an old printer model with an LPT connector, you can use a special adapter for connection. However, this method is unreliable, since not all models work, so it’s better to gain immediate knowledge.
Return respect to USB cable(It is your responsibility to come with the kit). On one end there is a USB “Type A” (primary double connector), and on the other end there is a USB “Type B” (or even a square connector). Type A is connected to the system unit, and Type B is inserted into the port on the printer. It is impossible to get lost because you are physically unable to insert the plugs into the wrong socket.
Adjustment of equipment
How to properly connect the printer to the computer we have learned, the time has come to go to cob adjusted ownership. The printer kit comes with not only cables, but also discs for installing drivers. If the device is connected, the system prompts you to insert and complete the installation of the software - you will no longer need to follow the installation master’s recommendations.
You can start driver installation in manual mode: just open the disk software security printer and run the setup .exe file. Before speaking, please download drivers for several models on one page - select your printer at once.
Installing printer drivers does not require power, as is the case with software installed. How can I connect a printer to a computer without a disk? There is nothing complicated - you just need to obtain the necessary components from the manufacturer's website. For example, you have an HP printer:
- Go to the manufacturer’s website and find the new “Drivers” section.
- For additional help, search for the product to find drivers.
- Download the latest version of the software to your computer and install it in the system.
This is how you can solve the problem with disk space in all printers, regardless of the printer, so you are not to blame for the same problems when connecting and setting up a printer to a computer or laptop.
Connecting the printer is a simple operation, and there is no need to contact your retailer for any difficulties, as everything is in order. Everything described below is also true when an MFP (Multifunctional Device) is installed, with the difference that the drivers must be installed on the scanner and fax, as well. To install the printer, you need to perform two steps: first: connect the printer to the power supply of your computer, and then: install the printer driver. If the printer is new, you will need to remove all the shipping lines so that the orange or yellow color is clearly visible. Connect the printer before electrical lines turn on yoga. U new printer Following the instructions and illustrations, you will need to install cartridges (other heads) on the screen, as come with a printer kit. Turn on the printer, connect with a USB cable (included with the printer, purchased separately) with USB port computer and turn off the printer. The computer detects the printer and Windows right-handedly at the bottom shows in the same window approximately the same notification “Found
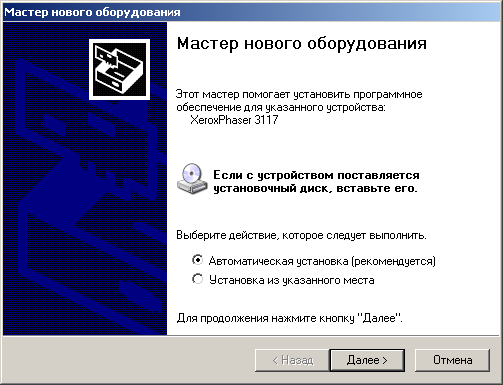
nove obladnannya”, and the lower name is obladnannya. Then the new device master window opens, after first inserting the driver disk (which is included in the kit) with the printer into the drive, you need to click “Next”. After installing the driver, you can go through the “Start” menu under “Printers and Faxes” or there is no such option there through the “Current Panel” and in the “Printers and Faxies” window you will see that the printer (MFP) is installed. To check your friend, you need to right-click on the name of the printer and select “Power” from the list, in the window, press the “Test friend” button. You can also install the driver and printer software (MFP) directly from the disk provided. To do this, insert a disk with drivers and software into the drive, after autorun the disk menu will appear, where you can start installing drivers and programs by pressing the corresponding button or clicking on the entry. The selected printer driver can be installed from the “Printer and Fax” window by clicking on the “Printer Installation” button. The Add Printer Wizard will launch and a new window will open. At the window you need to press further and select in the next window Local printer, connections to this computer" and if you want the system to find the printer connections itself, put a checkmark next to the writing " Automatic assignment installing a PnP printer." You'll be hearing about the printer and driver installation. The disk, with drivers, at this hour, is guilty of 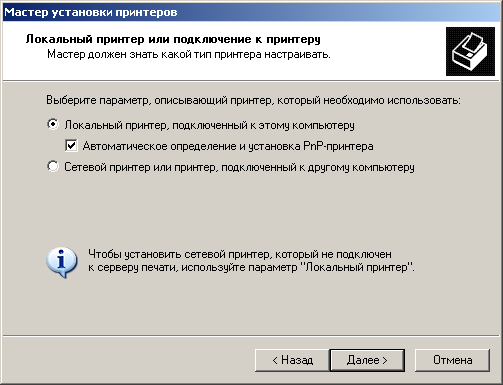 disk drives. If there are no drivers, you need to go to the website of the printer manufacturer (MFP) and select a driver version that matches yours. Windows versions. It’s very easy to visit the virobnik’s website. You need to type the owner's name in the address bar of your browser English, put a right-handed check mark, type ru after the check mark, for example canon.ru and press “Enter”. As a result, you will be sent to the Russian zone on the plant's website. Driver installations usually appear in the archives, which will unpack themselves. automatic start Installation and installation difficulties are not to blame.