How to throw Windows from a disk to a USB flash drive. We transfer the contents of one bootable flash drive to another. I How to create bootable flash media
We will look at two methods for recording an image Windows 7 to a flash drive
- Writing an image to a USB flash drive using UltraISO.
- Writing an image to a USB flash drive using command line tools.
This article only covers how to write an image to a flash drive.
- Detailed installation instructions in this article: Install Windows 7.
- How and where to download the image legally is described in the same article, in the chapter how and where to download the original image of windows 7 64 or 32 bits.
If you are not sure how many bit version of Windows 7 (32-bit ( x86) or 64-bit ( x64)) you need for the upcoming installation, then you can learn more about the difference between Windows 7 x32 and Windows 7 x64.
Before proceeding with the installation of the operating system, it is necessary to determine from what type of media the installation will be performed. Recently, this issue has become especially relevant, since compact devices have become widespread on the computer market. Netbook"and, not equipped with optical drives, as well as flash- high-volume drives that have become so popular and at the same time perfectly cope with the task of a boot disk for the operating system.
If you have at hand flash-drive (4 GB , since the installation image takes about 2.5 GB), then after carefully studying and following the steps described in this article, you can install the operating system using flash-drive as a boot disk. This does not require any additional software: everything will be done using the command line and a mounted image Windows 7... Generally installing Windows 7 from a USB flash drive- faster (albeit slightly more complex option).
Writing an image to UltraIso to Flash
After you have received the image with Windows 7, it is necessary to record it on some medium. The question is "How to do it?".This article will tell you how to write an image to a flash drive ( USB-Flash or HDD-Flash) using the program UltraIso.
Step 1... Install the program UltraISO (this lesson considers the version 9.31
, although there is no fundamental difference in other versions).
located at the end of the article, in the block attached files.
 Figure 1. UltraISO Installation Wizard
We press "Further", along the way specifying the necessary installation parameters.
On the last window NOT uncheck the boxes "Associate .iso file with UltraIso" and "Install ISO CD / DVD Emulator (ISO Drive)".
 Figure 2. Additional tasks for the UltraISO program
Step 2. After installation, we launch the program and in the offer to register the product, select "Trial period", which will give us the opportunity to use this program for 30 days (which is quite enough to record our image).
 Figure 3. UltraISO installation completed
Step 3... Before you start manipulating our image, you need to insert into the free USB-Output USB flash drive or external hard drive, which will be recorded.
Step 4. We open our image with "File - Open"... Next, go to the point "Boot - Write Disk Image (write disk image)".
 Figure 4. Writing a Windows 7 image to a USB flash drive
Step 5. In field Disk Drive you need to select your carrier (if several flash drives are inserted into the computer). Also check the correctness of the selected image in the line "Image file"... In line "Recording method" choose USB-HDD... When everything is selected correctly, you need to press the button "Burn"... Before the process begins, you will be asked: “Are you sure you want to continue the process? All information on the flash drive will be destroyed "... Check the contents of your flash drive, and if there is nothing important on it, feel free to click "Yes"... At the end of the recording, you will be notified that the recording was successful: "Burn successful!"... Your bootable USB stick is ready.
Writing a Windows 7 image to a USB flash drive using the command line.
- So, to prepare the image, connect flash-disk to usb-the port of your computer. Make sure to flash- the storage device does not have the data you need, because flash-disk will be formatted.
- Now run command line Windows... You can find the launch shortcut at:
Start -\u003e Programs -\u003e Accessories -\u003e Command Prompt.
Also you can press the key combination Windows + R, after which in the window that opens "Start the program" you need to enter the name of the program "Сmd" and press "Enter". - Now in the command line window that opens, run the command "Diskpart"... This will launch the system disk management utility. With the help of this program, we will clear the contents of the disk, create a partition on it. After that, we can make it active, format it and write the contents of the image to it. Then we will only have to place the bootloader files on the disk: after that, when the operating system boots, our flash-the drive will be defined as removable media - we can start the installation from it Windows 7.
After the system utility is loaded diskpart, you will see a prompt as a string DISKPART\u003e.
Now you can start executing commands.
Using the command "List disk" you can see a list of all disks on this computer (Figure 5).
 Figure 5. Preparing to install Windows 7 from a USB flash drive: creating a bootable USB flash drive
Now if you run the command "Select disk number» where "number" is the number of the disk that is flash-drive, then we will select this disk to apply all subsequent commands that we will enter when working with the utility diskpart.
As you can see from Figure 1, in our case it will be the command "Select disk 3".
But be very careful - you can select any hard drive and delete all data on it.
- Next, we will delete all data and sections on our flash-storage device. To do this, run the command clean.
- The next action will be, using the command create partition primary, create on flash-drive a new partition.
- Let's select this section for further application of commands to it using the command select partition 1.
- Let's make it active using the command active.
 Figure 6. To format the disk, run the command format fs \u003d NTFS.
Now it remains to initialize the disk connection using the command assign (the autorun window will open, as if we just connected to the computer flash-disk) and exit the utility using the command exit (fig. 7).
 Figure 7. Initializing the disk connection with the assign command.
The final step remains - we must copy the bootloader to flash-storage device.
To do this, mount the image Windows 7that you want to install on your computer.
Now use the command line to navigate to the given (mounted) disk. After that go to the folder boot and run the command bootsect / nt60 K :.
notethat instead of the letter "K"this command must contain the letter that was assigned your flash drive when executing the assign command.
This command will launch the system utility bootsect with 2 parameters:
- the first indicates the bootloader version OS (/ nt60 - parameter required to create a bootloader OS Windows Vista and Windows 7).
- the second parameter is the letter assigned to our flash-drive.
If you mount the 64 bit image Windows 7then you will fail to run bootsectif your operating system is 32 bit - t. this version bootsect is 64 bit.
Copying files to a prepared USB flash drive.
After the flash drive is prepared, the files are copied from the image:you can mount the image you have with the program DAEMON Tools Liteand then copy all files from the mounted disk to the flash drive.
Installation
Now if you restart your computer, then by going to BIOS, you will be able to install your USB flash drive to boot and install from it Windows 7 (first boot device).Now you can move on to the next chapter, which will talk in great detail about the further installing Windows 7.
Detailed instructions for installing Windows 7 in this article: Install Windows 7.
You can also pay attention to the recording of the image using the utility
Before installing the system, you need to understand how to write an image of Windows 7 to a USB flash drive, then set up your computer to install Windows 7, and begin the installation process. If you visited this page, then you are having difficulty creating a bootable USB flash drive or disk. Here you will find answers to all questions.
To write an image of Windows 7 to a USB flash drive, you will need specialized tools. There are quite a few of them, but we will describe them all. As an example, let's talk about UltraISO, USB / DVD Download Tool and many others.
Step 1: What you need to capture a Windows 7 image
Any operating system image or programs is a generally accepted format that most utilities recognize. The most popular image format is ISO. It can be burned to flash drives, hard disks, CD-DVD media. The format is somewhat similar to archive ZIP or RAR. In general, this is an image of an optical disc and is a single file or archive containing any other type of files. Modern operating systems already have built-in tools for working with the format. You can also use third-party software: UltraISO, DAEMON Tools, Alcohol 120%, PowerISO, ImgBurn, ISO Master and many others.
Before choosing an OS image, you need to figure out in advance the bit depth and volume that it will occupy on the media. There are 32-bit systems (86x) and 64-bit (64x). Here you can find out about the differences in these bit depths. The scope of the systems is also different. Below is a table of all editions of Windows 7 with system requirements:
| Editorial staff | RAM | Processors | KernelsCPU | ||
| 32x | 64x | 32x | 64x | ||
| Windows 7 Ultimate |
4 GB |
192 GB |
|||
| Windows 7 Professional | |||||
| Windows 7 Enterprise | |||||
| Windows 7 Home Premium |
16 GB |
1 | |||
| Windows 7 Home Basic |
8 GB |
||||
| Windows 7 Starter |
2 GB |
||||
Using these characteristics, you can choose a system for yourself. In this article, we will consider two programs, using which it is possible to write an image of Windows 7 to a USB flash drive: UltraISO, USB / DVD Download Tool.
You can download tools from resources without viruses from here:
- USB / DVD Download Tool.
- UltraISO.
- Command line.
Step 2: How to burn a Windows 7 image to a USB flash drive using UltraISO
Download the program from the above link or from your source and install. Using the trial version of UltraISO can accomplish the intended task, so you don't have to search for the version with a key. After downloading and installing, we perform the following steps (I also advise you to read the article if you work with optical media :)
- We launch the program. If it is not complete, then we use a trial period.
- Insert a 4GB or 8GB flash drive, preferably larger, into the USB port.
- In the program, click on the tab with the mouse "File" — "Open" and select the image file Windows 7 Ultimate (Maximum) or any other version.
- The files will be automatically loaded into the program window, which are displayed in the right section. Now you need to click on the "Bootstrapping" tab and select the option "Burn Hard Disk Image".
- At the next step, select the USB flash drive (Disk Drive), the image file that is already registered, the recording method USB-HDD +... It is worth noting that the files that are already on the flash drive will be destroyed.
- Click on the button "Burn".

- A message appears stating that the disc information will be erased. We agree with the "Yes" button.

- Preparation for recording begins, and then the process itself, which does not take much time.

- The end of the operation is accompanied by a message "The recording is complete!".
The finished flash drive can now be used for its intended purpose.
Step 3: How to Burn Windows 7 Image Using USB / DVD Download Tool
- We launch the program from the desktop. A window will open where you have to perform four steps. The first step is to select an ISO image of the operating system. Click the Next button.
- Next, select the type of media, in our case USB Device.

- Select the medium and click "Begin Copy".

- Next, formatting of the flash drive and copying files will begin.

After copying, the flash drive is ready to install Windows 7. It is worth noting that using the USB / DVD Download Tool you can burn the image to a DVD or Blu-Ray disc.
Step 4: How to write a Windows 7 image to a USB flash drive using the command line
If you have the Windows operating system at hand, using its capabilities, you can create a bootable USB flash drive. We will use the command line. Run this tool as administrator and follow these steps:
- In the command line (CMD), enter the command for working with disks: diskpart... Using it, we will format the media and write the ISO image files to it.
- After entering the command above, the user will find himself in the utility for working with disks, which is characterized by the line "DISKPART\u003e".
- The next step involves displaying all drives connected to the computer. For this there is a command list disk.
- You need to select the media that will be used as bootable. Here we focus on volume. For example, now a 30 Gb flash drive is connected here, in the "Size" column, this volume is just indicated. To select this disk, you need to register select disk N (your media number). When choosing, be very careful, because it is very easy to make a mistake here.
- We proceed to copying files to a USB flash drive. We mount the system image (so that it appears in the My Computer directory) and, in the command line, go to the created image disk.
- Using the commands, go to the boot directory and execute the command bootsect / nt60 N... Where N is the letter of the flash drive intended for installing Windows
- Copy the image files to a USB flash drive.
- Installing Windows 7.
Some users will find it a little difficult to use the command line as they have to enter a lot of commands. The probability of making a mistake increases many times over here. Therefore, we recommend using UltraISO or USB / DVD Download Tool. Other utilities will be discussed in the following articles:
Using all these tools, the user will figure out in no time how to write an image of Windows 7 to a USB flash drive. In this material, third-party and regular means for creating such a medium were disassembled. The next material will be about how to create a bootable DVD with Windows 7. This use case is losing popularity every year, as DVD drives are less and less embedded in computer systems, and flash drives are replacing optical disks.
This installation method is suitable if you own a netbook or your CD / DVD drive is out of order and you need to install Windows 7. This method is also good because the process of installing Windows 7 from a flash card is several times faster than from a CD or DVD disk.
Before you start recording Windows 7 to a USB flash drive, copy all important data from the USB flash drive to other storage media (hard drive where Windows will not be installed, another flash card, disk, etc.), since during the process of formatting and recording Windows 7 image on a USB flash drive, all data on it will be destroyed.
The first way
If you create a bootable USB flash drive while in the Windows 7 operating system, then you will need the program Windows 7 USB / DVD Download Tool, which can be downloaded from Of. Microsoft website at the link.
If you are creating a bootable USB flash drive under the Windows XP operating system, you will need to install Microsoft .NET Framework 2.0 and Microsoft Image Mastering API 2.0... Of course, if you have them already installed (more often it concerns the first program), then you do not need to reinstall it.
1) Insert the USB stick into the laptop.
2) Run the program. Click the button Browse.
3) Select the Windows 7 ISO image and click the button Open.

4) After you have specified the ISO image of Windows 7, click the button Next.

5) Press the button USB device.

6) Your flash drive should appear in this window. Click the button Begin copying

7) Click on the button Erase USB Device

8) Click Yes.
9) The process of recording the Windows 7 image to the USB flash drive will begin

10) When the recording is finished, the status will change to Backup completed. Close the program

Second way
For the second method, you need the program UltraISO.
1) Insert the USB stick into the laptop.
2) Run the program. In Windows 7 and Windows Vista, it is recommended to run the program as administrator.
The UltraISO program is paid, but you can use the trial period, consider this option. Click the "Trial period ..."

3) Select a menu item File ->Open...

4) Select the ISO image of Windows 7 and click the button Open.


6) In the field Recording method: select USB-HDD... Click the button Format.

7) The formatting utility will start. Click the button To begin.

8) Click OK.

9) After formatting, a success window will appear. Click on OK.

10) Close the program.

11) Press the button To write.

12) Click Yes.

13) The process of recording the Windows 7 image to the USB flash drive will begin.

14) At the end of the recording in the column Event the message “Recording complete!” appears. Close the program.

Third way
For the third method, we need the WinSetupFromUSB 1.0 Beta 7 program -.
Note: the link is a newer version, but the principle remains the same.
1) Insert the USB stick into the laptop.
2) Run the program. In Windows 7 and Windows Vista, the program must be run as administrator.

In field USB disk selection and format your flash drive should be listed.
Note: If the flash drive is not detected, then format it with the PeToUSB or HPUSBFW utility.
Also, the flash drive may not be detected if it is inserted into the laptop after the Winsetupfromusb 1.0 Beta7 program has been launched and in order for it to be detected, just press the button Refresh.
3) Press the button RMPrepUSB.

4) We mark such lines as: WinPEv2 / WinPEv3 / Vista / Win7 bootable (CC4), NTFS... Put a tick opposite Boot as HDD (C: 2PTNS)... Click the button 6 Prepare Drive.

5) Press the button OK.

6) Press the button OK.

7) After that, this will appear Doswindow.
Warning: Do not close this window. It should close automatically.

8) After Dosthe window will close press the button Exit.

9) Check the box next to Vista / 7 / Server 2008 - Setup / PE / RecoveryISO... Click on the square on the right.

10) A window will appear Browse folders in which you need to select a virtual drive in which the Windows 7 ISO image is mounted.
After you have done this, press the button OK.

11) Press the button GO... The process of recording Windows 7 to the USB flash drive will begin.

12) At the end of the recording, such a small window will appear. Click on OK.

13) Close the program.

Fourth way
The installation method is quite simple, so everyone can do it! For this we need:
1) Windows 7 image
2) Flash drive of at least 4GB
3) A program for creating and editing ISO-images, ultraISO from the above method or free MagicDisk
You can take any medium from a regular flash drive to an SD card, but not less than 4GB!
4) Run the command line (in Windows XP these are standard-\u003e command line. In Windows Vista / Windows 7, open start, at the very bottom there is a search, enter cmd and open as administrator).
5) Next, on the command line, enter diskpart, the disk management utility will open.

6) Next, in the diskpart utility itself, enter: list disk, this will display all the physical disks of the PC, namely disks and not partitions.
Among them we are looking for our flash drive.

7) Then we execute the command select disk #where # this is the number of our flash drive.
In this case, the flash drive on the screen at number 1, therefore s elect disk 1... All further manipulations will be carried out only with this disc.
8) We execute the command clean, clear the drive, then the command create partition primary - create a new partition on the disk.
9) After creating a new section, we register select partition 1, select this section for manipulations, enter activethereby making the section active.
10) Now, in order for the flash drive to be visible in bios, you need to format it in NTFS format, which we do with the command format fs \u003d NTFS.
11) Next, you need to activate the process of connecting the device and assigning letters to it, we do this with the command assign.
That's it, the preparation process is complete.

Installing Windows 7
Distribution can be recorded with any file manager or free.
In this case, you need to somehow open the image of the installation disk with the OS, you can do this with any disk emulator, Alcohol or MagicDisk, create an image and copy everything from it with a file manager to our prepared USB flash drive.
That's it, the process of creating an installation flash drive is completed, now we are trying to install the OS by setting it in bios.
Well, that's all, which of the four ways to create a bootable USB drive to use is up to you.
Enabling the BIOS to boot from a USB flash drive
Before you start installing Windows 7 from a USB flash drive, you need to go into the BIOS and enable booting from a USB flash drive.
To enter the BIOS, you need to press a certain key when the computer boots. On desktop computers, this is the Del key. On laptops, the most commonly used key is F2.
Usually, when you turn on the laptop, a screen appears on which at the very bottom there is a line in which it is written which key you need to press in order to enter the BIOS.
If you do not have such a line, then information on how to enter the BIOS should be viewed in User Manual walking with a laptop.
1) We insert the USB flash drive into the laptop if it is not inserted.
2) Turn on the laptop, if it is on, then reboot.
3) Go to BIOS.
For example, the whole process will look like it is shown below, if your BIOS is different, then the principle will remain the same. If you have any questions, write in the comments.

4) Go to the tab Boot... In it, in the order of loading, we need to put our USB flash drive in the first place using the arrow keys and keys F5and F6... That is, with the arrow keys we select our flash drive, and with the key F6we take her to the very top.
To find out which keys you need to use to set the boot order, see the tips on the right.
The name of the flash drive must appear in the line USB HDD.
Also, a flash drive may appear in the line USB KEY.
To save changes and exit BIOS, press the key F10... (The key may differ depending on the manufacturer of the BIOS; see the hints on the right or below.)

5) A window will appear in which in English it asks Save changes and Exit? You are taking Yes.

6) After that, a reboot will occur and the Windows 7 installation process will start.
Installing Windows 7 from a USB flash drive
If a bootable USB flash drive with Windows 7 was created using the WinSetupFromUSB 1.0 Beta 7 program, a green screen will appear first. Please select Start Vista / Win7 / Server 2008 Setup or PE / Recovery ISO from partition 0.

Next, the Windows 7 setup program will start.
Write in the comments what is not clear and what questions have arisen.
An operating system is usually installed from a DVD or downloaded from the Internet. But what about those users who do not have a DVD drive in their computer or laptop? A stable Internet connection is also not always available, and you cannot download files to a new computer without an OS. In these cases, it is best to use a bootable USB flash drive on which the OS installation image is saved. We will tell you in detail how to write Windows to a USB flash drive - which applications are easier to learn and how to configure them correctly.
Many programs are able to write Windows OS to a USB flash drive. We have selected the best ones for you - with simple settings that produce consistently high-quality results. Prepare a USB stick with at least 4 GB, delete all files from it.
MediaCreationTool
If you need to install Windows 10, use an app from Microsoft. It is available for download on the company's website. On the page following the link, click "Download the tool now". After the download is complete, run the file, agree to the terms of use of the license.
How to make a bootable USB stick in MediaCreationTool: in the first step, choose that you need to create the installation media. In the settings, select the OS version and architecture (32-bit or 64-bit), language. Next, specify the recording direction - USB-device and open a specific flash drive.

The process of copying files from the Microsoft Internet resource and forming the media will go. Then you will see a notification that the USB device is ready.
A simple and easy-to-learn utility, you can download it from the developer's website - click on the Russian version in the list. Without registration, UltraISO is allowed to use for up to 30 days without restrictions on functions.
How via UltraISO:
- Install the application, at launch, click "Trial period".
- In the File - Open submenu, find the Windows image as * .iso.
- In the "Boot" section, click the "Burn hard disk image" sub-item.
- In the new window, specify the flash drive (Disk Drive sub-item), the recording method is USB-HDD +.
- Click "Burn".

Sometimes it is necessary to format the media beforehand in order to completely clear it of previous data. To do this, after selecting the settings, first click "Format".
The utility is free, available on the developer's website. Does not require installation, it is also suitable for older versions of Windows - 2003, XP, 2000. How to write an image to WinSetupFromUSB:
- Specify the medium in the line "USB disk".
- Check "Auto format it" and NTFS.
- Choose which version of OS you will burn from your hard drive to a USB flash drive.
- Specify the path to the recorded image using the button with 3 dots.
- Accept user agreement, click "GO" to start.

For XP and 2000 versions, you must specify the folder with the files, not the * .iso file. It can be a folder on a CD or an image unpacked by the archiver.
Rufus
Another popular free utility for creating a bootable flash drive is small and fast. Available on the Rufus website. To record an image of Windows OS to a USB flash drive:
- Select a device for recording.
- At the bottom, click on the button with the drawn disk, point to the ISO image.
- Click "Start".

To copy the installation files correctly, Rufus will format the media first. Finally click on "Close".
Writing to disk
You can burn Windows to disc in the utilities discussed above or use an application for creating CD and DVD, for example, the popular Nero Burning Rom. Run Nero, in the main menu in the "File" section, click "Open" and find the path to the image. In the entry form, click "Burn".

Install the OS
After transferring the image to external media, Windows can be installed on the computer. The process will be slightly different from the usual when OS files are transferred from disk. Before you install Windows from a flash drive, you need to force start from a USB device in the BIOS:
- Insert the OS image media into the USB port.
- Turn on the computer, go into the BIOS - to do this, during power-on, press Del or F2. If that didn't work, read our guide on how to enter BIOS on different models of computers and laptops.
- On the Boot tab, use the arrow keys to move the USB device to the first position.
- Save changes and exit.
- Standard installation starts.

It is not difficult to create a bootable USB flash drive with Windows. For version 10, it is convenient to use the proprietary MediaCreationTool, which itself will download the necessary files. Choose any of the listed applications and write the OS image to a USB drive yourself.
The main link in the software of any personal computer is the operating system. Windows 7 is the basis for installing other software products. It acts as a kind of skeleton due to which the functioning of all other applications is ensured. Therefore, the problem often arises of transferring Windows for reinstallation or installation on another machine.
When do you need a bootable USB drive?
It is best to write the OS data to a USB flash drive. It is this method that allows you to speed up the entire process of transfer and reinstallation several times compared to burning and installing using a DVD disc.
Be sure to record your system and create a bootable USB flash drive for netbook owners. Due to the lack of an optical drive, recording and transferring the system to portable devices of this type using a DVD is not possible.
The presence of a flash drive with a Windows 7 image is a convenient safety net in situations where further operation of the operating system becomes impossible. And to restore the performance of the PC, a quick reinstallation of Windows 7 is required. For such a transfer, you will need a flash drive or expansion card, the volume of which should be about 4 GB.
Creating a USB flash drive using command line tools
The most time consuming way. More suitable for advanced users. Allows you to write a finished Windows 7 image to an expansion card or USB flash drive without installing additional software. Data recording and transfer is performed using command line tools.

- To start the command line, enter the "cmd" parameters into the "Start" search box.
- The search result is displayed at the top.
- Click on it with the mouse button on the right, and run it under administrator rights by selecting the appropriate item from the submenu.
"Run the command line as administrator" - this condition is not required in the procedure for creating a bootable USB flash drive. But it will avoid possible difficulties associated with rights and access in Windows 7.
You can also initiate the launch of the command line in a quick way: by pressing the keyboard shortcut "Win" + "R". But in this case, the application is launched under the user rights of the current session.

- In the Windows 7 command line window that appears, enter the "diskpart" command. With it, we launch the utility for working with disk space.
- In order to display a list of volumes to which you can write, enter "list disk".
- We select the desired number among them (according to the approximate volume). In our case, select the "Disk 2" flash drive. After the execution of each command, we receive confirmation from the system about the successful execution.
- By entering the command "select disk 2" select the disk with which we will perform manipulations.
- By entering the "clean" command, we initiate the process of formatting the flash drive in order to write the system image to it.
- Then we create a directory into which we will transfer the Windows 7 image (the "create partition primary" command).
- We enter the command "select partition 1", with which we select the partition we have created.
- We activate the section (enter "active").
- We format the partition to the NTFS file system, which supports the system image data (enter "format fs \u003d NTFS").
After a message appears that the flash drive formatting process has reached 100%, we mount it (enter the "assign" command).

- Then the system will assign a unique name to this volume.
- After entering the "exit" command, the utility will exit.
- Now the disk and the created directory are ready to write the specified system image or data from the Windows 7 installation disk to them.
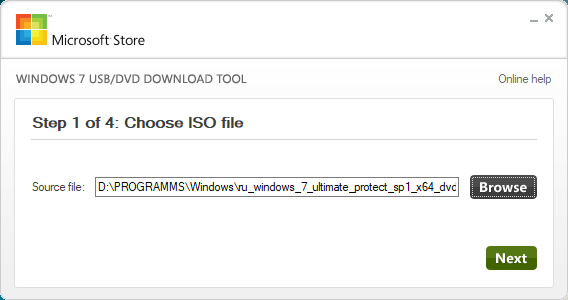
We transfer the system to a USB flash drive using the Windows 7 USB / DVD Download Tool
It is free software. You can download it on the official Windows 7 resource. This application was specially developed by the corporation so that you can write the OS to a USB flash drive. The volume of this utility is only 2. 6 MB. The process of transferring a system image or data from a licensed disc occurs in four short stages. After downloading and installing the software, do the following:

- We launch the application. In the utility dialog box that appears, at the first step, select through the explorer the image that you want to write to the USB flash drive.
- To do this, click on the "Browse" button. Or you can just provide the path to the file in the "Source file" text box.
- Then we press "Next".
At the second step, select the source to which you want to record the Windows 7 system image. In our case, click "USB device". During the third step, we decide on which flash drive we will transfer. To do this, select the one you need from the drop-down list. We perform the rest of the actions as follows:

