SmartArt objects. Adding or changing the graphic element of SmartArt.
If the figure you want to add is not associated with a SmartArt graphic, see Additional stats:
You can add shapes to a SmartArt graphic element either. Depending on the type of layout you are using, some of the commands described below may not be available. Some SmartArt layouts are surrounded by a number of lines or shapes. For example, in the “Simple Matrix” layout you cannot have many figures, so it is impossible to add additional figures. If you try to add additional figure In a SmartArt layout that can accommodate the maximum number of shapes, but creating a shape on a par is not supported by the layout, the shape and the text, the introductions in it in the text area will not be displayed. Shapes that are not displayed in the SmartArt graphic will appear as previously visible in the text area, and their markers will be indicated by a red X. graphic element SmartArt layout, which supports a larger number of shapes, and the selected shapes will be displayed. Additional information For information about bordering, see the article. In which SmartArt layouts can you highlight a large number of shapes?
Adding a figure directly to the SmartArt graphic element
Note:
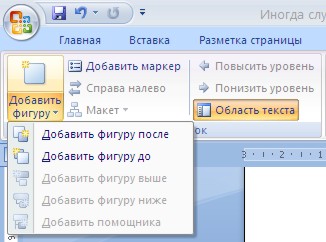
To quickly add a shape that matches the shapes in the SmartArt graphic element layout, click the button itself Add a figure, And not the arrow under it, as in step 4.
How to press the button Add a figure, If a figure is not selected, a new figure will be inserted after the figures upper level or under the figure of the upper level.
figure Add a deputy Available only if you have selected an organizational chart layout.
Adding a figure through the text area
Adding a figure before the original figure
In the text area, place the cursor in the top of the text where you want to add it.
Enter text and press ENTER.
Adding a figure behind an obvious figure
In the text area, place the cursor at the end of the text where you want to add it.
Press the ENTER key, and then enter the text.
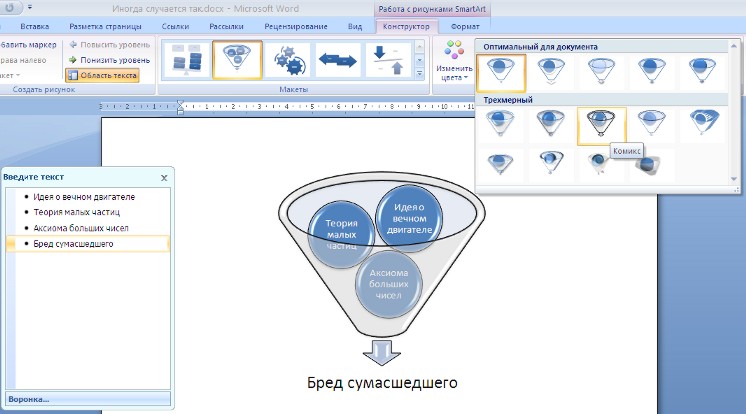
SmartArt graphics allow you to easily create a variety of barvy schemes.
When choosing SmartArt templates, you must understand their primary purpose.
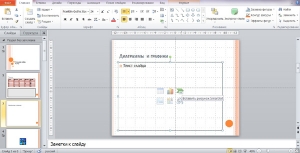
To insert a SmartArt object, use a single button on the panel "Illustrations" stitches "Insert".
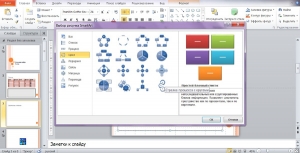
The window will open "Vibir little one".
Having chosen the template, write a short description.
After adding the template to the document word processor A contextual tool will appear to add two lines: "Constructor"і "Format".
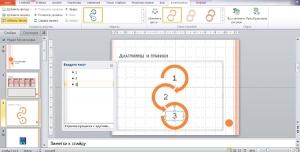
To fill in the text fields, the left panel of the SmartArt object is assigned to the template.
In the world of typing, you can quickly get the result.
To add a new element to a SmartArt object, simply press the Enter key. Sometimes it happens that it is impossible to add a new element to an existing object.
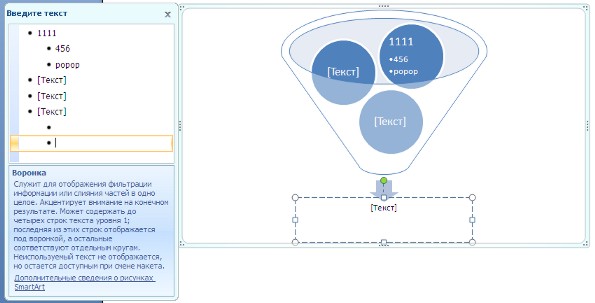
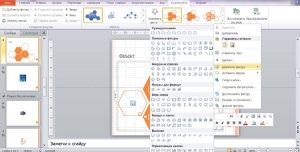
Another way is to use the button "Add figure". In this case, elements of the same level as the visions will be added to the SmartArt object. points "Add more figure"і "Add the figure lower" designated for inserting an element of a different level. If some buttons are inactive, adding a new element is impossible.
To delete any element, you need to see it and press the Delete key.
buttons "Move the rhubarb"і "Reduce the rhubarb" Used to change the level of visible elements.
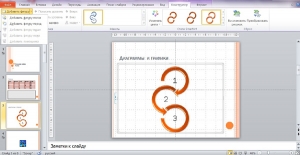
SmartArt objects are edited as standard graphic elements.
A line is assigned to format the SmartArt object "Format" contextual tool.
We won’t look at it in detail, since the knowledge you took away in the earlier lessons is completely enough for you to learn on your own. Note that to deny access to the screen until all settings have been made to the SmartArt object, select the item in the context menu "Figure format"(Vin shouts right buttons mice on the body of the SmartArt object).

At the window, select I need a tab and make the necessary settings.

The context menu item "Insert title" is used to add a caption to a SmartArt object.
insert of baby
To insert the baby, you need to quickly press the button "Malyunok" panels "Illustrations" on the page "Insert". In the window, find and select the required graphic file. The image will be inserted into the document. When will a new contextual tool appear? "Robot with babies", What to do with the stitch "Format".
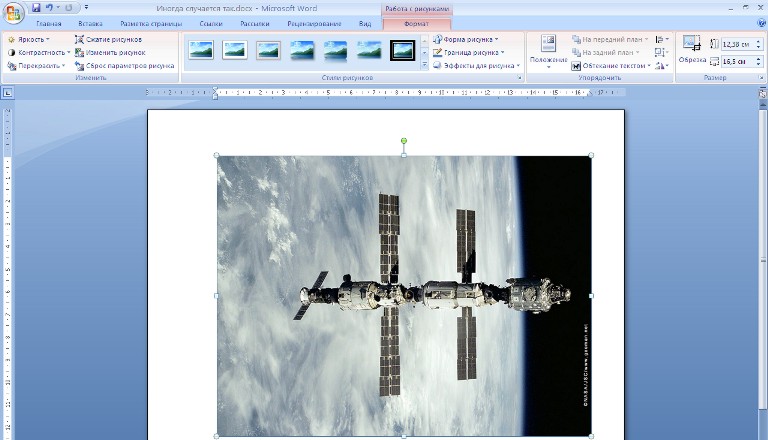
The operations that can be performed on images are similar to those already discussed for graphic primitives. However, keep in mind that the inserted image often takes up a significant amount of memory. Therefore, the Vikonanny of these operations will be occupied value hour Moreover, it will be more, the larger the size of the file that is inserted and the lower the productivity of the computer. So, on “old” machines, you can click a few things while the computer “sets up” the settings for cropping the image or changing color tones.
The robot with images would be more comfortable, and the pouch size text document Having consumed several tens of megabytes, you can fully compress the image.
What is the button for? "The squeeze of the little ones" on the panel "Change".
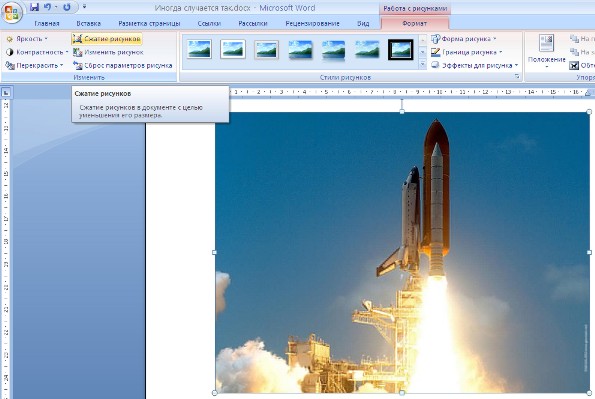
After pressing this button, a window will appear in which you can adjust the image compression parameters. button "Parameter" opens the window "Stisnennya".
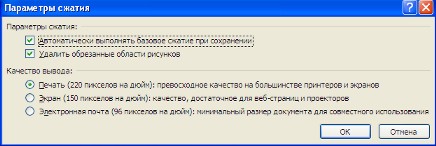
Three image compression options are available. Choose the one that best suits your personality.
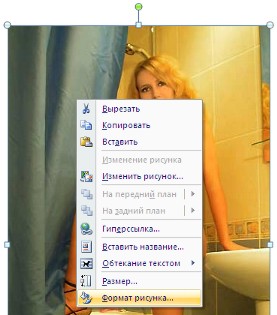
Don't forget about context menu little one. paragraph Find virtually all the necessary image adjustment tools.
This collection includes a selection of text editor images.
To insert a clip, you need to press the button "Clip" on the panel "Illustrations" stitches "Insert".
A panel will appear at the right edge of the window "Clip". There is a button at the bottom "Arrange the clips..", Having pressed on the yak, we will sink into the window "Clip organizer".
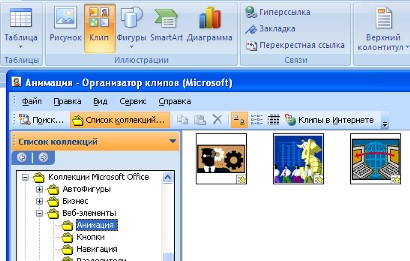
On the left there is a catalog of clips, and on the right hand - the area I will look at is selected by you to the catalog.
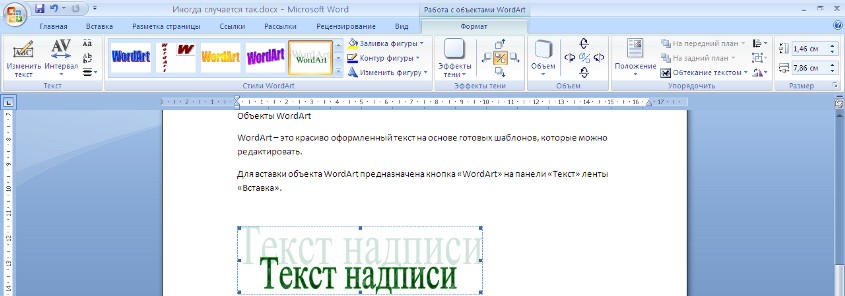
WordArt objects
WordArt is a beautifully designed text based on ready-made templates that can be edited.
There is a button assigned to insert a WordArt object. on the panel "Text" stitches "Insert".
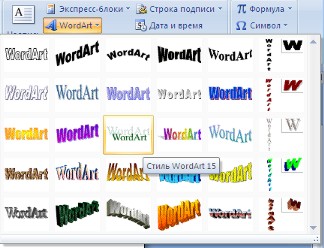
After inserting a WordArt object in the program window, the context tool appears "Working with WordArt objects".
You will no longer have any particular difficulties in dealing with the tools presented on this page.
SmartArt babies- here are pictures of ready-made blocks. You select the block you need and insert it into the middle.
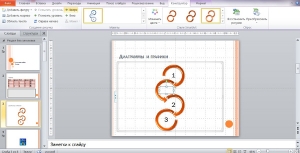
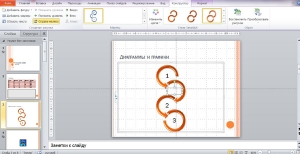
Click on the SmartArt button. A window will appear in which you need to select the appropriate baby. You can gulp and get to know the groups of babies. For illustration, I chose the Baby Cycle Simple Cycle from the group (Fig. 4.9).
The fragments of these little ones are used to describe various processes as a final confirmation of the work, and you may need to insert such a little thing into the table. So we’ll tell you a little about them in a report.
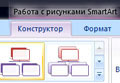
When you put the little ones in the cage, they will immediately appear new group tabs Robot with SmartArt little ones, which consists of two tabs - Designer and Format (Fig. 4.10).
For additional help in the Designer tab, you can use your steps.
If you are too tired of changing the layout, then click the Refresh button of the Skidanny group to return the layout to its original appearance.
On the Format tab for working with SmartArt babies, you select commands for changing the skin shape (Fig. 4.16).
Vikorist tools are included in these tabs, you can use them right away.
- Change the figure by selecting a banana from the list.
- Create larger and smaller shapes using the additional buttons of the Shapes group. Before speaking, there is another way to change the size of the figures, which you already know. You can change the location and size of the skin shape by using the frame that appears when you see the shape. Just grab the circles or squares, and the size of the figures will change.
- To make the shapes flat, you can select a third style using the additional Two-dimensional editing button (this works only for three-dimensional styles). When you press this button again, the shape buttons will become voluminous again. In a melody, this button is intended for easy editing of volumetric shapes.
- Remember the style of the figures, the vikorist one and the same group.
- Place the text in a WordArt style figure with the same group. You can select the desired style, specify an outline, fill the background and create animation for the text. For the next time, there is practically nothing limiting your imagination.
- Arrange the shapes behind the additional menu of the Organize button. The SmartArt baby is made up of several shapes. You can regroup the axis itself: you can bring it to the foreground or background, align them in the way you prefer.
- Set the size of the visible figure, which will appear at the end when you press the Size button. To delete a shape, scroll to it and press the Delete key.
Author:
POWERPOINT2015
License type:
grunt
movie:
Windows 8, 8 64-bit, 7, 7 64-bit, Vista, Vista 64-bit, XP, XP 64-bit
Vanished:
SmartArt in PowerPoint
Using additional Power Point programs, you can insert pictures, videos, SmartArt and tables into slides.
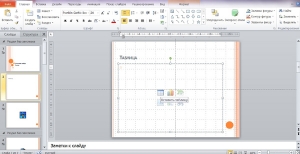
To start working with the table, you need to select a suitable slide layout to place the object. After this, click the “Insert table” button, open the editing mode and set the required number of columns and rows.
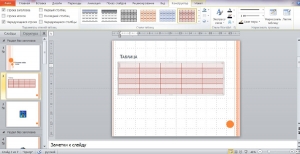
Once the dimensions of the table have been determined, you need to select its type of design. Check out the options for color, style, number of columns and rows.
Having filled in all the data from the registration, you can proceed to editing the current appearance of the table. The color of the table is selected by pressing the “Fill” button. You can determine how the skin cells will look by pressing the “Middle” button.
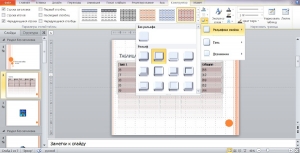
In addition, it is possible to insert a table into the datasheet. This is what the “Add Table” button is for.
After pressing the kistuvach button, you can draw out the middles or see the field that will be divided into middles. It is not difficult to remove unnecessary spaces from the table - the elements can be easily erased using the additional “Eraser” function.

Students will be able to create a beautiful flowchart and arrange text that is folded according to the structure by inserting baby SmartArt.
To do this, you need to select the slide in which the adjustment object is located, and click on the “Insert SmartArt little” button.
Once the window for the created object opens, the user can select a suitable layout based on the structure of the text and the appearance of the little ones.
Having selected the layout, you can begin editing the object. Text is inserted into the required column.
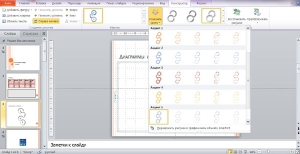
After the graphs are filled with text, the style of the object is set - the visibility of shadows, obscurity. The number of lines is chosen for relish. In the Vikorist tab “Designer”, you can add and remove elements. To add, click the “Add figure” button.
After adding the shape, you can insert it into the object layout and fill it with text. At this stage you can change the order of passing objects.
To change objects in places, see the required element, then click “Up” or “Down” on the toolbar.
Since the layout shows the appearance of the arrows, the “Right to Left” button is used to change the direction of the text. By pressing the button, you can change the direction of the arrows on the bed.
Any objects in the Power Point program can be edited, including SmartArt little ones. You can change your color or add color accents. For these options, use the “Accent” and “Change Color” buttons on the toolbar.
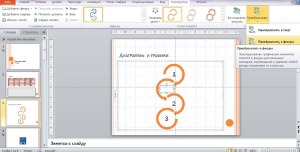
If necessary, a SmartArt graphic can be turned into a shape or text. As a matter of fact, the program will read it like one little thing and will not allow you to edit it. If you add to the text, then the graphic structure will be removed. On the toolbar for transforming objects into text and shapes, there is the “Convert to” tab.
To create folding objects from baby objects, when selecting the SmartArt object type, click “Baby”. Let us combine the little ones and the text.

Having activated this function, you can format objects using standard rules, which we will describe below.
When SmartArt objects display as standard slides, they can be animated. You can remove this ability to edit a slide by going to the “Animation” tab.
Inserting animation works on the same principle as inserting a picture and text. Elements can be combined or appear separately (from the specified speed in the recording mode).
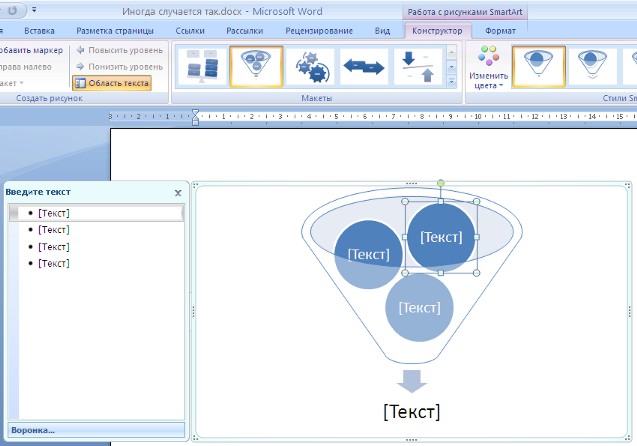
Objects are images that allow you to visually represent your information. To add a SmartArt object to it, place your cursor where you want to view it and go to the tab insert. Then find the button and click on it.
show up at the end Vibir baby SmartArt . You can find the option you need by clicking on menu items or simply scrolling down the list. If you see one of the options in this window, the right-hander appears to describe it in greater detail. external look. After making your selection, click OK, and the selected object will appear on the page.
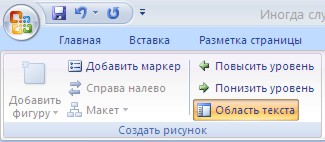
Now you need to put the text. Click on the words [Text] into the little box and write your own version of the text. You can put the text differently: see the SmartArt object, and click on the icon with a downward arrow, which is located in the middle of the left side of the object border. A window appears where you need to enter your text. І third option for entering text: see the object and click on the tab constructor
Then click on the Text Area button and enter the text in the window that appears.
The size of SmartArt objects can be adjusted, just like the size of a baby by moving the frame markers. You can also change the size of the skin element - click on the element and collapse the markers internal frames It appears in the middle of the frame of any object.
In addition, if any element can be moved and rotated, it’s just as basic.
 Let's now look at the possibilities of vikoristan tabs constructor
і format, They appear when we see a SmartArt object. Go to the tab constructor
. To increase the number of elements on an object, click the button Add a figure
. You can add a shape before or after any element, only you first need to see that element, and then press the button Add a figure. For some types of objects, this button, however, does not work - you cannot add new elements.
Let's now look at the possibilities of vikoristan tabs constructor
і format, They appear when we see a SmartArt object. Go to the tab constructor
. To increase the number of elements on an object, click the button Add a figure
. You can add a shape before or after any element, only you first need to see that element, and then press the button Add a figure. For some types of objects, this button, however, does not work - you cannot add new elements.
However, in all cases it is possible to remove the relevant elements. For which you see the element and press the button Delete .
If you have selected some kind of hierarchical SmartArt object, the buttons become active Move the rhubarb , і reduce rhubarb .
In a group of teams SmartArt styles You can change the colors of elements, or choose a completely different display style for them. extreme button renew the babies work him the way he appears from the beginning - until any changes occur.
at the deposit format You can continue to edit the SmartArt object. You can change the shape of the skin element, the color between fills, add shading effects, relief, display, and others.
In a group of teams WordArt styles You can tinker with the text: select a text style, borders and fill for the text.
Video about how to create and format SmartArt objects
more reports You can go to the sections “All courses” and “Courses”, where you can go through the top menu of the site. In these sections, the articles are grouped by topic into blocks, which contain the most comprehensive (as far as possible) information from various topics.
You can also subscribe to the blog and learn about all the new articles.
It won't take you too much time. Just click on the message below: