Canon printer connection master. Installation and setup of the Canon i-SENSYS MF3010 printer
Canon printers are affordable, easy to use, and may be of high quality. Models of this brand have positively recommended themselves over the market. Although installing via cable, as a rule, there are no problems, then setting up the printer in Wi-fi mode can cause a twist. Let's see how to connect a Canon printer via Wi-fi to a computer or a laptop, on the basis of the widest flagships Canon Pixma G3400, Canon Pixma MG3640.
Dekilka simple krokiv
The Pixma line of printers, the G3400 model, is equipped with wifi adapter, which implements the connection Canon printer Pixma in modes:
- infrastructural, tobto to the home measure from the router's widows;
- directly connected to the access point mode.

The main problem in times represents switching between modes. The Pixma G3400 model has a full-day display, so all manipulations vibrate on a flat track, pushing the buttons on the printer case.
- Sequentially press the buttons of a black friend, a color friend and Wi-fi. The indicator of liveliness ceases to blaze and to lighten up steadily.
- Activate Wi-fi on your computer or laptop.
- The list has the option to know the printer model.
- Enter the password to be asked. How to enter a password for new printers serial number, which can be looked through without interruption on the printer.
Even if the algorithm did not fail, it means that the connection is far away, and you can proceed to work. To connect a Canon printer to a laptop, you need to do it yourself.
Acts of authority are blamed for Wi-fi setup through home merezha with the router's wikis. At some point, the Pixma printer needs to be switched to infrastructure mode.
For whom:
- Press and hold the Wi-fi button before the printer's activation indicator is no longer bright.
- Sequentially press the buttons of a colored friend, a black friend and Wi-fi. The indicator of liveliness constantly shines.
Similarly, connecting through an access point, the humming printer appears in the folder and is installed, like a printer for locking. To get rid of the swindlers, if you press the buttons, varto write this information and stick її directly on the printer, so that it will always be under your arm.
Wi-Fi Protected Setup Connection
Pixma line printers support connections through a router for WPS assistance. This method allows you to hide the passwords entered and make it easier to restore the possession. Our recommendation for the printer is Canon MG3640. In order to speed up WPS, before setting up the printer, you need to check the settings of the router and activate WPS for the consumer. The router can be equipped with a WPS button.
Algorithm for how to connect an offensive printer:
- Connect the printer to the next life.
- Press and hold the Wi-fi button before the printer's activation indicator is no longer bright.
- Press and hold the WPS button on the router.
- When the printer and router are connected, the indicator on the printer is constantly on.
The procedure for asking the printer's router takes a little bit of air, and then it is necessary to ensure uninterrupted access of the MFP to the printer.
What works with old printer models?
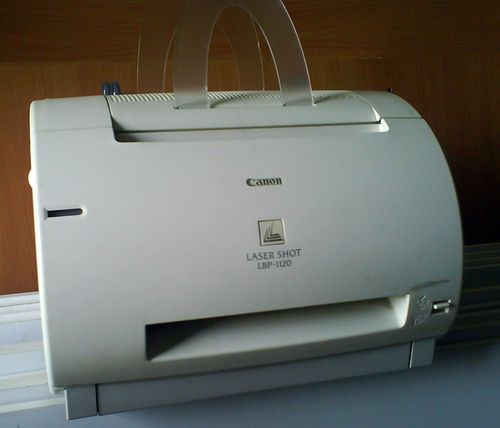
At the correspondent dossi dosit old printer models. These models cannot be connected via Wi-fi. In addition, the manufacturer does not release updates for drivers. For the sake of causing chirpy noise, replace a well-practiced, but old printer with a new one, I’ll upgrade the model. How to know the solution? As an example, we can try to connect the Canon LBP 1120 printer to the Windows 7 operating system on a computer or laptop.
On the website of the manufacturer, it is officially indicated that the drivers for the 64-bit system are found in the retailer. If the driver has a 32-bit OS installed, then the problems with the installed driver are not to blame. You can change the capacity of the system in the menu Computer - Power - Type of system (field Capacity). The driver for the LBP 1120 model is downloaded from the official website and installed on the laptop computer.
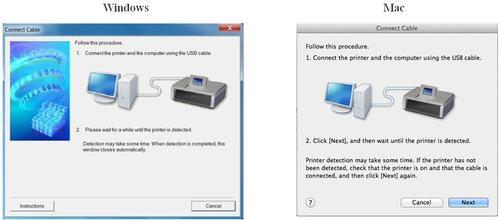
- Computer (laptop) and printer connected to life. Connect the printer to the computer via the USB port.
- Turn on the printer, and then the computer (laptop). After the interest operational system rozpochnetsya search for a new possession.
- Look for that installed driver. To search for a driver on the Internet and specify the system folder (option "Vikonati search for a driver on your computer"), where the driver was saved after the advance.
- After installing the driver, the printer is ready to work.
And what about the work, if a 64-bit Windows 7 operating system is installed on the computer (laptop)?
The problem has two possible solutions:
- Connect the printer to another computer or laptop required drivers, i through local measure provide necessary documents and photos;
- Vikoristati virtual machine paired with LBP 1120 printer driver for Windows systems xp.
Virtual machines are known to the rich modern coristuvachi. All software emulators that make the robot work on different platforms without reinstalling the robot operating system. The butts of such machines are the programs VirtualBox, Windows XP Mode.
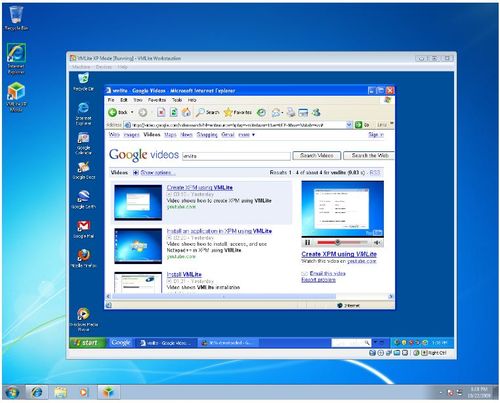
Briefly, the algorithm is used in the offensive:
- Install and install the virtual machine on the computer.
- Know and save the Canon LBP 1120 driver for Windows XP on your computer.
- Run virtual system, have it install the printer.
Nalashtuvannya that robot z virtual machines make sure it's enough high level competence. If you are not in the best of your ability, you should trust the connection of the Canon LBP1120 printer to a professional.
In contact with
Instruction
Turn off the computer and connect the USB cable to this port. printer. Connect the other end with the Canon lbp 2900 add-on. Enable the printer and check out while the operating system recognizes the new property.
Connect to the Internet, launch an Internet browser and visit www.canon.ru. Go to the “Pidtrimka” branch and open the “Driver catalog” section.
Restore the proponed table. For general language, select the Printer parameter for the Product column. After going to the new menu, select the "Software security" item. Now enter the operating system installed on the computer.
Click on the original archive with the name Printer Drivers. Put a check mark in the field "I accept please please" and press the "Apply" button. Dock the completion of driver acquisition.
Open the "Start" menu and select "Add Printers". After the appointment of a friend, I will build a click on the left end of the mouse with the left button of the mouse. Open the “Obladannya” tab and press the “Power” button.
Go to the "Drivers" submenu and press the "Update" button. Navigate to the item "Start a search on this computer". Select a folder until the browser saves the downloaded files. Download the installed drivers for the printer.
If you would like to add additional utilities to select the necessary files, download the Driver Pack Solution program. Run the utility and check until the scanning of internal and peripheral devices is completed.
Now check the checkbox next to Printers and Others. Press the "Install Select" button. Restart the printer after installing the selected files. Run text editor I will rewrite the practice of Drukarska.
Jerela:
- how to select driver for canon printer
- Get HP LaserJet 1018 driver free of charge
A virtual printer is a program whose interface is similar to that of a printer driver. Vykoristovuєtsya Vіn for converting the document to PDF format, PostScript, Djvu, and also in order to revise, as if looking at the document after the development.
you need
- - computer;
- - Program Do Pdf.
Instruction
Request that you install the Do Pdf program on your computer, for which you can go for help http://biblprog.org.ua/go.php?site=http://www.dopdf.com/download/setup/d..., check out the program and run the installer. Install the program on the computer. Rezavantazhte computer, sobіni nabuli chirnostі for the creation of a virtual printer.
Open the MS Word program, create a document that you need to print on a virtual printer. Go to the "File" menu, select the "Druk" command, select the Do Pdf printer from the list. They gave me the choice of the parameters of the friend as it is, like in the case of a wonderful friend. Set the number of copies - 1. Choose the number of arches on the side, for example, 2. Choose the book orientation.
At the Save PDF file window, choose where the program saves overcharges file, after the help of the “Look around” command, then press “OK”. Let it be open vіkno Adobe software reader virtual printer.
In order to know the driver for the Canon printer, please explain your model first. Tse important umova, adzhe u different models can be different technical characteristics. The necessary information can be found in the documentation that is included with the add-on, as well as read on the body of the printer itself. If so, you can tell jokes.
I’ll build it up to whatever it is that will require the installation of an additional software, you must always add the disk with the correct driver. As for the faults, you can come to the computer salon or sell the driver selection software. Just be sure to change the list, the driver for your model is on the list. If someone you know has the same printer, you can download the replacement disc.
You can also download the driver from the official Canon website. Russian Koristuvachs more pidide resource for the address http://www.canon.ru. on head side select the section "Pidtrimka" and the item "Catalog of drivers". If the side is updated, you will add two graphs. Fill in that column if your situation is similar: the lion is assigned to those who home computer, rights - for those who need it for business
For the first field, indicate for the additional list that you can get your country, for the other - the type of possession (Printers). In the third field, select the printer model and press the Go button. Dock, your docks will be processed by the system. Dorimuyuchis vkazіvok on the screen, go through the next path, filling in all the fields you need. Press the Download button to download the printer driver for your computer by specifying the appropriate directory.
After the driver is zavantazheno, reconnect the printer physically connects to the computer and electrical outlets, run the save file and read the instructions for the installation wizard. Oskіlki process povnіstu avtomatizatsii, you will need vikonati minimum dіy. After installing the driver, instruct the trial side.
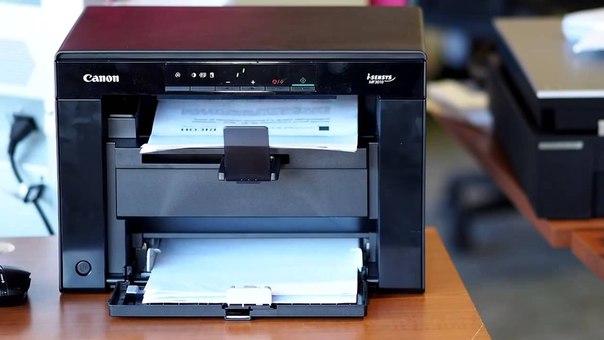
As a happy owner of the printer Canon i-SENSYS MF3010, you next need to talk about yoga correct connection to PC, as well as about the correct installing the correct drivers. Without such manipulations, unfortunately, your MFP cannot please you. like a robot.
How to set up the Canon i-SENSYS MF3010 printer yourself.
Good, if the Canon i-SENSYS MF3010 is getting a good deal. You will be familiar with the awkwardness of self-determination in all nuances, as if blaming the hour of work with richly functional outbuildings. On the right, if you install the Canon i-SENSYS MF3010 printer, you need to be new, but do not orient yourself in the same technical nutrition, pov'yazanom z such an annex. It is recommended that such beginners carefully read the instructions, as the bindings are included, as the Canon i-SENSYS MF3010 is bought from a trading mortgage.
Well, if you were asked to take the MFPs hand in hand for a graft, don’t worry, because you didn’t show such an important supporter of a coristuvach for you. We will help you to get familiar with the issues related to the installation and adjustment of the MFP, if such a printer is possible for you please with a yakіsnoy robot.
How did you get the Canon i-SENSYS MF3010 MFP, for this correct work, it is important to remember two main benefits:
- install the drivers correctly;
- install refill cartridge.
Ignore the installation of the driver for the MFP is not possible, but the driver is special program, as I allow keruvati adjuncts, nadsilati zavdannya on another. Apparently the skin printer is supported by its own specific driver. Otherwise, if you install the wrong driver, you will not be able to secure the communication between the computer and the printer.
Driver installation
Otzhe, rozumіyuchi, that the driver is the most important tool that allows you to secure the connections between the PC and the MFP, we are to blame install this special program.
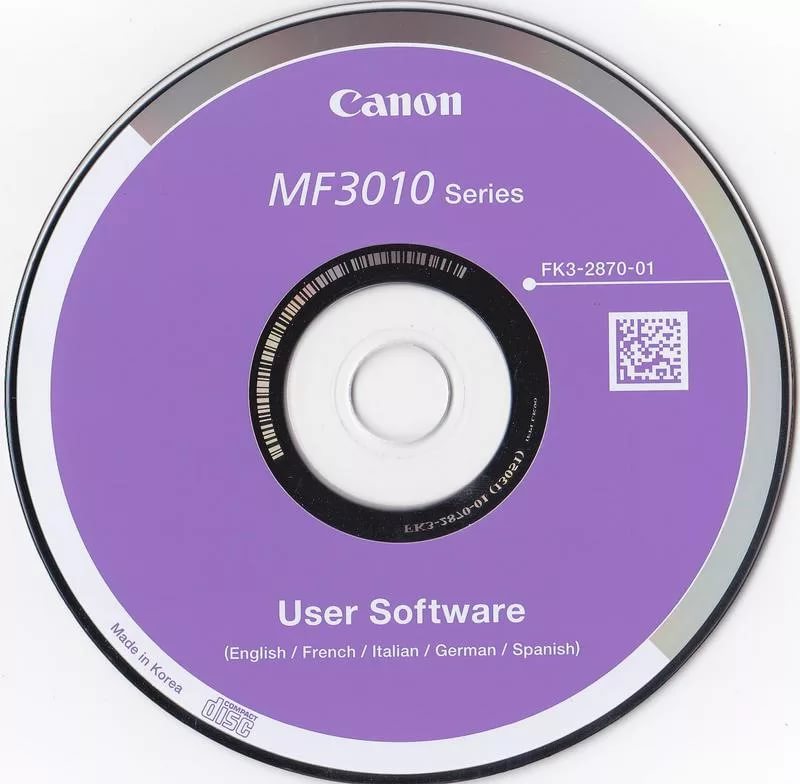
Most of the time, the driver is included in the kit, so it’s enough to look at the packaging, know on the disc what to save. In other cases, the printer can be sold in commercial mortgages without such a disc. However, in these cases, the virobnik does not forget about its clients, it installs drivers on its official website. And you can also know the drivers and get them from other sources on the Internet.
Before importing the installation files, it is recommended to check with your memory the information that what is the operating system installed on PC. At the moment, the choice will be made to the koristuvachas of the archive options for the acquisition, which are suitable:
- for Windows 7 and Windows 8;
- 32 or 64-bit systems.
When you provide some resources, it will be enough for you to enter the printer model, and the plug-ins will automatically set your operating system to that size. Let me ask you a file for downloading. Most of the drivers are zavantazhuyutsya in the archives, so before їx distant vikoristannyam rozarchivuyut archives.
Now open your printer from the computer, go to the folder, in the unzipped the driver. For your father, you will find the file Setup іz extensions.exe. On the file itself, click on the lower buttons to activate yoga and start the installation process. Now on the screen you will see the installation master's window. Vlasne, following the recommendations of the mayor, follow everything you need to ask and press the “Dalі” button.
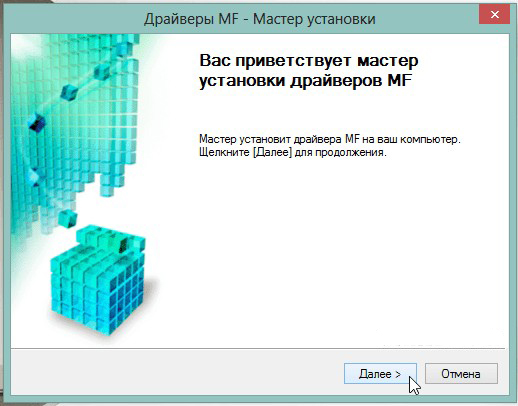
If the master gets close to the final stage of the installation, the wines will be connected to a PC. Connect the printer to the computer using an additional USB cable. On which driver installation is completed, obviously, the printer will be ready before the end of the day. Sometimes you may need to restart the operating system, so that you can change your rank. As if such a help was needed, do not lament, re-engineer the computer.
Instructions for installing the printer without a disc
Since the kit comes with a disk with drivers for the Canon i-SENSYS MF3010 MFP, newbies don’t know how to install the printer, and it starts to ruin their minds. You can actually install the printer for the availability of the drivers, with which it is not necessary to send a search and download them in advance.
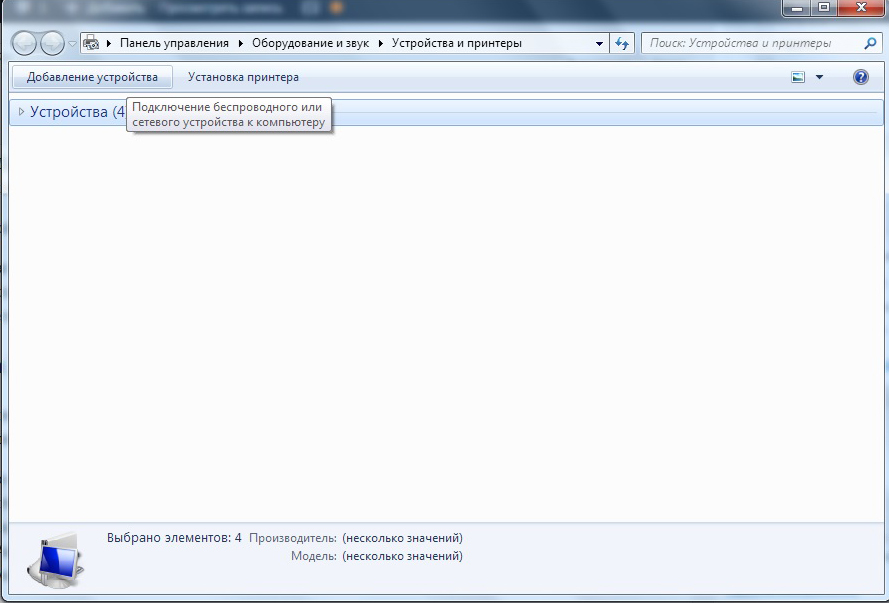
To speed up the installation of the MFP in this way, connect the printer to the computer. The next thing to press on the item "Start", z right side you will know the row “Add printers”. Such a row can be displayed by going to the "Control Panel".
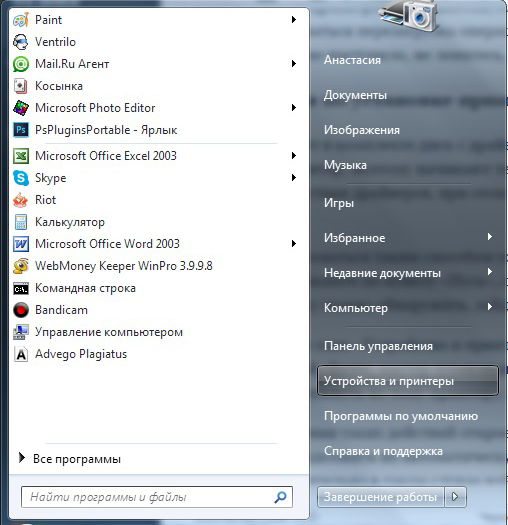
At the window "Attach printers" you can easily see the button "I will add an attachment", click on it. Let the installation master designate all printers so that they are ready to be connected. You have to press on the printer that you present moment please connect.
Since the viconannia of such events will be new, in which case it will be recommended to install drivers from the disk or continue them automatically installed. Obviously, you are guilty of pressing the "Dalі" button, the master independently knows this time need drivers and create your own installation.
MFP setup
After a successful driver installation, your printer is ready to go. Now on the new one you can make a copy, scan, make copies. If you still don’t have a practical knowledge of working with an MFP, if you still can’t scan, then you should familiarize yourself with the Canon i-SENSYS MF3010 manual, how to show, how to scan any documents. We will also help you to find out how to scan for help Canon i-SENSYS MF3010.
Emphasizes respect for those who can make changes to the improvement in order to ensure the maximum result.
Practical vikoristannya MFP
Since your printer is ready for work, you can add another trial side. And it is also possible to bring a document to another document. The printer has been set up correctly, mindlessly typing all the tasks.
You can also not sever the document for another, but go back to the “Vlastivosti” annex. At any time you can change the factory settings, orient the MFP for the best fit, as it is important to you at a particular moment:
- another few copies at once;
- the other is not the entire document, but a fragment of a number of sides;
- vibir song format arkush;
- choose other side orientation;
- displaying a different equal to each other.
Even though there were more coristuvachis to drukuvat, then not everyone had a chance to scan earlier. Therefore, when blamed for the need to scan documents for some coristuvachis, a stupor is caused. The stench does not understand, how do such people think. Indeed, the process of scanning is clumsy, it is sufficient to familiarize yourself with our recommendations, which are the main distribution of a helper for a koristuvach.
Also, as it is important for you to start scanning documents, go to "Start", go to the already known menu item "Add printers". After that, as it appears most of the time, you will see the printers listed in the new list, which are ready to work, select your MFP, click on the new one once, so that it was seen. Now troch below the address row you will see the menu bar of the number of parameters assigned.

You need to know the "Start scanning" parameter, click on it, that automatic process start up. Show up one more time, de vie, like a koristuvach, you can make some change. However, it is not necessary to make such a change on the cob, on the cob stages of awareness. Press the button at the bottom of the "Scan" button, and the attachment of the icon is inserted in front of it.
Yak bachite, the scanning process is also clumsy. It is easier to copy a document, it is enough to place a document, close the top cover and press the exit button, which is pinned on the body of the MFP itself. It will be easy to find such a button, the shards are accompanied by an icon, in which two copies of the document are shown, and also below this icon is a double name.
PORADA. For whatever reason, a richly functional attachment should be worked out, reverse the connection to the computer. More often than not, the problem is blamed on the aphid of an insignificant input to the USB cable.
Krym tsgogo, the problem can be blamed on the nature of the viral infection. Viruses often deprive of negative traces, among them drivers are seriously damaged. In any case, it may happen to re-install the drivers, in order to restore the normal functioning of the richly functional outbuilding.
Later, the installation farther away of the improved functionality of the Canon i-SENSYS MF3010 is not accompanied by folds, as if listening to the recommendations, becoming familiar with the algorithm of diy and, spiraling on them, zdiisniv all manipulations.