How to set up a Windows 7 edge printer. How to gain hidden access to the printer
On Windows, open behind-the-scenes access It is possible not only to folders or disks. It is very easy to open the underground access along the boundary for printer, Connected to one of the computers in the local network. As a result, you can use one printer for multiple documents from several different computers. It is not only possible to protect valuable assets, but also to save staff from having to deal with flash drives or disks if the office staff needs to be deconstructed.
Please refer to the information supplied to the printer or the printer's website to obtain information about your connection. If it shows that you are already using printers, then everything is ready. On the next screen you will simply learn about your home groups.
The “Printer Power” window displays the type of printer adjustment. You are advised that the printer will NOT be available if your computer is asleep or disabled. In addition, if you are a frequent user of passwords, you are advised that only those who use your account and the password for your computer can use your account on your new computer. If you prefer, you can make access available to guests so that passwords are not required, and this option can also be set to any files you have shared.
To gain access to the printer, sit down at your computer, before connecting the printer , And select upcoming events:
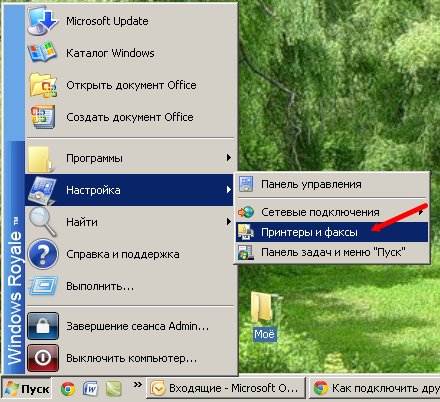
1) Go to “Start” - “Control Panel” - “Printers and Faxes”.
2) Click right button Follow the name of the printer until you want to give secret access to the merchants of the border - select the item "Authority" - go to the "Access" tab: 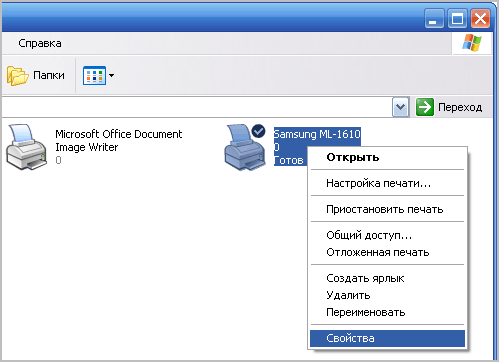 3) Place a marker next to the item “Restricted access to this printer.”
4) In the “Metering name” field, enter the name or description of the printer, so that the border will be visible to customers. It is not necessary to remove gaps in the printer name: 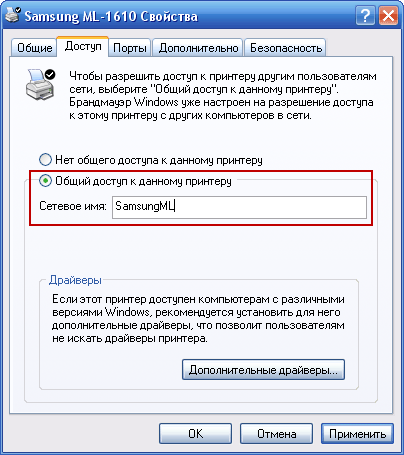 5) Press the “Freeze” button - “OK”. Once you reach the printer, you will have access to the printer and a hand symbol will appear on it:
We encourage you to become familiar with this and first make such a decision. To continue, turn on the “Share this printer” option and, if you wish, give the printer a stronger name so that other accounts can more easily identify the printer.
Another option that you can install here is if you want to end your relationship on client computers. Because this parameter is enabled, all documents that will be handwritten are displayed on computers, where people hesitate to use them. When this connection option is enabled, documents are displayed on the computer before connecting the printer.
In order for any computer's local border to run on a given border printer, it is necessary to install the printer on your computer. Since all computers need to be able to print on their printer, then on the skin of many computers Let's foresee the coming days:
Now, you're ready to move on to chapter two. How do you work, just lie down because you are vikorist in your home group or not. This, melodiously, is the simplest thing for your assistant. You can follow the same process that we went over to the first step in order to bind them.
Connecting to a printer without a victorious home group
Tim is not a mensch, but it’s still easy to finish. If you are using a printer, you are wondering, then your robot is simply superb. At the next window, you will find a number of options that will help you find it. If you know the exact names of your computer and printer, you can enter them here. For printers without a display, you can select the sequence of pressing the buttons as the settings will be different for you. Learn more about how to earn money. I know again, we rarely noticed how the wine takes away the device, which is not revealed under the hour of cob scanning. Ale, maybe, try it. Add a local printer or hemstone printer with manual settings. This parameter can help you add a printer without doing anything. The main thing for setting up a local printer to include accurate information about ports, and also, there is one parameter that can help with border printers, if you know the model. This is a great result, you just have to try it because you won’t be able to do anything else.
- My printer is a little older.
- It’s worth trying a simple method, but you can still get a lot of money.
- Oberit zagal printer by name.
1) Sit down at the computer of the computer operator who needs a hemline printer. Go to “Start” - “Control Panel” - “Printers and Faxes”.
2) In the menu row, click “File” - “Install printer”. The "Printer Installation Wizard" will launch. Press "Distance":  3) In the next window, place the marker in the position “Border printer or printer connected to another computer” and click “Next”:
 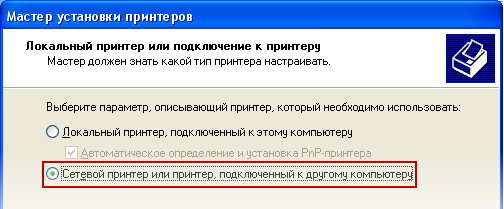 4) Then place the marker in the “View Printers” position and click the “Next” button:
 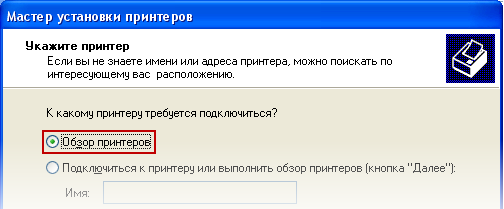 5) In the next window, you will see a list with the names of computers and printers connected to them. Select a computer and then a printer until you need to connect. When the name of the selected printer appears in the “Printer” field. Press "Distance":
 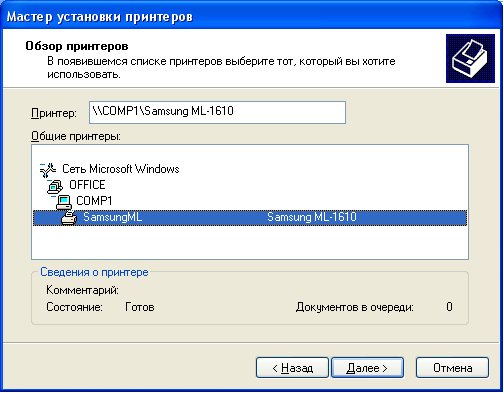 6) Please make sure that the printer drivers are installed on your computer in advance. Press "So":
  7) At the next window, you will be prompted to install a printer for cleaning. If you prefer, fill in the marker in the “So” position and click “Next”:
 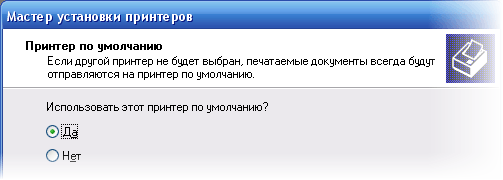 Now the installation of the hemline printer is complete. After you click the “Done” button, the printer icon will appear in the “Printers and Faxes” folder.
The hand on the edge printer does not differ in any way from the other on local printer. You will also show the correspondents advance notices about the availability of paper and other information. You can also ask or pin your friend.
Do not forget that in order to use the printer with other network computers, it is necessary for the computer, before any physical connection of the printer, to be turned on and not frozen, and for connections to be made locally. If you hit the hemline printer, you'll have to change the minds of these people.
External access to the printer in Windows 7. Rich in the new operating system Windows system 7 There are difficulties due to hidden access to the printer. We have already looked at how to create hidden access to a printer on Windows XP. You can read about it in my article.
Now our factory is more complex. It is necessary to create secret access to the printer in Windows 7.
I really want to increase your respect a lot. If your printer is old (about 4-5 years old or more), then installing on Windows 7 is the fastest way to install it. Be careful, but if you connect it via a network, especially through Windows XP, problems may arise. You will need a driver for Windows 7. The same thing happened when I created the video, which I included at the end of this article.
If the printer is not too old, you can download the new driver on the Internet.
From now on we need to set up remote access to the printer in Windows 7.
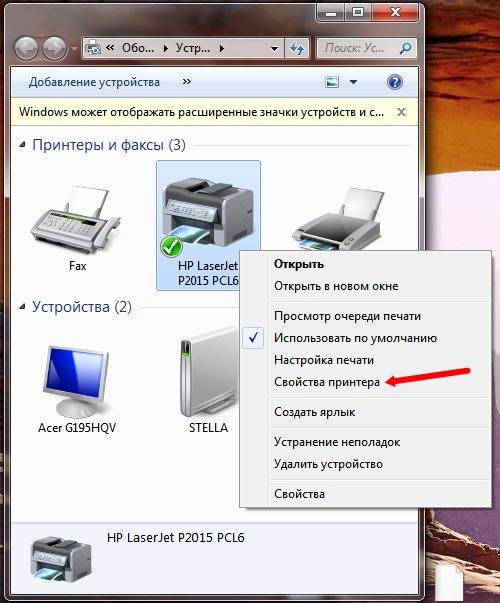
For this we go to the menu Start - Appliances and printers.
Right-click on the printer you want to select from the menu that appears and select printer power .
Go to tab access and check the boxes next to the entries Direct access to this printerі Painting must be done on client computers (recommended) .
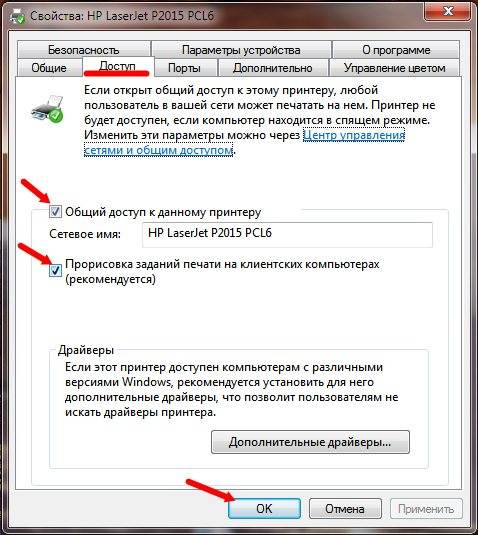
For more help buttons zastosuvatiі OK .
Now check which group your computers belong to. The group name must remain the same on all computers in your network. Otherwise, you won’t be able to get rid of the stench, and you won’t be able to connect the printer.
Checking the group name inWindows 7
To do this, go to the menu Start and right-click on the tab computer and select from the drop-down list power .
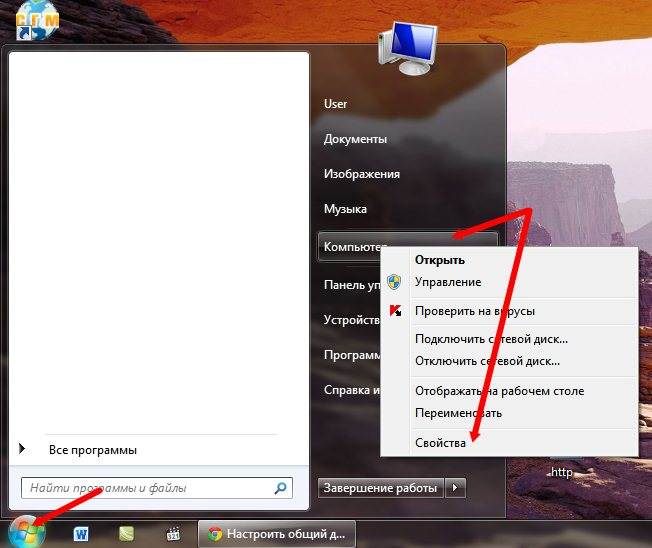
New Year's Eve system select item change parameters .
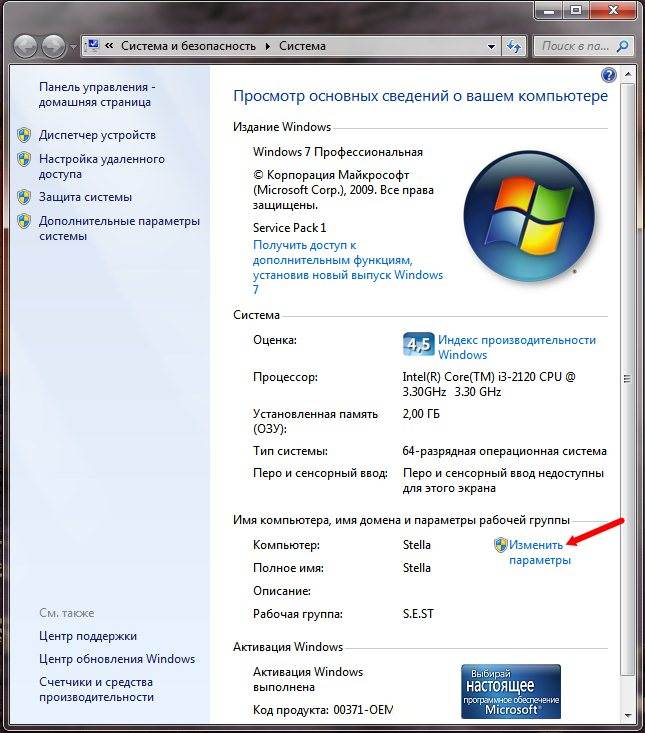
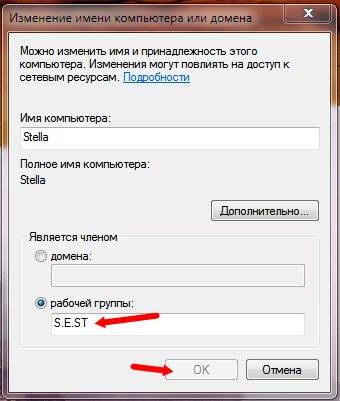
Go to tab Computer name and watch the post Robocha group .

If you need to change it, press the button change. Change the name and press the button OK .
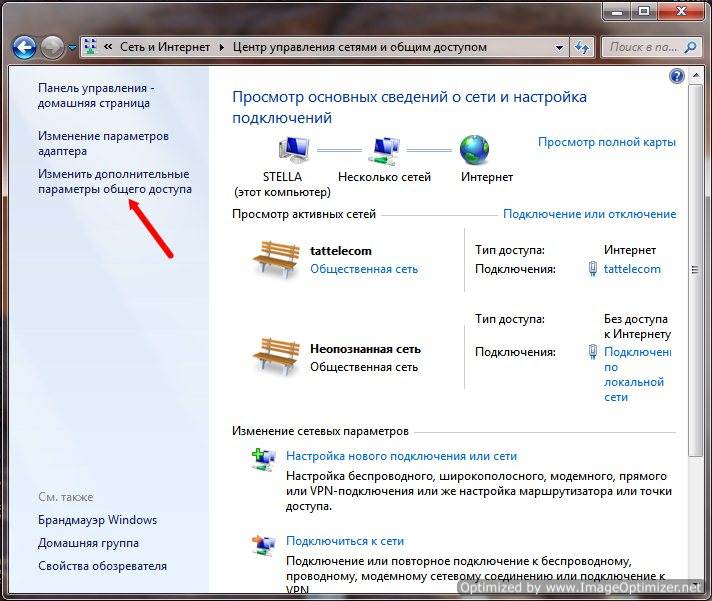
Let's go to the menu again Start – Control panel . At the top right corner at the end of Poshuk write the word “ measure" You will have such a list.
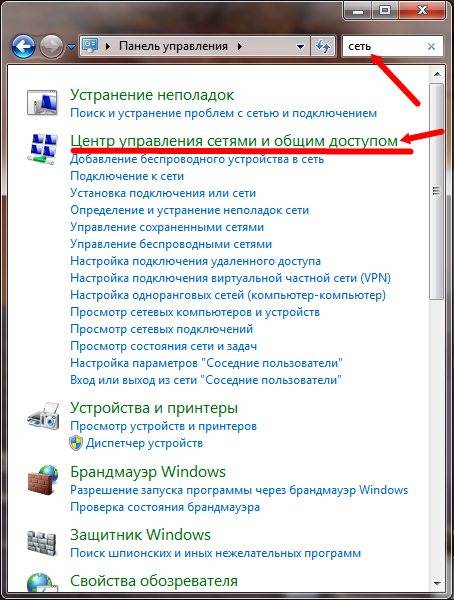
Click the bear on the entry Control center for barriers and backdoor access . At the next window, go to the left side and click on the entry Change additional parameters for sleep access .
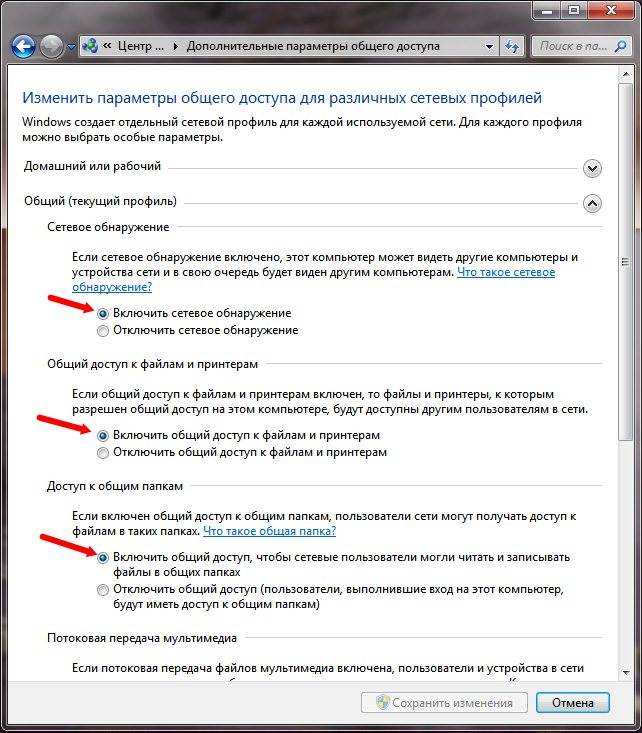
At the next window, set the jumpers to
- Turn on the boundaries of the display.
- Enable behind-the-scenes access to files and printers.
- Enable behind-the-scenes access so that third-party users can read and write files in behind-the-scenes folders.
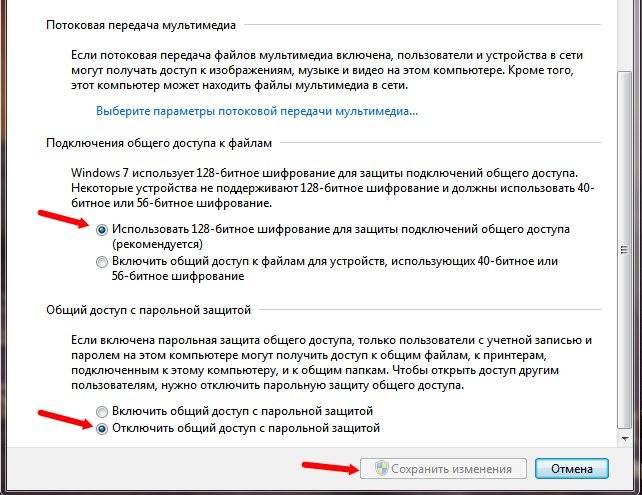
- Use 128-bit encryption to protect your connection from behind-the-scenes access (recommended).
- Enable secret access with password protection. (If you can’t do this, then when you get to the printer you will need to continuously enter the password.
Now let's go to the computer operating system WindowsXP .
We first check the boundary group.
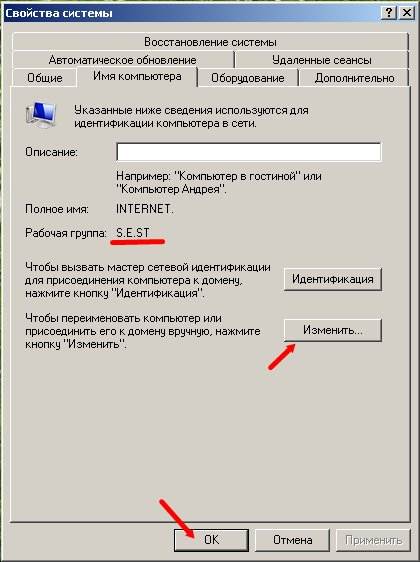
Right-click on the mouse icon My computer and select from the drop-down list power. The window will open at the same time power .
Note
This can obviously be opened in a different way. Start - Settings - Control panel - System .
Go to tab Computer name , And if necessary, change the name work group .
Now open the window Merezhevy connections .
For this we go to the menu Start - Settings - Panel management - network connections .
Go to the left half of the window and click on the message Merezheve sharpening .
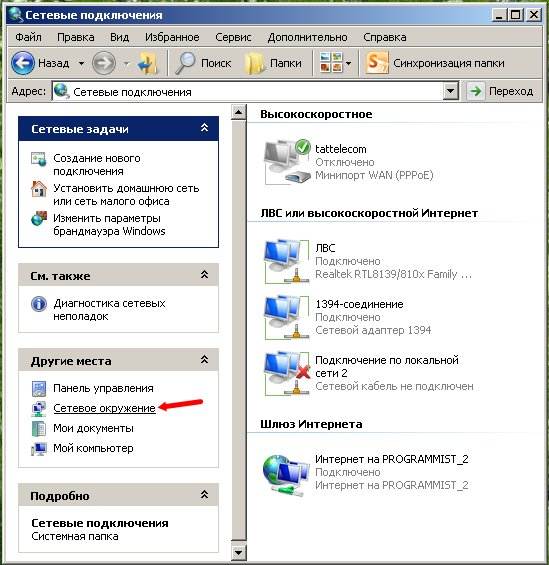
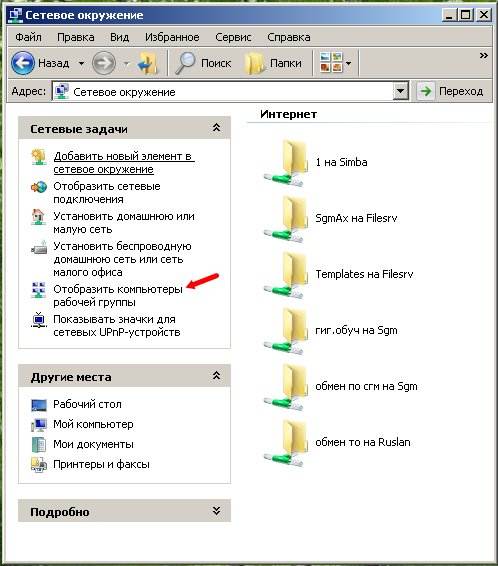
Now on the right we see all the computers in our network included in Danish moment. We know the computer on which we have Windows 7 installed and a printer.
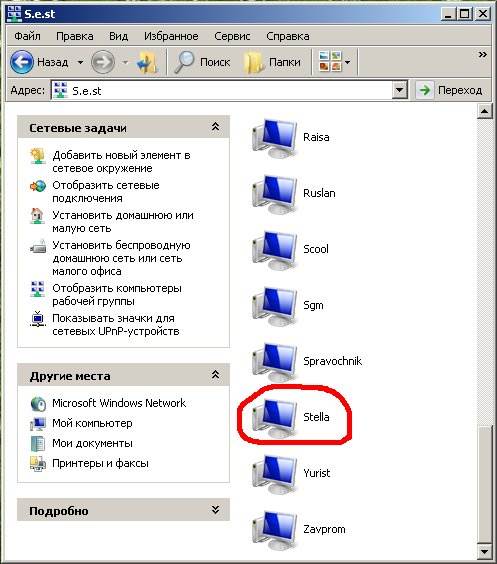
What do you have home frame, Then you won’t get to shukati for a long time. Click on the end of the computer with the printer installed.
There, on the right, our printer will appear.
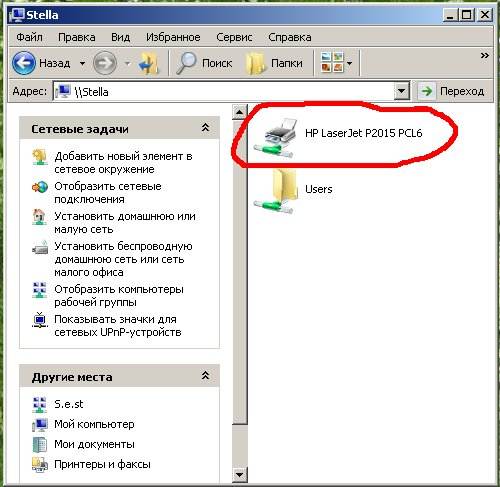
Click on the new teddy bear. Show up with the question.
If you want to connect to the printer, the appropriate drivers will be automatically installed on your computer. Printer drivers can contain viruses or scripts that can damage your computer. It is necessary to check that the computer that gives the printer access to the printer can be trusted. Will you continue to live?
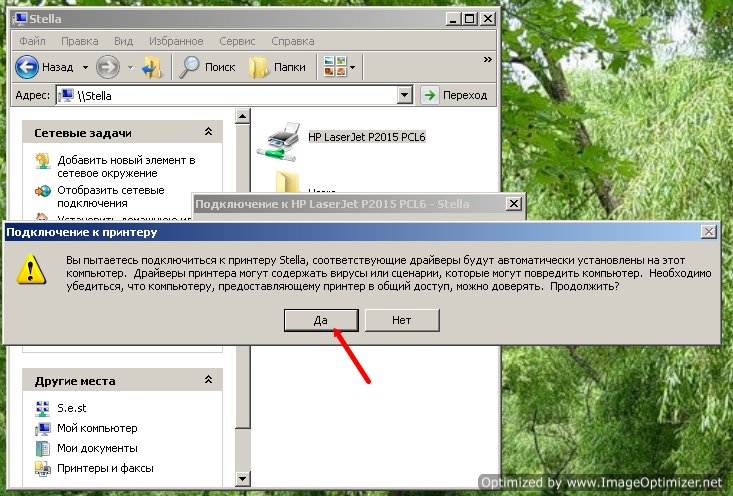
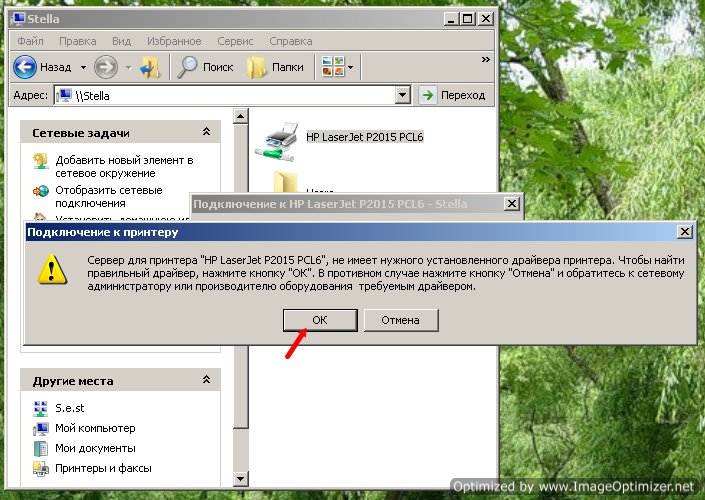
Cutely emboss button So. The offensive will appear.
The server for the printer does not contain the required installed driver printer. To find the correct driver, press the " OK" Otherwise, press the “Select” button and go to the administrator or electronic device supplier with the necessary driver.
I call the embossing button So .
Insert a disk with drivers for the printer that is installed on Windows 7 into the drive. Make sure the file is found automatically, or you can specify the location yourself.
To do this, in the next window, enter the drive letter and find the file using the button look around .
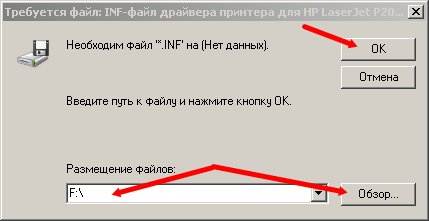
This is where problems begin.
With a new printer you won't have this. So, new printers and drivers are new for Windows 7.
There are no drivers for Windows 7 on the disk, so you will need to find them on the Internet right away.
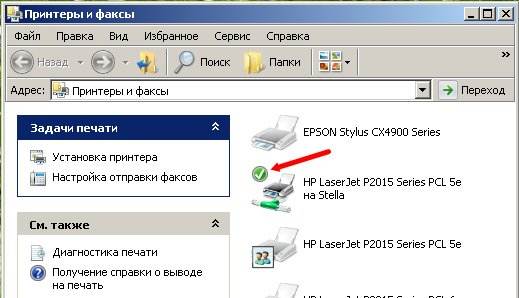
At the window Printers and fax we know ours new printer. Click on it with the right mouse button and select from the drop-down list Vikoristovvati for zamovchuvannyam .
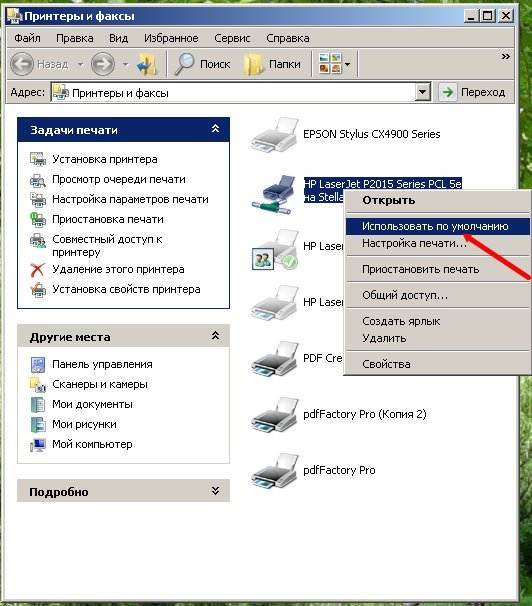
The printer must show a white check mark in the green circle.
Now you can unpack your documents.
Everything that's worth worrying about local measures You can read it in the articles under the headings.