How to install mobile Internet on an Android tablet. How to set up a tablet running Android OS
The first time you turn on any current Android smartphone or tablet, the assistant starts, through which way you can work basic settings I will install, and first of all, what is needed to connect to Google account record and the store " Play Store" Once the assistant has finished his work, you can click on the settings that are demonstrated in the application Sony smartphone Xperia with OS. WiFi- the first sub-item in the menu, designed to help save energy. You will need to configure all available WLAN networks and change them whenever possible; This way you can save both on expensive mobile traffic and on battery charging, since connecting to a nearby WLAN router consumes less energy than connecting to a remote station Elniki bunch.
In separate "Wi-Fi / Advanced settings" deactivate the function “Start making jokes” Otherwise, the WLAN module will drain electricity when the gadget is turned on. Offensive menu item - Bluetooth.
data roaming you need to deactivate the section “Setting up / Mobile network / Data roaming”, And it is purposeful to directly turn on only when your smartphone is located outside the cordon. Otherwise, finding a location near the sovereign cordon can lead to a sharp increase in your expenses for communications. In separate "The shortest type of edge" Choose the most suitable option that is supported by your smartphone and tariff. Although it is true that devices in 2G mode consume less electricity when transmitting data than with 3G or LTE, while transmission using more advanced technologies costs less per hour, then It is better to spare the battery of the gadget .
In adjusting the display Oberit low rhubarb brightness and humility "Automatic brightness control". Extended battery life and energy-saving mode (for certain devices) ( “Electric life / STAMINA mode”). Oberit "Activate automatically", And then, when the battery charge level is low, energy-saving functions will be activated, which will last for an hour of work.
Keruvannya koristuvachami It is practical for Android devices, which many people use. In the setup menu, go to section "Koristuvachi", Then - “Dodati koristuvacha”, After which Android creates another circle of clients without access to the data and adjustment of the first client. Next, after unlocking the device, swipe the screen from the top edge to the bottom and press the shortcut on the right hand: Android will be ready for power start screen and data (including completed matches, saved notes, etc.).
museum your smartphone is permanently recorded, and data about it is transmitted to Google. If you are not under control, just turn on the geolocation services robot.
If necessary, you can re-enable the option through the menu shvidkikh nalashtuvan, For example, when using the navigator. Don’t forget to also change the display lock from standard to more secure with a different PIN code. It is possible and necessary to work in the department "Safety".
Hello Shanovniy Chitachu!
. Since our resource is dear to you, we will be grateful for your contribution (Webmoney Z667342162966, R290774558293). All collected money will be used to pay for the content manager.
The site team is working hard to convey to its readers the most reliable information about tablets. If you are already corrupting him, we will be even more generous if you write your opinion, and even the very idea of corruption is valuable for being examined and tested!
Behind the scenes!
Activating the tablet is a special procedure designed to confirm the authenticity of the device being used, as well as the installation of special data on the user. Without activation, the tablet will constantly display a guess.
Instructions
Go through the activation procedure, which begins immediately after you first start the tablet. This consists of several actions that include the adjusted date and time, inserting the name of the user and your special data, choosing a mode for connecting to the Internet and other parameters. If you have the advantage of skipping this procedure, instructions about it may appear periodically on the main screen in the future.
Go to the tablet settings so that the activation process does not start automatically. Select the appropriate option in the menu and proceed with activation. Please note that in some cases, in order to successfully complete the procedure, you must first set up an Internet connection, since information about the registered device is sent to the retailer’s website. Over the years, in case of any problems, the specialists will look for a clear signal and promptly help them to correct them.
I will update the security software through the adjustment menu. This is an important point, without any activation it will be inconsistent or it will never happen. This process can take a lot of time, after which the device will be re-engaged.
Go to the official website of the tablet manufacturer and get information about registering the device. You will need to go through a short procedure to revoke your login and password, after which you will be denied access to special profile.
To reduce the possibility of making purchases in the retailer’s online store through a special add-on (on Apple tablets and Android), you will need to enter your ID number and enter your payment information. This procedure also begins automatically after the device is turned on for the first time, or it can be launched through the setup menu.
Currently, tablets have flooded the digital technology market and are gradually pushing laptops and netbooks into the background. More and more people can communicate with a tablet in their hands. It’s not surprising, compact size and high productivity in a timely manner autonomous robot, Take a more powerful tool from the tablet. The potential of tablets has increased with the emergence of a large number of programs for android tablets. The simplicity of today's tablet computers allows you to launch important games and programs without much effort or delay.
Today, tablets are equipped with powerful four-core processors and a large volume RAM. Even worse, in stationary computers and laptops they died. Today the situation has changed dramatically. With the advent of laptops, a large proportion of computer owners began to appreciate a better mobile way of life. That's true, it's needed desktop computer Because a laptop is lighter and you can take it with you to cafes and parks that today have WiFi connections
Today, you can see the same topic on your tablet and laptop. The size of a tablet is often no more than 500 grams and the size of a small book, and the capabilities and productivity are completely sufficient for manual work on the Internet, watching movies, photographs and work in office supplements, We didn’t know each other. Just wait a minute! As a result, the end of the computer evolution has arrived. People have begun to gradually switch from their already accumulated laptops to compact and stylish tablets.
On Mother's Day today, the tablet has become not only fashionable, but also handy. Always, forever, access to the Internet, access to the post office, etc. It is no longer possible to imagine life without a tablet computer.
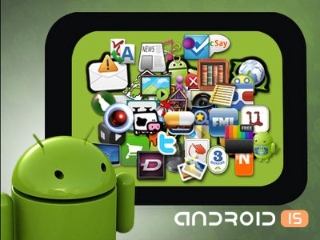
Lyudina, having bought your first tablet computer, you will immediately run into a few problems, but luckily it’s easy to get rid of it. Most tablets without access to the Internet, such tablets are of little use. For the most part, this is the work itself on the Internet. Of course, after purchase, the tablet computer already has essential programs installed, such as postal customer, Browser, audio video player, gallery, etc. Ale all the same, myself great ceremony programs are primarily available on the Internet. To access them, most Android tablet computers have Android program Market.
All tablets have a cable to connect to the Internet border extensions. As a rule, this dartless fence Wi-Fi mobile internet 3G. To connect your tablet to the network, you will need to have a Wi-Fi network. For this, it is enough to have a router-router device.
Tse pristriy, rob za iz zhe zvichny home internet more i droneless Wi-Fi. Then you can divide your Internet into two types: Wired and Wireless. Wired you also use vikoryst on your computer, and before wireless Wi-Fi you can connect your new tablet and laptop. Moreover, all these devices can be used simultaneously. And the main thing is that there is no need to pay for the Internet on all computers.
Otje. Now looming without a dart Wi-Fi internet For your tablet, you can begin to install the program. To access them, most Android tablet computers have the Android Market program installed.
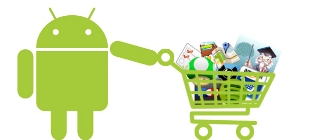
Android Market is an online store for purchasing all the necessary programs for your tablet. Programs in the market are divided into paid and free ones. Cost-free, downloaded from the market and installed on your tablet, without any special steps. With paid ones, everything is more complicated... It’s impossible to attract them just like that. Installation is only possible after payment. The size as determined by the retailer - the seller of this software security. Variety is indicated in the program description and is noted immediately, without additional search.
Also, each program in the Android market has ratings, comments and screenshots. Customers rate the product on a five-point scale with a star. Also below are present videos downloaded about this program. There you can find out what other people think about this product and decide whether you need this program itself. You may have read “I have a galm, flies, works a lot, etc.” You will change your mind about installing or purchasing this program.
Still, Android Market comparisons cost-free programs that igor, among whom you will clearly know what you need!
If you are not controlled by such an Internet client, such a service can be performed in our
What can we say, that very moment when you pick up your first Android tablet is unforgettable! However, you don’t need to think that you will never learn to profit from it. In fact, everything is quite simple - both in terms of working with devices on Android in general, and in terms of their setup.
crocs
Part 1
Pochatkove getting betterRemove the tablet from the box. Before turning it on, you need to remove from the box both the tablet itself and all the accessories and documentation that comes with it.
Charge the tablet. So, there is a chance that the battery of your new tablet still has some charge left, so don’t waste it and charge the device again.
Hold down the tablet. Having charged it to the maximum, turn it down by pressing the “Down” button. The button will be physical, it will take about 3 seconds to press until the notification appears.
Part 2
Startup setup process- Press "Next" when finished.
-
Choose yours Wi-Fi measure. Local Wi-Fi networks will then be displayed on the screen. You will obviously need to choose yours from them. If you are not included in the list, bring the device close to the router and press the “Refresh list” on-screen button.
-
Check until the tablet connects to the limit. While it is waiting, a placeholder window will appear on the screen to symbolize the connection process. And the plug on those and the plug, you, while the tablet is connected intermittently, will not be able to work with it. Just put it on the side for one or two minutes.
- Your tablet will display information about those who have managed to connect to the next step, after which you will need to press the “Next” button to move on to the next step.
-
Try your Google GPS settings. Then you will need to decide for yourself what is morally nourishing - and why allow services and Google extensions Would you like to use your Wi-Fi network to improve your location? There will be two options related to these meals. The options, as it’s not easy to guess, are few - either allow or block.
- First option: add-ons based on GPS tracking (also Google Maps) can find your destination and mark it on the map.
- Another option: search data about your location to modify Google search results.
- Both options will be selected (subject to adjustment), but they can be enabled manually by dragging the corresponding bars to the corresponding positions.
-
Set the hour and date settings. Now you will need to tinker with the calendar! Having entered the hour and date, you can sleep in peace - the tablet will not be damaged if you turn it on.
- You can select your time zone from the list below the heading. In addition, you can manually change the values of the fields “Day”, “Month”, “Rus”, “Hour”, “Hour” and other settings.
- When you are finished with the settings, click “Next”.
-
Set up access to your regional registration Google. Since Android is created by Google itself, for most of the functions available Android koristuvacham They will need a Google account record. Obviously, you will need to either enter the authorized data for your existing account or create a new one.
- You can, of course, skip this entire step by clicking on the corresponding button, or else don’t bother, especially if you plan to use Google Store and others important functions Android.
- When you are finished with the settings, click “Next”.
-
Enter address by e-mail Gmail and its password. By first clicking on “Dalya”, you will be prompted to enter your email address and password. If you have a Gmail account, YouTube account, or a Google+ profile, then you already have a Google account account. In this situation, all you have to do is enter the email address and password you entered in order to log in to the specified services.
- What kind of shape is it? Google posts You don’t have any, and you can create it in the future by clicking on the previous message.
- Once you have completed entering your authorization data, reset the dummy screen again. Don’t worry, the tablet connects to Google servers at all times.
-
Adjust the options backup and renewal. Having “linked” the tablet to your account, you will see on the power screen about those you want and proceed to setting up the backup and update options. What do you want? Once again, you will see two options that you can enable or disable. True, the stench is already turned on ... and, apparently, let it be turned on and lost.
- When these options are enabled, you can import settings and add-ons from another device under Android controls, Connected to your Google profile, or create a copy of your settings and add-ons, which you will be able to use in the future on any device running Android.
Choose a language. When you turn on the tablet for the first time, you will need to complete the process first cob adjustment(Settings at startup). And first of all, you will need to select your interface from the list. The list, as it were, scrolls with the delicate hand of a finger. Choose a language that you think is good for you.
part 3
Adding widgets and add-ons to the desktop-
Marvel at the work desk. Well, you’ve customized your tablet for work, now you need to customize it for yourself! What are you planning? You have a work desk, which you will see most often, which will appear every time, when you unblock the device, or simply turn it on, when you exit the add-ons, and so on.
- Well, since the work desk will appear in the field of view often, then you need to adjust the sense of it - “customize”. There is a way to add various widgets to your desktop that can show you the weather, the hour, and so on.
-
Add widgets. To add a widget, you need to click on the “+” button, which is located at the top of the desktop. When you click on the button, a list of widgets available for adding will appear. The choice of widgets is great, the stink will be abundant - in the dark, choose!
- To add a widget, just click on it and you will see it. When you see a widget, press it with your finger and, without releasing your finger, drag the widget onto the desktop.
-
Add extras. Accessory shortcuts are dragged onto the desktop in the same way as widgets. Where is the list of programs? Next to the widget button there will be an “Add-ons” button - in the same place, at the top of the desktop.
- By clicking on the "Add-ons" button, you will open the entire page, all the shortcuts. Scroll side, select program requirements and add them.