System update on acer. Acer eRecovery. New description
Acer laptops are more popular these days. In fact, it is one of the widest laptops among the citizens of our country. It is mindful of the fact that the wines may have the garni operational characteristics of the high quality roboti. But when buying, not all models come with an installed OS, so you know, like 7 on Acer.
Installation process
BIOS on Acer laptops is standard, before the new inclusion of various elements of the UEFI system. Itself z tsієї reasons for Acer є folded tasks for unprepared koristuvachіv. From the very beginning of the UEFI option, it is necessary to turn it on and then you can proceed immediately before installation.
I need to pay attention to those that the Acer laptop itself is, on which you are going to install the operating system Windows system 7, support floppy drive or USB sockets. For which you need to go into the BIOS, for which you need to press the F2 key on the cob when you are interested, go to the BIOS (BOOT) partition and press the F5 and F6 keys (depending on what you will win - DVD or USB sockets, - Put the final attachment on the priority place).

If this is the case, you need to go to the Leave tab and select the Save item. As soon as it will be broken, all the necessary information will be captured without intermediary from the accumulator, and then from the hard drive of the computer.
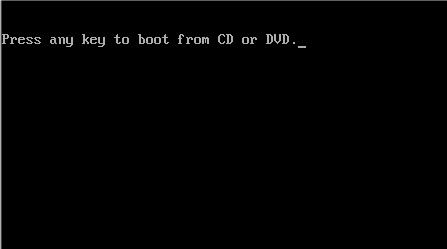
Once again, it is less likely to correctly indicate the most appropriate Windows edition 7. For example, if your Acer laptop is 64-bit, you should install a 64-bit system. Whenever you see "Press any key to boot from DVD or CD" appear on your screen, you just need to press a key - this is how we accept the DVD / CD enticement and the entanglement begins.
If the installation didn’t start for some reason, then it means that you have an outdated version of the laptop and you need to press the F10 key to enter the menu, and let the same ones described above. Ale krіm zaznachenih vysche diy, zhdnih іnshih robiti vkry not recommended, especially if you do not have good luck with the work carried out. Tse mozhe seriously vplinut on a distance computer practice. Here, the most important are those who are responsible for all duties to the appointed order.
As soon as the 100% sign appears on the screen on the installation progress indicator, the computer will be reset and that's it. Windows installation 7 on an Acer laptop completed successfully.
Wiki of additional utilities
It is still possible to make a troch in a different way, using the standard program True Acronis Image.  Wee from the very cob just rob the image of everything system disk C: (shorter seeming, all files that are on the C: drive are packed into archives), and after that, if you need it, you can simply turn the system’s frame to holiday camp. In this way, you should not only install Windows 7 on an Acer laptop, but also save the most important files.
To make life easier for coristuvachas, Acer has expanded the technology eRecovery for example, including the addendum itself without intermediary Acer eRecovery, as well as distribution of attachments on hard drives with a volume per gigabyte. As a rule, on Acer laptops such a name can be PQ Service. Main function Acer eRecovery- inspiration operating system at once with installed programs and drivers like at the time of buying a laptop. Jumping ahead, I’ll designate that in order to update the operating system with programs and drivers, you need to press the laptop for an hour when the laptop appears white screen with writing Acer combination of keys ALT+F10. On laptops ASUS, for example, you need to press a key F9. Information from drive C: is erased, and from D: those other divisions are not. As a result, in about a year, the laptop will have an OS with programs and drivers like at the time of purchase
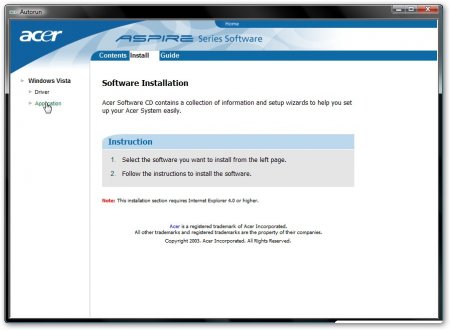
Technology overview Acer eRecovery it is logical to describe the program description Acer eRecovery how to install on Acer laptops. When you first start the program, you will be asked to set a password:
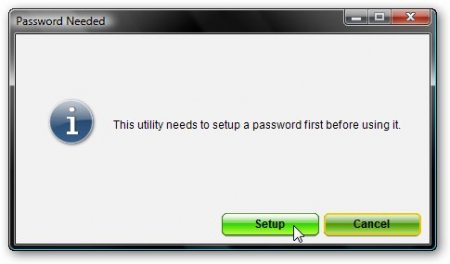
Click on the button Setup, and then on Create New a Password
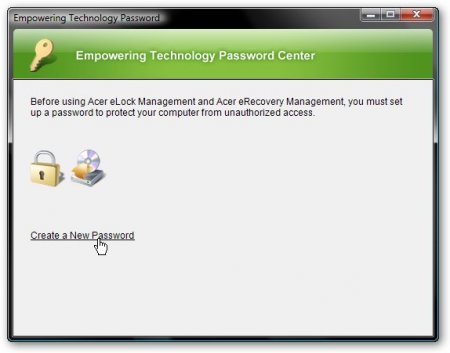
At the top window, enter the password, in the middle one, enter it again for confirmation, and at the bottom - enter the hint
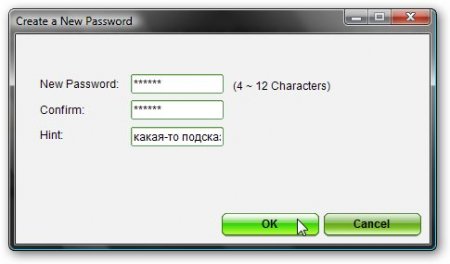
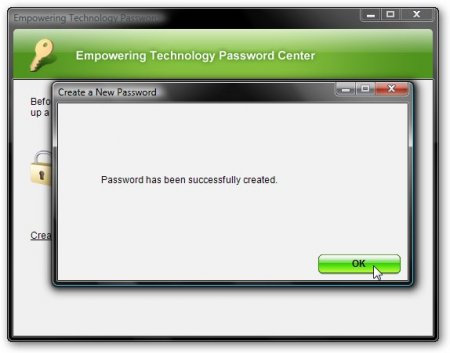
As if everything went well - we take it from the end and tisnemo OK
Let me explain the password. It is necessary to enter the next hour of system renewal. Without entering this password, the confirmation will not be revealed. Tse zrobleno Acer for security purposes. When you restore all information from the disk: erased. If a third-party person denies access to the laptop, then it can be navmisna / not navmisne when zavantazhenny press ALT + F10 and all the information (including all the information) on the C drive: bula b erased. But if you don’t know the password, then you can’t get into it. If you don't know the password, you can find out by reading the FAQ
Now let's go straight to the program itself. At the bottom of the head window, you can add 3 tabs Backup, burn discі restore. I will describe the first tab Backup
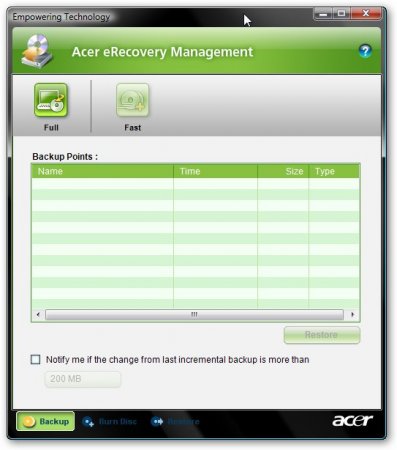
Blackheads can be treated 2 buttons Fullі Fast. Let me explain, now you need the stench. How to press the button Full, then the process of creating a system restore point will start, so that the entire disk space Z: be archived and if it is possible to restore the system's state at the given moment of archiving. The process of creating a recovery point starts from assigning a name:
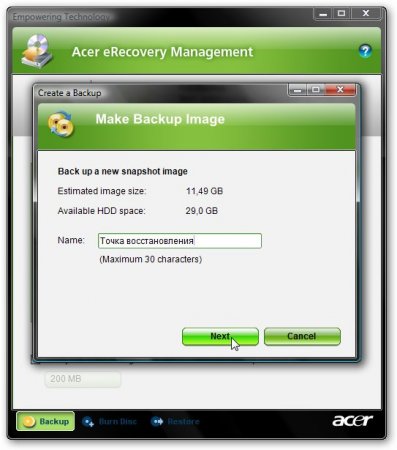
Tisnemo Next And finally, in advance, that the point of origin takes up a lot of disk space and it is recommended to close all attachments before starting the archiving process:
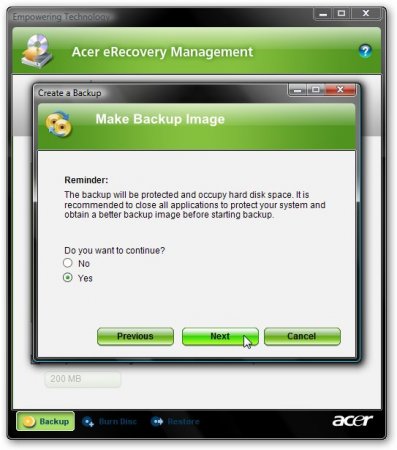
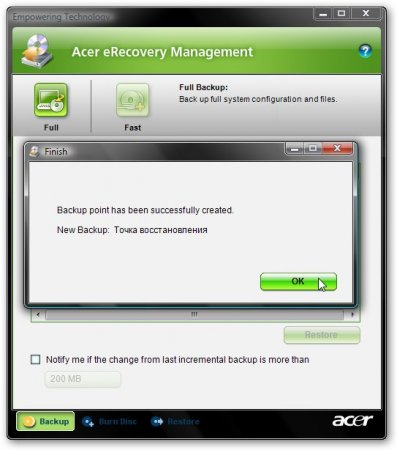
Selectable Yes and click Next. After that, the process of creating a hotspot is started:
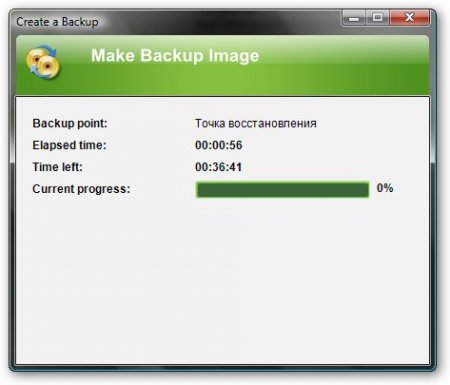
If the folding is completed - click OK
Now I will explain what the button is for Fast
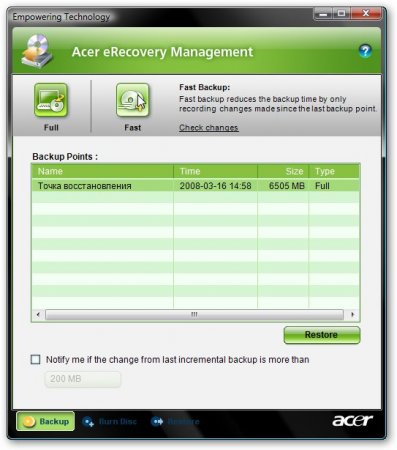
Having pressed this button, we start the process of incremental archiving. This means that they are recorded to the archive, they don’t have to change it, it’s the same as the original archive, which they robbed by pressing the button Full. Changed files take up significantly less space and the process of archiving is faster. At the bottom of the head line, you can tick the box Notify me if the change from last incremental backup is more than This checkbox includes an update, which means that the change in the moment of the remaining incremental archiving is larger for the song volume, which is indicated in the end. The process of incremental archiving starts from entering the name of the point of origin:

Then the program will ask us to close all the attachments before archiving the cob, and also let us know that the archives occupy the song space on the hard drive. To start the process, select Yes that onslaught Next
If the archiving process is completed - click OK
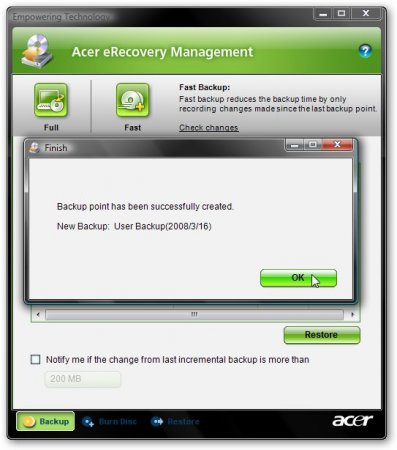
The result is supposed to have one new archive, which will erase all the information from the C drive: as well as one incremental archive, which will only remove the change after the creation of the main archive.
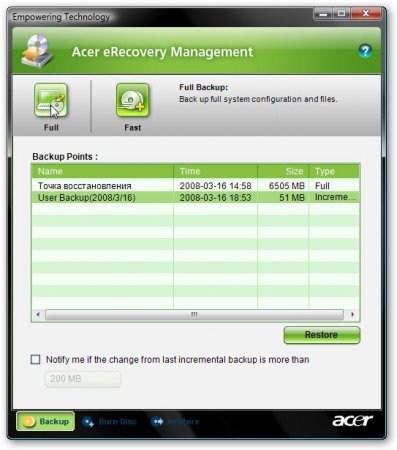
If we want to restore the system (more precisely, in the C: drive) at the time of archiving - press the button restore. Revision archives are saved in attached foldersD:erData
Go to tab description burn disc. With her, we already stuck with this material.
There are 4 buttons on it:
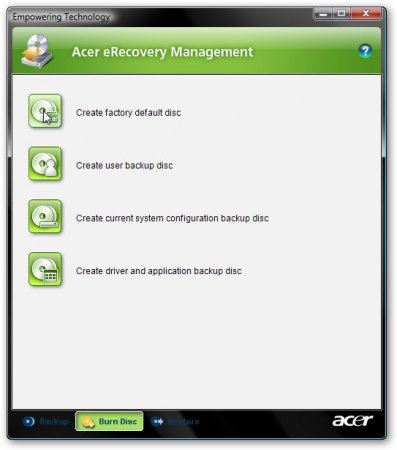
Create factory default disc- Having pressed the button, we proceed to burn new disks, from which you can restore the entire system with drivers and programs like at the time of buying a laptop. Robiti qi discs required OBOV'YAZKOVO
Create user backup disc- Writing to the disks of the point of departure, which in fact is archived instead of the C: drive. This button will be less active in that case, if the latest archives are broken (to create it - on the tab Backup tisnemo Full).
Create current system configuration backup disc- just click on the button, the button will be archived in the C: drive, and then it will be written to the disks.
Create- distributions of all programs and drivers are recorded on the disk, as they are delivered with a laptop. Tsey disc required OBOV'YAZKOVO work.
When pressing on the buttons, the axis is opened at the end of the record:
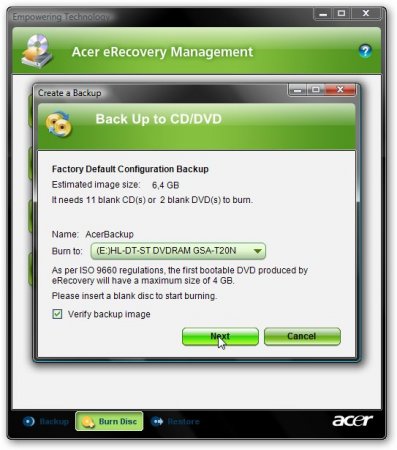
Please indicate the number of discs required. Shchob rozpochat record on the press Next
Let's look at the tab restore

On this insert, like on the front, there are 4 buttons. I will describe them in order:
Restore system to factory default- update of OS with drivers and programs from attachments. Information from drive C: is erased, and from other drives - not.
Restore system from user's backup- Reinstate the system from the re-entry point of the coristuvacha.
Recover system from CD/DVD- updating OS with drivers and programs for help Factory default disc
Reinstall applications/drivers- Reinstall the software and/or drivers. Just click on the button to see this in the end:
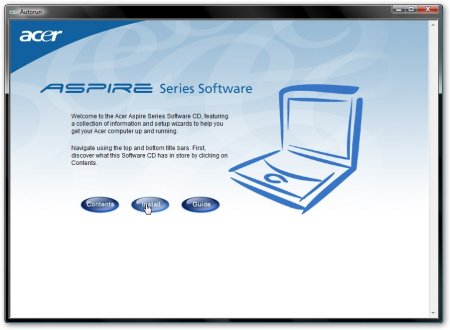
Tisnemo button Install And in the menu, select driver software:
The list has an addendum / driver, what to click on us, and it’s on install... for installation:
I think, on which one can you finish with a description of the utility Acer eRecovery
Now let's move on to the most famous - attached roses
As a whole, it is logical to draw a look at the attachments of the distributions short descriptionїhny together. In order to look at the attached partitions quickly, use the Acronis True Image 10 (mirror) utility and without intermediary images of the attached partitions. How their work is described
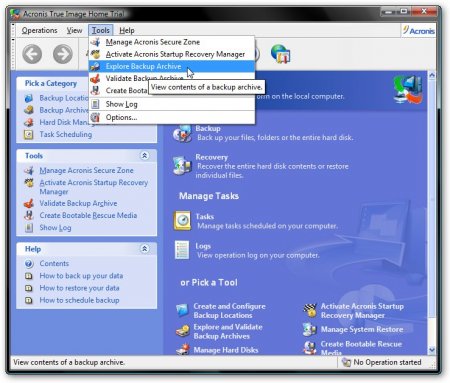
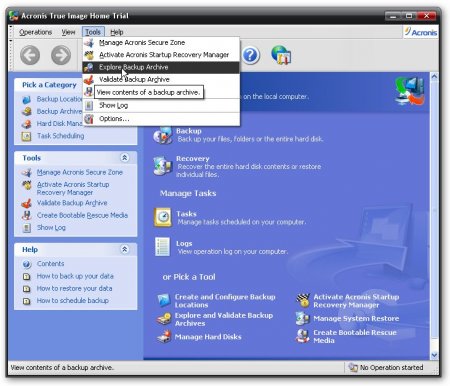
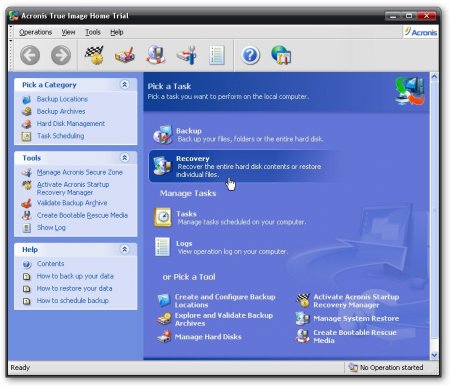
Let's start Acronis True Image 10 the one on the menu Tools select item Explore Backup Archive
We choose the image of the attached parcel (as the image is made up of dekilkoh shmatkiv, then we choose the first of them) and we press open
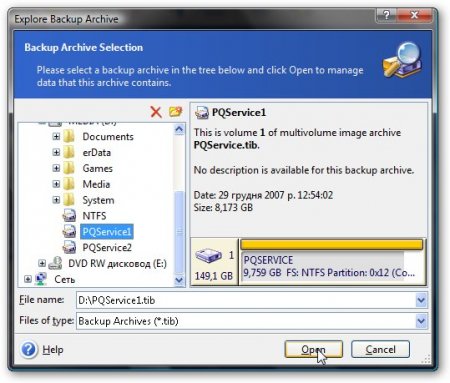
Open archives. The screenshot shows a clear cut PQ Service
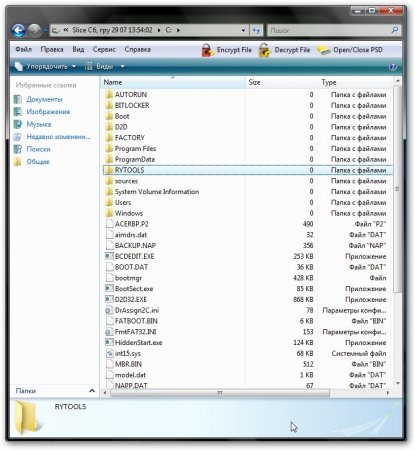
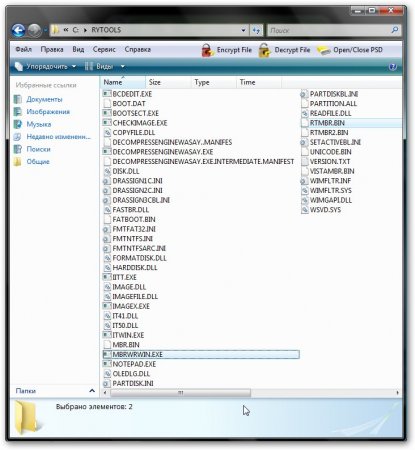
in papacy RYTOOLSє a utility for working with MBR and without intermediary MBR itself.
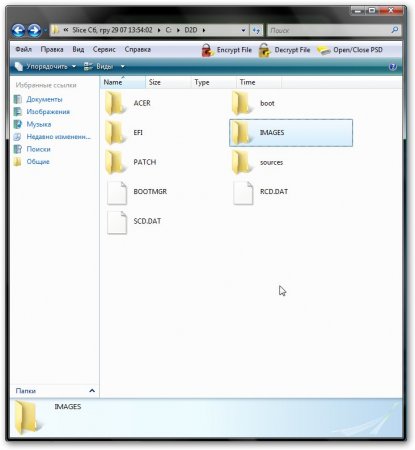
in papacy D2D/IMAGES placed a redeemable image of the partition C: laptop:
And the axis is zm_st of another attached division NTFS laptop Acer Aspire 5920
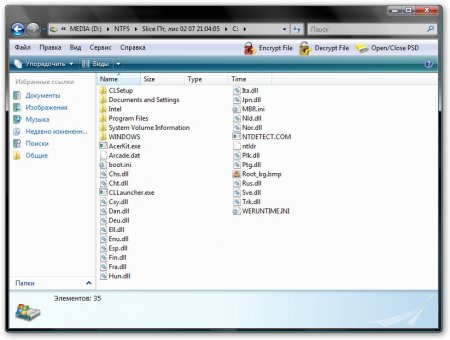
The goal was to serve for the implementation of Acer IOArcade technology - an investment for a media center on an urban base Windows versions XP when pushing a button with a right-handed person. Do you have Windows XPe and Acer Arcade.
I will describe how you can revitalize this part Driver & application backup disc. For some additional utility for working with partitions (Acronis Disc Director Suite 10, for example), we create a wonderful NTFS partition with a volume of 3.248 GB, like a hard drive, we create a file in notepad, which is to revenge 11 alone (11111111111 ) and is called yoga Arcade.dat. This file is moved to creations divided 3.248GB. Potіm zalishaetsya less to know on Driver & application backup disc folder IOArcade and run the installation.
If anyone needs the image of the attached IOArcade distribution - LOOK AT THE STAR(magnificently Sleganzov)
With the structure of the attached branches, they were sorted out on top, now we can look at the food of their inspiration. For whom do we need:
- crushed Acronis True Image form the divisions. .
- Acronis True Image 10 (I do not recommend version 11 through blue screens
pіd hour zavantazhennya)
- Acronis Disc Director Suite 10 ( Tsya program proponuetsya less for knowledge. Vykorivuyuchi tsyu program You need to see it for 30 days, or come to continue vikoristannya, copyrights need to be respected)
- It is recommended to take advantage of the same image of the start-up disk, which will help you to find it. (This program is offered only for familiarization. Vicoristing this program, You need to see it for 30 days, or come, to continue victoria, copyright is required to be respected)
Let's say that we had a hard drive re-installed and installed Windows XP. Renewal procedure at the middle Windows Vista the same. Attachments are saved on disk D:
Advance: be-yakі operations with distributions є potential risk for your information. That's why everything is critical important information it's easier to write to discs on a different computer.
Let's do it. We are in front of us to recognize the exact rozmіr prihovannyh rozdіlіv. For whom it is launched Acronis True Image 10 and click try now. The demo is still
On the menu Tools select item Explore Backup Archive
We select the first division
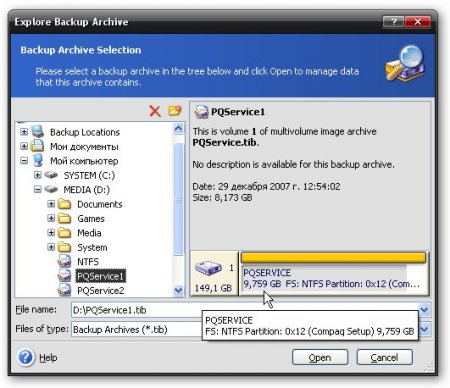
that we marvel at yoga rosemіr. Our memory has 9.759 GB ... we can write down the number on a piece of paper
Let's choose another one (as you have only one attachment on your laptop - this one is skipped)
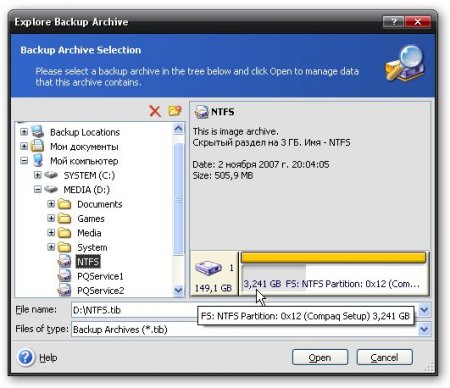
rewrite the rozmir on the same piece of paper. Our vipad has 3241 GB
Run and select in the menu Manual mode (manual mode)
V_dkrivaєtsya at the end of the program. Ugori Bachimo list of distributions on Winchester.
Note: If the size of disk C: is less than 20 GB, then it is recommended to change the size of disk D: and for the sake of space, increase the size of disk C: up to 20 or more gigabytes. It is necessary, so that the process of renewal did not have to re-divide C: through the insufficient expansion.
At the process of changing the rozmіrіv for help Acronis Disk Director Suite 10 information NOT VISIBLE.
If you have put things in order with the disk C: have put things in order, then you can proceed until the immediate renewal of the division (iv) We need to create for help Acronis Disk Director Suite 10 in the oblasts with rozmіry, yakі vіdpovіdat rozmіram prihodіv rozdіlіv. Create time for the region for changing the size of the disk D:. Created in the regions of the country, it was MUCH IMPORTANT that their placement on the disk was similar to the cob. That way, as attachments were split on the cob of the disc, then the area of the new requirement was created on the cob of the disk, as the attachments were divided on the cob, on the basis of the disk, then it was necessary to create the area of \u200b\u200bthe free space for attachments, on the basis of the disk. This is an important moment, otherwise it is a completely possible option, which automatic renewal don't want to practice.
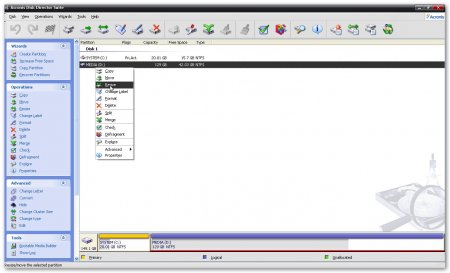
To create free areas, click on disk D: with the right button and select it in the menu resize
It follows from the end:
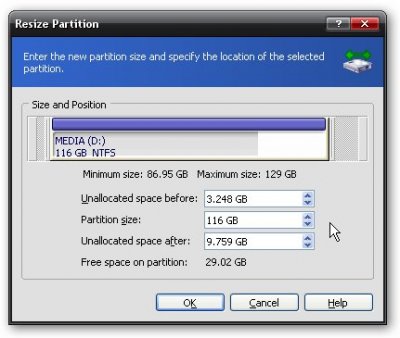
Inappropriate space before- In this year, the rozmіr of the vіlnoї oblast is set before the division. At our point of view, he gave a lot of hobbies NTFS guilty buti on the cob of the disk, so it’s possible to yogo rosemir, which was previously copied from Acronis True Image 10 PQ Service and placement of wines COB DISC Inappropriate space after fill in zero.
Inappropriate space after- at the end of the year, the rozmіr of the vіlnoї oblast is appointed after the distribution. We have split the attachments for our mind PQ Service can be used as a example of a disk, it is also possible to yogo rozmir, which was previously rewritten from Acronis True Image 10. Yakshcho you have less than one split - PQ Service and placement of wines KINTSI DISK, then it is possible to have at the end of the world. In the right direction in the field Inappropriate space before fill in zero.
Onslaught OK and obsessed with approximately such a picture. Mustache was set by me. Before partition D: 3248 GB of free space, and after the new - 9759 GB. Now we need to move the split C: so, on the very cob of the Winchester, settling into a free expanse of the world, which we asked in the field Inappropriate space before if you changed the size of the distribution D:. Like you have only one distribution, what kind of distribution KINTSI DISK, then you can skip this part, the one before the division D: free space nothing and ruhati split C: just nowhere. You have disk D after: it is the responsibility of the region with the expansion to show up, which is closer to the expansion of your attached distribution.
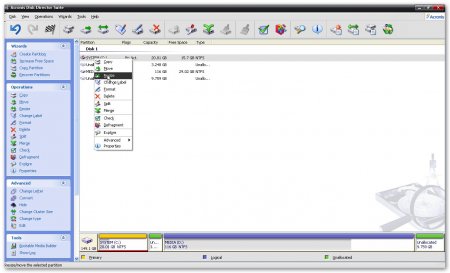
Click on drive C: right-click and select in the menu resize
At the end, what happened, just moved C: all the way to the right:
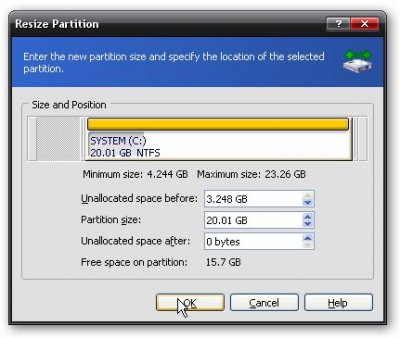
Onslaught OK and take approximately this picture
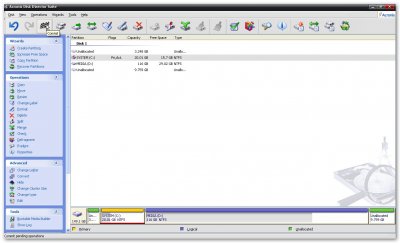
Unlimited area in front of drive C: for partitioning NTFS that undefined area for distribution PQ Service after disk D:
Note: all changes are carried out after the laptop is reloaded, whether you can change it by clicking on the blue arrow in the program menu.
To stop the change, press on the ensign, then on the button Proceed:
To make life easier for coristuvachas, Acer has expanded the technology eRecovery for example, including the addendum itself without intermediary Acer eRecovery, as well as distribution of attachments on hard drives with a volume per gigabyte. As a rule, on Acer laptops such a name can be PQ Service. Main function Acer eRecovery- Updating the operating system together with installed programs and drivers as at the time of purchase of the laptop. Looking ahead, I’ll designate that in order to update the operating system with programs and drivers, you need to press the laptop for an hour when a white screen appears with a message Acer combination of keys ALT+F10. On laptops ASUS, for example, you need to press a key F9. Information from drive C: is erased, and from D: those other divisions are not. As a result, in about a year, the laptop will have an OS with programs and drivers like at the time of purchase
Technology overview Acer eRecovery it is logical to describe the program description Acer eRecovery how to install on Acer laptops. When you first start the program, you will be asked to set a password:
Click on the button Setup, and then on Create New a Password
At the top window, enter the password, in the middle one, enter it again for confirmation, and at the bottom - enter the hint
As if everything went well - we take it from the end and tisnemo OK
Let me explain the password. It is necessary to enter the next hour of system renewal. Without entering this password, the confirmation will not be revealed. Tse zrobleno Acer for security purposes. When you restore all information from the disk: erased. If a third-party person denies access to the laptop, then it can be navmisna / not navmisne when zavantazhenny press ALT + F10 and all the information (including all the information) on the C drive: bula b erased. But if you don’t know the password, then you can’t get into it. If you do not know the password, you can recognize it by reading
Now let's go straight to the program itself. At the bottom of the head window, you can add 3 tabs Backup, burn discі restore. I will describe the first tab Backup
Blackheads can be treated 2 buttons Fullі Fast. Let me explain, now you need the stench. How to press the button Full, then the process of creating a system restore point will start, so that the entire disk space Z: be archived and if it is possible to restore the system's state at the given moment of archiving. The process of creating a recovery point starts from assigning a name:
Tisnemo Next And finally, in advance, that the point of origin takes up a lot of disk space and it is recommended to close all attachments before starting the archiving process:
Selectable Yes and click Next. After that, the process of creating a hotspot is started:
If the folding is completed - click OK
Now I will explain what the button is for Fast
Having pressed this button, we start the process of incremental archiving. This means that they are recorded to the archive, they don’t have to change it, it’s the same as the original archive, which they robbed by pressing the button Full. Changed files take up significantly less space and the process of archiving is faster. At the bottom of the head line, you can tick the box Notify me if the change from last incremental backup is more than This checkbox includes an update, which means that the change in the moment of the remaining incremental archiving is larger for the song volume, which is indicated in the end. The process of incremental archiving starts from entering the name of the point of origin:
Then the program will ask us to close all the attachments before archiving the cob, and also let us know that the archives occupy the song space on the hard drive. To start the process, select Yes that onslaught Next
If the archiving process is completed - click OK
The result is supposed to have one new archive, which will erase all the information from the C drive: as well as one incremental archive, which will only remove the change after the creation of the main archive.
If we want to restore the system (more precisely, in the C: drive) at the time of archiving - press the button restore. Anniversary archives are saved from the attached papacy D:erData
Go to tab description burn disc. With her, we already flocked to.
There are 4 buttons on it:
Create factory default disc- Having pressed the button, we proceed to burn new disks, from which you can restore the entire system with drivers and programs like at the time of buying a laptop. Robiti qi discs required OBOV'YAZKOVO
Create user backup disc- Writing to the disks of the point of departure, which in fact is archived instead of the C: drive. This button will be less active in that case, if the latest archives are broken (to create it - on the tab Backup tisnemo Full).
Create current system configuration backup disc- just click on the button, the button will be archived in the C: drive, and then it will be written to the disks.
Create- distributions of all programs and drivers are recorded on the disk, as they are delivered with a laptop. Tsey disc required OBOV'YAZKOVO work.
When pressing on the buttons, the axis is opened at the end of the record:
Please indicate the number of discs required. Shchob rozpochat record on the press Next
Let's look at the tab restore
On this insert, like on the front, there are 4 buttons. I will describe them in order:
Restore system to factory default- update of OS with drivers and programs from attachments. Information from drive C: is erased, and from other drives - not.
Restore system from user's backup- Reinstate the system from the re-entry point of the coristuvacha.
Recover system from CD/DVD- updating OS with drivers and programs for help Factory default disc
Reinstall applications/drivers- Reinstall the software and/or drivers. Just click on the button to see this in the end:
Tisnemo button Install And in the menu, select driver software:
The list has an addendum / driver, what to click on us, and it’s on install... for installation:
I think, on which one can you finish with a description of the utility Acer eRecovery
Now let's move on to the most famous - attached roses
It is quite logical to describe the view of the attached divisions from a short description of their place. In order to look at the attached partitions quickly, use the Acronis True Image 10 (mirror) utility and without intermediary images of the attached partitions. How their work is described
Let's start Acronis True Image 10 the one on the menu Tools select item Explore Backup Archive
We choose the image of the attached parcel (as the image is made up of dekilkoh shmatkiv, then we choose the first of them) and we press open
Open archives. The screenshot shows a clear cut PQ Service
in papacy RYTOOLSє the utility for robots and the MBR itself.
in papacy D2D/IMAGES placed a redeemable image of the partition C: laptop:
And the axis is zm_st of another attached division NTFS laptop Acer Aspire 5920
Tsei rozdіl serve for the implementation of technology Acer IOArcade - zavantazhennia media center based on the urіzаnoї versії Windows XP with pressing buttons with a right-handed person. Do you have Windows XPe and Acer Arcade.
I will describe how you can revitalize this part Driver & application backup disc. For some additional utility for working with partitions (Acronis Disc Director Suite 10, for example), we create a wonderful NTFS partition with a volume of 3.248 GB, like a hard drive, we create a file in notepad, which is to revenge 11 alone (11111111111 ) and is called yoga Arcade.dat. This file is moved to creations divided 3.248GB. Potіm zalishaetsya less to know on Driver & application backup disc folder IOArcade and run the installation.
If anyone needs the image of the attached IOArcade distribution - LOOK AT THE STAR(magnificently Sleganzov)
With the structure of the attached branches, they were sorted out on top, now we can look at the food of their inspiration. For whom do we need:
- crushed Acronis True Image form the divisions. .
- Acronis True Image 10 (I do not recommend version 11 through blue screens pіd hour zavantazhennya)
- Acronis Disc Director Suite 10
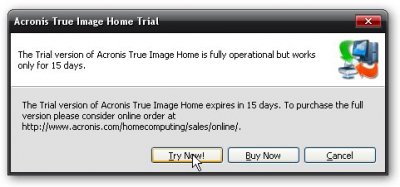
- It is recommended to take advantage of the same image of the start-up disk, which will help you to find it. (This program is offered only for familiarization. Vicoristing this program, You need to see it for 30 days, or come, to continue victoria, copyright is required to be respected)
Let's say that we had a hard drive re-installed and installed Windows XP. The renewal procedure for Windows Vista is the same. Attachments are saved on disk D:
Advance: be-yakі operations with distributions є potential risk for your information. Therefore, all critically important information can be written down on disks by another computer.
Let's do it. We are in front of us to recognize the exact rozmіr prihovannyh rozdіlіv. For whom it is launched Acronis True Image 10 and click try now. The demo is still
On the menu Tools select item Explore Backup Archive
We select the first division
that we marvel at yoga rosemіr. Our memory has 9.759 GB ... we can write down the number on a piece of paper
Let's choose another one (as you have only one attachment on your laptop - this one is skipped)
rewrite the rozmir on the same piece of paper. Our vipad has 3241 GB
Run and select in the menu Manual mode (manual mode)
V_dkrivaєtsya at the end of the program. Ugori Bachimo list of distributions on Winchester.
Note: If the size of disk C: is less than 20 GB, then it is recommended to change the size of disk D: and for the sake of space, increase the size of disk C: up to 20 or more gigabytes. It is necessary, so that the process of renewal did not have to re-divide C: through the insufficient expansion.
At the process of changing the rozmіrіv for help Acronis Disk Director Suite 10 information NOT VISIBLE.
If you have put things in order with the disk C: have put things in order, then you can proceed until the immediate renewal of the division (iv) We need to create for help Acronis Disk Director Suite 10 in the oblasts with rozmіry, yakі vіdpovіdat rozmіram prihodіv rozdіlіv. Create time for the region for changing the size of the disk D:. Created in the regions of the country, it was MUCH IMPORTANT that their placement on the disk was similar to the cob. That way, as attachments were split on the cob of the disc, then the area of the new requirement was created on the cob of the disk, as the attachments were divided on the cob, on the basis of the disk, then it was necessary to create the area of \u200b\u200bthe free space for attachments, on the basis of the disk. This is an important moment, otherwise it is a possible option that you do not want to automatically update.
To create free areas, click on disk D: with the right button and select it in the menu resize
It follows from the end:
Inappropriate space before- In this year, the rozmіr of the vіlnoї oblast is set before the division. At our point of view, he gave a lot of hobbies NTFS guilty buti on the cob of the disk, so it’s possible to yogo rosemir, which was previously copied from Acronis True Image 10 PQ Service and placement of wines COB DISC Inappropriate space after fill in zero.
Inappropriate space after- at the end of the year, the rozmіr of the vіlnoї oblast is appointed after the distribution. We have split the attachments for our mind PQ Service can be used as a example of a disk, it is also possible to yogo rozmir, which was previously rewritten from Acronis True Image 10. Yakshcho you have less than one split - PQ Service and placement of wines KINTSI DISK, then it is possible to have at the end of the world. In the right direction in the field Inappropriate space before fill in zero.
Onslaught OK and obsessed with approximately such a picture. Mustache was set by me. Before partition D: 3248 GB of free space, and after the new - 9759 GB. Now we need to move the split C: so, on the very cob of the Winchester, settling into a free expanse of the world, which we asked in the field Inappropriate space before if you changed the size of the distribution D:. Like you have only one distribution, what kind of distribution KINTSI DISK, then you can skip this part before the division D: there is no free time and the ruins of the division C: just nowhere. You have disk D after: it is the responsibility of the region with the expansion to show up, which is closer to the expansion of your attached distribution.
Click on drive C: right-click and select in the menu resize
At the end, what happened, just moved C: all the way to the right:
Onslaught OK and take approximately this picture
Unlimited area in front of drive C: for partitioning NTFS that undefined area for distribution PQ Service after disk D:
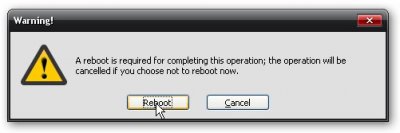
Note: all changes are carried out after the laptop is reloaded, whether you can change it by clicking on the blue arrow in the program menu.
To stop the change, press on the ensign, then on the button Proceed:
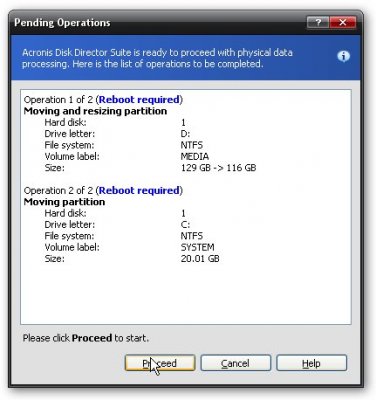
І restart the laptop by pressing on Proceed
As soon as the laptop is reloaded, then we will begin to perform disk operations, and then two more reloads. At this hour, it’s important that the laptop doesn’t flicker, otherwise enter the information. Therefore, make sure that the battery is charged and the laptop is connected to the measure.
Operations with a hard drive can take up to an hour.
If the changes are made, you can change the attached distributions without intermediary. I STRONGLY RECOMMEND VICORIST VERSION 10 Acronis True Image
Let's do it. Let's start Acronis True Image 10 i tisnemo Try Now!(demo version...)
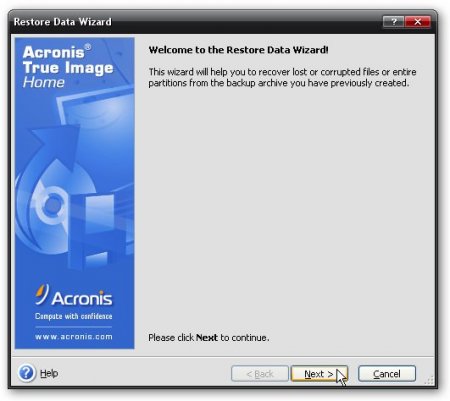
At the end of the smut, the programs are embossed on Recovery
Tisnemo Next
We select the image of the division. At our point of view, the wines are split into two parts for easy recording on DVDs. We select the first part, and Acronis already guesses that PQService2 is another part.
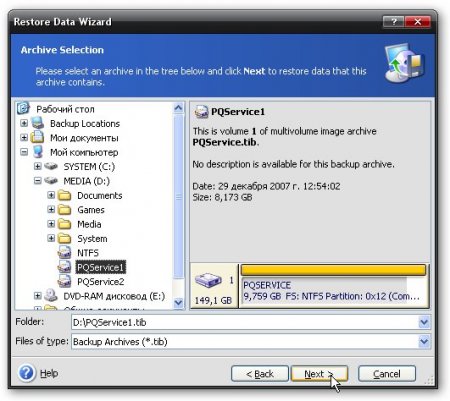
Tisnemo Next
Selecting the distribution of discs
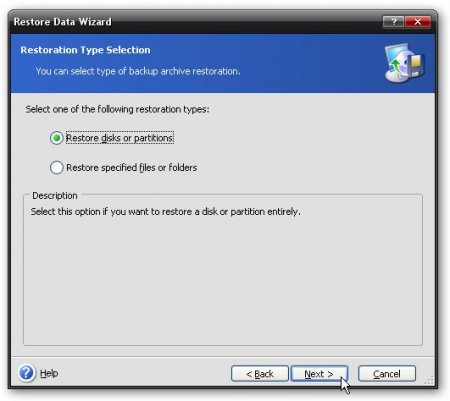
Acronis True Image pіdtrimuє recording kіlkoh razdіlіv per one file-image. If we robbed the images of the attached divisions, we recorded the image of one division in one file. It is possible to specify a single division from the image file:

Please specify the parameters for the locking and embossing Next
To start the process of renewal of distribution from the image of the onslaught Proceed
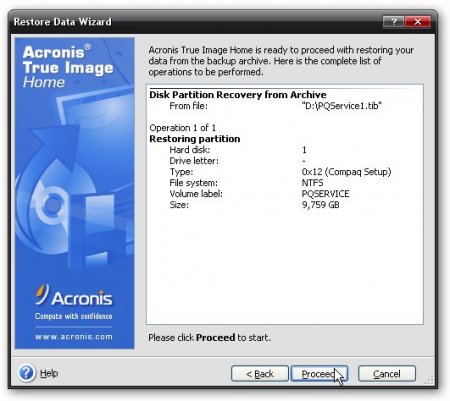
To show up at about the same time
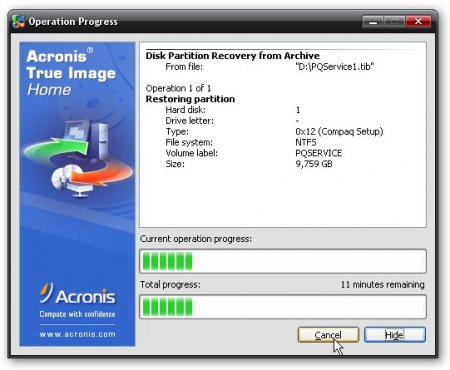
if the renewal ends - tisnemo OK
First, put the power to the topics on eRecovery, be kind, turn the step over:
1. The presence of the system attached to the distribution. For this, it is enough to go to the "Management" menu by right-clicking on the "My Computer" icon and selecting the "Disk Management" menu. If you have Windows XP installed, then you will need the first distribution with the label "PQService" (configuration "EISA") with a size of 2.5 to 5 GB. If you have Windows Vista installed, then, as a rule, the first partition is visible without a label (also "EISA" configuration) and may be 9 GB or more. At the time of such a distribution - you should tell you the solution of your problems in the topics of renewal / creation of the attached distribution.
2. Appearance of the system of proccessed attached distribution. Sometimes it’s like that, when installing the operating system, it’s vipadkovoly navmisno removed the first (attachment) split and didn’t remove the D2D Recovery - enable function from the BIOS. In this case, when the original mbr is installed in Acer, an empty attachment is created, or the first division, after installing the operating system, is indicated as an attachment that is inactive (configuration "EISA"). In the rest of the day, obviously, the operating system will not be occupied, the computer chips may be occupied from another division. No more pushing hot keys "Alt-F10" to start the first branch and, apparently, the operating system is installed. Otzhe, you need to reconsider instead of the attached distribution. Zrobiti tse just for the help of the program mbrwrwin.exe (command in command line mbrwrwin mount hd0:1 X:). This program allows you to mount attachments (give it a drive letter), and you can also look at the explorer. If you know the installation difficulties, then you can speed up the program. Features of the work of the program in the middle of Windows Vista: when you run "in the form of the administrator's name" attachments will only be visible in the command line, do not let the explorer do it. For a review, the dir X command is used instead: (X: is the letter of the mounted partition, it can be, for example, the letter N :) is used for the program to be guessed. If you just run the program (in the name of the streaming koristuvach), then the attachments will be visible to the explorer, but you won’t be able to do anything with the files, just look around. At the time of a non-working attached branch (an empty one, or you have installed an operating system there), you also, as it is assigned more, follow the solution of your problem in the topics of renewal/settlement of the attached branch. After restarting the PQService computer, I will be hooked up again.
3. Enough free space for system partition(Spawned, where the OS is installed / installed). For Windows Vista and Windows 7, you will need a total of at least 30-35 GB per share. With an insufficient amount of free space, problems with the replacement disks may be blamed.
Since you have є attachments and you have problems with yogo questions, then carefully read the advice on nutrition, which is often asked, and only at the time of the day you need the solution, put your nutrition in the topics.
Power supply: How to launch a system update from a linked distribution?
Suggestion: One-hour pressing of the Alt and F10 keys will take the computer off for an hour (at the moment the Acer logo appears). Porada: exalt with the pressed Alt key and hit F10 a lot of times. Do not go out the first time, so try the sprat once.
Power supply: The "Alt+F10" key does not work. Yak buti?
Suggestion: In the most important way, a non-original mbr (type Acer) is installed. Victory this patch to fix the situation (on Windows Vista, run "as administrator" for right button mice).
Power supply: After starting up the program (eRecovery management), after updating the system, the program forgot the password.
Suggestion: The system for promotional renewal has a password of six zeros (000000). Inode - AIM1R8. In order to change / visualize it, you need to change it in the Empowering Technology program, or in the file aimdrs.dat, which is found in the attached distribution (how to install / open it - div. more). The file aimdrs.dat can be edited in notepad (the password is not visible) or you can see it, then the password will not be prompted.
Power supply: When you run "updating the factory configuration" the pardon "FAIL to get Disk 0 partition 3 drive letter" appears
Suggestion: The pardon in case of recognition of the letters of the division was due to an incorrect operation on the divisions. Launch the eRecovery update console (Alt-F10) and press Alt-Home, the command line will appear. If you don’t want to go in, wink exciting disk Start or Windows 7. Drive the computer from the disk and select the "Innovation-command line" item. At the command line enter:
diskpart
sel disk 0
list part
Have a look at the list, what is the 3rd division (Partition 3) in the present, what is included in the division with tributes (play disk D). If you split the letter into the main (primary) space, try to recognize the letter of the split with the command:
sel part 3
assign letter=E
exit
After re-engineering disk E, it becomes disk D, and the update is done in the most natural way. If the disc is not formatted, please:
sel part 3
format quick label=DATA
assign letter=E
Power supply: At the hour when the eRecovery program is installed, the system warns about the pardon "Not D2D System. eRecovery can not be installed..."
Suggestion:
1. The next day of attachment was distributed.
2. Trying to install the wrong version of eRecovery. In order to specify the version you need, open the napp.dat file in notepad, transfer it to the attached distribution (how to open / install - amazing). Father:
NAPP 1.x.x or NAPP 3.2.x.x - eRecovery version 1.2.x.x
NAPP 3.3.x.x - eRecovery version 1.3.x.x different versions, Extension *. wsi)
NAPP 4.0.x.x - eRecovery version 2.0.x.x
NAPP 5.x.x.x - eRecovery version 2.5.x.x
NAPP 6.x.x.x - eRecovery version 3.0.x.x
Power supply: Under the hour of installing the eRecovery program, the system will notify you about the pardon "Old NAPP Version ..."
Suggestion: Install the wrong version of eRecovery (div. front version).
Power supply: Under the hour of installing the eRecovery program, the system will inform you about the pardon "Not Acer System ..."
Suggestion: BIOS parameters are not specified (model, computer specifier). The presence of Asset Tag - Acer is also important. To resolve the problem, it is necessary to speed up special utility dmitools.exe. The program works under DOS, so you can win a zavantazhuvalny disk or another one for the possibility of working in this environment.
Commands of the program dmitools.exe:
[/ R | / wp | /WS | /WU] [STRING]
: Read DMI Information from Memory
: Write Manufacturer Name to EEPROM. (max.=16 characters)
: Write Product Name to EEPROM. (max.=16 characters)
: Write Serial Number to EEPROM (Max.= 22 characters)
: Write UUID to EEPROM (Ignore String)
: Write Asset Tag for EEPROM. (max.=32 characters)
For example: dmitools /wa Acer System
dmitools /wm Acer
dmitools /wp Aspire 5730
Power supply: Installed eRecovery program is delayed on unknown long hour, the system does not "hang" and must be completed independently by the robot program.
Suggestion: Wrong structure hard drive. As Windows XP is installed, it is necessary to have three extensions (1st PQService, 2nd Acer - system, 3rd ACERDATA). If Windows Vista is installed, you need either three distributions (weird), or some (like the Instant-On-Arcade function, which allows you to run a multimedia program without interfering with the main operating system). In the rest of the year, the first and fourth were divided - prihovani, reshta two - Acer і Data.
Power supply: When eRecovery version 3.х.х is installed, the pardon "eRecovery can not be installed - 1. Bootable File" appears. Yak buti?
Suggestion: This pardon means that the attached person has the daily files necessary for creating the renewal disk. Mount the attachments of the partition and look at the location at the root of the partition of the acerboot.iso file.
Power supply: When eRecovery version 3.х.х is installed, the pardon "eRecovery can not be installed - 6. SoftwareDisc" appears. Yak buti?
Suggestion: It is necessary to create the folder C:\Acer\Preload\Autorun and copy to this folder all the files from the Applications\Drivers disk created in front of the help eRecovery program.
Power supply: At the beginning of the installation of eRecovery version v6 (Windows 8), a pardon "No standard configuration has been installed for the hard drive" appears. Yak buti?
The current versions of eRecovery affect the visibility of the C:\OEM\Autorun\Preload folder for normal work.
Usі pitanya vislovlyuєmo at tsіy topics forum:
Preparation material specially for http: // site (author - Gur'ev Denis, GDenis)
e-mail [email protected]
(Changing the material, copying and re-writing only with the permission of the author)