How to make a black white photo. Use the Camera Raw plug-in. Conversion to Grayscale in Camera Raw
If you want to dramatically change a photo by performing just one simple action, then nothing compares to converting it to black and white. Translating in grayscale can also save the image, which does not help color correction, or make a beautiful person who needs to seriously whiten his teeth or to do their own skin. These problems almost disappear when you enter the black and white kingdom.
How does a photo actually appear black and white photos? We need not only cameras, but also a film that has been made in order and stored in large packages so that it does not show up. In fact, it is a transparent ball about 0.1 mm thick, called the base. On the one hand, there is a sensitive layer of gelatin, in which there are dispersed microscopic crystals of silver bromide and other chemicals. For us, the most important bromide is silver, a combination of brine and silver, a chemically simple compound, but all physical crystals are a real immersion.
But does this mean that you need to set a black and white shooting mode in a digital camera? No no and one more time no! It is much better to shoot in color and then bleach the pictures in the Photoshop program. In this case, you get a huge number of possible creative solutions, such as the effect of partial discoloration, achieved by discoloration is not the whole picture. And, since I'm talking about color, there are several tools in Photoshop that allow you to change the color of everything - from the car to the hair on your head. In addition, you can give a new life to old photographs by adding colors to them.
With a flash of light, a small part of the bromide is released and several atoms of metallic silver are released, which remain in the crystal. If we mock the sensitive layer of the film with the image created by the camera, it comes out stronger in brightly lit areas, in weaker illuminated mines. This is how the picture is taken on the film that we photographed. We call this exposition or exposition. This image is not visible, we call it hidden. To become visible, you must call the movie from the developer.
The chemical contained in it is faster for light crystals, with the result that the latent image becomes more visible and visible. In the next stage of the process, if it is installed, intact bromide silver dissolves. The film loses its sensitivity to light and changes in the negative. By pouring it into clean water and drying the film, we end the negative process. The negative is named because it fixes the brightness of the subject's object in a reverse, negative way. That which was really light is dark and vice versa.
You probably heard the expression “We both pay and work!” In Photoshop, this expression is converted to "Most quick way - not always the best. In other words, some tricks - these include color to black and white conversion - you have to spend a little extra time, but the result is worth it.
Of the negatives, we can make any number of positives, animations or copying on photographic papers. This paper is equipped with a film like a film, and after exposure to an extruder or a copier, it is already cured, cured, washed and dried. Negativity of negativity, i.e. positive, consistent with reality.
During the analogy or film roll, we were more likely to meet with black and white photographs. There were two reasons black and white photo, which could be done at home, and a black and white negative film was also cheaper. Today, the material aspect of the question is out of the question, so why “photograph” in black and white?
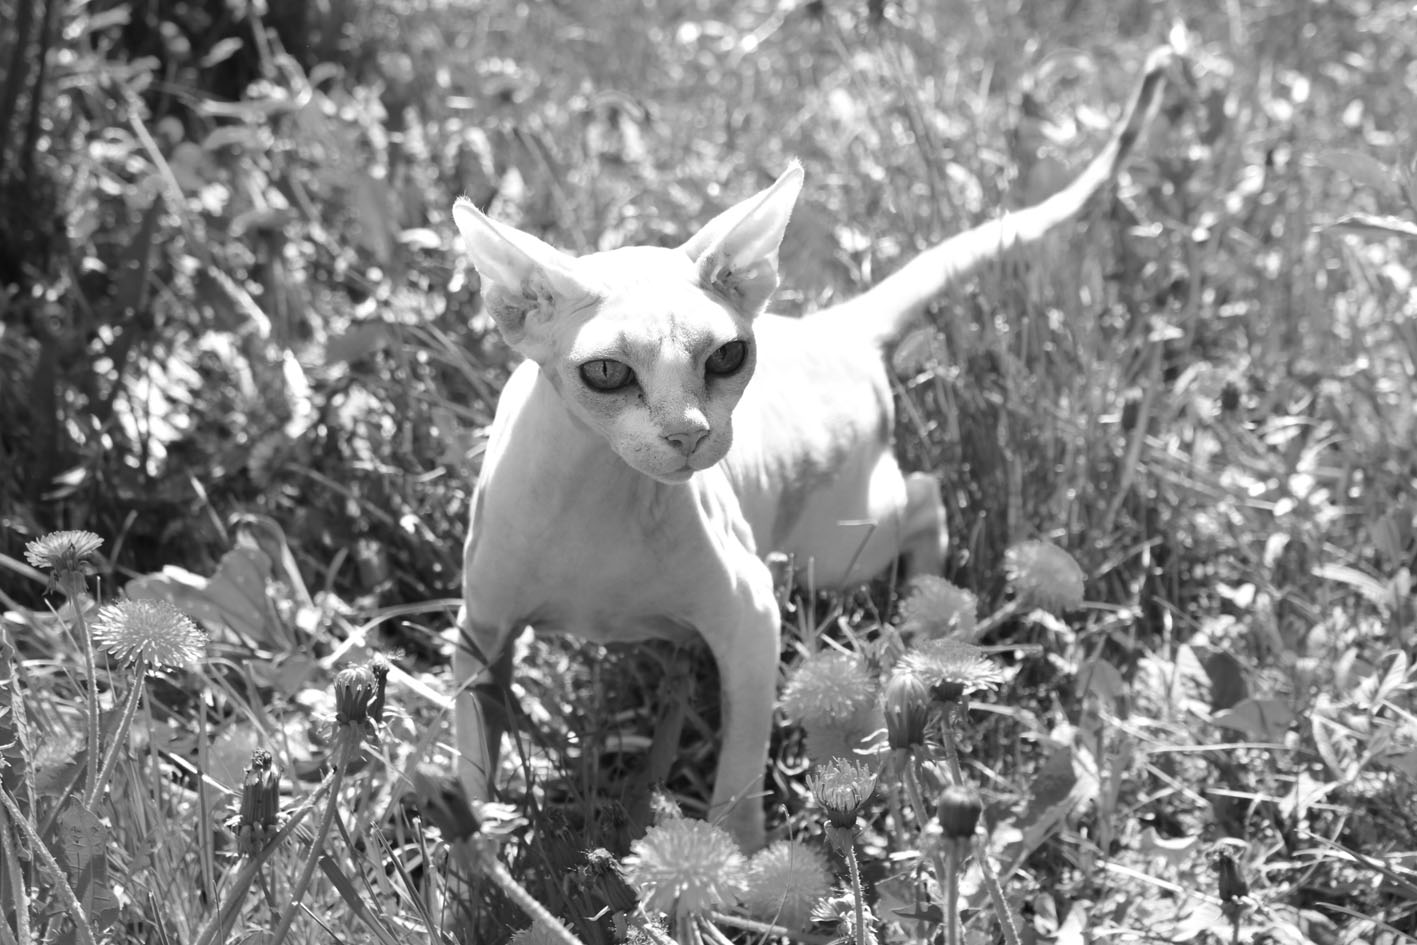
Let me explain by example. Open a color image. I'll take a photo of Daska.
Select the menu command Image =\u003e Correction =\u003e Desaturate (Image =\u003e Adjustments =\u003e Desaturate).
Bleaching means removing all colors from an image.
Black and white photography is often perceived by many viewers as a supreme art. His role then is that black and white paint does not distract attention, and the viewer can better enjoy a wide range of midtones and focus on the message. Even today, you will encounter a series of shots that are shaded in gray and have an unforgettable atmosphere. So why not try black and white photography too. But be careful, the shift in shades of gray is not selfless, and if the photo is not good in itself, it will not be good even in black and white.
Photoshop easily converts an image into black and white, but the result is unlikely to inspire you.
2. Create a black and white adjustment layer.
Open the palette Correctionby selecting Window =\u003e Adjustment (Window =\u003e Adjustments) in the menu, and click on the Black & White layer layer icon (it looks like a rectangle diagonally divided into black and white halves).
You can convert a color image to black and white in almost two ways. The lowest intensity is digital tuning for scanning in black and white. But forget about it, because the results will be of poor quality. Usually there is no contrast, and the whole picture has a flat pattern. The camera will only discolor the image, and you have no chance to influence anything.
Other ways will lead you to the computer screen, which will open the photo editor, which also allows you to convert to shades of gray, but with much more comfort and, above all, different settings. The first way to make black and white with a color photo is to use shades of gray that are in the Effects menu. In the editor, open the desired image that you want to edit, and launch the tool settings dialog as described above. In the newly opened window, you view the image before and after editing.

Photoshop will make the image black and white and will display on the palette several slider knobs and other controls that you can use to fine tune the created layer.
3. Move the sliders until you get a contrasting black and white image.
At the bottom of the dialog box, you will find a selection of the bleaching method and a three-way scroll bar that can change the appearance of the individual color channels in the image. The image transformation method is the focal point of the entire operation, as it affects the resulting image tracing. The following parameters are available: grayscale, desaturation, advanced, channel average, maximum channels, minimum channels, red channel, green channel, blue channel, user choice.
The choice of gray is the main tool, but the resulting photo is less contrasting.
For best automatic results, select Advanced when the program uses more complex grayscale calculations. However, the largest control over the image is offered by the user's choice, where you can set the exact ratio of the representation of individual color channels in the image.
Although the program has discolored the image, there is still the possibility of improvement. Move the sliders in different colors to make the objects look even better. Moving to the right paints areas that were previously painted in the color corresponding to the regulator, in a lighter shade of gray; moving to the left colors the areas in a darker shade of gray.
For example, in the Roulette mode, select “Custom” to activate the sliders on each channel, before making changes, check the “Normalize” box to make sure that the sum of all percentages is 100% and the image will have a realistic view of the channels.
As for the individual channels, the general rule is that adding them will make the color lighter, and when you switch the channel, the color becomes darker. Try experimenting with individual channels until you find the optimal presentation. The image should be sufficiently contrasted with the greatest possible shade of gray.


In addition, a lot of ready-made settings contains a drop-down list at the top of the palette - select the list items one by one to see how they affect the photo. If you click on the Auto button (Auto), Photoshop will show you how, in her opinion, your image should look in grayscale.
The choice of the user and the ratio of the representation of all three color channels in the image
The second way to convert a photo to a black and white scale is to use the color tone function, which is also located in the Effects menu. As in the previous procedure, a new dialog box opens, but at the bottom there is only one axis showing the range of hues from one color to another.
The collection consists of seven plug-ins. All offer another photo editing option. The plugin includes 38 types of templates for conversion to black and white. You can continue to work with the selected template. Change the contrast, brightness, hue in the selected part of the photo. Grain intensity, vignetting and tonality. The appearance of the final photo is up to you.
4. Save your photo in PSD format if you want to edit it later.
Lightning tint
You probably already noticed the Tint checkbox at the top of the Adjustments palette when you created the Black and White adjustment layer. If you check this box, the program will add a brown tint to the entire image (called a sepia tone). If you want to use a different color, click on the color box to the right of the check box to open a dialog box to select a color. This technique allows you to create so-called false two-tone image.
Read the instructions below.
Alternatively, make small flaws. Do not move the sliders from contrast to saturation. Leave the other parameters as they are set. The edited image has the same name as the original, but the end of the editing. There, the program records all changes and changes that you made. From there, you can eventually bring back one or more events.
Equipped to enhance photos
I hope the tutorial helped you and you got better. The work in it is intuitive, simple and the result is worth it. An important parameter of the film is the format of the film, which can be inserted into it. There are cinemas, velvet and velvet formats. Each focal length of the field is related to the focal length of the zoom lens. Other foci will have a similar effect, like a wide-angle or telephoto lens. In addition, the lens is designed to transfer a specific area of the sample.

Channel Mixing Correction Layers
Using “Black and White” adjustment layers is the quickest and easiest way to discolor images, but layers are also suitable for this purpose. They have no advantage over corrective layers.
A shorter lens simply does not need to remove a larger field of film. For the first attempts at humor, we can agree on a smaller domestic legendary producer Mopte. The magnifying glass should be fitted with a film and a lens clip. The lens icon does not make sense to try the first attempts. I note that the light source in a magnifying glass can be a jacket with a capacitor or a so-called color head. To refresh the paper lighting time, another important part of the clock is another. For a certain time, it supplies electricity to the chimney, and therefore it ignites.
First, make sure that the Background layer (or the image layer you want to work with) is highlighted in the layers palette, then click the button with a half black, half white circle at the bottom of the palette and context menu select team Channel Mixer. When the Adjustments palette opens, check the box Monochrome at the top of the palette, and then move the sliders Red (Red), Green (Green) and Blue (Blue), as you like, or select one of the ready-made presets in the drop-down list at the top of the palette.
They can be bought at the market for about 300 Ci. This is usually a small fraction of the price of our best photographic lens, and this has the greatest impact. Papers are processed in photographic documents. Choose the most popular shape and buy cups of the required size. A unit in the bazaar can cost up to 50 thousand. Dollars and need three - for development, breaks, stops. Each bowl requires one photographic tweezers - it is flat and will not damage the paper.
Expansion and return of photos will occur in complete darkness, that is, when the lighting is turned on. Foma’s shops are located in every major city, and Foma also has tedious service. Photo paper for photography is distinguished by several attributes. The surface is glossy, matte, semi-matte and more. The most versatile is the glossy surface, and it is well scanned. Semi-matte and matte paper are popular with portraits.
- Substrate.
- A photosensitive emulsion is applied to the substrate.
- There are papers of one graduation and all-union paper.
- Multigraph processing is more perfect, but it uses material better.
- We are limited to a monograph.

If you want to darken or lighten the entire image, move the Constant slider to the left or right at the bottom of the palette.

We will put the engraver and everything else in a bright spot. Typical room - bathroom. Frames are ergonomic and comfortable. Efforts must also separate the so-called dry and wet parts. Light should be at least a meter from the candlestick and dishes with the development. We refer to the development, as recommended by the manufacturer, and pour into the first bowl. As an interruption, you can use water with vinegar, clean water or weak water. The weak patch option is probably the most practical. We have three bowls of three solutions, and each bowl has one tweezers.
Channel "Brightness"
As noted in the article on, lab mode got its name from the names of the three channels. The letter "L" denotes the Brightness channel (Lightness), in which the program stores all values of light and, thus, all visible outlines and image details. (The letters "A" and "B" denote the channels a and b, in which color information is stored.) This means that the Brightness channel, taken separately from the rest, is a black and white version of the image.
It is important not to push them towards development. Moving a switch with a stop is not as critical. At this point, the camera should be ready for injury. It is really good to provide a camera fixture. Outdoor lighting affects the drawing of photographs.
Work with photo paper
Creating a photo consists of the following steps. Suspend revocation in the interrupt lobby. Paper setting. Jester and drying.
- Set a negative value to ring bell.
- Adjust focus and focus.
- Search for a suitable exposure on paper.
- Exposure to securities.
- Choose a paper from a positive developer.
To see what a channel looks like, open an image and select Image =\u003e Mode =\u003e Lab from the menu (Image =\u003e Mode =\u003e Lab Color). In the Channels palette, highlight Brightness. If you like the resulting image, select Image =\u003e Mode =\u003e Grayscale from the menu and click the OK button when Photoshop requests permission to delete color information.

In my case, it turned out too bright and pale. This option is not suitable, but you need to know about it. At different picture he will play in different ways.
Conversion to Grayscale in Camera Raw
If you take pictures in the format Raw, then to convert them to grayscale, you can also use an external module. This module is easy to use and, besides, it does the conversion well. To open an image in this format, double-click on its file icon, and it will automatically open in Camera Raw.
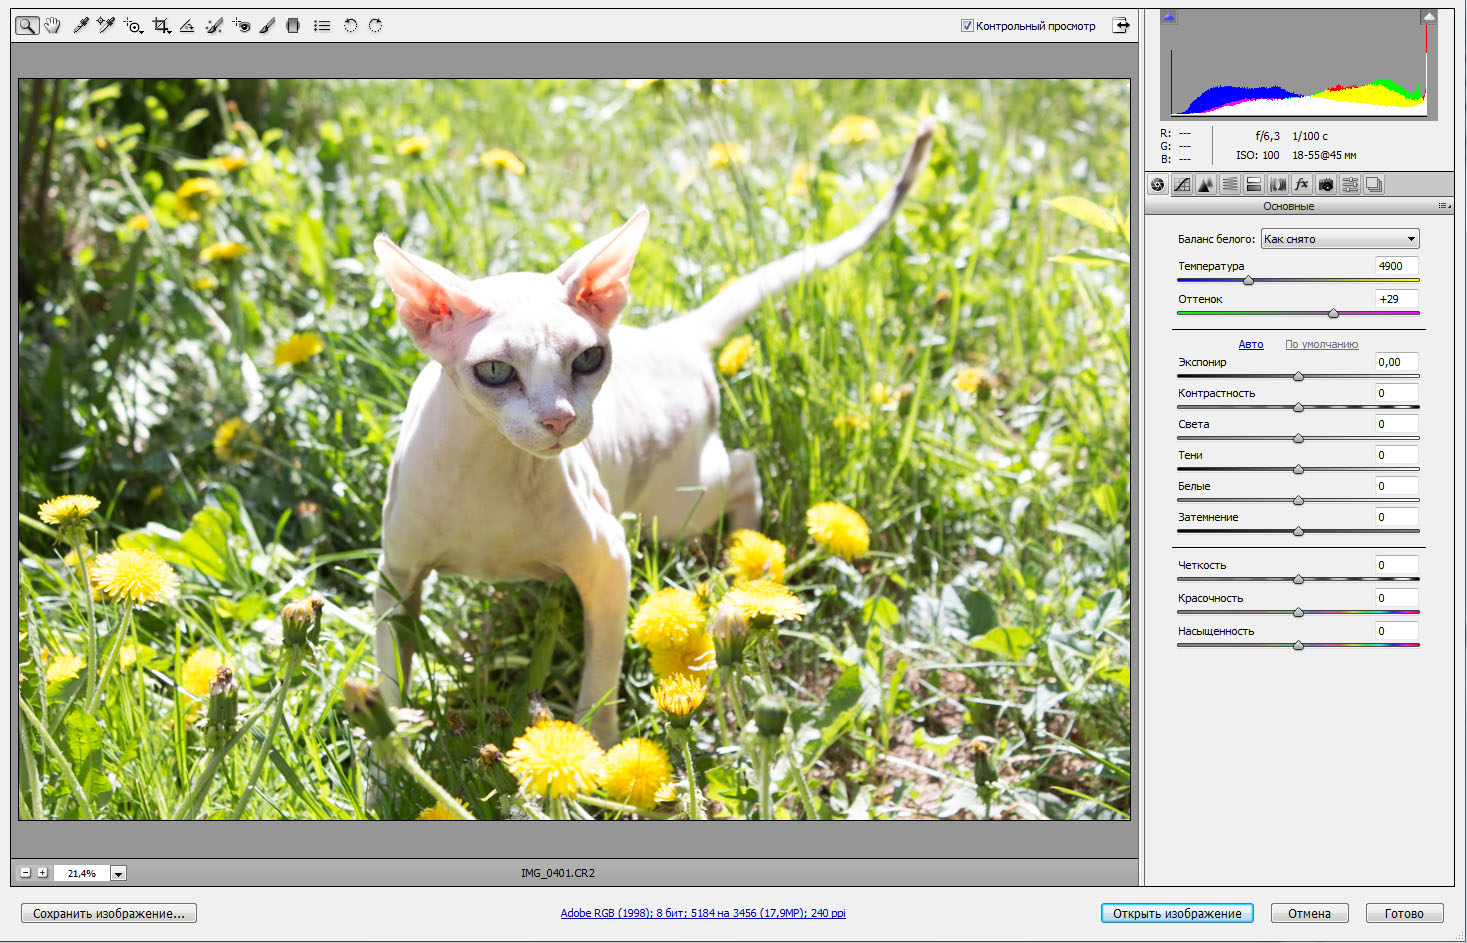
1. In the Camera Raw window, open the HSL / Grayscale panel.
To open this panel, click the button of the same name. Then in this panel check the box Convert to Grayscale (Convert to Grayscale). A group of sliders will appear on the right side of the Camera Raw window. To add contrast to the image, you can lighten any color by moving the corresponding slider to the right, or darken it by moving the slider to the left.

2. Open the Basic panel and move the Exposure slider to adjust the black and white image. Also move the sliders with different settings to different settings in this tab and you will be pleasantly surprised how your black and white photo will play!

Even dandelions look like dandelions!
Noticed a mistake in the text - select it and press Ctrl + Enter. Thank!
September 6, 2011 January 13, 2017
How to make a black and white photo in Photoshop
The question of translating color photos into black and white is perhaps the most popular. Ways of these in a huge amount. Before starting to write this article, I ran on the Internet and found quite good reviews. Unfortunately, the best of them are either outdated or poorly structured. What does it mean? This means that all methods for transferring to black and white are dropped into one heap by type, choose any, all are good. But this is far from the case. They are not all good, some of the methods are sharpened for certain tasks, which is not taken into account by the authors of the articles.
Color Correction Layers in Photoshop
I would like this article to be as simple as possible, and at the same time as informative as possible. Therefore, I deliberately decided not to involve color correction in this article. I can only say in the brief that color correction layers can be created from Layers\u003e New Adjustiments Layers or from the panel Windows\u003e Ajustiments They are a color correction in the form of a layer and almost completely duplicate the old color corrections that we are used to. Image\u003e Adjustiments After creating such a layer is in the layers panel Layers. So it can be managed just like a regular layer. Put a mask on it, turn it off, apply layer blending options to it. Most importantly, the color correction layer does not apply to the photo itself. The original source of the photo remains intact and safe under a cluster of your color correction layers. And this is their main advantage. If I wanted to create a black and white photo using layers of color correction, then here is the easiest way.

Layers\u003e New Ajustiments Layers\u003e Blak and Whites. Click Ok. And here is how we create a black and white photo using layers of color correction.
The easiest way to create black and white photos in Photoshop
Perhaps the easiest way to create a black and white photo is as follows. Open any photo and select in the menu Image\u003e Adjustiments\u003e Desaturate or click Ctrl + Shift + U Everything. And this is the easiest way to create a cheno-white photo in Photoshop. Unfortunately, the easiest way has the biggest flaw: the complete lack of color control. We get the shades we get, there is not the slightest possibility to somehow control the shades of color.

Black and white photos via Vibrance
Open a photo and select Image\u003e Adjustiments\u003e Vibrance In the menu that appears, you will see 2 settings. Himself Vibrance and classic Saturation. Saturation simply and linearly removes color. And back, it intensifies the color intensity if we want to make the photo more colorful. Vibrance more intelligent and cunning, for the most part it is sharpened by an increase in saturation, rather than discoloration. Its main purpose - to increase the saturation of the clever. Vibrance protects already supersaturated colors from saturation and saturates those that are less saturated. In the opposite direction Vibrance protects saturated colors from complete loss of saturation.

WITH Saturation everything is very simple. It linearly reduces color saturation, and linearly increases it. Desaturatewhich we bleached the photo in the past way no more than Saturation -100
Black and white photo via Hue / Saturation
Hue / Saturation - in truth, universal black bleach photos, which served for these purposes to all designers for many years. You will find it in Image\u003e Adjustiments\u003e Hue / Saturation.
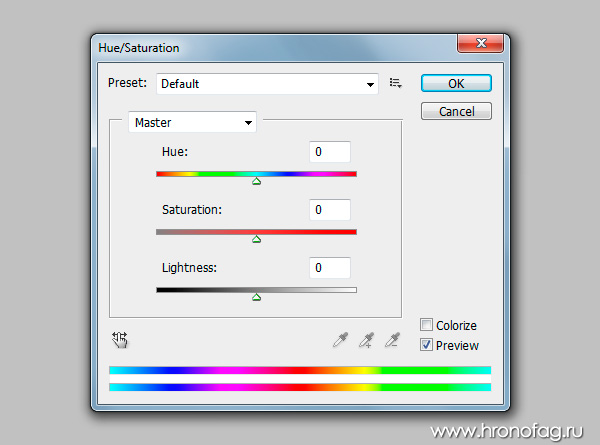
Slider Hue - this is the shade itself. About Saturation we have said. Lightness not an analogue of brightness. He adds photographs of light or plunges it into the abyss of darkness. The main purpose Hue / Saturation - work with individual shades of color and adjust them according to the above three options, that is, change the hue, saturate or discolor, make it darker or lighter. Via Hue / Saturation You can discolor both a separate color (you can choose it from the menu above the sliders) or a range of colors that can be selected directly from the photo with a pipette or you can customize the rainbow palette at the bottom Hue / Saturation manually.

Check mark Colorize allows you to disable multi-shading and translate the entire photo into the same shade. Which in turn helps to achieve very specific photo effects like sepia. By the way, in the menu Presets, which allows you to save ready-made settings, sepia already exists.
 In my example, I set up Hue / Saturation in the following way. I selected all the shades except the red-orange and removed the saturation Saturation. I also made these shades darker with Lightness.
Black and white photo via Black and White
Remember in the beginning of the article I forced you to remove the saturation of the photo using the color correction layer Black and white? Now we talk just about him. Open a photo and select Image\u003e Adjustiments\u003e Black and White.

When resources Hue / Saturation were exhausted, the developers gave us a new color correction. Black and white sharpened by literate translation of color to black and white, and I would recommend using it. What is it good for? First of all Black and white discolors the photograph on the move, but does not do it as linear Saturation. Black and white automatically discolor hues, but also selects the optimum illumination for them. In this sense, each slider with color for Black and white, is essentially a setting Lightness from Hue / Saturation, but for a particular shade, which allows you to manage color much more mobile and more flexible.
If you adjust each of the color shades to 50, you get a linear Saturation -100. If you press the button Auto — Black and white He will try to correct the result himself, based on his idea of the beautiful. If you try to spin the sliders yourself, you can get an even more interesting result. Good on the menu Preset There are ready-made template settings for all occasions. A tick Tint allows you to add a shade ala sepia. It is quite another matter!

Black and white photo via Channel Mixer
From the name it is not difficult to understand that the Channel Mixer mixes channels. This means that the correction occurs at the level of channel masks. Super yes? A small theoretical digression for clarity of understanding.
The image of all TVs and monitors produced from three color channels. Red green and blue. Together this is called color mode. Rgb. There are other modes, such as print mode, but now is not about him. Of the three primary colors, other primary colors are obtained. From different combinations of red blue and green, other primary colors are obtained, that is, all the colors of the rainbow. For example, from pure red and pure green it turns yellow. Well, then you remember, the light in the prism unfolds into a rainbow and gathers back. And the different colors of the rainbow in different proportions create all the other one hundred five hundred million colors. The same thing happens in the monitor emitting its alluring light on us. Any image has 3 color channels. Each color channel has a mask, where the lightest area is the color of the channel (red for example) and the darkest is the absence of channel light (black). Of the three channels get the rest.

Channel mixer mixes color at the level of channel masks. That is, it mixes the channels themselves, making them brighter or darker. Through this the whole color combination changes. Having opened Image\u003e Adjustiments\u003e Channel Mixer tick off immediately Monochrome. This is the same as Saturation -100 or Desaturation. Then you can flip the saturation of the channels and get similar to Black and white Effect. On the menu Presets as usual ready-made templates. But the main danger lies in the option value. Total.

Value Total must not exceed 100% . Why? By changing the sliders, we lighten or darken the channels. If the total allowable value is exceeded 100% we “burn” the photo in the direction of darkening or lightening. This means that in some places the photo will lose its shade, information about the color will be deleted. The photo will become, in the language of photographers overexpanded, or vice versa. That is, the photo will begin to lose information about the shade, and some of its areas will be either 100% white or 100% black. And this is evil.
Black and white photo via Threshold
This is where black and white really lurked. Threshold is a very ancient feature in Photoshop, it was created about 15-20 years ago, and it is sharpened for processing images for printing old printers that can’t be found even on the most recent dump. Printers are long gone, but Threshold stayed and that's what he does.
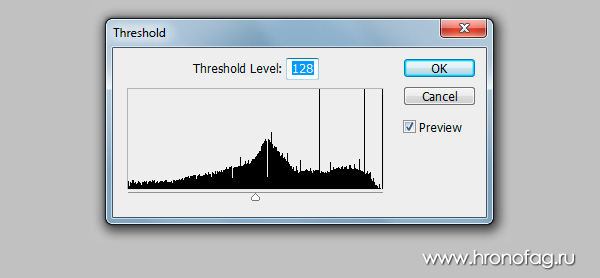
Each photo can be judged by the degree of light and darkness. If we ignore the color saturation (Saturation -100) we get a normal black and white photo, where each pixel will be either light gray or dark gray. Slider Threshold is a kind of index. Those pixels that are sufficiently light, based on the value on the slider, become white. Those that do not become black.

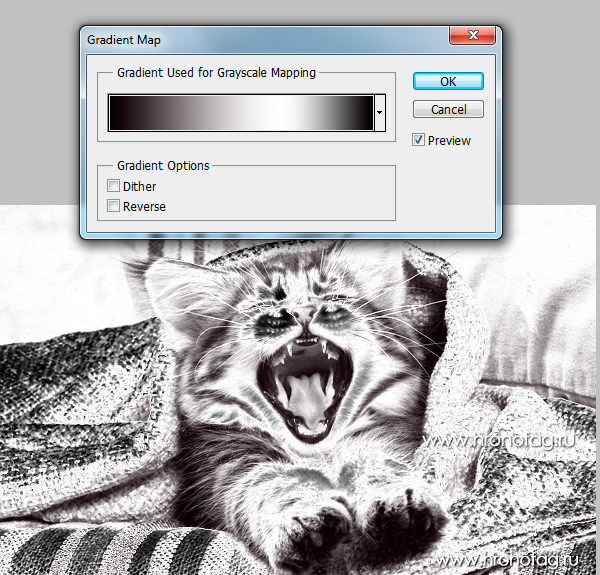
Black and white photo via Gradient Map
Gradient map - acts the same as Threshold, it was only created later 10 years later and according to its capabilities once in 100 advanced. You can find it in Image\u003e Adjustiments\u003e Gradient Map

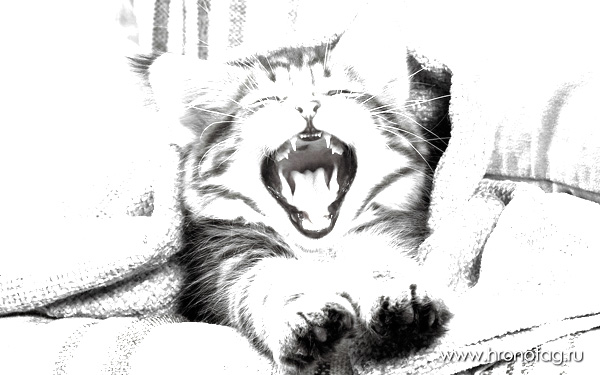
Conditionally Gradient map divides the photo into light areas and dark areas, and then superimposes on them a gradient where the right edge of the gradient overlaps the light areas and the left edge over the dark ones. Since the gradient can be any, the result will be completely different. From sepia to hdr.
And this is another way to create a black and white photo in Photoshop's piggy bank.
Black and white photo via Selective Color
Selective color not created for production black and white photos, and to correct specific shades of color, but what the hell? Black and white photograph can be made in it. Although with the same success you can take your camera, and go reshoot in black and white.

Open up Image\u003e Adjustiments\u003e Selective Color and reduce to 0% all shades. Remain white, gray and black. Just play with them.
Black and white photo via HDR Toning
By the way about HDR tinted. Black and white photo can be obtained through this filter. Why not? True, for this you will have to merge all the layers of your work, so create a duplicate for this case.

so Image\u003e Adjustiments\u003e HDR Toning. At the bottom of the settings window are the same Saturate and Vibrance. Reduce the sliders to -100 and play around with the rest of the settings. By the way in the menu Presets as usual, a number of good blanks for black and white toning. Unfortunately, my photo is not suitable for this HDR effect, but as a platform for the experiment completely.

Black and white photo via Match Color
Match color not to be translated into black and white, but to combine the tonality of light and the color of the two different images. Well, for example, we cut out one photo of Masha, and pasted it on another photo next to Dasha. And the colors are different. Masha is in a bathing suit on the beach, Dasha is in a poorly lit room, and the photo was taken by a Polaroid about 10 years ago. But, meanwhile, in Match color we have tools for bleaching and creating a sepia tone familiar to us.

I will not even dwell on this color correction, since it is not for conversion to black and white, but since we are going to the end, why not mention it?
Black and white photo via Variations
Variations Photoshop's ancient color correction for working with hues and light. You can get a black and white photo even through this dinosaur.
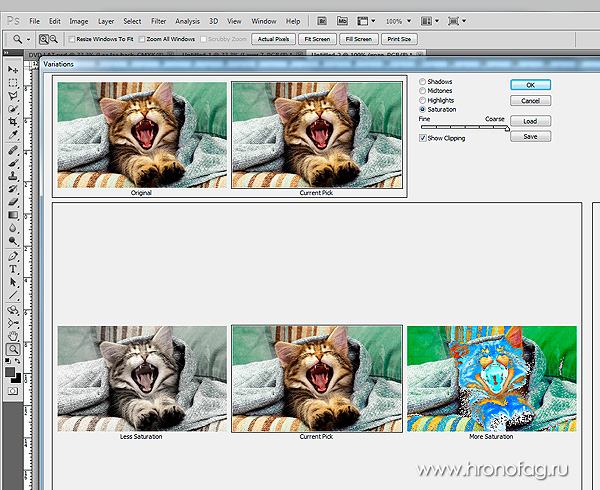
Open it through Image\u003e Adjustiments\u003e Variations turn on the check mark Saturation and click until you go crazy! The slider indicates the strength of the applied effect. You can click forever. Then, switch to Midtones and in the right part of the window add or subtract light.
Black and white photo via Replace Color
Tool Replace Color blunt and straightforward. Pipette color is selected. And then this color changes where necessary, including in the direction of black and white.
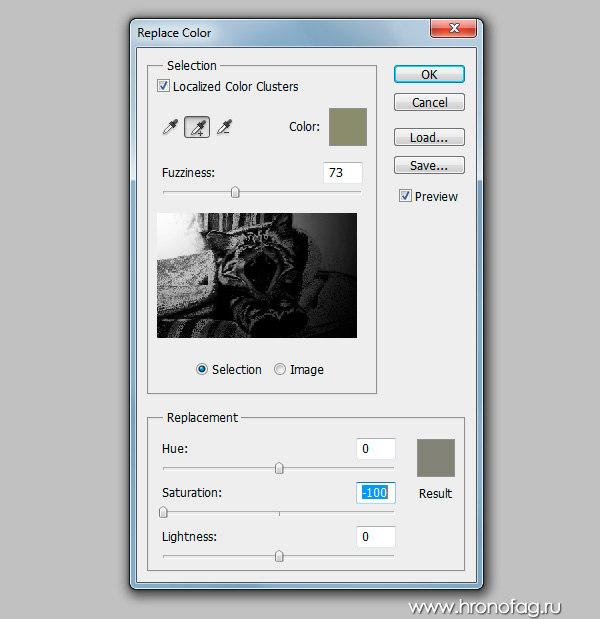
Choose a pipette with a plus, it chooses not one color, but several, and draws over the area you want to repaint. Along the way, change the Fuzziness setting. This option expands the color gamut. In fact, it creates a smoother and softer effect than jerky torn. Made? Now Saturation -100 and Lightness to taste. The dish is served.

Random quote
Hide what you say yourself, find out what others are saying, and you will become a true prince.