We bend a little bit of the side in Photoshop
We specially prepared this side to give you short information about our company, our products and our services to your native language.
We believe that all the information provided below is easy to understand on our website. Let us know what was the best side for you. At the subject of your sheet, enter: "AV Bros. Russian page".
About us...
We are expanding plugins (plug-ins) for Adobe Photoshop and other hosts (other graphic editors that support Adobe specifics), scripts for Adobe Photoshop CS-CS4 and other programs (standalone applications).
AV Bros. exalt the high quality of the products, the swede and professionalism of the technical support service. Zavdyaki tsomu, the Company can have a lot of thousands of registered coristuvachs more and more in 50 countries of the world.
Our software products
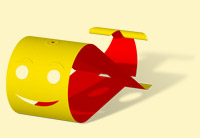 AV Bros. Page Curl Pro 2.2
Danish assignment plugin to help koristuvachs graphic editors(Designers, artists, etc.) Create an over-the-top realistic and foldable side fold effect (including multiple folds!), In two options: page curl (Page Curl) and page fold (Page Fold). At any point you can see AV Bros. Page Curl Pro 2.2 як багатоцільовий плагін, оскільки використовуваний в ній АБСОЛЮТНО НОВИЙ неперевершений механізм дозволяє не тільки згинати зображення, але також текстурувати його за допомогою рельєфних карт (Bump maps), орієнтувати його в тривимірному просторі (в тому числі з додаванням перспективного спотворення) і more control over the process of clarification of the image (including the ability to see inner shadows).
Important! Mac OS X version of this plug-in for Adobe Photoshop is now t.z. universal binary. What about Windows, then for the operating system, Page Curl Pro 2.2 can be both 32-bit and 64-bit versions.
Plugin AV Bros. Page Curl Pro 2.2 is considered to be the most important plugin for page curling in the market today.
 AV Bros. Page Curl 2.0- plug-in (8bf), which is a high-density, thin and light filter for Adobe Photoshop and other hosts. The version of this filter for Mac OS X and Windows.
This plugin is designed to help curvy graphic editors (designers, artists, etc.) to create two (2) effects for the help of a new improved mechanism: more realistic effects - Page Curl and Page Fold ).
Plugin AV Bros. Page curl 2.0
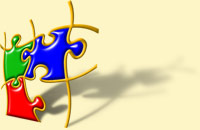 AV Bros. Puzzle Pro 3.0- plug-in (8bf), which is a tighter and more acidic filter for Adobe Photoshop and other hosts. The version of this filter for Mac OS X and Windows.
This plugin is designed to help graphic editors (designers, artists, etc.) to create a "puzzle effect" and give them practically absolute freedom to create puzzle shapes and the ability not only to break the image into little pieces, but also to depict the shape " of the knife "split the image on q_ shmatochki (Draw Splitter function)! We have added impersonal new possibilities to the new version of our plug-in for Photoshop and some of them are truly revolutionary! With renewed confidence, we can confirm that Puzzle Pro 3.0 is a "must-have" tool for both professionals and amateurs!
Important! Mac OS X version of this plug-in for Adobe Photoshop is now t.z. universal binary. What is worth Windows, then for tsієї operating system, Puzzle Pro 3.0 can be both 32-bit and 64-bit versions.
AV Bros. Puzzle Pro is a short plug-in on the market for creating a "puzzle effect".
 AV Bros. Circumscriber 1.1 is a JavaScript utility for Adobe Photoshop, and can only be played with Adobe Photoshop CS and later versions.
This new code-free script will help you easily and quickly describe the number (as seen (Selection)) for about two (2) or three (3) designated points.
AV Bros. Circumscriber 1.1 spares you a lot of time.
 AV Bros. Collector 1.0
This new, cost-free script will help you easily and quickly merge a bunch of documents into one large-sized Adobe Photoshop document (leather document - in a clear ball).
AV Bros. Collector 1.0 will spare you a lot of time.
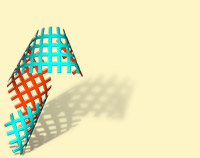
 AV Bros. Draftsman 1.2 is a JavaScript utility for Adobe Photoshop, and can only be played with Adobe Photoshop CS and later versions.
For the help of this script, you can quickly and easily create a permanent or change a repeating linear structure (grid), which is formed from vertical and / or horizontal lines. The grid is created like a vision (Selection).
AV Bros. Draftsman 1.2 will spare you a lot of time.
 AV Bros. Guide Master 1.2 is a JavaScript utility for Adobe Photoshop, and can only be played with Adobe Photoshop CS and later versions.
This script allows you to quickly and easily create a Bazhan scheme for direct distribution (Guides), so that you can directly locate the output from the algorithm you specify.
AV Bros. GuideMaster 1.2 spares you a lot of time.
 AV Bros. Colorist 1.0 is an independent supplement that works only under Microsoft Windows OS.
qia is small manual program allows you to choose the color and set for the new value of the parameters RGB, HSB and Hex (WEB color) for the help of the "color wheel" (Color Wheel) or the great library of naming colors (more than 500 colors).
How to take advantage of our software products
At this age, you know how to create a realistic curl of the side. You need some simple deformation techniques. You can create folded folds for paper sides, choose cut, expand wigu and gradient.
final image
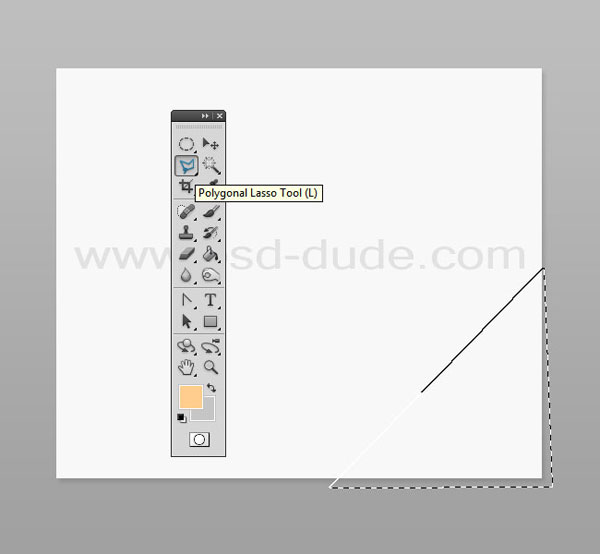
Repair the creation of a simple shape of a rectangle, it can also be a square. It is important that the shape is rasterized. Name this ball 'Storinka'.

Take Pollygonal Lasso Tool(Straight Lasso) and see the right lower corner of the side, as shown in the little one below.
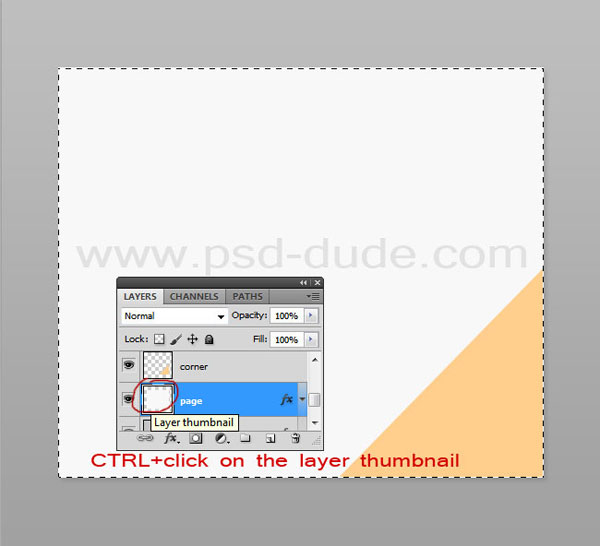
Press Ctrl + J to create a ball in the visible area and name it 'Kut'. To make it more visible, fill the whole ball with some kind of color.

Turn to the ball 'Storinka' and, pressing the Ctrl key, click on the thumbnail of the ball to create a vision.
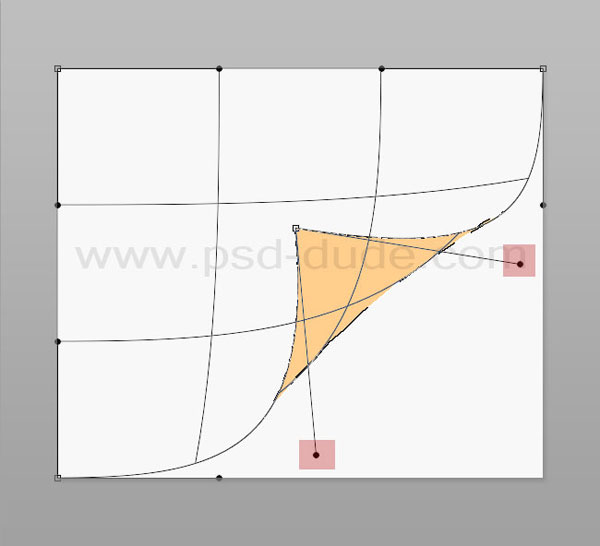
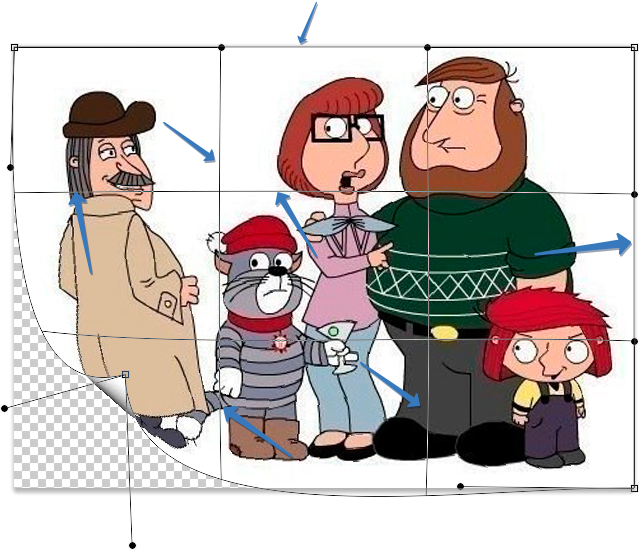
For more active visions, turn to the ball 'Kut'. Go to menu Edit> Transform> Warp(Edit > Transform > Deform) and do a cut to create the side fold effect.

To create a realistic fold, drag control points, lines, or the area in the middle of the mesh, to change the shape of the intermediate frame and mesh. To help you with Photoshop's warping process, add 12 control points to the top of the image. To start the deformation, drag the lower point to the right directly.

Now move the assigned control lines to the little one below.
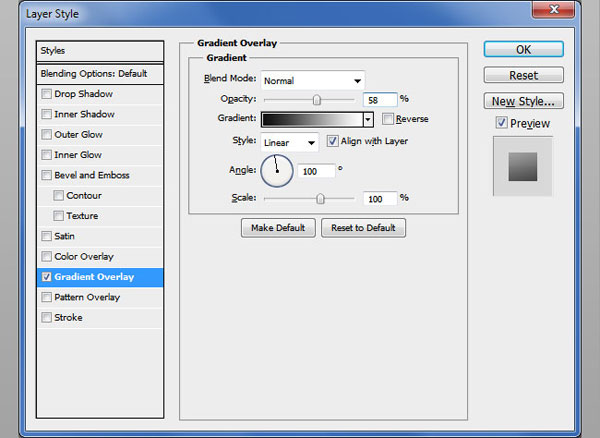
For help styles ( gradient overlay(gradient overlay), Drop Shadow(Tіn)) you can change the light and the tіnі to match your paper color, background color, twisted paper paper, etc .; so that the stench looked more real, you could add a mild effect of darkness. Copy and paste two balls. Name the balloon 'Tin' and add style to the balloon Drop Shadow(Tin). Move the ball back.
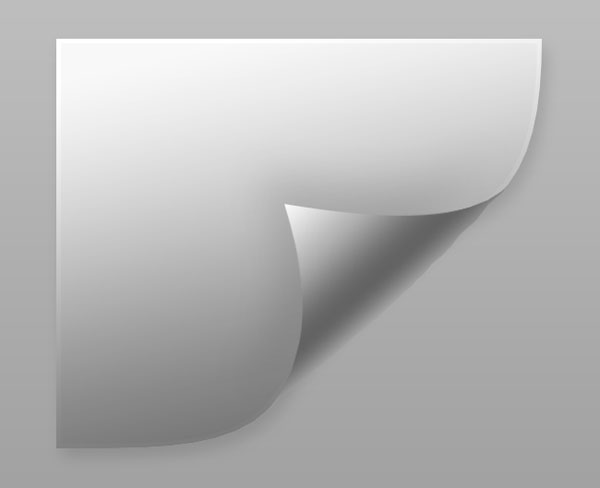
Below the readings is the result of a realistic folded side fold, cut from scratch in Photoshop.
Today will be simple, but the lesson will be learnedrobiti curled kutochok in photoshop(Vіn is the effect of laryngeal side). Such an effect often occurs in the processing of photographs or pictures for any web project, for example, for the VKontakte group.
To reach the effect of the curled-up fold, we vikoristovuєmo, about which we have already spoken in detail within the framework of the Photoshop handbook. I'm guessing that this tool is available in any version of Photoshop from CS2 to CS6.
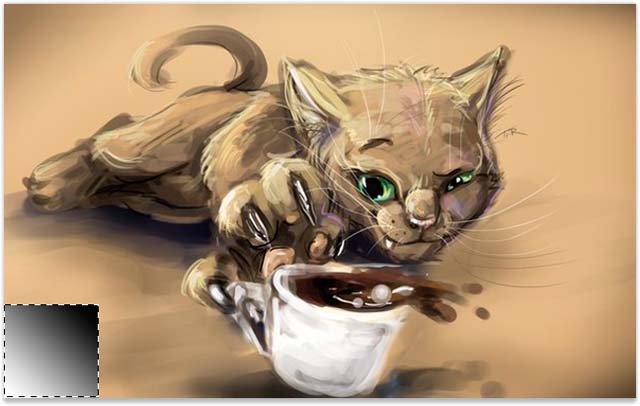
Krok 1 Show the photo.
Croc 2
Then you need to unblock the background ball (like on the thumbnail of the ball there is a small padlock icon), for this binary, click on the background ball. on the panel shari double click on the padlock. Let's press the OK button in the dialog box.

Croc 3 We select a tool.
Croc 4 We can see in the kutka region, on which there will be a stagnation effect.

krok 5
Then select the Gradient tool. We install yoga black-and-white. Zastosovuєmo іnstrument to our pryamokutnik, so that the upper right kut is black, and the lower levi is light gray. Tse and will be our future curled little fold.
Croc 6 Know the vision of the team Seeing -> Saying or just pressing a combination ctrl + d.
krok 7
The hour of deformation has come: Editing -> Transformation -> Deformation. As a result, a mesh will be superimposed on the image.

krok 8
The lower lion's eye of transformation will need to be reduced to the dark part of the gradient so that the black color is not lost. Play with your buzzers so that the side is bent as you wanted.

krok 9
Lost to add shade for more realism. Go to (double clicking on the ball). Bookmark shadow set the following settings:
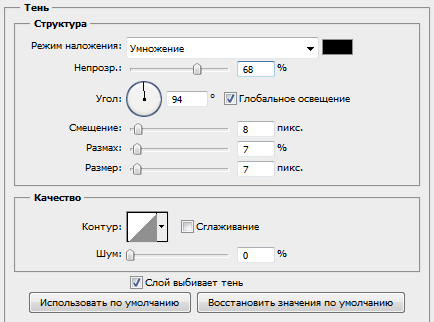
Krok 10. Viishov's axis is such a curl:
Under the hour of transformation, the type of photograph changes, what should it work for?
Speaking in a medical way, with deformation, side effects are possible - the creation of objects and features in the photograph. All right in the instrument itself. If we are pulling by the tuft, we, like a carpet, are pulling behind ourselves and all the images.
In this situation, the ideal 100% capacity cannot be achieved; For whom you need to try, so that the transformation of the lines of the grid will be straight. Look at the butt:
Just remember that the stench is not straight, necessary, natural, not out of the mode of deformation, push the bear on the line and pull it in the right direction. Here you will need to marvel at the situation, and find out the average balance between the usual lines, so that you can “lead” other lines.
Return respect to the lower left square curled up. For this square, the deformation is maximum, so the fragment of the image is no longer straightened.
Marked the pardon in the text - see it and press Ctrl + Enter. Damn it!
Vitannia! today let's talk about those who grow up inversion of the side on WordPress, such a feature can often be seen on rich blogs, to promote video courses or services. To shy away in order to turn the respect of the guardian, if the person is pointing at a tuft pops up after it, you can grab a gift in exchange for an e-mail subscription.
Installing the page peel plugin
1) Get the page peel plugin you can for cym.
2) Why upload the plugin to the server in the directory ( wp-content/plugins/).
3) I, obviously, activate yoga in the blog admin.
nalashtovuemoa little bit on the site
In the blog admin, go to the plugin settings Parameters ->PagePeelOptions. Like bachite, the plug-in can be practically at least improved. You won't take a lot of time.
PagePeelsmallimageURL: enter the address of the small picture, size 75x75px.
PagePeelbigimageURL: І also indicate the address of the large picture in size 500x500px.
After all the broken things, press the button updateOptions. І vіdginаієtsya kutochok z'appear in your blozі.
Recognizing the address of the picture
To find out the address of the picture, you need to go to Media files -> Add new.
Capture a picture from a computer. І after what you show up on the picture. Copy the address, and paste it in the place where it was necessary to enter the address of the picture.
Let's do it for respect. Good luck to you!!! I to new zustrіches. Boo!