Create a table in word and fill it in
After reading this article, you can learn how to create tables in MS Word 2007 and 2010. Since it all sounded bad, I hasten to calm down, just like brushing your teeth. First I’ll describe the process, I’d like to explain a little bit about what the table is and why it’s needed.
A table is an ordered area of the document that contains rows and columns, on the crossbar of which a middle is created.
Changing the table using the Layout tab
Regardless of which table style you use, it can have another effect. You may need to experiment to get the exact look you want. Vikorist commands on the “Layout” tab, you can make a variety of changes to the table.Creating vertical text can add a style to the table and provide space, allowing you to fit more columns around the table. To keep your table looking neat and organized, you may want to divide the rows evenly to keep them neat and tidy. You can create rows or columns throughout the entire table or just part of it.

Basic concepts of the table
The table can be composed of one row and a column, and without a row. It is also possible to create folding tables with different types of middles. Regardless of the complexity of the table, its main purpose is reduced to the highest level of upcoming tasks:
- It is possible for you to evaluate the information presented in the table;
- Systematize and group information under different headings;
- Use a tool for more flexible formatting of information.
I think the first two points do not scream “what is this?”, and the third axis needs to be explained for the most part. On the right, Word is used for preparing documents of varying foldability, and sometimes it comes down to the task of folding placement of various elements of the document. It’s a good idea to come to the table for help.
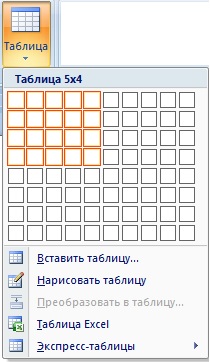
You can enter the required row height or column width for your rows. Some tables will require a layout that does not match the standard layout. In these situations, you may need to eat or separate the middle. The axis is how to create a powerful table style and save your template. Move over the squares in the table to select the number of columns and rows you want in the table.
Select a style from the “Style Tables” gallery and gain respect for the name of the style. You will need to protect your feet. Give the table style a new name. From the list that opens, with the “Style based” option, select the table style in which you want to place yours.
I hope you now understand why you need to create tables in Word. Next, I will tell you how to create a table in MS Word 2007 or 2010.
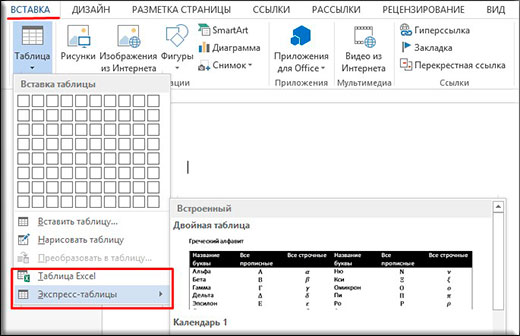
All main activities can be found in a separate panel Swedish access"Insert". It contains the “Table” element.
Create a table in Word
Quick method Word 2007-2010
Creation of a table with various cob adjustments
In order to better understand the meaning of parameters when creating new tables, I recommend simply experimenting with the parameters. I would especially like to click on the “Automatic width selection” group  .
.
Select settings and formatting. For example, you can change the font and style of the font, change the borders and colors of the boxes, and also change the text alignment. While we are busy, we are going to bury ourselves in the table, which is an important part of developing well-formatted documents. Having discussed the tables, we will look at some other controls that will help you complete your formatting, including adding instructions, changing symbols, creating math equations, and much more!
Until now, you will be very familiar with document extraction to the level on which you can adjust tabulation and entries, paragraph alignment, interrow interval and create customized lists. If you need to refresh what we've seen so far, you should review Lesson 1 and Lesson 2 so that you can get yourself up to speed.
Manual mode
Naymensh zruchniy and vikoristovany є manual mode If you want to achieve the desired result in such situations, you can achieve the desired result with the help of your own help. The main shortcoming this methodє:
- the hour it takes to spend this method is much longer for most methods;
- Koristuvachev needs to give birth to the right.
In this mode, you can paint the table; to complete the process, you need to press the Esc button. Please note that this mode is usually useful for adjusting the table, giving it a more visible structure, and breaking up the middles.
A table is a method of verifying the presentation of data in rows and columns. Here you will find a grid that allows you to customize the table, but you can also insert, draw or select from various “tables”.
The quick way is to simply quilt the table as you want, using a vikoristic mesh. Now, if your table is now located next to your document, you can specify its formatting, as we will see in the near future. Alternatively, you can “Insert Table,” which means you simply enter as many columns and rows as you want to make it “Autofit.”
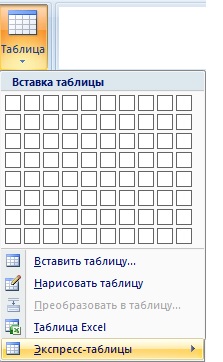
Express table
Don't forget about this method of creating a table as an express table. This is a ready-made table with simple templates. I would like to read a set of obvious templates. The reason is trivial, the templates are poorly designed, but there are a lot of tables created in other ways that are not available.
If you decide to create a table or frequently change its size, you can open the "Insert Table" dialog box to save it for new tables. When you draw a table, the cursor changes to an oval and you can display columns and rows. In this way, you can customize the table to your satisfaction.
After you paint the first middle, you can paint further middles and create a table that is more based on what you want it to look like, what it looks like. Obviously, you have a lot of text and numbers, and you realize that it would be easier to read if they were in neat columns and rows. Don't be afraid, text to table allows you to quickly and easily transfer all this data into a table, which you can then format to your liking.
I would like to say that all methods for creating a table are simple. You can learn how to paint your skin with them. There is a richer understanding of the need to create tables. Well, since there is a need for a separate table in documents, I would like to say that a rare document can do without them.
Simply, if you want to convert a section of your document into a table, you select the section under the help of Misha, and then select “Convert text to table.” Opening the dialog box allows you to select as many options as you want. The number of rows is automatically calculated by row breaks, for example, if you have a block of text divided into lines, your table contains several rows.
Items are indicated by numbers, tabs, paragraphs or any other symbol that can be entered manually. All tables need to be simply sized. Let’s say you want to insert a quick calendar, a matrix, or a tabular list. You can also create a table and save it to the list for more useful and useful content. Simply select the table you want to save and select “Save videos to the table gallery.”
Good morning, my dear friends and guests of my blog. Today, if you don’t object, we will continue to communicate with you text editor Microsoft Word. Due to the nature of my activity, I often have the opportunity to interact with him, and I cannot deprive him of him without respect.
And today we will work with you using tables. So. Without whom our justice simply has no place. Even a lot of people don’t know how to get into life, and even more so in a number of ways. So I’ll tell you how to create a table in Word, with a selection of different options and methods. I am sure that if you are in the office in 2013, but if you have 2010, then this article will also be relevant. Are you ready? Let's go!
There is nothing to master here. Please note that when you insert a new table, you can edit and format it as if the table was created from scratch. And in this note, let’s actually skip all the information about formatting that we talked about throughout this lesson.
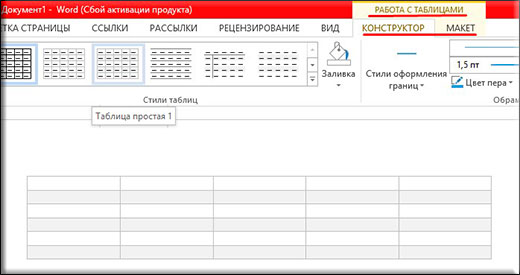
The table tools are divided into two tabs. “Layout”, which allows you to add and remove items, adjust the height and width and text alignment. You have more tools at your disposal. Please note, you can easily delete the table in the next step.
Insert
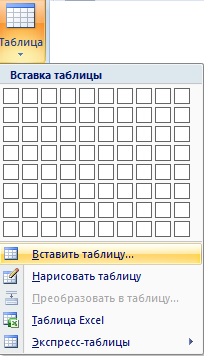
Our first method will be the simplest and most classic, and the most basic is inserting a table. Here we don’t need the same supernatural features. You just need to set the number of rows and columns.
Exit Word and go to the “Insert” menu, then select “Table” and visually select, using the squares, how your table appears in real time. If everything is in your control, then you simply wave the left mouse button at the desired point. True, this row contains a number of rows and columns. And here another option will help us.
Turning back to the page, on the right side of the “Layout” tab you will find a number of manual controls for controlling “Verification” and “Data”. You can also sort business data, insert formulas, convert a table to the original text, and repeat rows of headings. The remaining option is brown, since you have a table with several pages, you can designate the rows of headings that will be saved when you scroll the table. This is useful for determining what is the same as in other tables.
For example, the “Design” tab is all about how your table looks. At the bottom of this menu you can change the table style if the exact table selection is not suitable for you. When you make changes, they will be reviewed first so you can review them before committing.
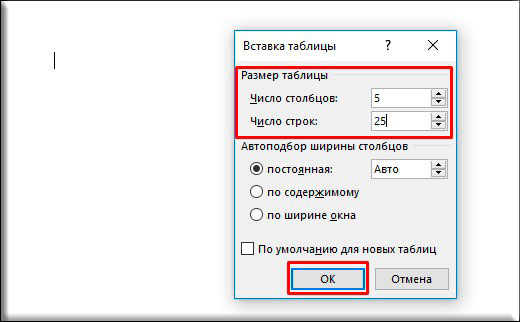
To set the number of columns and rows, we need to go back to the same section, only once again select the item "Insert table".
We will be informed at the end where you will be advised to select the required number of rows and columns.
When formatting or changing a table, if the selection you make is not close to what you want, you can simply start from scratch. In this box you can open the “New Style” dialog, which allows you to create a new table style based on the current table styles.
Not much has changed in this dialog box and change dialog, due to the fact that the changes are based on the same table design. Finally, the formatting of your tables will be based on what data you represent and the specific benefits. We suggest that if you want to add tables, you create an empty document and save your space. We remember that you create and format additional sets of data less than you need to say “stacks and rows!”
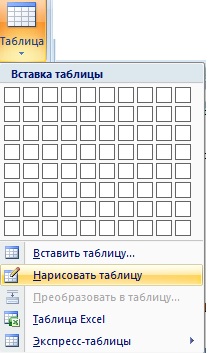
Malyuvannya
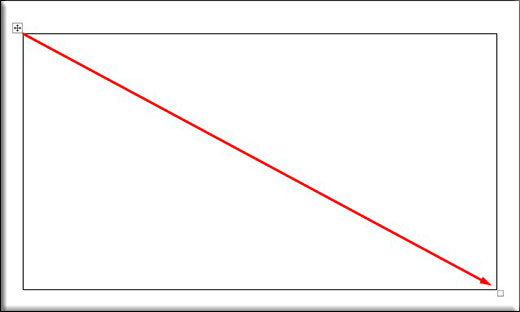
Finish manually The creation of the sign is a painting. So here you choose the bud yourself, as you look better. In order to put this into practice, we need to go to the same point “Insert” - “Table”, and then go to “Draw a table”. Your cursor will change to olivier.
A nested table is one table placed in the middle of another, where the large table acts as a container for the smaller one. Nesting tables are a way of organizing objects, such as images or text, in evenly spaced rows and columns. The attached table can allow you to organize different groups of data in groups to display clients.
Once again, go to the “Insert” tab to create a table. Vkazivnik will change to olivets. Paint a rectangle with a size of 1 to 2 mm, shorter for the size of the container in which it is located. Add horizontal and vertical lines in the middle of the rectangle. For example, paint one horizontal line and one vertical line to create a 2 by 2 table.
This is how we paint our sign. To do this, press the left mouse button on one edge and move it to the other edge below, after which the rodent is released.
Now start moving the vertical lines from where the spies would like the stinks to go away. This will be the floor between our soldiers.
Another simple way to create a nested table is to create a new one, and then copy and paste the original table in the middle of one of its middles. Kim Lewis is a professional programmer and web developer. She was a technical writer for over 10 years and wrote articles for business and the federal government. Lewis is a Bachelor of Science degree student and is starting to learn about programming for the Internet.
When you receive a response, applications may appear in all rows, or if you look at the table, you may notice that the one there looks the most broken. This rotates the table back so you can try again. . Go to table.
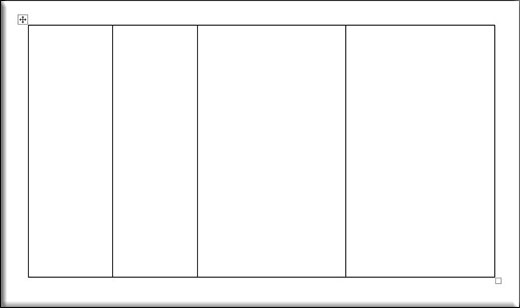
And to complete it, just fix the little ones yourself horizontal lines from beginning to end, so that we can formulate a complete table. Before speaking, we can conduct every line not from the beginning to the end, but from another place, for example, from another line. Once again, we can take care of those that we don’t get.
Set the sign “Width is important” to enlarge the text field. Add more to the table by inserting additional rows. You can also add items in this manner, although it does not affect the size of the table. Place the cursor on the left or right between the tables. You will change the cursor to a double-headed arrow. This process is also performed on the lower edge of the table to increase the table's capacity, rather than on the upper edge.
Place the rows in the table to change when you see the row. Drag the line up or down or left or right, changing the size of that part of the table. Simple tables are easy to insert or change. Point the mouse indicator at the required number of columns and rows.
Other ways
I’ll briefly cover two other methods, and the insert itself excel tables and express table. If we quickly use an Excel table, then it’s natural to get fancy. This is great because you can use all the advantages of Excel Word documents for example.
You can easily insert a large table into your document. From the pop-up menu, select “Insert table”. Select the number of items you would like to insert into the Items field. Install the "Automatic update at window" remixer. You can quickly insert a table with the required columns and rows and automatically change the size of the table to suit your document.
Paint the table for your help Misha
Paint a rectangle with the size of the table if you want to create between tables. Then paint rows for the sides and rows in the middle of the rectangle.
Inserting a table using your keyboard
This is a trick that few people know about! To insert the table behind the keyboard.Express tables - these are ready-made templates that will help you make your sign more useful in terms of design. For example, using them you can create a calendar in one click. With all these functions, make sure you take advantage of them more often.
Other functions
If you see the table or any part, you will see a new time menu on the page called "Working with tables". This menu will include two tabs: Layout and Design.
Repeat lines 2 to 4 to create additional sections. This creates a smooth table in one row. Now, if you thought about it yourself simple ways When inserting tables, try one of these methods in your documents. You can insert a small, simple table or add a larger, folding table. The word also gives you vitriol, so that you paint your power, and the stench penetrates you, so that you vikorize him!
Method 1: "Insert table" button
To obtain additional information, please work with the tables. The most commonly used methods include. Some more advanced methods for inserting a table include. The “Insert Table” button on the standard toolbar or the “Insert” tab is one of the most in many ways inserting a table into a document. Move the mouse pad to the number of boxes you need to insert into the document. Please note that the lights change color as you move the mouse over them.
At “Constructor” we can fill our entire structure or around the middle with any color, in addition, you can choose one of the templates that changes a little external look table. Well, you can immediately change the color and type of cordons.
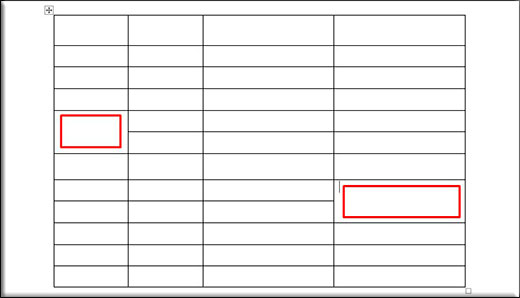
And the axis on “Maket” I would like to do a little more reporting. Here we have a lot of different functions that we need. For example, if you select the “Eraser”, then you can always move a line in the middle of the table, a whole book, etc. Sometimes this speech is simply needed. I often complain about it myself.
In addition, you can add new rows or rows in any place, even in the middle. To do this, select one of the items: insert top, bottom, right-handed, left-handed. If you want to kindly insert another row, you can do it easier. To do this, it is enough to place the cursor at the end of the row after which you want to create a new one.
Another miraculous function is “Sorting”. For example, you can simply sort the values in any column. Let's just be interested, I'll write in the first column the numbers out of order and we have 5, 2, 16, 1, 2, 13. Now I see this column and press the button "Sortuvannya (A-Z)".
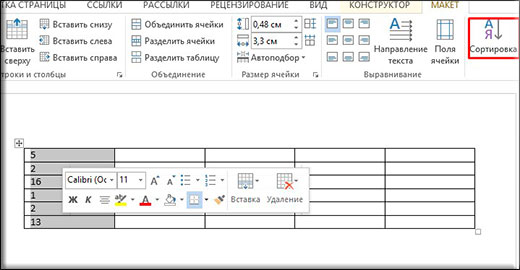
After this new window appears, you will need to select a specific item in which sorting will be carried out, as well as a symbol (number, date, text). If you have seen a specific item, all meanings will be presented automatically. Well, then we press on OK and now everything will be in order.
With respect, Dmitro Kostin.