Smart art word templates. Video on how to create and format SmartArt objects.
Author:
POWERPOINT2015
License type:
Grunted
Languages:
Windows 8, 8 64-bit, 7, 7 64-bit, Vista, Vista 64-bit, XP, XP 64-bit
Downloaded:
SmartArt in PowerPoint
Using Power Point, you can insert pictures, videos, SmartArt pictures and tables into slides.
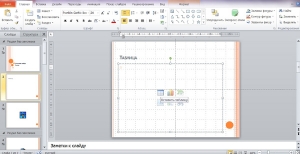
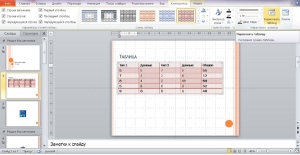
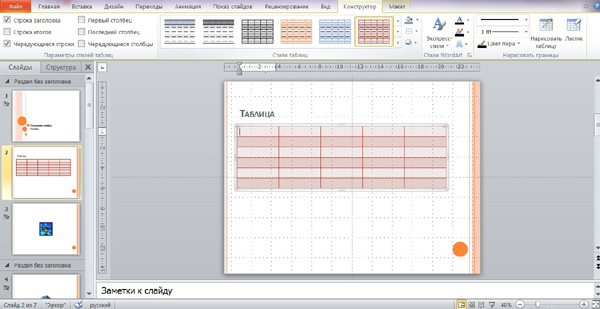
To start working with a table, you need to select the appropriate layout of the slide containing the object. After that, click the button "Insert table", open the edit mode and set the required number of columns, rows.
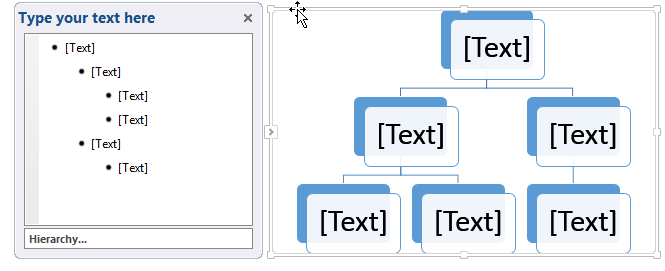
The categories in the left pane of the dialog box are not mutually exclusive, so some charts are displayed in more than one category. See the “Changing Charts” section later in this chapter. You can find layout information in the "Text" area after creating a chart. Sometimes the Text panel displays the name and layout description below; in other cases, only the layout name is displayed.
You can enter more or less information than the original diagram requires. When you enter text in the Text panel or in a selected form, this text is also displayed in a different place. You can insert and modify the text either directly in the chart shapes or in the corresponding “Text” area. In the "Text" panel, only a single-level bulleted list or a multi-level list can be displayed if the diagram chart supports several levels. You can expand the chart by adding more list items or adding more shapes.
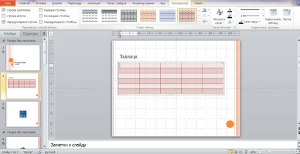
After the table sizes are indicated, you need to select its type, design. Options for color, style, number of final columns and rows are offered.
Having filled in all the design data, you can proceed to editing the appearance of the table. The color of the table is selected by pressing the “Fill” button. How each cell will look like can be determined by clicking the "Cell" button.
Some diagrams support a certain number of records, while others can be significantly expanded. The number of elements displayed in the diagram can be expanded or reduced to convey the exact meaning you want to convey. In layouts that support additional entries, the shape of the diagrams changes to accommodate content. Inside the chart, font size and size always remain the same. If the text entry is too long to fit, the size of the text changes in all shapes.
In the section “Organizing Objects on the Page” in Chapter 10 “Organizing and Organizing Content”. To create a chart in a document. There are a variety of styles to choose from, which you can use to illustrate various ideas. 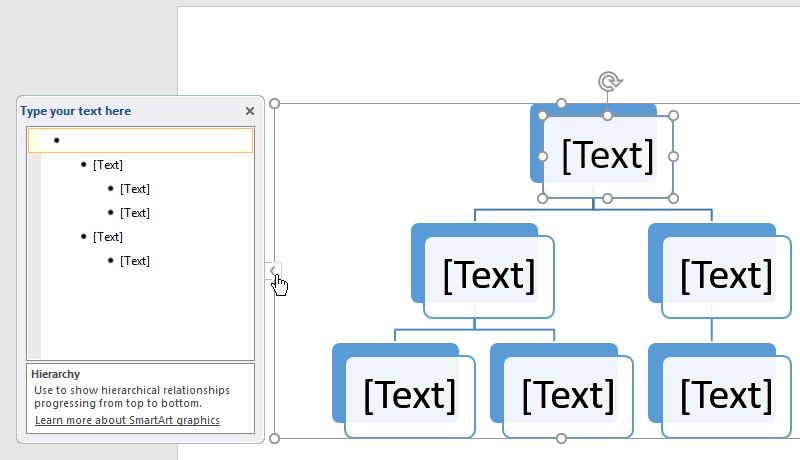
This works well if you only need to add text to several forms.
In addition to the usual, the user is given the opportunity to insert their own table. For this there is a button “Draw a table”.
After clicking the button, the user can draw the cells individually or select a field that will be divided into cells. It is not difficult to remove unnecessary cells from the table - elements are easily erased using the “Eraser” function.
To change the order, add and remove shapes.
You can do all this in a text panel, and this is very similar to creating a contour with a multi-level list. For more information about multi-level lists, you can familiarize yourself with our lesson. 
Simply select the form you want to edit, then select the desired command. 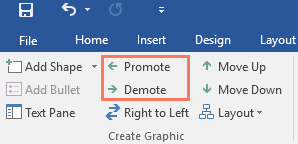


You can also downgrade and promote shapes from the task pane. This is very similar to creating a multi-level list schema. For more information, you can view our lesson on indents and line spacing.
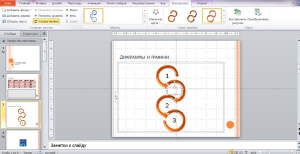
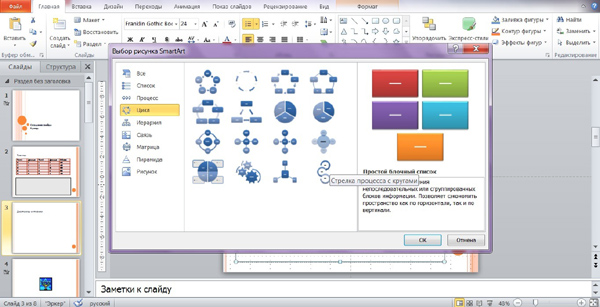
Users are given the opportunity to create a beautiful flowchart and organize text that is complex in structure by inserting a SmartArt graphic.
To do this, select the slide that contains the object to be adjusted, and click on the Insert SmartArt Picture button.
To change the order of the figures on the same level
If the new layout is too different from the original, some of your text may not be displayed. Before you decide on a new layout, carefully check to see if you will lose any important information. The presentation must contain at least two slides.
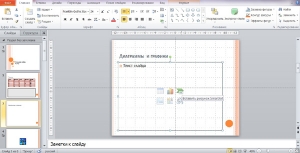
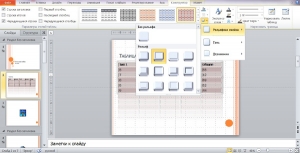
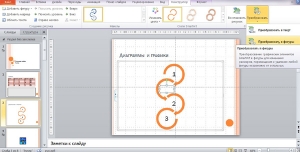
After the window for creating an object opens, the user can select the appropriate layout, taking into account the structure of the text and the presence of pictures.

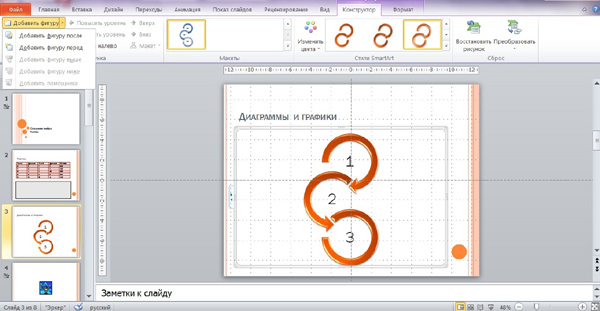
By selecting the layout, you can start editing the object. Text is inserted into the necessary columns.
If you place the cursor on one of the borders, the cursor changes to four small black arrows. Choose "Cut" from the drop-down menu to copy the image to the clipboard and remove it from the slide. Kirk Bennett began writing for websites and online publications. He covers topics in nutrition, health, horticulture, home improvement and information technology.
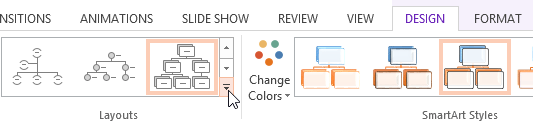
Work with organizational charts. Inserting, editing and formatting images Working with shapes and objects. For the layout we chose the “Pyramid List”. In short, the organization chart has the following options. Figure 4 - The "Organizational Chart" dialog box.
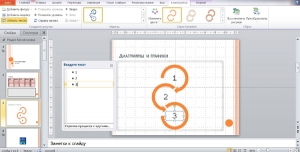
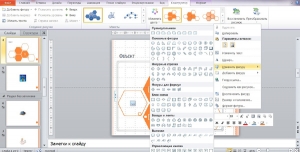
After the columns are filled with text, the style of the object is set - the presence of shadows, volume. The thickness of the lines is chosen to taste. Using the "Designer" tab, you can add and remove elements. To add the button click "Add figure."

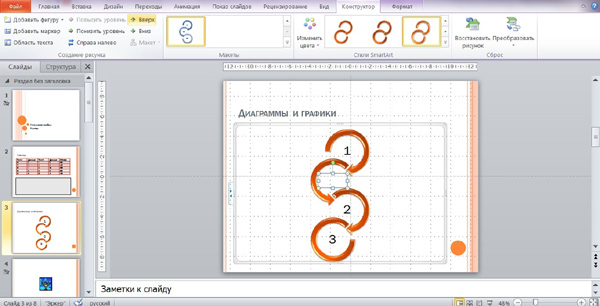
After adding a shape, you can embed it into the layout of the object, optionally fill it with text. At this stage, you can change the order of objects.
Organizational Chart Tip. It is very easy to make an organizational chart seemingly cluttered and difficult to read. The key to readability is pure simplicity. If you think that you may not need something, then most likely you will not.
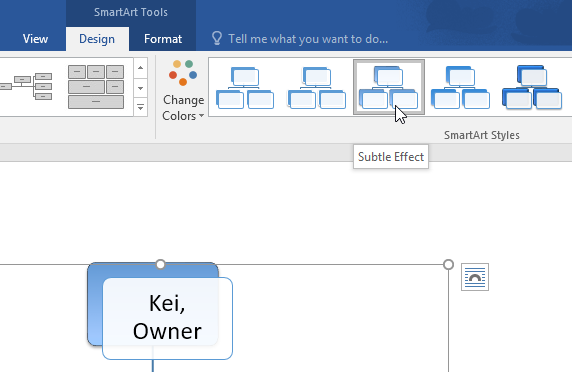
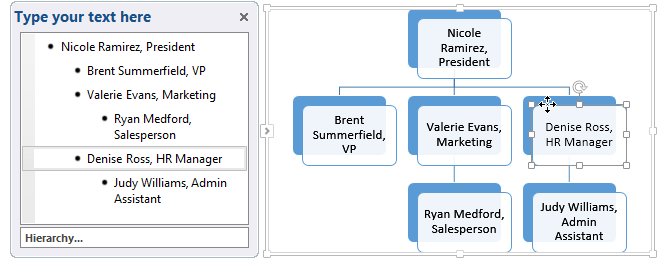
Figure 5 shows an example organization chart that has been filled out, formatted, and configured. We decided to use the simplest organizational scheme. To demonstrate that the junior executive director is on an equal footing with the Executive Assistant, we used the Add Form After command in the Create Graphics group on the Design of Intellectual Arts tab. We chose the Intensive Effect style for graphics and changed the color to blue and green.
To swap objects, select the desired item, and then click "Up" or "Down" on the toolbar.
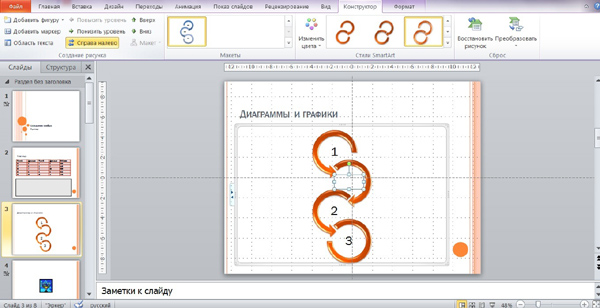
If the layout provides for the presence of arrows, the Right-to-Left button serves to change the direction of the text. By pressing the button, you can change the direction of the arrows to the opposite.
Figure 5 - Sample formatted organizational chart. Figure 6 - Inserting a clip. The clip organizer already has thousands of clips available for your use. Figure 8 - Selecting the mode of adding clips. Figure 9 - Automatic addition of clips.
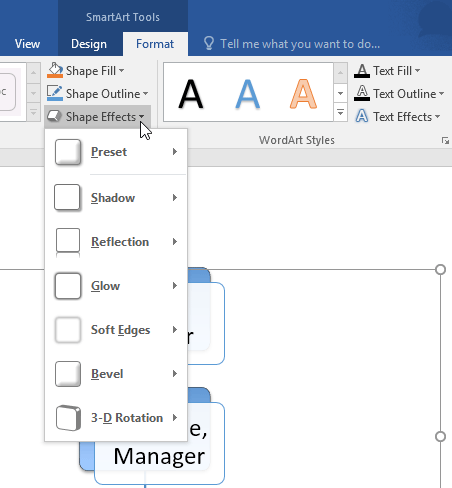
The Insert Picture dialog box appears. Figure 10 - Insert Picture Dialog Box. You can find the picture you want to use. Figure 12 shows the image that we formatted and configured. Using the Image Effects command in the Picture Styles group, we selected the Soft Circle bevel, changed the image shape to oval using the Image Shape command, and changed the three-dimensional rotation to Perspective Above.
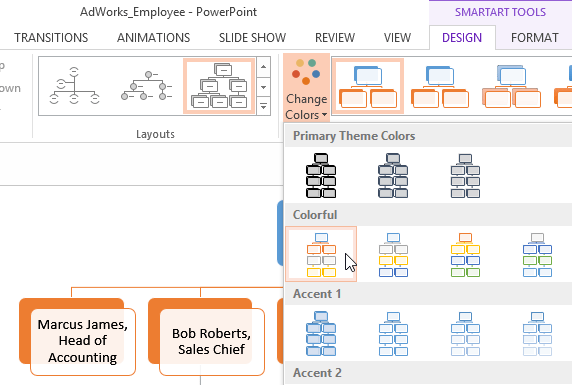
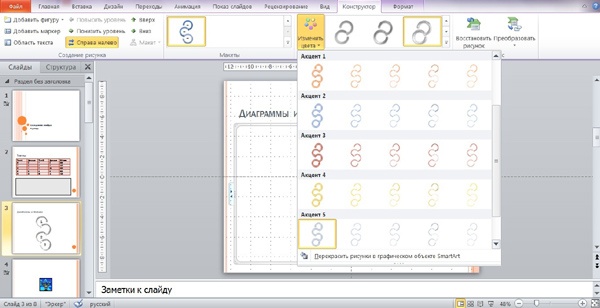
Any objects in the Power Point program can be edited, including the SmartArt drawing. You can change its color or place color accents. For these features, there are buttons "Accent" and "Change Color" on the toolbar.

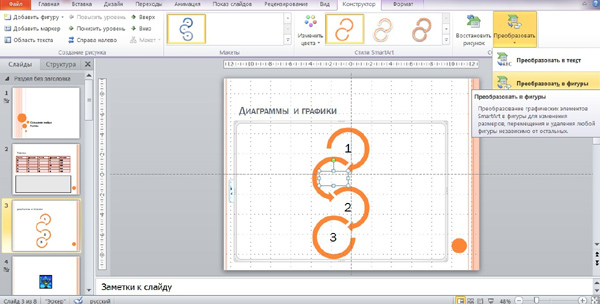
If necessary, the SmartArt design can be turned into a shape or text. If in a figure, the program will read it as a single drawing and will not allow editing. If the text, then the graphics structure will be removed. On the toolbar for turning objects into text and shape there is a tab "Convert to".
Figure 11 - Tab "Insert images and images." Figure 12 - Formatted image. Work with shapes and objects. In particular, a form is a basic object that can be placed on a slide, such as a callout, a circle, an arrow, a square, etc. As can be seen from Figure 13, there are many different options when it comes to choosing a shape. Figure 13 - Inserting forms.
When the shape is active, the "Format Drawing Tool" tab appears on the ribbon. Once your shape is inserted, you can format it just like any object. Figure 15 - An example of an individual form. Work with media clips and animations.
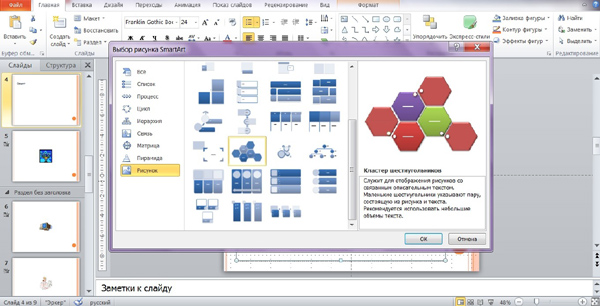
To create complex objects from drawings, while selecting the type of SmartArt object, click "Drawing". This will allow to combine pictures and text.

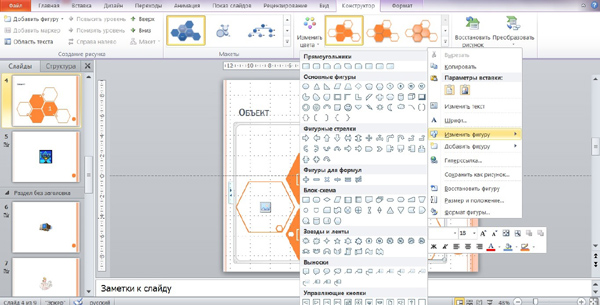
By activating this feature, you can format objects according to the standard rules described above.
Demonstrate an understanding of sound and movie file formats. The use of animated slide transitions. Apply custom animations to objects. However, it is important to remember that multimedia should always be added to the message of your presentation, and not distract attention from it.
To insert a sound or movie clip, simply select either the Movie command or the Sound in the Clamps group on the Insert tab. Let's say we want to add a round of applause at the end of the presentation. The clip will be displayed as an icon on the slide. Figure 3 - Insert Clip dialog box.
If SmartArt belongs to standard slide content, you can animate them. You can get this opportunity while editing a slide by going to the “Animation” tab.
Inserting animation is carried out on the same principle as in the case of images and text. Elements can be combined or appear separately (at a given speed in the recording mode of the show).
After you have inserted the selected sound or movie clip, you can customize the way they are presented. For example, you can loop the clip to play forever, hide the icon during a slideshow, or completely customize the icon to fit your presentation in the Image Tools tab. Figure 4 shows the “Sound Instruments Parameters” tab.
Figure 4 - Sound Instruments Parameters Tab. The first is to animate the transitions between slides, and the second is to apply animation to objects. Slides transitions can be set using the slider view or normal view. To set transitions, simply select the slide to which you want to apply an animated transition, and in the Transition section to this group of slides, select an animation of your choice.
The program Power Pоint makes it possible to insert not only simple objects (pictures or video clips) into the slides, but also objects such as SmartArt tables and pictures.
Working with a table in Power Point begins by selecting the appropriate layout of the slide that contains the object. The user then selects the " Insert tableAnd switches to the table editing mode, setting the number of rows and columns.
Figure 5 - Parameters of the transition to the slide. To apply an animation to an object, select the object that you want to animate, and then use the "Custom Animation" button on the "Animations" tab, which will display the "Custom Animation" taskbar on the right side of the screen. Four basic options for custom animation of objects: input, output, selection and motion paths; each one has several animation options to choose from.
Figure 6 - Custom animations. Select a category from the list on the left side of the dialog box. By doing this, you will see its contents in the panel on the right. It contains tabs "Design" and "Format". This does not interfere with the placement of elements within the graphic object. Then press the “Delete” or “Del” key on the keyboard to delete all the graphics.
Having determined the dimensions of the table, the user selects the type of the table and its design (color, style, presence of the final rows / columns).
After entering the data, you can continue editing the appearance of the table. Selecting the " Fill", The user can change the color of the table, and the button" Cell"- display style of a single cell.
Tracing your family tree can be a lot of work. It can also be difficult to show your relationships, as well as fill in the gaps in the family tree, if you do not have any visual assistance. Since this is an animated template, each tab opens one after the other. If you plan to create a presentation for employee training, product descriptions, history, marketing strategy, experimental results, a business plan, or simply want to create a beautiful list, then you have come to the right place.
If you are tasked with creating a complex presentation project in which you need to tackle processes and steps, you need to know the importance of keeping it short but detailed. When discussing the process, whether in a corporate or academic environment, it is important to present each step or step in such a way that everyone can easily understand and remember. Such an approach to the presentation of the process is important, especially when training employees, clarifying details to interested parties or raising awareness.

In addition to standard tables, the user can insert his own table by clicking on the " Draw a table».
In addition, each cell is drawn separately or the general field selected by the user is divided into cells. If you want to remove cells from the table, you can erase the elements by selecting the function “ Eraser».

You can streamline the complex structure of the text and develop an interesting flowchart using the SmartArt graphic.
To create an object, select the corresponding slide (containing the object) and click the " Insert SmartArt Drawing».

Before the user opens the window for creating an object. Depending on the structure of information and the availability of pictures, the user chooses the desired layout.
After the layout is selected, editing of the object begins. The text is inserted into the appropriate boxes.

After writing the text, the user sets the style of the object, choosing the thickness of the lines, the presence of shadow or volume. In addition, in the contribution " Constructor"The user can add or remove items using the" Add a shape».
The added shape is embedded in the layout of the object and can also be filled with text. In addition, you can change the order of objects.
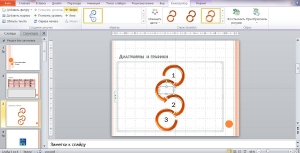
In order to change the elements in places, you need to select the desired element and click " Up" or " Way down"On the toolbar.
If there are arrows in the object layout, you can change the direction of the text following by clicking on the “ From right to left". When you press this button, the direction of all arrows changes to the opposite.
Like any object in the Power Point program, a SmartArt graphic can be edited by changing the color of the object and placing color accents. To do this, select the button “ Change color"And" Accent».
A SmartArt object can be converted to a shape (editing will be impossible, the object will be treated as a single drawing by the program) or text (then the graphic display of the structure will automatically be deleted). Conversion of objects is done in the tab “ Convert to"On the toolbar.
If you need to make a structured object from the drawings, you need to select the type of SmartArt object “ Picture". This type is suitable for the arrangement of pictures and text as a whole.
In such a case, standard formatting of objects is possible, as described above.
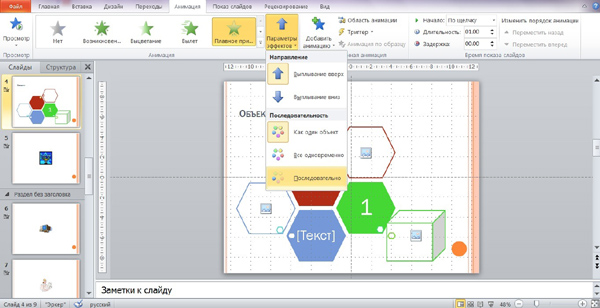
SmartArt objects, being standard slide content, can be animated. To do this, the user, when editing the current slide, goes to the tab “ Animation».
The task of animation for an object occurs in a standard way, i.e. same as for text or image. Elements of an object can appear as a whole, or separately. In the latter case, you can set the speed at which each element of the object appears (in the recording mode of the show).
Test drive of the program was conducted by Ekaterina Yanyutina, portal How to make a presentation