Three ways to install a plugin in WordPress.
skin Suchasna Lyudina Vikoristova uses plugins in her life. But not all people know what they are, what they look like and, obviously, do not install them, adjust them, or turn on unnecessary ones.
In this article, I will try, as simply as possible, to inform you about what these plugins are and what they are for. In another part of the article, I will show you how to install add-ons for a website on WordPress.
However, plugins are small programs that add functionality to the main programs for which they are created. It may seem simpler - it’s not superfluous, additional or corrected, but the resulting program becomes more beautiful (functional) from the point of view of a particular developer.
The peculiarity of these programs lies in the fact that they cannot work independently, but are additional, as they produce less results when connected to the main program. At the same time, the basic program for which plugins are created can miraculously manage without them.
Additional ones are being created for different categories of programs, but the most popular are such “add-ons” for games, add-ons that work with the Internet, such as web browsers and for sites, more precisely for their management systems. I would like a lot of other programs to have similar functionality, for example Photoshop.
What plugins do you need?
Once we understand what plugins are, you may be left with a more logical question - “What do you need?” It’s not easier to immediately add all the necessary functionality to the program and not bother with installing and adjusting additional functions.
Efficient, simpler, but not more effective. Modules include 2 important functions:
Take it easy and speed up the program
First of all, as soon as all programs are released with full functionality, they will become even greater and will occupy a special place. Also, unneeded utility functions will consume computer resources, which will reduce the speed of required programs.
As a result, the merchant receives great obligations from non-victory data and a wide range of benefits. The inclusion of plugins in this form allows you to connect only those functions that are needed by the skin specific person. The configuration of the programs is created according to the individual needs of the skin scrubber, as a result of which the supplement takes up less space and works faster.
Allow to customize programs
The use of a modular scheme in the robotic program, where the skin plugin can be connected or enabled without affecting the basic functions of the robot, allows you to operate programs not only by the developers, but also by other programs c. For example, if you need to add some functionality to the program, you simply write such a plugin, and do not wait until the developer decides to add the functionality you need.
How to install the plugin?
Note that they can be installed in two ways:
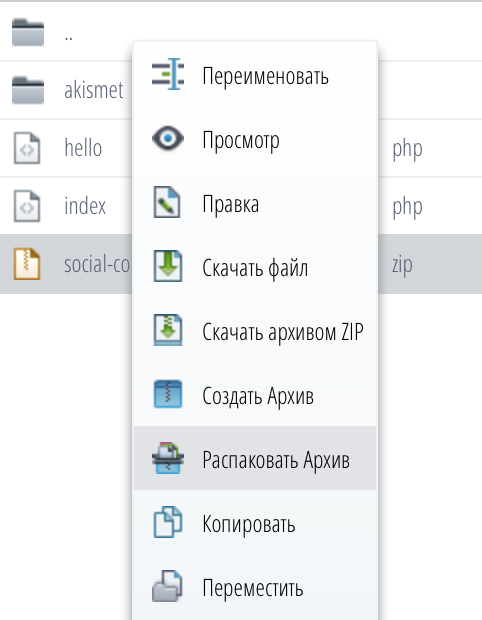
- Direct copying of files with code special folder programs
- Installation through a special menu in the program itself, if such a possibility is realized
Naturally, for any program the installation process is individual. As I already said, most often I stick with two types of plugins - for my sites and for web browsers. I will give a report about them.
How to install plugins on WordPress?
WordPress is a special program for website management, and I use it for my resources. It is, of course, famous for the great number of all kinds of additions that can be added to the site, be it any functions. My list of plugins for wordpress.
Once I've done it, I watched a video tutorial on installing plugins for this program:
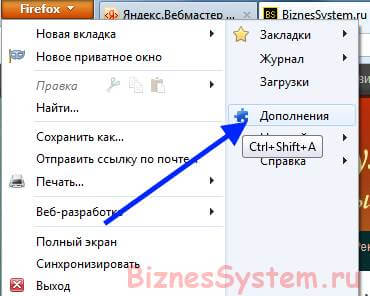
How to install a plugin for the Firefox browser?
For a web browser, all plugins are installed either automatically, when you open any pages or add-ons, or they can be installed manually by searching for plugins.
With automatic ones you can mean the following:
- When you try to watch a video on the Internet, whatever page appears, it will prompt you to install it and navigate through all the steps. The same will happen when you try to open a pdf. A lot of additional information is installed automatically.
Some functions for the browser must be added manually. To do this, in the browser, open the page again, press the axis button:
 After that, you can select the required additions from the recommended lists or search quickly.
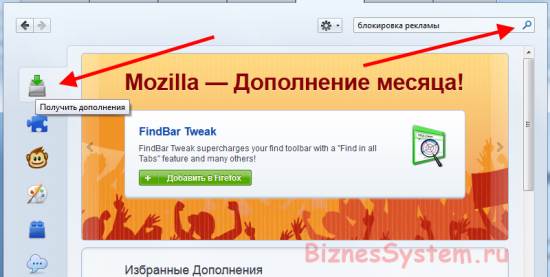 For example, I searched for “ad blocking” and selected the list of two additional options following the description. All you need to install them is click the install button.
Installing plugins in WordPress involves three different steps - automatically search for plugins in the official WordPress catalog through the interface; manually, by downloading the ZIP archive from your computer to the site and further activating it; Or you can save the archive on FTP to your hosting.
Let's look at all three options and start installing plugins in any situation! 😉
Respect!
Avoid this situation if you have a lot of installed or inactive plugins. Whether an additional plugin will in one way or the other be a potential breakthrough in the lack of security of the site. Look at the plugins, as long as you don’t take advantage of them!
Automatic installation of the plugin is required in most cases, if the required plugin is on the official WordPress website (I looked at the instructions in the instructions).
The installation itself comes down to a simple set of steps:
- Know the required plugin for keywords
- Installs plugin selections
- Activation and further configuration
The search for plugins can be found in the “Modules” interface - “Add new”. When you enter the add plugins interface, the most popular and recommended plugins will be displayed.
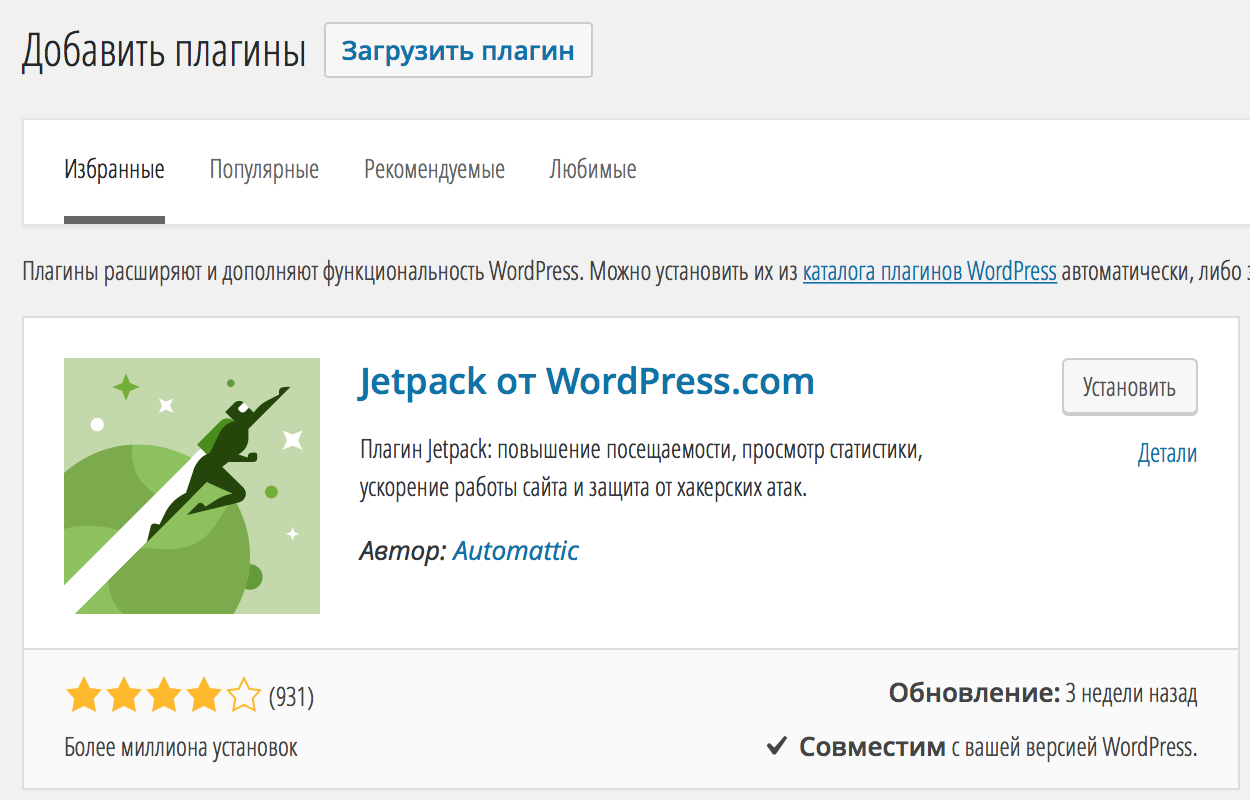
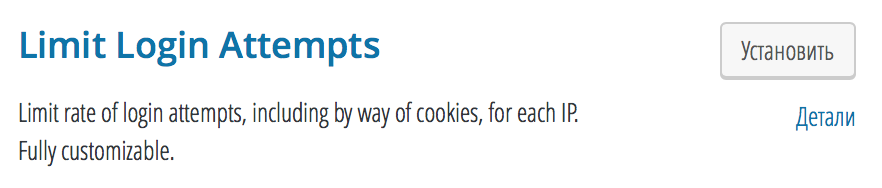
On the right side of the screen, quickly search for the name of the plugin. For example, I will try to find out and install the Limit Login Attempts plugin, which blocks attempts to select passwords in the WordPress admin.
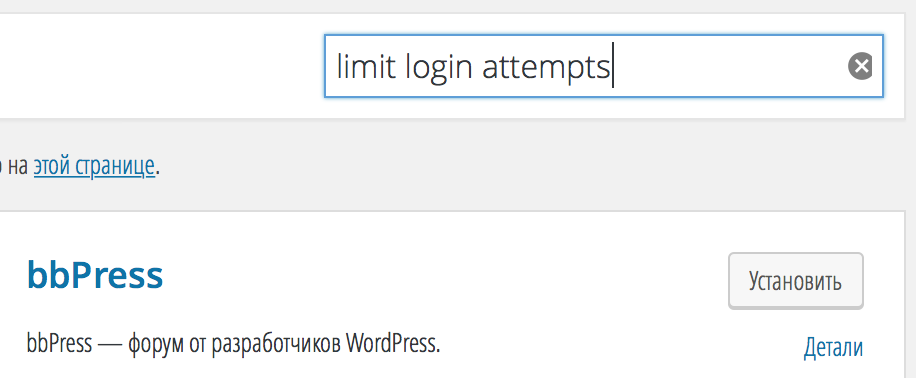
A number of plugins of the same type will be selected and you will need to decide which one suits your needs. I've always been in love with this, that evil is burning, it has more than a million installations and a plugin of revisions every hour. The plugin works with the remaining version of WordPress and is not updated for a simple reason - there is nothing to update, it just works and that's it.
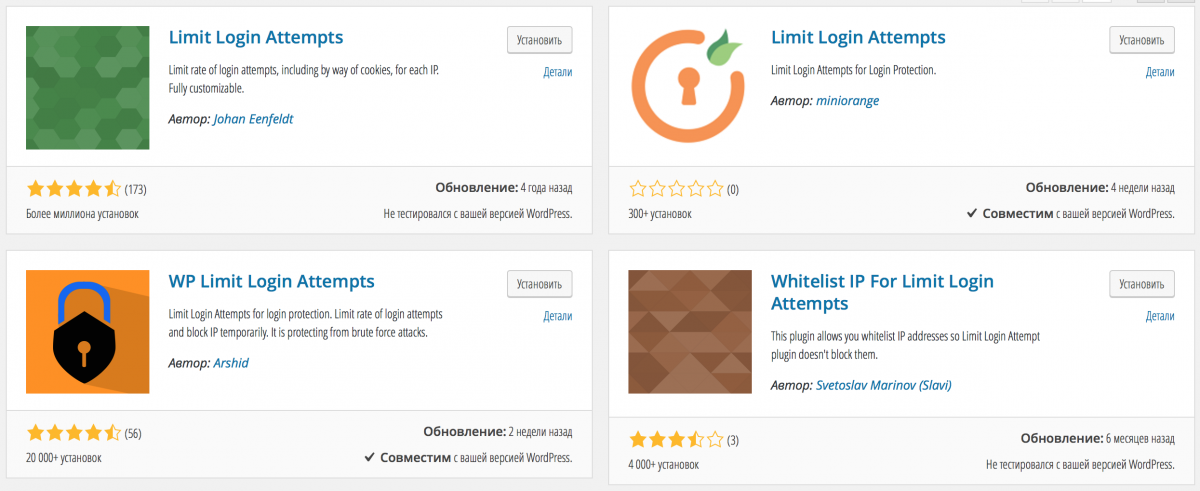
Respect!
I still recommend installing plugins, which are definitely crazy remaining versions WordPress to avoid problems with upcoming updates. I myself only use those that I have checked on dozens of sites and can allow myself access to the rules, but I don’t recommend you to try anything :)
Once you have installed the plugin you need, you can no longer click on the “Install” button in the plugin card and the archive with the plugin will automatically download to your hosting or server. WordPress can independently extract from the archive instead of the plugin and install it wherever needed.
Now you need to activate the plugin so that you can start trading on your site. If you can’t create something, then there won’t be an option to configure the plugin in the WordPress menu. Hurry up to activate and get started before you get started! 🙂
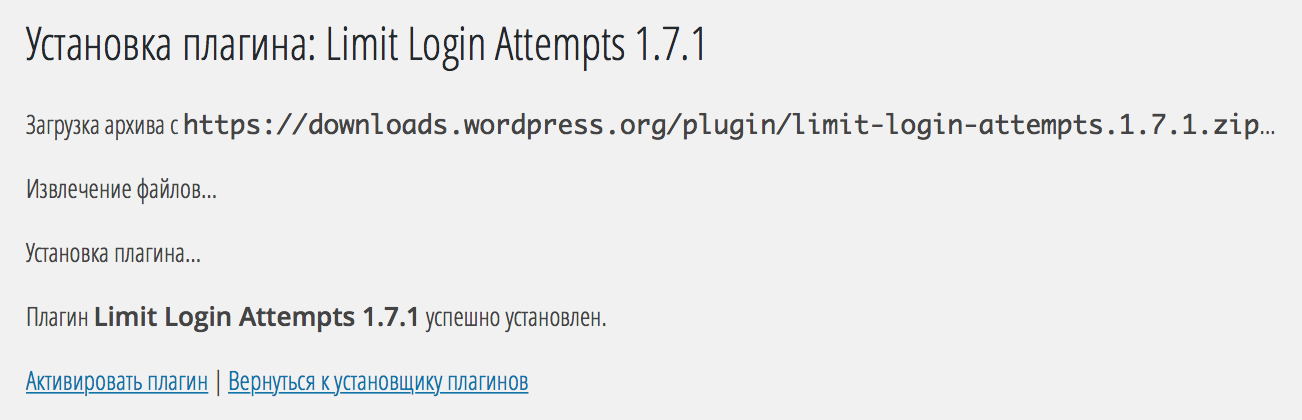
In general, this completes the installation of the plugin. As you may have noticed, everything is as simple as one-two-three, absolutely no additional knowledge (besides the difficulty of knowing the plugin you need) will not be required.
How to install a plugin on WordPress manually using the ZIP archive
Another method will come in handy for you if you have purchased the plugin from one of the popular and trusted online stores (I recommend CodeCanyon.net) or downloaded it from the retailer’s website.
I’ll tell you about every mishap to save you from problems: Never trust those who give you evil versions paid plugins, This will bring you only problems and no satisfaction in the form of violence!
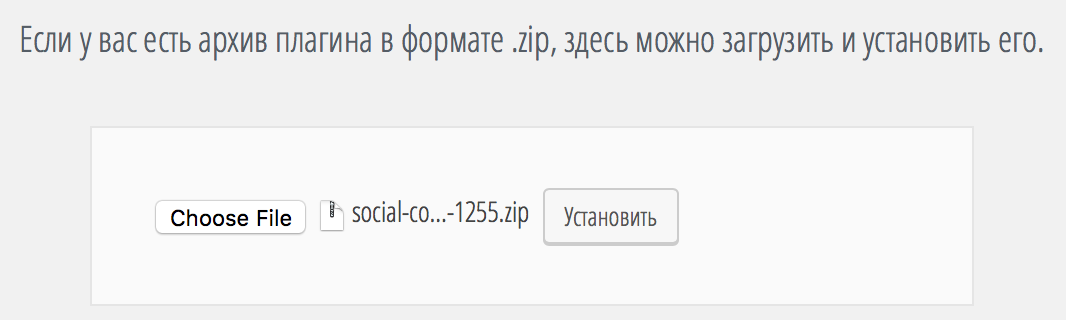
So, after purchasing the plugin, you will have more ZIP archives, which do not need to be further unpacked or manipulated in any way. Everything comes down to being implemented through the same plugin management interface in WordPress.
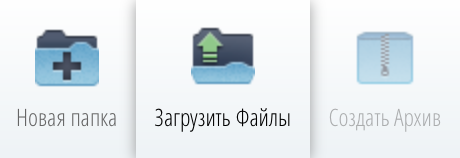
Go to the “Modules” section - “Add new” and click on the “Add plugin” button:
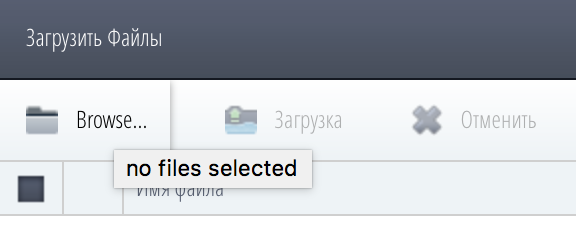
Select the archives on your computer and click on the “Install” button:
The archives will be transferred to your hosting and after that you will only lose the ability to activate it. After this you can proceed to setting up your plugin. It's simple! 🙂
This may be the case if your plugin is in the archive. So, you have ZIP archives, which contain documentation, and the plugin itself is located in the middle of this archive. In this case you can refuse a similar favor when attracted:

As a result of this information, you need to download the archives and find out in the new ZIP archives that the name matches the name of your plugin (to check, you can extract it in addition, there are files from extension.PHP with the name of your plugin) .
Then try to download the whole ZIP archive attachment (and not the PHP files themselves) and you won’t have any problems with the installation.
Installing the plugin on FTP of your hosting
Finally, let’s look at the shortest way to install a plugin, which can be useful in the event that your WordPress is set up in such a way as to protect the import of plugins through the admin panel (I’ll look at correcting this situation in another instructions).
FTP is a way to access files on your website via special program, Installed on your computer or through the file control panel on your hosting (there is a lot of such possibility, see what is possible on the hosting).
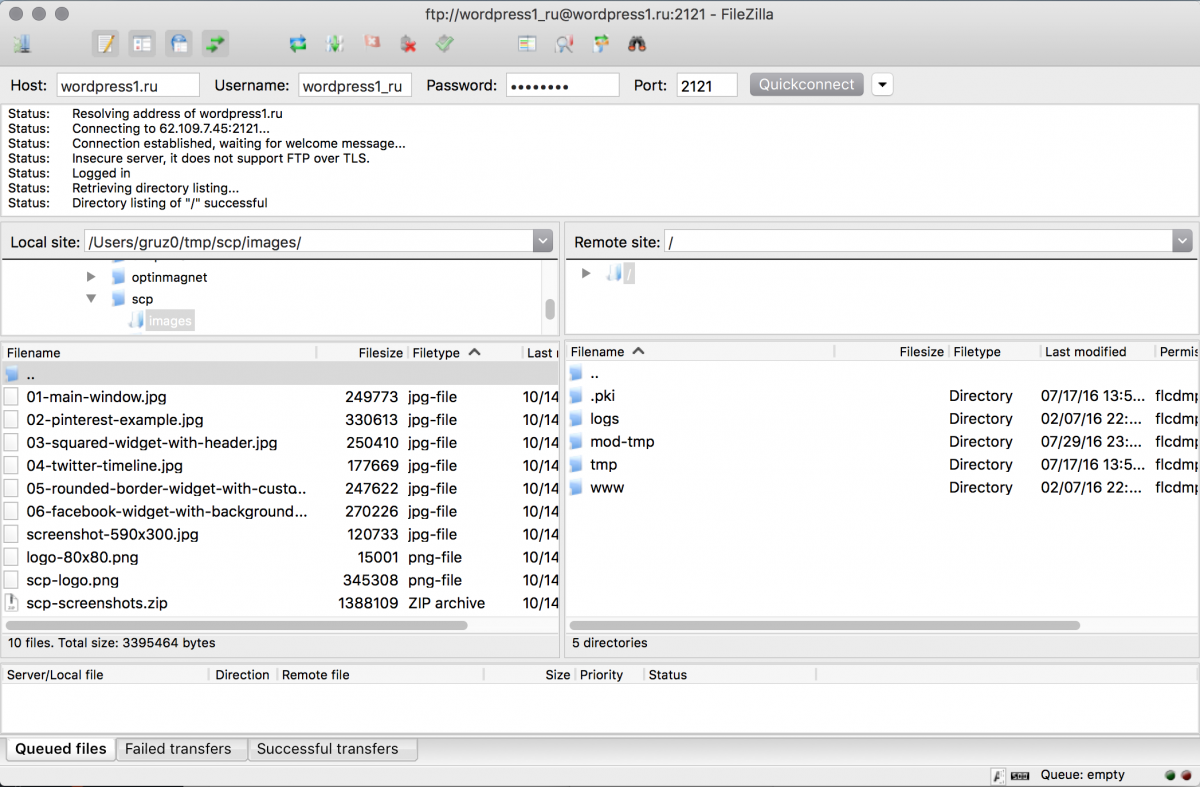
For FTP work, I use the popular (and recommend to everyone) program FileZilla. This is a cost-free client that is accessible to all popular operating systems. By the way, the instructions will be shortened, but for now I’ll just give sequence algorithm, Which allows you to install the plugin.
The program interface is Russian, so there won’t be any special problems with it. This is how the program looks like after connecting to hosting, and then my English(I’m making fun of the English language, don’t shout at that):
You will need to enter your details to connect to hosting. You can check them in the hosting control panel in the FTP section, so these data are often sent to you immediately after the purchase tariff plan or placement on the site.
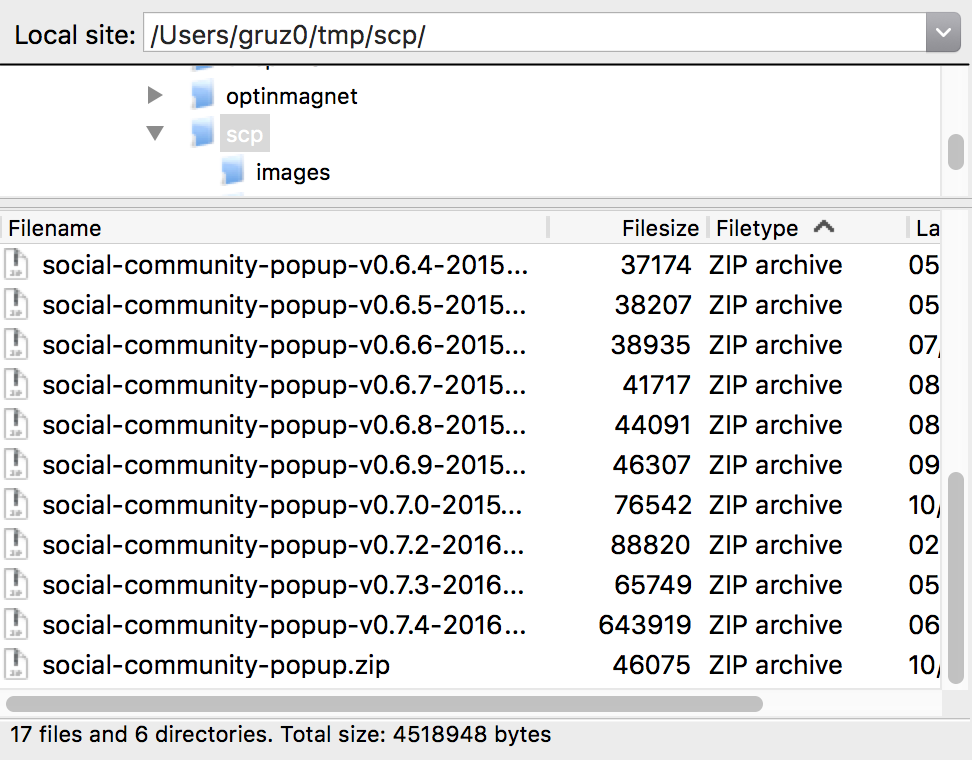
The Evil panel displays the files on your computer:
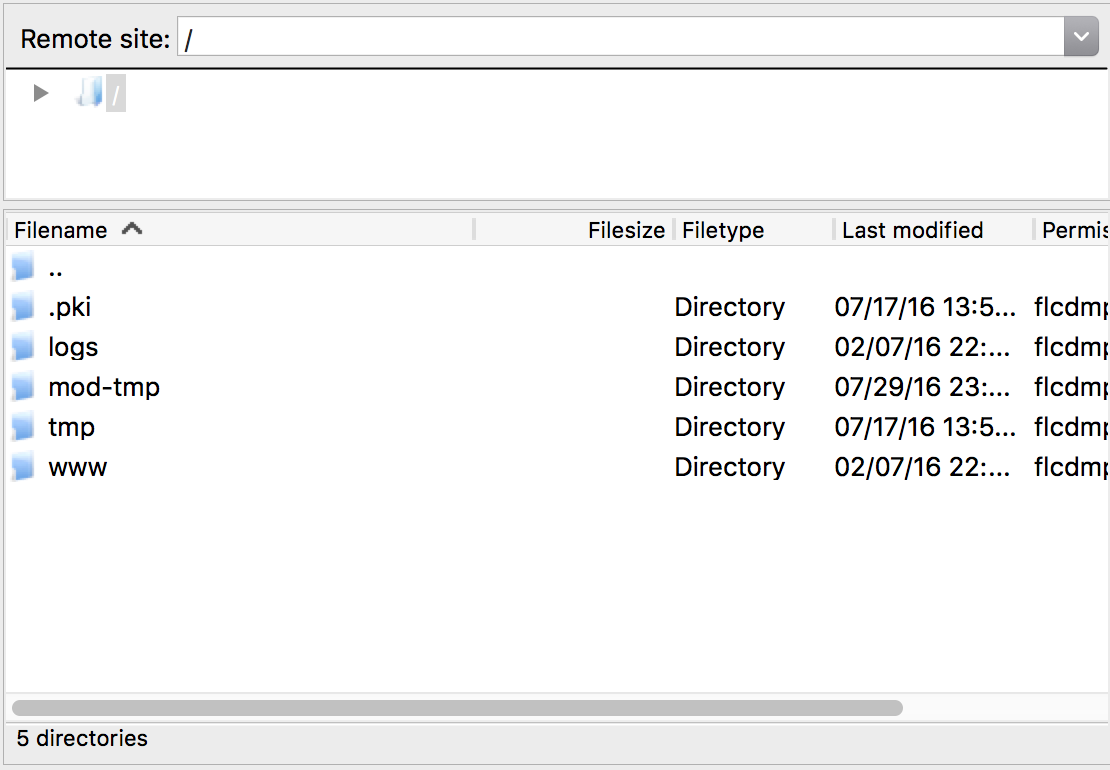
And in the panel on the right is what is on your hosting:
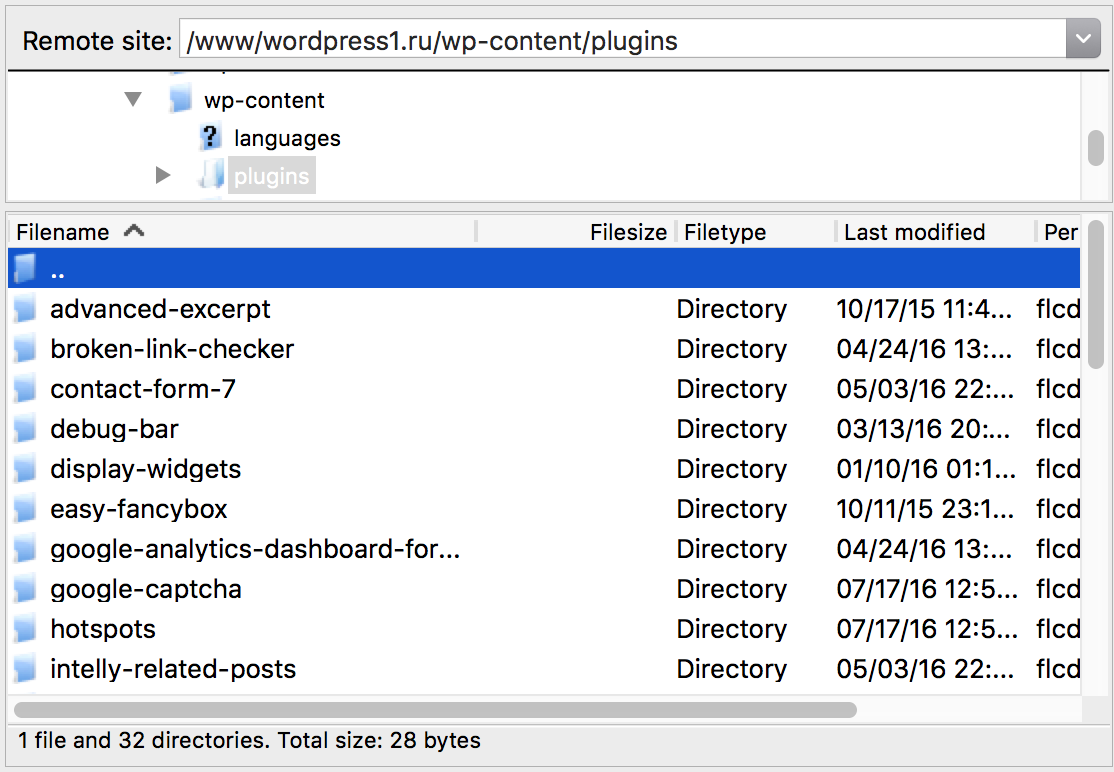
You need to know the www directory, public_html or the name of your site. The wp-config.php file, which is always located at the “root” of your site, will help you determine the correct directory.
After this click, go to the wp-content directory, then go to plugins and you can add more plugins installed on your website.
Everything is simple: on your computer, download the files of your plugin from a ZIP archive so that they are located in the directory with the name of the plugin. For example, for the Social plugin Media Popup In the archive with the name social-media-popup.zip, the folder will be called social-media-popup and in the middle there will be files with PHP extensions.
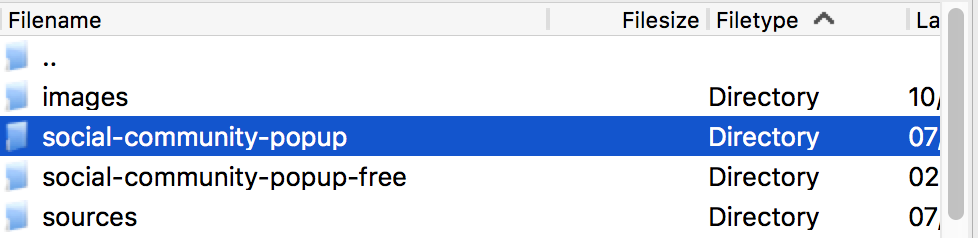
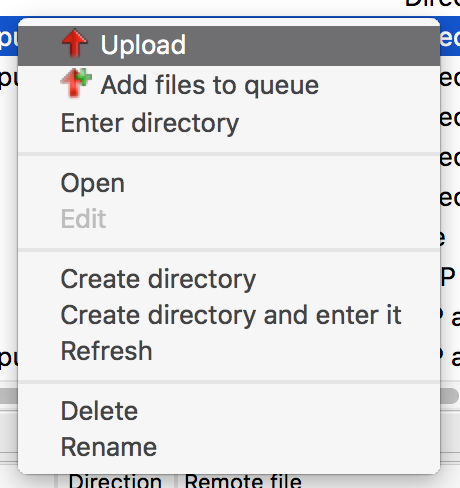
After this, we drag the entire folder to the right panel or click on it right button click and select the item “Enter” (for the Russian version of the FileZilla program) or “Upload” (for the English version):
Respect!
It is necessary to secure the directory itself with PHP files, and not ZIP archives, as you may end up with a lot of money. If you download archives, then WordPress will not work and installing the plugin will not work.
Once you have selected the plugin directory, it will appear in the “Modules” section of the admin panel of your site. Now you just need to activate the plugin and start working with it. 🙂
Hosted file manager wiki
If you do not want to install FileZilla on your computer, there is no less simple way to add archives with the plugin to your website. For this reason, you should quickly use a hosting file manager (I use Beget.ru, look at it).
I’ll look at everything on the Beget hosting application, in your opinion it’s a modern look file manager The directory structure and available actions on files and archives may differ from those presented in the instructions.
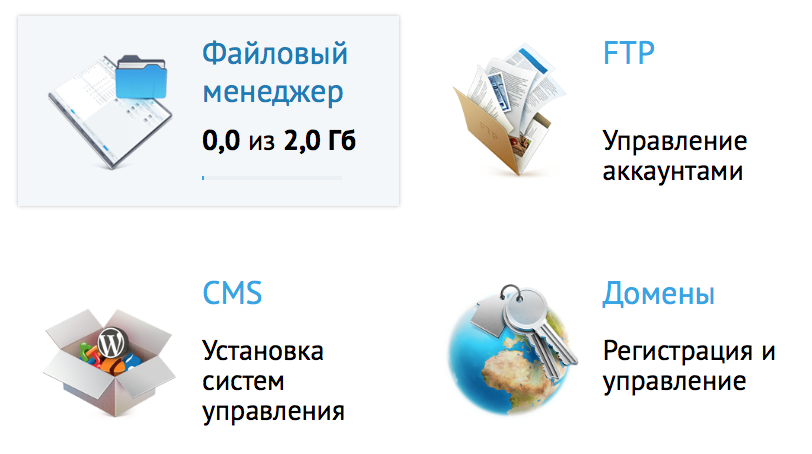
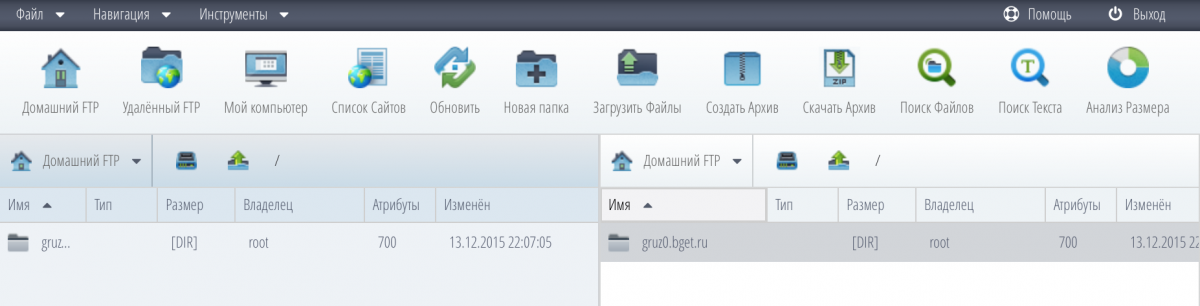
After logging into the hosting panel, you will see the File Manager item:
The new window will open the file management interface for your hosting. Both panels will show your home directory:
In any of the panels, go to the name of your site, then go to www or public_html, and then by analogy with the first point: wp-content, and then to plugins. You will see directories with already installed plugins:
Find the button for importing files in the toolbar:
Select ZIP archives (this is important!) To view your computer:
Download the file and you will see it on the screen:
After that, you will need to see the downloaded archives in the panel where you downloaded your archive, press the right mouse button and select the item “Unpack archives”:
Your plugin will be installed in WordPress and you will only have to activate it in the “Modules” section of the admin panel of your site. That's all! 🙂
visnovok
We and everyone looked at you possible ways installing the plugin on your site. Which option to choose is up to you. I especially give priority to downloading the plugin first on the official WordPress site, since for some reason installation is not possible, and I will also download ZIP archives.
I trust that this instruction has been helpful to you and you will share the messages on it in social measures for your friends and acquaintances. See you again! 😉
If you have found a solution - see a fragment of the text and press Ctrl + Enter.
Share messages for instructions with your friends!How do you place food? where to install plugins? » Those after installation, singing, singing - how to know them?
To my knowledge, I realized that installing a plugin on the WordPress platform is not enough, the plugin needs to be adjusted! And to get started, you need to know who is on the list... Since you are new to the topic of creating blogs, and especially with the English word “v”, then my instructions will quickly help you get used to it. I prepared a number of pictures with tips and in this article I will show them. There will be clues in the pictures, so you can find the required plugin in the admin in order to set it up.
Ale for the cob, I still need to get some food." where to install plugins »!
In the WordPress admin, everything is easy to do.
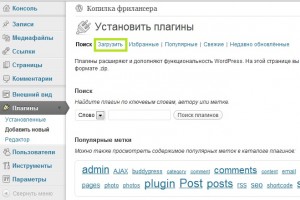
let's go to Console / Modules / Add new.
Key on the button "Zavantazhit"
Select a file and press "Install"
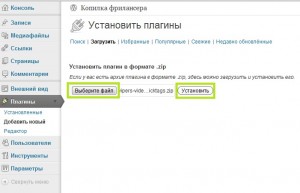
I want to respect that you need to install archives from . zip expanded If you have purchased a plugin, and it is, for example, in .rar, then you need to unzip it and place it in a zip.
Well, more food, where to install plugins:)? Good. Let's go!
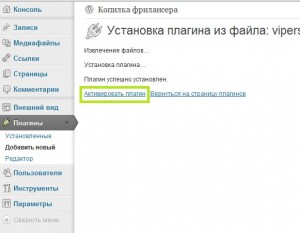
After installation, the plugin will need to be activated:
And nutrition is to blame here: “How can I know how many plugins have been installed and activated?” On the right is that after activation, WordPrees redirects us to a page with a complete list of plugins.
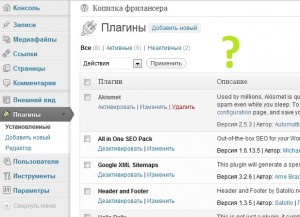
And in order to make the settings, you need to know where the plugin is installed and configure it. Instruct all plugins to be used in "Parameter", Inodі y « External look» , And even earlier in "Instruments".
Before speaking, depending on the version of WordPress, items may differ and be called slightly differently. Let my pictures help you get your bearings!
I won’t show you how to set up plugins right now, since everything depends on the plugin.
Well then, where to install plugins I showed you, now I’ll show you how to know them.
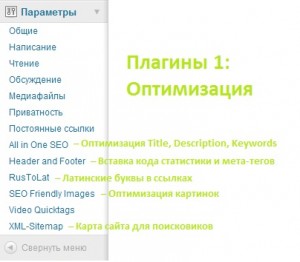
Before the speech, the plugins indicated in the picture are the main ones and one of the first plugins that you need to install after installing WordPress.
All in One SEO - Optimization Title, Description, Keywords
Header and Footer - Insert statistics and meta tags into code
SEO Friendly Images - Image Optimization
XML -Sitemap - Site map for search engines
That's all! I hope you enjoyed this PrtSc instruction! I tried to create as much as possible reporting instructions, To check your meal plan date - where to install plugins.