Yak zrobiti photo yak paint for additional help PhotoShop
Often, photographers want to learn how to make use of photographs of babies, so that they can further deconstruct the photograph and save them as babies. Let's take a look for ourselves effective ways.
Let's take a look at the sprat for the cob popular services, with the help of which you can quickly create a baby effect in a photograph without installing additional security software to the computer.
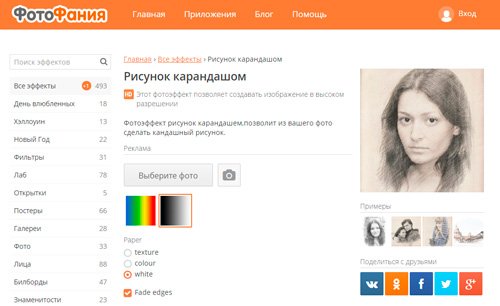
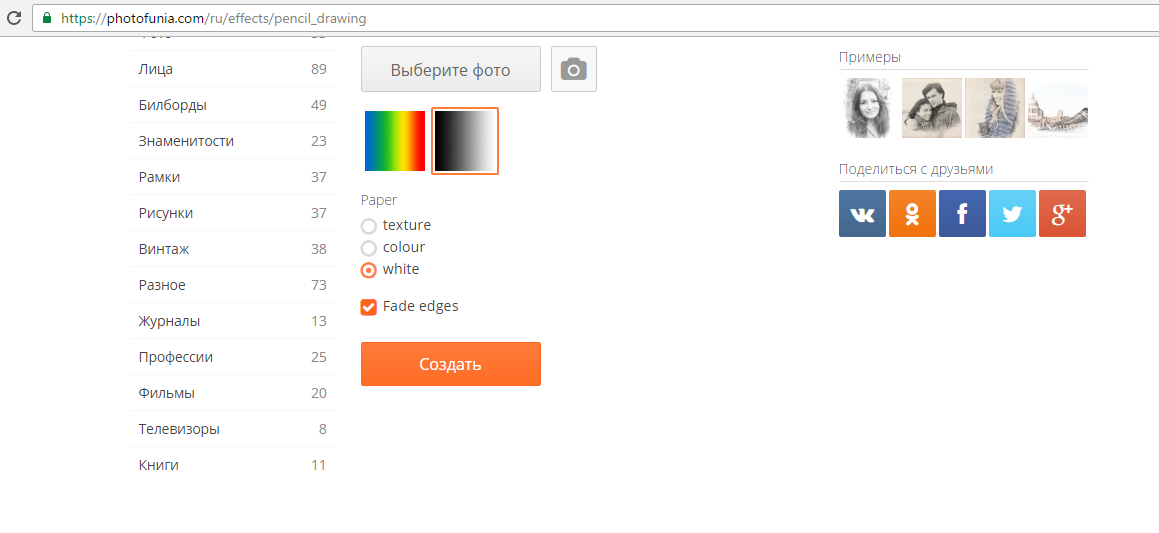
Photo Phunia Service
On this site, players can use an automatic effect, with the help of which the picture is simply transformed into a baby. You can also select a texture for the background of the output file: color, white or special.
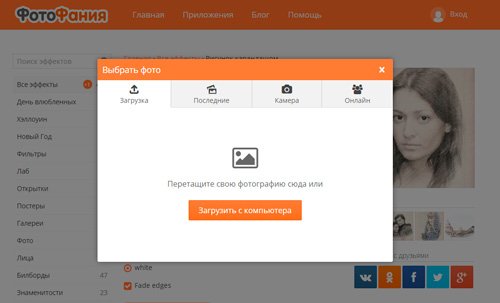
To send it to the robot, copy the file to your PC. For this purpose, press a copy of Browse on the site.
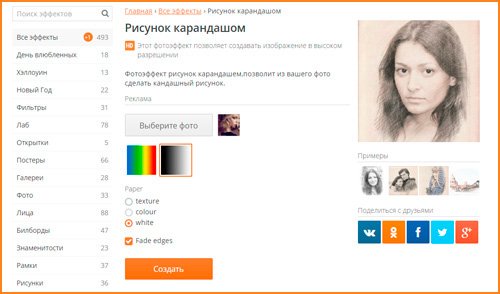
Then select the color scheme of the image (black and white or color).
Click on the texture shape you want to output, and click the “Create” button to print the process of creating the file.
In a few seconds, a direct message will be generated to download the image from the site.
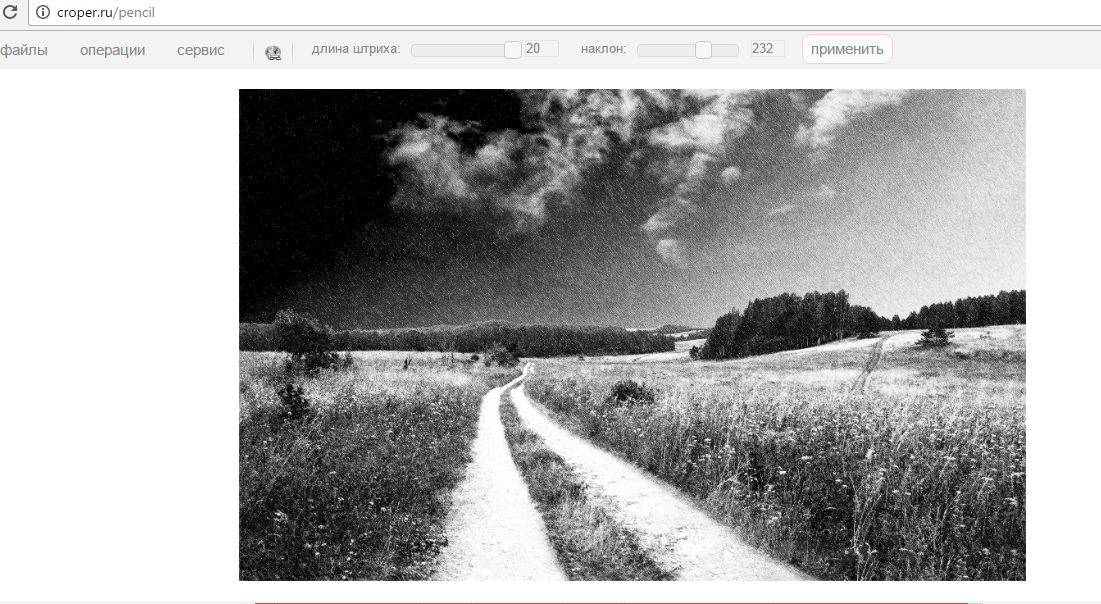
Service Croper
The most popular website for creating a little one with a unique picture is Croper. Tsey online photo editor Allows you to view additional effects before photographing them.
For more help you can do unique images without wasting juice.
One of the most popular features of this site is the baby sheep function.
When reworking the file, the dark tones of the image are created, then strokes are gradually applied to the balls of the picture, which, in their own way, create a sketch.
The editor interface is very simple. Upload the file to the site by clicking the above button.
The picture will appear on the new website. After this, you will find the tabs of the main menu - they are located at the top of the site. Click on “Operations” - “Effects” - “Olivets”.
At the top of the page, select the options for the last stroke and the last stroke.
Then press the button to start the image transformation process.
This loan is no more than one piece. As required, you can adjust the contrast of the end picture.
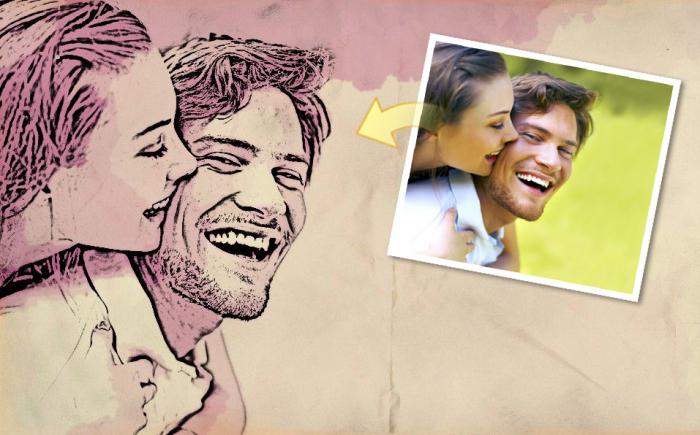
The result of the Croper robot is shown below.
Creation of a baby in Adobe Photoshop
With the help of Photoshop, you can also create a baby sheep from the original picture.
By using the program's functions, you can achieve a clear display of all strokes and a natural-looking image.
The effect of the baby will be clearly visible if you unzip it on the printer. For greater effect, you can quickly apply white or craft paper.
All points below are shown in Photoshop programs CS6. All functions are available in the latest and all new versions of the program.
We will use the original scanned photograph; We recommend that when working with Photoshop, you do not distort small images, and even after setting the effect to a small size, some of the pixels may be crushed, which will reduce the brightness of the small-sized image.
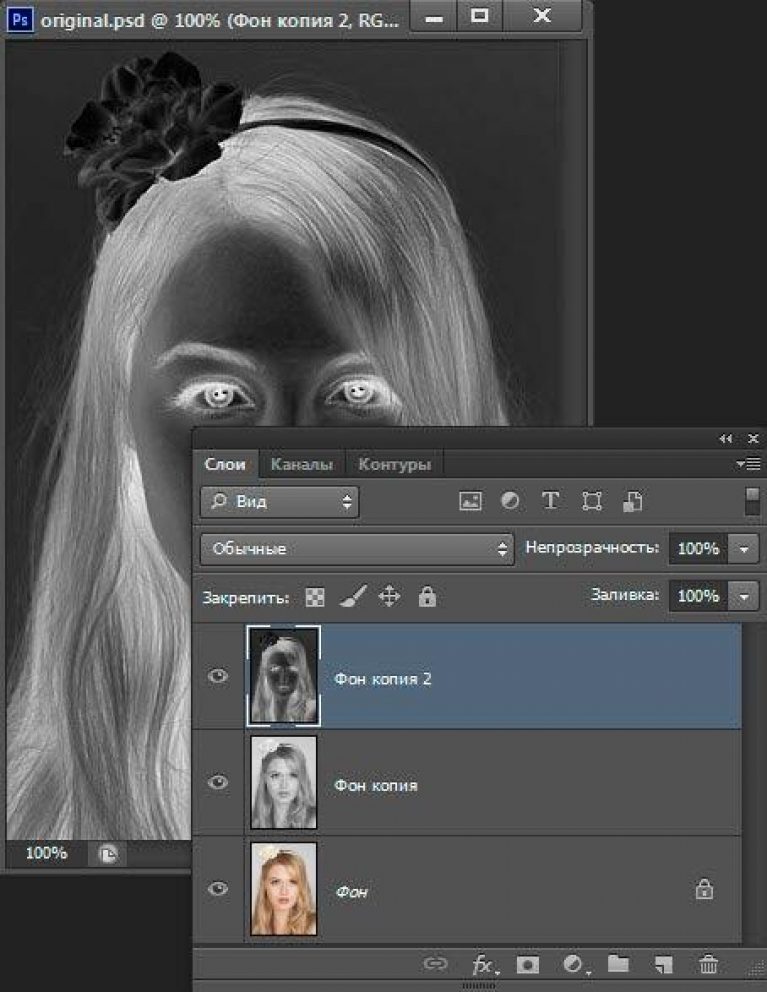
We first need to copy the original image.
To do this, open the image in the program, select the desired toolbar and press the F7 button. Then press Ctrl - J on the corresponding buttons. In this way you will create a duplicate of the ball.
To do this, press the Image button (at the top of the program menu). Click on "Correction" - "Inversion". Also, to save time for the ball, just press the Ctrl and I keys at once.
As a result, we reject the negative image, and not the black and white version. All light parts of the photo will become dark, and all dark parts will become light.
In the tear-out ball panel, the negative will be displayed as another copy of the original ball. Next, you can change the mode of displaying the ball. Click on ball 2 and in the “Mode” row, open the list that appears. Click on “Brightening the basis”.
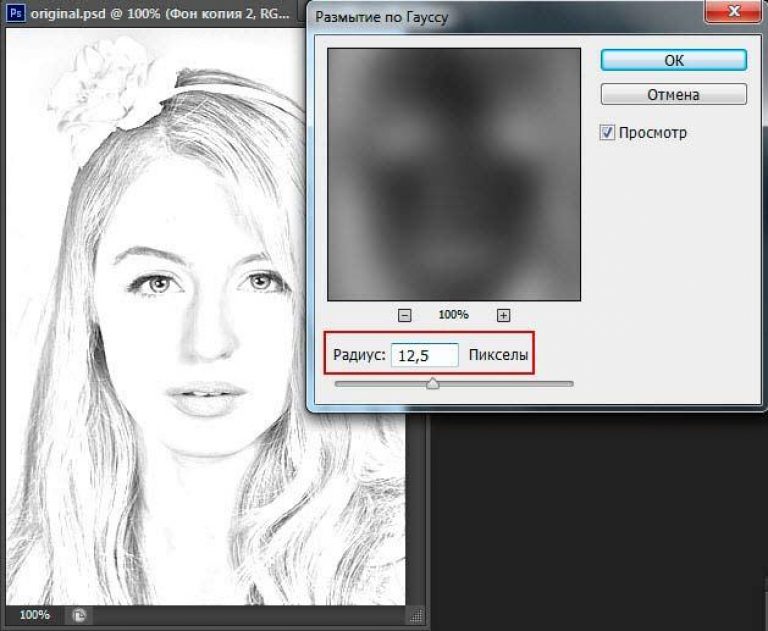
After changing the canvas mode, the project will become completely or partially white. On the main menu panel, click "Filter" - "Display".
From the registered list, select "Gaussian Role". At the window, adjust the slider to adjust the spread level.
The more significant the display, the brighter is the picture, the swelling outlines of the daubed.
Important! Do not overdo it with the blur filter, otherwise the photo may become too light and the effect will be ruined. The optimal blur value is 12.5 – 13 pixels.
This method of sparing allows you to achieve maximum clarity of the strokes of the picture, not to lose pixels, and preserve the separateness of the picture. Like Bachimo, the picture became brighter, but it didn’t become quite bright.
Go to the "balls" window and select the first ball, as shown in the picture below. Then carry the indicator until the name of the ball and wait for it to appear context menu. Click on the item “Combine visible balls”. squeeze Alt button And the clerk will see all three balls that need to be combined.
Select the top ball (ball 1). It is necessary to change the display mode to multiply. This allows you to darken the skin line of the sketch, giving the sketch more naturalness.
The lines are not to blame for being too dark. If this happens, adjust the “Blindness” parameter to 50%. It is necessary to preserve the color of the “simple” olive.
This is where you can end the work. As a result, we are obsessed with the black-and-white sketch of a cob photograph. If you need to add a little color to the sketch, create a copy of the background ball by pressing Ctrl - J.
Now you just need to change the settings for the color of the image of the split duplicate ball. Select the “Coloriness” mode and in the Visibility row set the value to 65%, as shown in the smaller one.
The final result of transforming the picture into a sketch will look like this:
The created little one from the original photo will take you no more than 10 minutes from Photoshop, apparently because you don’t stick it in the pocket.
In this simple lesson I will show you the technique of how you can create little ones from just a photograph using Photoshop. The bet is divided on the circled edge. There is an effect that the first few babies were thrown with olives, and then they were stuffed, with little emphasis on outlining the contours.
Weekend image:
Kintsevy result:
Krok 10
Activate the bottom black and white ball and set the overlay mode depending on how your photo looks.
With mode Perekrittya:
With mode It's light:
To reduce the intensity of the color, you can reduce the value on another black and white ball or on the background ball.
PIDSUMC
The finished result may look something like this:
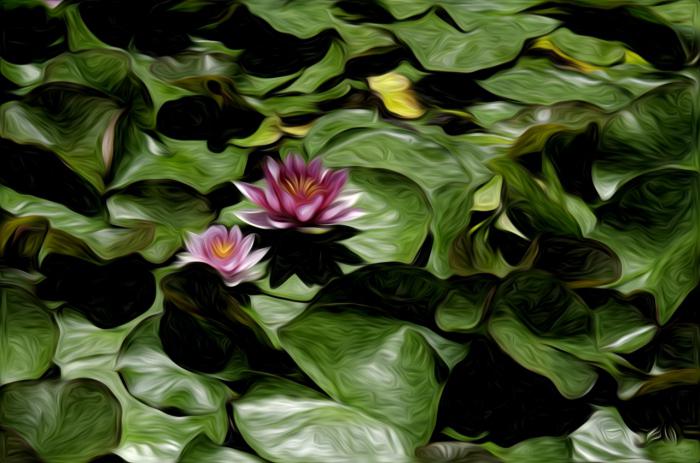
When choosing a photograph for editing, pay attention to the fact that this lesson best allows you to stylize images with nature or flowers. Also suitable for the lesson are images that are used to help with macroeconomics. Editing portrait photos or photographs from images of creatures, which are obvious for everything, does not look so effective.
If you marked a note in the text, see it and press Ctrl+Enter. Yuck!
7 votesGood morning, fellow readers of my blog. Hand-made baby. Rocky 15 that no one would have thought of such a word, but now - be kind. Today's technologies have reached such a level that anyone who wants anything can take a portrait of themselves in any artistic style in just a few seconds.
Today I will take a short look at the services that allow you to take photos painted by Olivets online. Impersonal techniques: animation, stylization, collage, insertion. More than 3,000 effects: impressionism, Van Gogh style, automatic retouching, watercolor paintings, pastel, farb, kreid.

You won’t be able to figure out the result for a long time. You will learn about the best ways to edit photos.
Korist for the web master
One may be surprised by the surprising presence of similar statistics in the blog about the creation of sites. Even better. Well, first of all, a picture created using a similar method can be used as a design element: a hat, lining, or as a thumbnail for an article or baby in the body of a publication.
However, I must immediately tell you that if you like one of the techniques and you want to take all the photographs and display them in your blog, then the idea will be miraculous. Prote, don’t forget about copyright law.
Don’t think that anything after all belongs to you. No matter how much manipulation you carry out with the picture, it is up to the photographer or artist who created it.
Read the article about those. I want sound systems such content is considered unique.

So, if you take a photo from a free source, edit it with a photo editor, and put it on your blog, then Yandex and Google will tell you that you are doing a great job and are using your uniqueness them materials. In this case, you are not afraid of re-investigation. Everyone is happy and satisfied. In this case, you have no more than a few hvilins.
It's not all about the advantages. Retailers are people too. We all have friends and sometimes celebrate the days of nationality, joy, new rocks and so on. The portrait can be opened in a large format and placed in a frame. You will spend a fraction of a pittance, even if you bought the little ones from the artist. So the result, no matter what happens, will turn everything around.
Well, now I think everything is clearer. Let's move on to look at the servants.
Review of services
To write this article, I analyzed a lot of resources. Most of them turned out to be inhuman. Here there is a constant treasure of interest, but the result of the vyishov is below average. I have deprived the list of three resources. At the same time, I’ll tell you straight away that in reality I only know one.
I won’t waste your time and will proceed to a detailed examination.
Photofacefun
Website www.photofacefun.com Dossit cute and completely bezkoshtovny. Here you will find more than 1400 options for your photo.
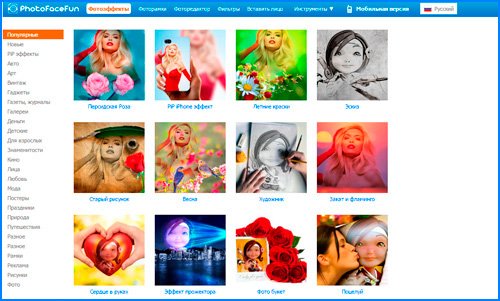
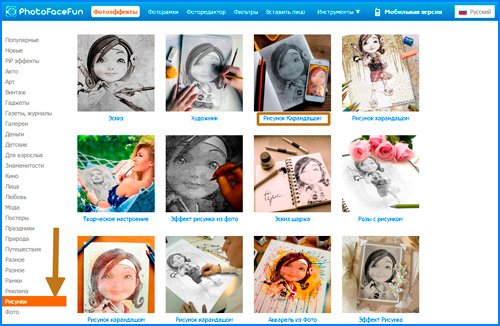
If you want to transform the picture into a little one, let’s go straight to the same section and there are amazing options. For example, the third baby is an olive. Embossed on Nyogo.
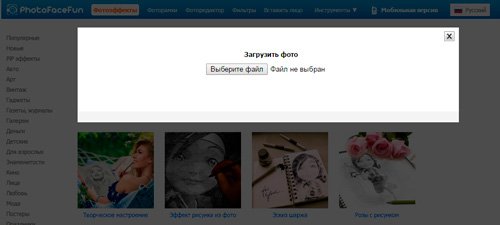
We are securing the file. Before speaking, it’s not obligatory to immediately enchant that very photo. You will save money on the server and you will have access to it quick access Don't fill up the portal yet.
It is necessary to crop the picture so that it becomes a collage.

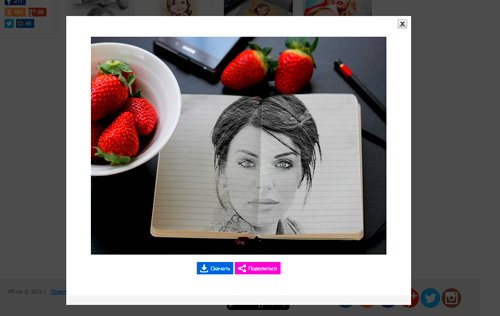
Ready. I rejected this result.

As you know, it’s important to show off your portrait, insert a beautiful picture into it, create a collage. That's great, that's great. There is a bath here of all butts, the result is practically always quiet. But it's not quite what I wanted.
If you simply insert your photo and select the same one, or in a different style, then this resource will not suit you. And yet, let's try one more option: baby sheep on the same page.

As promised, you have easy access to everything else you want.

It’s important that the picture is cool. The same logos, watermarks, etc. The service is completely cost-free.
I’ll tell you straight away, it’s better. There is something new to talk about now.
Pho.to
Portal funny.pho.to/ru/ You can really keep it quiet. I've been here twice now and now I can't help but laugh and smile with satisfaction. This resource is cool. More than 600 frames, effects and filters. In addition, the tool automatically retouches portraits, creates gif animation Based on your photo, a correction is made.

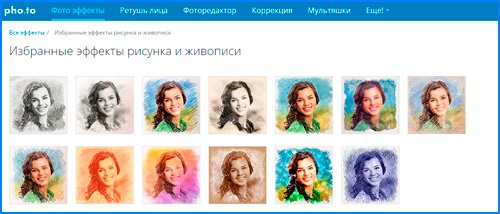
Let’s go to “malyunki and paintings” or “Vibrani efekti malyunka”. Raja will try offensive categories, because there is a great choice of little ones and sheep.
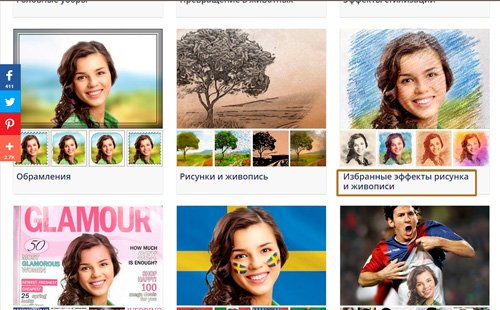
Here you will find sketches with an olive or paper pen, pastels, oil paints, Van Gogh’s baby effect, impressionism and much more. Try it and enjoy it.
Capture photos from your computer and have easy access to them at any time at the bottom of the panel.
![]()
The axis is the same result for men. One small part - posted at the bottom of the photograph.

I thought the cartoons immediately started tsking at me. It's really fun! Enchant photos from the disk and on the right side you begin to change emotions.

In my opinion, it’s realistic and clever.
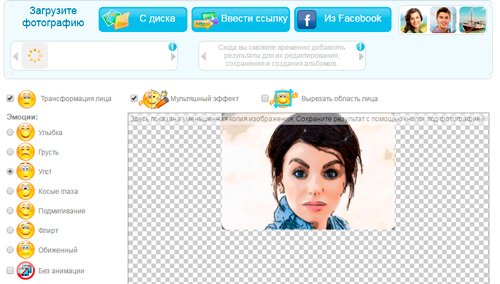
You can get a cartoon effect and share with your friends social measures instead of emoticons.
![]()
I will also call the retouching of exposure a non-vague function. You simply insert a photo and check when processing is complete.

To go to effects, you can replace the background, add color effects or lightening, and also stylize the picture.
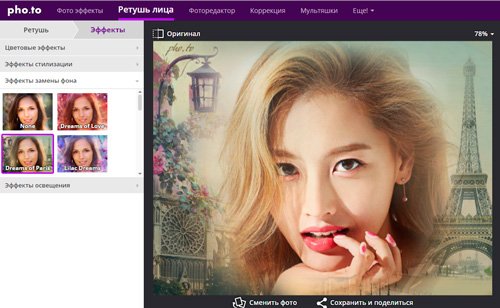
In my opinion, it's shortest resource From everything presented on the Internet, you also have another way to create a photograph with an Olive portrait.
Photofaniya
The service is good because you won’t get additional logos. The portal is catless. Ale na nomu is a bunch of inexpensive ones. For example, for several days now I have not been able to log into head side, do not perform effects, do not open categories. Unfortunately, the site needs more work.
It is absolutely clear that even though these are difficult times, until the moment you want to take your portrait, the situation will change. Tim is not a mensch, I'll give you a hard time side of the olive baby . I didn't have any problems with this filter.
Capture a photo from your computer.
Cut your hair.

The axis is the same result for men. You can download it.

Photoshop for three kroki
In fact, the baby is a sheep - not such a difficult task for Photoshop. Marvel at this video. Here it is shown how to create your masterpiece in just three hours. Before speaking, the video is really cool. I can’t help but rave about the author’s work.
Online services – this, of course, is just a shame, but they won’t cut you off. It’s good to sit for a couple of minutes, laugh at the coppery results, otherwise you won’t get far.
Practicing Photoshop yourself is a lot of fun. The projects turn out to be very colorful. You know what you're doing. You can adjust the emerging specifics of a particular photograph and you will move on. Photoshop won't take you any longer. You will want to practice with him, develop, improve your skills.
Marvel at how easy and simple it is or how it is possible. And everything is not lost. Download the cost-free course " Profession web designer in 10 days " This introductory course may be your first step towards a new hobby.

Well, if you prefer creating beautiful pictures, even if you don’t know anything about Photoshop, then I can recommend it. Photoshop from scratch " In this course, you will spend many days learning everything about this program. Understand how it works, what its functions are, and how it works.

Open up to the change. If you have a passion for design, don’t limit yourself with ideas. To begin with new life, in which you will take up your favorite law. Subscribe to my blog and learn more about working on the Internet.
What to do if you paint neither an olive nor for help computer mouse You don’t know how, but want to create a digital drawing? Today, a lot of people are talking about how to take photos and how to paint. The answer is simple: all that is needed is to carefully read the instructions from this statistical material and put the knowledge into practice.
Let's talk about mysticism
The hours have passed, in order to capture the moment, you need artistic talent and a lot of study, but in our time such a concept as photography emerges, so it’s not at all difficult to take note of the little ones. With the help of modern technology, we can create our own little creations of mysteries. Well, the obviousness of everyone graphic editors It opens up a wide range of possibilities for creativity in the painting and processing of photographs and the creation of various effects.
How to paint a photo?
The neck is sleeping in various ways How to turn a photo into a real baby. The simplest thing is to transform photos directly in your browser online. It is clear that all adjustments are made to sleep and cannot be adjusted to the skin photo. Another, more productive way is to use programs specially created for such purposes. On the Internet there are a large number of different editors that directly convert the photo into a small computer. The number of available adjustments will be greater, and you will be able to achieve a pleasant result. In the most beautiful way It is important to use a graphic editor using PhotoShop (hereinafter referred to as “Photoshop”). In this case, photo editing is done under your special control, and therefore the quality of your work will be optimal.

Of course, you get the most negative result by painting a portrait or a landscape from the artist, and our method is to become aware of the work of the editor, so that you can easily understand how to take a photo or paint it. Also, artists don’t like the robot, but we ourselves will understand the principle of Photoshop work. There is nothing complicated about the given task: if you carefully read the instructions and step by step, then everything will work out easily. The final result is pleasing to the eye, and you can learn something new.
How can I take photos painted with olive oil from Photoshop?
There are a lot of opportunities to earn money from the wikis of Photoshop. First, let's look at the simplest way to turn a photo into a black-and-white baby ovine.
Work with farbs
Yak zrobiti photo yak daubed with farbs? In addition to a special filter developed by Adobe, which is publicly available on the Internet - Pixel Bender. The Ps6 version has already been installed, and in the Russian version it is called “Oliyna Farba” and is located in the top menu under the “Filter” column.
This effect looks especially good in photographs of some kind of place: ancient paintings, landscapes and still lifes. It is also possible to compare photos of people, but the result may be ambiguous.
It’s even easier to use this editing method, below: you simply open the required photo, then go to the top menu “Filter - Olive Farb...”, after which the additional filter window will open, in which you By changing the adjustment, you will immediately see the next result. Two main parameters change - the power of the prisoner and the light. Podsumkov’s picture looks even more beautiful, and the brand, it seems, is effectively painted for the help of penzlov and farb.
І to the remains
As it turns out, there are no options on how to take photos as painted, how to create little ones that can be effectively remembered by the way the photographs are processed. You can achieve the effect of cartoons, caricatures, comics, paintings, little ones. The list can be continued as long as your imagination suits you. The possibilities of graphic editors are practically limitless - you don’t need to be afraid to read them. Install PhotoShop, start simple, step by step, and you will achieve great results!
Often, photographers want to learn how to make use of photographs of babies, so that they can further deconstruct the photograph and save them as babies. Let's look at the most effective ways.
First, let's take a look at a number of popular services, with which you can quickly create a baby effect on a photo without installing additional security programs on your computer.
Photo Phunia Service
On this site, players can use an automatic effect, with the help of which the picture is simply transformed into a baby. You can also select a texture for the background of the output file: color, white or special.
To send it to the robot, copy the file to your PC. For this purpose, press a copy of Browse on the site.
Then select the color scheme of the image (black and white or color).
Click on the texture shape you want to output, and click the “Create” button to print the process of creating the file.
In a few seconds, a direct message will be generated to download the image from the site.
Service Croper
The most popular website for creating a little one with a unique picture is Croper. This online editor allows you to add additional effects to photos.
With this help, you can create unique images without wasting quality.
One of the most popular features of this site is the baby sheep function.
When reworking the file, the dark tones of the image are created, then strokes are gradually applied to the balls of the picture, which, in their own way, create a sketch.
The editor interface is very simple. Upload the file to the site by clicking the above button.
The picture will appear on the new website. After this, you will find the tabs of the main menu - they are located at the top of the site. Click on “Operations” - “Effects” - “Olivets”.

At the top of the page, select the options for the last stroke and the last stroke.
Then press the button to start the image transformation process.
This loan is no more than one piece. As required, you can adjust the contrast of the end picture.
The result of the Croper robot is shown below.
Creation of a baby in Adobe Photoshop
For help, you can also create a baby sheep from the original picture.
By using the program's functions, you can achieve a clear display of all strokes and a natural-looking image.
The effect of the baby will be clearly visible if you unzip it on the printer. For greater effect, you can quickly apply white or craft paper.
All points are placed below these arrows in Photoshop CS6. All functions are available in the latest and all new versions of the program.
We will use the original scanned photograph; We recommend that when working with Photoshop, you do not distort small images, and even after setting the effect to a small size, some of the pixels may be crushed, which will reduce the brightness of the small-sized image.
We first need to copy the original image.
To do this, open the image in the program, select the desired toolbar and press the F7 button. Then click on the corresponding buttons Ctrl-J. In this manner you will create a duplicate of the ball.

Read also:
To do this, press the Image button (at the top of the program menu). Click on "Correction" - "Inversion". Also, to save time for the ball, just press the Ctrl and I keys at once.
As a result, we reject the negative image, and not the black and white version. All light parts of the photo will become dark, and all dark parts will become light.
In the tear-out ball panel, the negative will be displayed as another copy of the original ball. Next, you can change the mode of displaying the ball. Click on ball 2 and in the “Mode” row, open the list that appears. Click on “Brightening the basis”.

After changing the canvas mode, the project will become completely or partially white. On the main menu panel, click "Filter" - "Display".
From the registered list, select "Gaussian Role". At the window, adjust the slider to adjust the spread level.
The more significant the display, the brighter is the picture, the swelling outlines of the daubed.
Important! Do not overdo it with the blur filter, otherwise the photo may become too light and the effect will be ruined. The optimal blur value is 12.5 – 13 pixels.
This method of sparing allows you to achieve maximum clarity of the strokes of the picture, not to lose pixels, and preserve the separateness of the picture. Like Bachimo, the picture became brighter, but it didn’t become quite bright.
Go to the "balls" window and select the first ball, as shown in the picture below. Then point to the name of the ball and wait for the context menu to appear. Click on the item “Combine visible balls”. Press and hold the Alt button and the checker will see all three balls that need to be combined.

Select the top ball (ball 1). It is necessary to change the display mode to multiply. This allows you to darken the skin line of the sketch, giving the sketch more naturalness.
The lines are not to blame for being too dark. If this happens, adjust the “Blindness” parameter to 50%. It is necessary to preserve the color of the “simple” olive.
![]()
This is where you can end the work. As a result, we are obsessed with the black-and-white sketch of a cob photograph. If you need to add a little color to the sketch, create a copy of the background ball by pressing Ctrl - J .

Now you just need to change the settings for the color of the image of the split duplicate ball. Select the “Coloriness” mode and in the Visibility row set the value to 65%, as shown in the smaller one.
The final result of transforming the picture into a sketch will look like this:

The created little one from the original photo will take you no more than 10 minutes from Photoshop, apparently because you don’t stick it in the pocket.
This method allows you to achieve the most vivid effect of the picture daubed with olive oil.