Yak have photoshop zrobiti prozora tlo. How to clean up the white background
Following the images, you have to add flies to cutlets, then. background of the image.
There is a soulless place where you can enchant miraculous cliparts, which, it is important, goes with white ashes. Apparently, it’s clear that you need to save yourself. I guessed some ways to earn money. This article contains information about them.
Method 1
tidy up white background in the image, the tool has become frozen.
This is one of the simplest and in many ways viconics of this kind of operation. Select the rubber pad on the toolbar and click on the white aphid. As a result, all white pixels will be removed and you will see a checkerboard, which means the appearance of clarity in place of the background.
It may also happen that next to the white background, on the image itself there may be pixels close to the white shade.

As you can see, in the image shown, part of the sword and several elements on the face of the face have been removed. There are two reasons for this unpleasant effect. Go back to the tool parameters panel.
1. Small pixels. Marvel at what a tick there is in your setup. There is no need to talk about those that will see all the pixels of a similar color (these are known parts of the image). Check the box and Photoshop will remove only those pixels that stick together.
2.Tolerance Often the background consists of a whole set of colors, for example the same white color. The more important the tolerance, the more specific programs you can see. Most often, you need to focus on edging around the image (small edging of pixels that were lost from the background). Increase the tolerance and the clamping will become smaller and smaller.
Another short command to remove the trim: Ball - Trim the edges - Trim the trim.
Method 2 See the background for help.
The most important thing is to remember to unlock the background ball. I’ve already written about this more than once, but I’ll repeat it again. If the ball has a small lock on the ball palette, it means it is not blocked. Double click on this ball I make it new, which can be edited.
Now, having turned Charming stick, click on aphids. You can see yourself as “Marching Ants”. You will no longer be able to press the Backspace key. I will show up again to the Shah's Tlo.
Like a charming noise, pay attention to the parameters of the tolerance of small pixels. The smells work in a similar way.
Method 3
Briefly it looks like this:
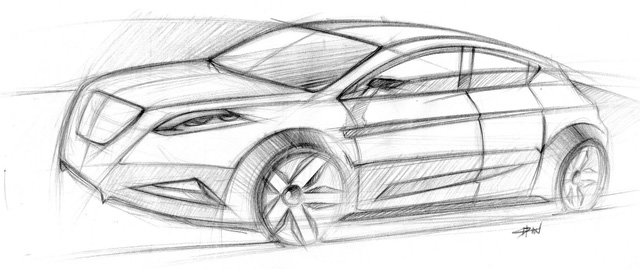
1. We have images. I want to take everything away so that I lose only Prozory background.
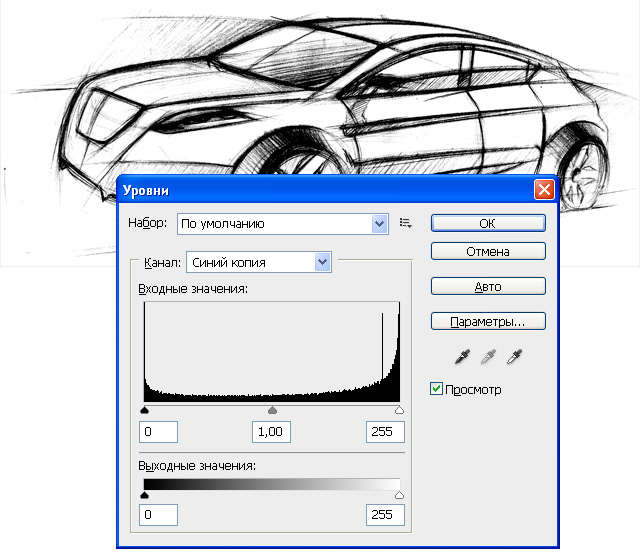
2. Create a duplicate of the blue channel. Press Ctrl+L. The window "Rivni" appeared. We begin to crumble the pieces so that everything becomes as close to black as possible. In other words, it is necessary to achieve such a result so that what you want to see becomes white and black.
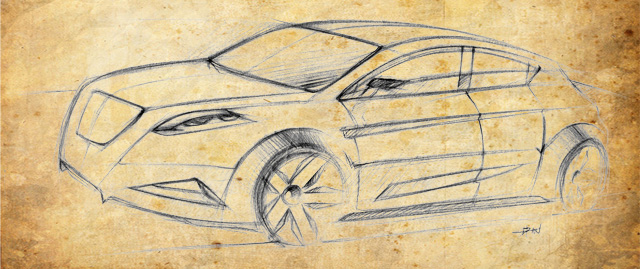
3. Now click on the thumbnail of the duplicate channel we created using the Ctrl button. A vision appeared. As soon as you have to invert everything you see, press Shift+Ctrl+I. Now you can either press Backspace to delete the file or create a duplicate ball by pressing Ctrl+J to transfer the video to a new ball. On my butt, I added a texture, as it turned out:
Method 4
Since in the previous methods, after the image was removed, part of the image was lost, we will now begin to change the background. This method of knitting is specific Overlay modes darken and multiply.
Well, a little lower, evil we still have the same face, but the right-handed texture.

On the balls panel, the texture is placed in the background and can be darkened or multiplied. The face became visible. That's a problem. Several elements of the image, which were also white, became texture colors.
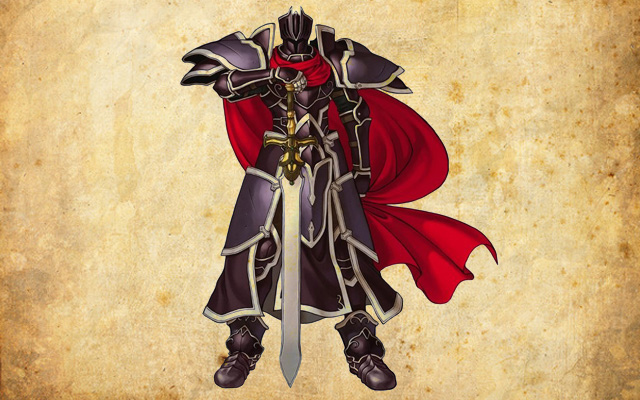
Nina can be fixed. Add a mask ball to the top ball (with texture). Taking the Pencil tool, we begin to remove the texture from the visible area. Carefully, without haste, the result turned out like this:

Awkward, clear, neat. Miraculous way.
So far these are the only ways I have figured out. You know, write about them in the comments.
If you marked a note in the text, see it and press Ctrl+Enter. Yuck!
Most photographs and pictures can look wonderful on a white aphid, and sometimes look completely harmonize with him. However, such situations may occur if such a lining on the picture does not fit with the design of the site and does not look good. In order to get rid of this shortcoming, you just need to speed up. korisnoy program Picture of the sample Adobe Photoshop . For help, you can get not only white, but also a different lining of pictures, which is not suitable. Whose has nothing foldable, but instructions given I’ll help you figure out how to get rid of any images.
Necessary:
- Adobe Photoshop.
Instructions:
- Open up View the required image (picture or photograph) (Select All) and copy it completely (Ctrl+C). After whom to create new file, which will be the same behind the size as the one in front. For this press Ctrl+N. At the end of the options that appear at the time of creation, indicate that a new document is about to start Prozory background (Transparent). This means that the lining will not burn out. Having set the customization data, click the “OK” button and paste your image into the new template (Ctrl+V).
- Come on, marvel at toolbar and choose a viewing method Lasso Tool. Now see in the photo the area of the white background that you need to touch, and press the button Delete. In this manner, the lining will be seen , and instead of it there will be clarity (gray-white legs will be visible).
- So just wake up and see a different background. It is necessary to work with the greatest care in the area where you are familiar with the object, so as not to see the contours of the image itself.
- Before finishing your photography and color correction, try adjusting the saturation and brightness, play with tune-ups in such sections as Levels, Curves, Color Balance, Hue\Saturation. As it is, you can add some effect or filter to the photograph. It is possible to earn more of it with sparkling and infused, and also unforgettable.
- If you believe that the photograph is ready, save її. To do this, select “File” and “Save as”, and select the folder in which you would like to save the images. It is easier to save money in GIF and PNG formats, since they are much easier to use if the image is displayed in the background.
- Before the speech, for to this algorithm, you can clean it up absolutely come what may background , and not just white. You can also simply translate any speech. Therefore, experiment more often, you can work with all the new ones versions of Photoshop CS.
When working with graphic files, there is often a need to add a background to an object. This may be due to the insertion of this element of the photograph into any composition, or it may be necessary to replace the background of the image. In connection with this there is a popular question: “How can you remove the background of a photograph in Photoshop?”
Vidalennya plain background
When looking at how to clean up the background in a photograph, take a closer look at how you can quickly remove the background in Photoshop, which has the same color. This allows you to remove all the work necessary to remove the different color parts of the picture.
Before you can remove a necessary fragment of a photograph, you need to see it. You can earn money in dozens in various ways If you need to see a distinct shade of color, then Photoshop has a special tool that allows you to get the most out of it. Selected in the panel Swedish access menu item "Vision", you need to know the item "Color range".
When the window appears, select the “Pipette” tool and click on the background you want to see. After using the sliders, simply adjust the area that is visible and press “So”. The result of these actions will be to see all areas of the photo, allowing you to make color choices. To delete, you need to press the Del key on the keyboard. This method This is one of the simplest and most important tasks, such as removing the background from Photoshop.
"Charivne" cleansing
An analogue of this type of background is the “Gumka” tool, which can be used even more widely. To do this, just select the “Charming Gum” and click once behind the background - as a result, a checkered background will appear in its place, which symbolizes the visibility of the transparent part of the photograph. The downside of this approach is the lack of control over the area that will be visible, in lieu of vicarious visibility.
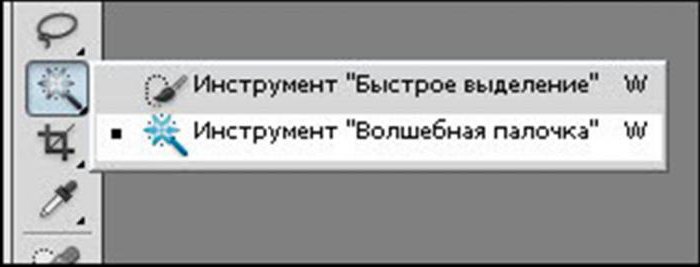
In order to ensure control over what you can do with Photoshop without any hassle for solving photographs, you can quickly use another “charming” tool that follows a similar algorithm with a rubber band, otherwise you will see it instead of selecting it. There are two such instruments, and they are concluding new activities – and “Swedish Vision”. The only advantage is that the wand allows you to select a color at a glance, and the view allows you to move the cursor across a large expanse of images at a glance.
Widow mask mode
The front approaches are the answer to nutrition, how to get a whiter body. Photoshop, in addition to single-color backgrounds, has the ability to clear rich backgrounds. This need may be fulfilled, since a region is depicted there that does not correspond to the forces. So how can you remove the backside from Photoshop?
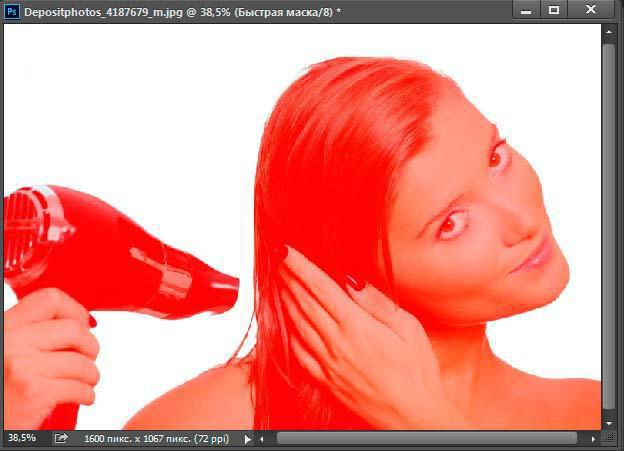
There are also a number of ways to accurately identify the required part of a photograph. The first one lies near the vikoristan "Swedish Mask". A mask is a special mechanism that allows painters, using additional tools, to paint and fill the area that needs to be seen. To quickly switch to the “Swidka Mask”, it is enough to press the letter Q on the keyboard. Then, using the help of a pencil and rubber pad, you need to fill in the part of the photograph that may have been removed. Turning to the default mode and pressing the same button, we note that the necessary area of the image will be visible - and we will no longer be able to press the already familiar Del key.
Vidalennya fon for help Laso
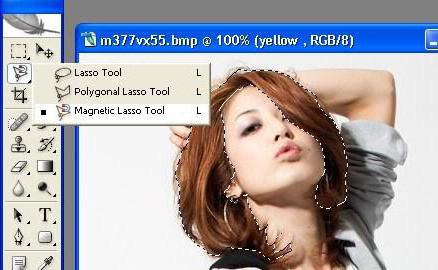
If an object that needs to see the background can have clear boundaries, then another manual way How to remove the background from Photoshop. To speed up the trace, use the “Laso” tool. It is found in three species. The first one has a similar name, “Lasso” - it allows you to fairly draw the lines of your future vision of the area. Because it is not easy to accurately see the required part, two other versions of the tool are often used.
The next step is the “Straight Line Laso” – with this help you can paint the area of vision, vikorist and straight lines. With this technique, you can draw a precise cordon, for example, around bodivel or ungrabbed geometric figures.
For folded elements, such as the silhouette of a person, use the “Magnetic Laso” method. After all, its algorithm works along the contour of the object, which means that due to the additional difference in colors, it is necessary to move the bear cursor approximately over the element of the photograph.
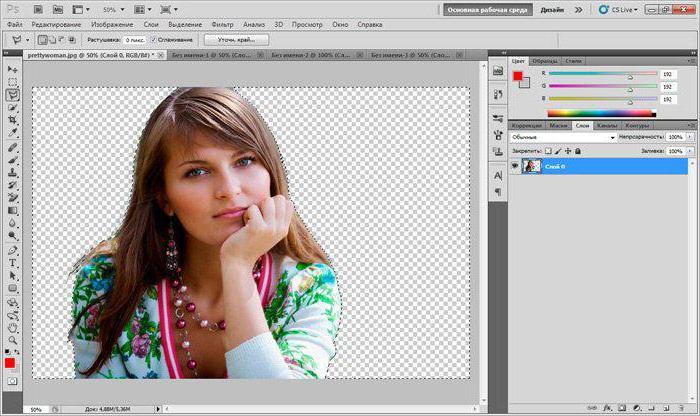
As a result of selecting “Laso”, the element itself will be visible. To unhide a background image, invert the visible image by pressing Ctrl + I. Then you can unhide the background image.
Other ways
It means that, if you understand this, how to remove the background in Photoshop, you can find a number of different ways. However, most of them end up being easy, allowing you to get a clear picture. However, it is possible to achieve a good result and more forgive me at my own expense, Having spent a little more time and effort, perhaps, saving a little time.