Arduino shield 5500 principle circuit diagram. Robimo shield programmer for Arduino Uno, which is lying around idle. Wikoristannya "Arduino" from a roboticist
Don’t be fooled by the fact that there is a lot of information on the Internet about A4988 drivers For CNC machine tool. I believe that I will collect everything necessary for these prisoners.
It is possible to vikorystuvati for the door CNC machines (CNC machining):
- milling workbench;
- 3D printer;
- laser engraver.
What is CNC shield v3:
1
- Discount button.
2
– Contact blocks for connecting external motor drivers.
3
– All A can duplicate one of the axes X, Y, Z with the help of an additional motor and driver or operate autonomously (for example all A You can use Vicoristan for the extruder motor, 3D printer). These contact blocks serve for adjustment axis A. To duplicate the axes, you need to install jumpers on the pads in the following order:


For autonomous A-axis robot. Block D12 freezes for the possibility of keruvannaya krok, block D13 closes for the possibility of keruvannya directly wrapping. Directly the motor wrapping is changed by changing the motor contacts or changing the mask in the firmware.
4
- We are growing life. You must submit a fee food 12 - 36 V.
5
– The skin slot for connecting the motor driver is the motor microcircuit block. If you set the jumpers carefully, you can reach as much as 1/32 krok on Drivers for DRV8825 ta 1/16 kroku on Driver A4988. Jumper settings for keravanniya krok or microkrok for A4988 drivers shown in the table.
|
MS1 |
MS2 |
MS3 |
Allowed microcroc |
|
Powney krok |
|||
6 – Blocks for connecting a bipolar motor (4 darts).
How to select a flow motor and how to connect a flow motor with pins larger than 4 axis at the front position:
7
– Contact block for UART and I2C interfaces:
- UART pins: RX, TX, 5V, 3V3;
- I2C pins: SCL, SDA, GND, RST.
8
– Contact block for connecting three terminals.
9
– Block for connecting contacts:
- Spindle extension (SpnEn);
- Spindle Direct (SpnDir);
- switching on the refrigeration supply (CoolEn);
10 – Block for connecting contacts:
Respect!!! 3 firmware GBRL 9.0i were replaced by Z-Max (D12) and Spn_EN (D11).

Now the spindle is connected to D11, which is a PWM port. To control spindle speed via PWM.
Now, if you want to connect the Z_Max clamp, it must be connected to Spn_EN, and the spindle switch must be connected to Z+.
A4988 driver specifications:

- life voltage: 8 to 35 V;
- Possibility of setting the limit: from 1 to 1/16 of the maximum limit;
- logic voltage: 3-5.5;
- protection from overheating;
- maximum flow per phase: 1 A without radiator; 2 A with radiator;
- stand between rows of legs: 12 mm;
- board size: 20 x 15 mm;
- driver dimensions: 20 x 15 x 10 mm;
- radiator dimensions: 9 x 5 x 9 mm;
- car with radiator: 3 g;
- car without radiator: 2 rub.
Brief description of Driver A4988
The board is based on the A4988 microcircuits from Allegro - a bipolar motor driver. Features of the A4988 include throttle regulation, protection from overheating and overheating, the driver also has five micro-rotation options (up to 1/16-motor). It operates at a voltage of 8 - 35 and can provide a flow of up to 1 A per phase without a radiator and additional cooling (additional cooling is required when supplying a flow of 2 A to the skin winding).
These are the main characteristics of the slide for CNC. I have a current video connection 4 blood engines. Install buttons. Let's try the electronics on the table. I'll check the start-up to make sure everything is connected correctly and everything works without interruption. This will help us install the electronics on the bench.
Subscribe to my channel onYoutube and join before the group
One of the key advantages of the Arduino platform is its popularity. The popular platform is actively supported by manufacturers of electronic devices, who release special versions of various boards that expand the functionality of the controller. Such boards, quite logically called expansion boards (other names: arduino shield, shield), serve until the end of the most important tasks and can simplify the life of an arduino operator. This article states that the Arduino expansion board can be used to work with various Arduino devices: motors (motor driver shields), LCD screens (LCD shields), SD cards (data logger), sensors (sensor shield ) and without respect to others.
Let me first understand the terms. The Arduino expansion board is used for completing devices, for installing basic functions, and is connected to the main controller using additional standard connectors. Another popular name for the expansion board is Arduino shield or simply shield. All the necessary electronic components are installed on the expansion board, and interactions with the microcontroller and other elements of the main board are achieved through standard Arduino pins. Most often, the power supply to the shield is supplied from the main arduino board, although in many cases it is possible to power it from other devices. Any shield will be deprived of a number of valuable pins, which you can use at your discretion by connecting to them any other components.
The English word Shield is translated as shield, screen, screen. In the context of this, it is clear that it covers the controller board, which creates an additional ball of the device, a screen behind which various elements are hidden.
What do you need for an arduino shield?

Everything is very simple: 1) in order for us to save time, and 2) in order to make money for this. How about spending an hour designing, arranging, soldering and cultivating what you can already take from your chosen option, once you’ve started to tinker? A well-thought-out expansion board, as a rule, is more reliable and takes up less space on the end device. This does not mean that there is a need to be completely independent and it is not necessary to understand the principles of action of these and other elements. Even the relevant engineer will soon be able to understand how those who are victorious work. We can also use more folding devices, since we don’t just need a bicycle, but focus our respect on the fact that few people have lived before us.
Of course, you have to pay for opportunities. Almost always, the quality of the end shield will be greater than the price of other components, and it will be possible to produce a similar option cheaper. Let me tell you how critical the hours and pennies spent are for you. With the provision of all possible assistance to the Chinese industry, the availability of boards is gradually decreasing, so most often the choice is to rely on the cost of ready-made devices.
The most popular applications of shields include expansion boards for working with sensors, motors, LCD screens, SD cards, borders and GPS shields, shields with built-in relays for connection to the installation.
Arduino Shields connections
To connect the shield, you just need to carefully “pull” it onto the main board. Make the contacts of the shield type comb (tato) easy to insert into the socket of the Arduino board. In some cases, it is necessary to carefully correct the wash marks, since the board itself is not properly soldered. Here the head should act carefully and not be overpowered.
As a rule, shields are intended for a specific version of the controller, although, for example, many shields for Arduino Uno can be used entirely normally with Arduino Mega boards. The pinout of contacts on the mesa is arranged in such a way that the first 14 digital contacts and the contacts from the opposite side of the board are avoided from the pinout of the contacts on the UNO, so a shield can easily be installed on the Arduino.
Programming Arduino Shield
The programming of the circuits with the expansion board does not differ from the original programming of the Arduino, and even from the point of view of the controllers, we simply connected our devices to their primary pins. The sketch needs to indicate the pins that are connected to the shield with the corresponding contacts on the board. As a rule, the distributor indicates the type of pins on the shield itself or in addition to the connection instructions. If you enjoy the sketches recommended by the payment provider itself, you won’t need to work at all.
Reading or recording of shield signals is carried out using the same primary method: using additional functions and other commands that are essential to the Arduino operator. In some situations, there may be conflicts if you clicked on the connection circuit and selected another one (for example, you pulled the button to the ground, and on the shield - until it was alive). Here we just need to be respectful.
As a rule, this expansion board is found in Arduino kits and therefore Arduino engineers use it most often. The shield is simple - the main task is to provide reliable connection options to the Arduino board. This is due to the expansion of additional sockets of life and earth, brought to the board to the skin of the analog and digital pins. Also on the board you can find a connector for connecting an external power supply (for reconnection you need to install jumpers), an LED and a reset button. Variants of the shield and butts can be found in the illustrations.


There are several versions of the extended sensor board. All stinks are distinguished by the size and type of roses. The most popular versions today are Sensor Shield v4 and v5.
This Arduino shield is very important in robotic projects, because Allows you to connect the main unit and servo motors to the Arduino board. The main purpose of the shield is to ensure the control of devices that live with a high level for the initial payment of the arduino strum. Additional capabilities include the function of controlling the tension of the motor (with the help of PWM) and changing the winding direction. There are a number of different types of motor shield boards. What is important for everyone is the presence of a circuit of a transistor, through which the external supply is connected, thermal conductive elements (usually a radiator), circuits for connecting external life, sockets for connecting There are no motors and pins for connecting to the Arduino.


Organizing work within a framework is one of the most important tasks in current projects. To connect to a local network via Ethernet, you need an extension card.


Pay extension for prototype
Payments are simple - there are contact boxes for installing elements, a reset button is displayed and there is the possibility of connecting external devices. The purpose of these shields is to make the device more compact if all the necessary components are located above the main board.


Arduino LCD shield and tft shield
This type of shields is used for robots with LCD screens in Arduino. Apparently, connecting to a simple 2-row text screen is far from a trivial task: you need to correctly connect 6 contacts to the screen without affecting life. It’s much easier to insert a ready-made module onto the Arduino board and just download the accompanying sketch. The popular LCD Keypad Shield has 4 to 8 buttons on the board, which allows the company to organize an external interface for the user of the device. TFT Shield also helps


Arduino Data Logger Shield
Another task that is important to implement independently in your operations is saving the data collected from the sensors, from time to time. The ready-made shield allows you to not only save data and remove an hour from the old date, but also connect the sensors manually using a solder path or on the circuit board.


Brief summary
In this article, we have looked at just a small part of the large assortment of various devices that expand the functionality of Arduino. Extended payments allow you to focus on the most important thing - the logic of your program. The creators of the shields conveyed the correct and reliable installation, the necessary mode of life. All you need to do is to know the required board, the English word shield, connect it to the Arduino and download the sketch. Regardless of whether the programmable shield is present in Vikonanna for simple actions from renaming internal changes to ready-made programs. As a result, we take away the ease of choice of devices and connections, as well as the ease of assembling ready-made devices or prototypes.
The disadvantage of using expansion boards is their versatility and the possible loss of efficiency due to the versatility of shields, which lies in their nature. For a small plant or an end device, all functions of the shield may not be required. In this case, you should only select the shield at the stage of layout and testing, and when you create the final version of your device, think about replacing it with a design based on a power circuit and type of layout. Give you every opportunity to make the right choice.
Getting involved in robotics, we have to think about the folding of the payload for operating the engines early and late. If you need to fix the speed of the motors without losing power, then it is better to select a shield relay. If you need smooth control of the speed of the motors and are ready to deal with the maximum current flow of the motor at 600 mA, then read this article and select the control board for the wide-ranging L293D microcircuit. Get started Motor shield L293D.
If you look at the datasheet for the remaining micron, you can see that it includes 4 logical I-NOT gates. It is possible to replace 74HC00 with Radian analogues K155LAZ K155LA8. The principle of its operation can be understood by looking at the little guidance below (depending on the signals that are sent to inputs a & b and the values at output c). The “truth table” for this element is also pointed at the little one.

The sensor of the 74HC00 microcircuits in our device has the ability to change the one and zero places on the Output1 and Output2 circuits of the L292D microcircuits, reversing the direct winding of the motor, vikorista for which there is only one ok controller.

We set the motors to wrap directly, but without supplying life to the Enable1 pin, the motors won’t wrap. By supplying a PWM signal to this circuit itself, it increases the speed of the motor wrapper. You can read a report about the operating principle of the L293D.
Control of 1 motor (pin 4 - direct wrapping, pin 3 (PWM ATmega 168.328) allowed wrapping and speed regulation)
Control of motor 2 (pin 7 - direct wrapping, pin 5 (PWM ATmega 168.328) allowed wrapping and speed regulation)
To complete what has been said, I will attach a diagram of the principle (clickable).

To control the speed of motors, select PWM pins (3, 5), which, however, are only available on ATmega168, 328.
In my opinion, with the Mega8 installed, it is easier to use the power of adjusting the speed of the rotor, then you will have 3 power pins available (PWM on ATMEGA8 (9, 10, 11)) to control servos, and 8 on 328 can be replaced come at any moment , having denied access until the speed is adjusted.
Servo robot
The board has four connectors for connecting servos (6, 9, 10, 11).
The Arduino board already has a voltage stabilizer of the 7800 series, and the 7805 itself, which is responsible for providing a stable voltage for the controller’s operation. To avoid voltage drops in the controller's lanyard during sudden startup of hard servos, it is best to connect the power part of the servo to a nearby stabilizer.
KR142EN5A is a linear stabilizer, and it transfers that all the energy that is converted is converted into heat, and when the heat is connected, the stabilizer begins to heat up in direct proportion to the amount of the compressed stream. Based on this, it is recommended to place the stabilizer on the radiator.
When choosing low-voltage servos of the type, I recommend using a five-volt stabilizer with markings 7805 VIN KR142EN5A. Five volts will be enough to power servos of this size.
The archive contains two folders and a list of parts
. Folder MSV1DIY1 includes a PP template of a great size with Arduino DIY (USB, COM), which connects the additional VTG INPUT output, the voltage on which is taken even before the drying voltage. For this value, you can use the Arduino shield, the power part of the shield from the Arduino, and the stabilizer for powering the servos in the Arduino.
. Folder MSV1DIY2 includes a board template with original Arduino.
Open photo => Friend => Full side
The difference lies in the fact that the connection can be made on the Vin Arduino pin. The voltage at this output is equal to the input minus the voltage loss on the dry diode (approximately 8 Volts are supplied to the Arduino connector, approximately 7.4 Volts are removed from the Vin output, and then to the power supply shield relay), as well as maximum flow through a 1000mA boundary diode. You can never spend 0.7 volts for free. The way out of this situation is simple: feed not the shield from the Arduina, but the Arduina from the shield, thereby avoiding the drying of the diode.
This option can also be combined with self-made versions of Arduino using the same principle.
To make it easier to unsolder the SMD components on the gate of the board, where there is no marking, I’ll show you a picture.
MSV1DIY1

MSV1DIY2

Shield is an additional price. I propose dividing the shields into multi-sized and cross-sectional modules. The full-size boards, with their contours, repeat the shape of the Arduino board, be it UNO, Nano or MEGA. Along with the modules, there are boards of a sufficient form, created to complete a specific set of functions. Both of these can be both universal and for the development of highly direct tasks.
In stores you can find faceless shields, and if you are qualified, you yourself can install a manual board that repeats the Arduina in shape and placement of pins and selects your unique one. The picture shows it with a set of shields.
Of course, there is a shield that does not carry any special functions, but is designed for ease of installation of your projects. The first thing we want to do is make it easier to install projects using the Arduino Nano board, although the cost of small “NANO” sizes is zero.
On the expansion board there is a connector for connecting a plug to the life block, a voltage stabilizer, as well as a terminal block. They are signed and resemble the Nanka models. In addition, there is a “discount” button and a “Harvest” LED.

Another purpose shield for the Uno payment. On the new one, a solderless breadboard was laid out for the folding of the project and the components that duplicate those on the arduino itself are a hand-made solution.

Any analog sensor will require a negative contact, if there are a lot of them, the jumper becomes so important that it will be very important to change the circuit. That's why the designers figured out shields for such solutions. They have all the inputs and outputs displayed, and the contacts that need to be maintained are duplicated and instructions are placed.
The axis is the butt of such a board for the Arduino version of Mega.

Dart and dartless sound
With the help of these boards, you can organize communication with the microcontroller via an Ethernet cable, for example, or wirelessly - via GSM connections by inserting a SIM card.

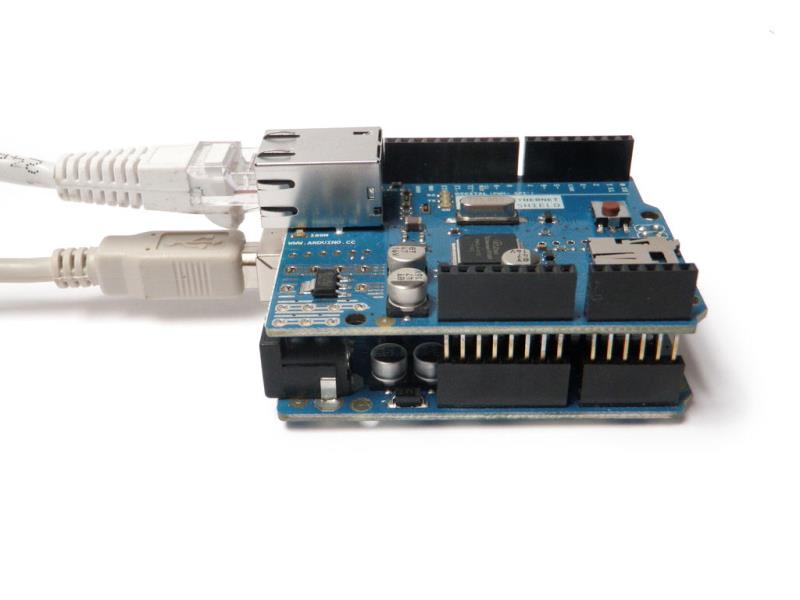
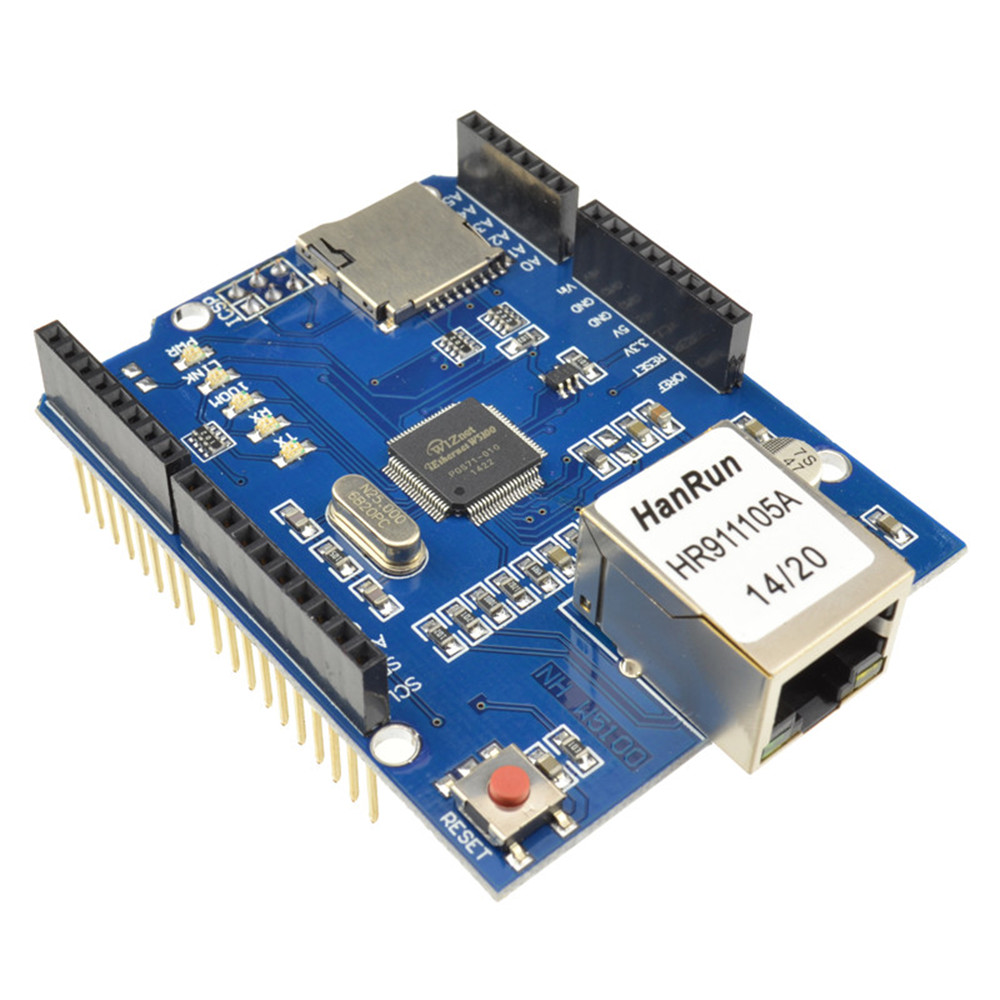
This board is called w5100 - it contains an Ethernet module and an SD card reader module. This means that you can save data, for example, a log of sensors to a memory card and connect the system via the web interface. To connect Arduino with it, check out the libraries:
Ethernet library;
To restore respect, it repeats the concept of the Arduino UNO R3, and is also suitable for Mega.
If you think the W5100 is too great, then the ENC28J60 will take up less space. Unfortunately, the new one already has an SD module.

The downside is that it can be mounted on a board, and mounted as a separate module.
W5500 is another option for the Ethernet shield. In its essence, the W5100 version has been updated and optimized in terms of speed and energy efficiency.

Please note that on full-size shields, all pins are duplicated with a terminal block. It's a pity, shieldy vikorist spoil. This itself includes MOSI, MISO, SCK, and pin 10, for the CS signal (select the recipient for communication).
What kind of wireless connection you need is your choice of Wi-Fi shield, Internet and router, and anything else you don’t have – GSM modules or GPRS shield.

The photo shows the official shield. The new slot supports a Micro SD memory card, and communicates with the microcontroller via SPI protocols; via Mini-USB you can update your security software. Supports 802.11b/g.

GPRS-shield for "Amps" more and more. You can replace the antenna with a stronger one. Closer to view you can see the slot for the SIM card, and there is also a slot for a CR1225 battery. The battery on the board is required for real time, but it is important to supplement the capabilities of the GPRS shield. You can send SMS to anyone and everyone.
For an additional fee, you can control and issue commands (or any other project of your implementation), running on any remote site. It is important that you stay in the area where you are taking the stilnikov binder.
How to save data on Arduino?
In projects, not all information fits into the riddle about the microcontroller. Sometimes it is necessary to save certain information. The first thing that comes to mind is that it has already been said - this is the recording of information from sensors in order to determine how it changes over the course of years, days, years. In addition, it is a home weather station. This is useful not only for long-time successors, but also for amateurs to gain insight into the development.

This is rather not a shield, but a module. It is miniature and easy to repeat, before speaking, this scheme.

A full size shield to save your data. It works with SD memory cards, on board there is a real time clock module that runs on a CR1220 battery with a voltage of 3 V, which is a huge bonus.

We take care of the microcontroller
First, what can you save on a thought - tse relay. With this help, you can switch it off like a steady stream, and with a daily electrical supply of 220 Volts, the stinks will go away with a bang.
The very image module below can switch 1 kW 220 voltage (or 5A) along the skin channels, to increase tension you can either parallelize the channels or turn on the cyclic relay. In this case, the relay and shield play the role of intermediate boosters.

Basically, you can switch the relays the way I described in the statistic via a transistor and select the relay along the string, or create a finished board that will be more reliable, simpler and look better.
The relay has one fault - limited number of applications - resulting in burnt out contacts. This occurs through the arc of the arc when the pressure is released (especially of an inductive nature - this is the motor). You can create such a shield using the following scheme:

And this is what the axis looks like in the assembly:

Therefore, to turn on the alternating current, you can use thyristors and triacs. One problem is that it is not possible to connect them directly to the arduino; if there is a breakdown in the pn junction of the electrode that controls it, 220 V can appear on the microcontroller board and burn it out. The way out of this situation is to use an optimist.
Since this problem often faces wine-makers, a ready-made solution was developed - a triac shield, which is called again - ICStation 8 Channel EL Escudo Dos Shield for Arduino. From the very beginning, they were considered to be the ceramic colors of the “bungee neon”.

There are 8 channels, to which the alternating current and voltage supply are connected.
Shields for engines
Controlling an electric motor is never an easy process. In some situations, you may not have enough time to implement the task at hand, or the execution algorithm may be complicated. With such boards you will be able to design your robot much better.
Motor-SHIELD for Arduino can be powered by electric motors (4 pieces) or two electric motors.

The production is based on two L293. This microcircuit is folded with two H bridges, which makes it possible to control two DC motors or one bipolar motor. Connection diagrams per line:

And in the upper left corner of the board there are two blocks for the servo drives (plus, minus and the signal that controls). A red stake circles the area where the jumper jumper is installed. Whatever it costs, this board is part of the base Arduino board, and what is not is part of the external device for 5 units.

Behind the pre -school module of the vibyznoye Vobron is able to Keruvati Korivati by the movements of the post -ore clam, in the same time, the liennya of the liennya of the macrocontroller is aboard ї ї ї ї ї ї ї ї ї ї - for Zhilnnieu nud, the crooked jerel.

Can be used with motors that are rated for a voltage range of 5 to 24 Volts. The replacement of 2 DC motors can be replaced by 1 single-phase power supply or by paralleling the channels and connecting 1 power DC motor with a power supply of up to 4A, and at a cost of not less – 48 W at a supply voltage of 24 V.
To connect the servo, you need three darts - plus, minus and a signal, but what to do if you have a lot of servo? Your board will turn into a mishmash with a jumper. To be unique, there is a multiservo shield.
Here, too, there is the possibility of sub-Lantzug life, as was the case in the previous version. You can connect 18 servos (on the board the numbering is from 0 to 17).

It has its own specificity, shields for unexpected tasks.
Atmes328, the heart of our board, is an ADC. The main problem is that the Arduino board has more than 6 analog inputs. What's the point, since we have more analogue sensors?
You can combine two Arduinos into a single network. Use one vikorist as the main one, and the other as an auxiliary one for changing and first send the signals of the dead to the server or display them on the screen... It’s complicated: you need to spend memory on additional rows of the program code to implement this oi systems.
How can you multiply the skin input by 16? We can have up to 16*6=96 analog inputs. This is really for the additional help of the multiplexer. It simply switches through 16 analog channels to one analog output, which you connect to such an input of any light controller.

Using the Atmega microcontroller, it is very important to implement the voice recognition function, but Arduino engineers may not be able to find a special solution - EasyVR Shield 3.0.
This is ready, but the road has been decided, at the time of writing the article, Russia is worth at least 100 dollars. First, the Shield writes down your command, then it compares it with those that are recorded in the memory, after entering the number, it is written.
You can control the dialogue with the computer, and you can create those that are recorded in it. Without additional boosters, it is recommended to adhere to this plate from a distance of no more than 60 cm.

Image displayed
LCD Keypad shield is a reference control panel. There is a new LCD1602 display (16 characters in two rows) and a set of buttons. There are a lot of ports through them, for example A0 and D4 through D7 for the keyboard, and port D10 is a PWM brightness control. D8 and D9 - disable and enable.

In fact, there are a lot of displays powered by Arduino. More precisely, those about which the most information is written and you can easily launch them on your system. Add the self-produced screen, popular among colas, to the NOKIA 5110, select from OLED and TFT screens that operate via I2C. Ale stinks not at the “shield” Vikonanny.

Self-contained food
Add an unidentified shield to this good thing, which is the primary task. Power shield - comes with all the necessary protections and a charging socket. You don’t want to do anything special, but to ensure the final appearance of your project, and you won’t have to place the lifelines in a row with the main boards.

Visnovok
The choice of shields for all purposes of the project is to allow the number of jumpers to be eliminated and connected, and thus to reduce the number of jumpers and jumpers to be connected. After folding, you remove the rich surface sandwich from the factory-made boards. This approach is sometimes called “modular design”. Among other things, it will make it easier to maintain, repair and improve equipment.
Enthusiasts practice the design, development and folding of unique modules. This is one of the reasons for the high popularity of Arduino not just as a platform for self-designed designs, layouts and prototypes, but as a platform for ready-made solutions.
I programming. It will replace bulky analogue devices or microcircuits and is ideal as a gift for all radio amators.
Arduino: high-tech designer
"Arduino" is a board based on microcontrollers with contactless contacts and a power processor. The board is the basis to which you can connect and add a large number of so-called shields (in English Shield - shield), which expand the functionality of the board. You will get involved in process automation systems, but you can also easily get involved in robotics. There are many areas of activity for the Arduino board. It gained popularity among radio amateurs because it is inexpensive, simple and highly functional.
The "Arduino" program works as a follow-up to additional programming. The process is easy, and a beginner can stick to it. And if you have a basic knowledge of Movi C++, then programming the board will be even easier.
The main advantage of the payment is the ability to add an uninterrupted number of peripheral devices to it, thereby achieving maximum automation of the robot. Besides, if a newbie can’t do anything, it doesn’t matter. You will always be at ease with a wealth of information and instructions for programming and connection. Radio amateurs are a wonderful choice.
Keep in mind that the designer works on free software (for example, a special Linux distribution), he will not have to pay extra for the OS and software.
Robot with shield-boards (shields)

As was said above, the functionality of the device is enhanced with the help of special boards - shields. Tse are ready to pay with this or another process. Shieldy comes for help with roses - penins. The range of processes that can be carried out using shields is very large: from transmitting data via Ethernet to controlling electric motors. The process control system for additional shields can be obtained by hand. "Arduino" does not share the role prescribed in the program, and other external devices directly work with the expansion boards themselves.
There are problems when it is necessary to record data on the riddle (for example, GPS points). The "Arduino" itself cannot create anything, due to the fact that there is a lot of memory storage. This is where the shield comes in handy, which adds the ability to store micro-SD cards up to 64 GB.
It’s not surprising that you can create the shield yourself. For example, a simple LCD shield. Take the screen from a calculator or an old pager and enter the PIN payment. Of course, you will also have to write a program so that Arduino displays images on the screen. And that’s it, the self-made shield is ready.
Programming "Arduino"

Programs for Arduino are written in my Wired. This language is quite similar to C++. However, if you don’t have any programming experience, getting started with Wired is not going to be difficult. On forums dedicated to Arduino, programs are called “sketches”. However, as long as you program it yourself and don’t leave it, you can find a large number of ready-made sketches.
For the skin sketch you need your own set of libraries. You can also search for them on the Arduino forums. For beginners, there is even a nasty old guide with step-by-step instructions for writing sketches for the same process.
Making shields for Arduino with your own hands

Buying shields for Arduino is not at all difficult. Let's say you don't have $30 left, but you have a bunch of unnecessary parts and you really need to automate. No problem. Golovny, so that you already have a main board with a firmware OS and the ability to write sketches.
From the available parts you can get an Arduino circuit. You won't have to solder the components with your own hands. If the structure is transferred to a non-rukhoma, then there is no need to solder anything. It is enough to simply connect the components with wires. It is necessary to respect that such a self-designed shield for Arduino is much cheaper than the factory one. For example, an Arduino kit for automating the work of electric motors will cost $80-90. If you choose to do the collecting yourself, you can reduce your contribution to $30.
There are also no other sets created for these or other areas, and they, in addition to the main board, include all the necessary parts. For example, dialing for creating a “smart” wake-up call, video alert, climate control and stereo systems.
Of course, not all shields can be earned by yourself. In such situations it is simply impossible to know the necessary details. For example, the shield with extensions for the memory card will have to be purchased.
Why you can use "Arduino"

There are a lot of areas of construction in which we can look at just a few examples of the application.
For example, you have a car. And you need information about fluidity to be displayed on the radio screen of the radio. How to get a speedometer from Arduino? Quite simply. We buy a fee. For example, Arduino Mega 2560, GPS module Ublox NEO 6m GPS. Once we find that the sketches for control are ready, we write everything in Arduino, add one by one, and everything is ready.
You can also easily create an entire control system with your own hands. "Arduino" gives such power. Golovny - stock up on necessary sketches and details.
Wikoristannya "Arduino" from a roboticist

"Arduino" is widely used in robotics. However, as long as a large number of servos, motors, and sensors are connected before payment, you can create an entire robot, built with your own hands. "Arduino" also allows you to program it at any time. If you want to get along well, ride and shave off bugs, then “Arduino” is perfect for you.
In addition, if you connect the device with several sensors to the quadcopter, you may end up with a nasty robotic guard. But this is already a good technology.
In robotics you can develop your own imagination, and with the help of Arduino you can bring it into life. Some clever people like to build prototypes with “Futuras”, vikorists and the same designer.
Replacement
Arduino controller boards are ideal for automating any processes that are highly customized. In addition, the problems with the programming of the boards are not the fault of any of the rich research assistants with whom. If something breaks during the process, it doesn’t matter if you repair it with your own hands. "Arduino" allows people to express their endless imagination. For an additional fee, you can do everything for free, starting with a heating system control system via a smartphone and ending with a robot.